

If your Meta Quest 2 starts to feel heavy after 30 minutes, or you wake with forehead pressure or a sore neck, switching from the stock strap to a comfort strap with a head cushion can be game-changing. This guide walks new Quest 2 owners through choosing the right strap, preparing for installation, step‑by‑step mounting, fit adjustments for long sessions (including tips for glasses wearers), troubleshooting, compatibility with batteries and facial interfaces, and upkeep so the strap lasts. ⏱️ 11-min read
Read on for concise, practical steps and examples you can follow while holding your headset. You’ll finish with a balanced setup that reduces facial pressure, stabilizes the view during movement, and lets you play longer without the aches that kill immersion.
Why upgrade from the stock Quest 2 strap to the Comfort Strap with head cushion
The stock Meta Quest 2 strap is engineered for simplicity and light use, but it falls short once you push beyond short sessions. The most tangible upgrade when installing a comfort strap with a head cushion is improved ergonomics: thicker padding, better weight distribution, and reduced forehead and nose pressure. Where the stock elastic strap tends to concentrate the headset’s front-heavy mass on your face, a comfort strap shifts more load to the crown and back of the skull. That change alone reduces facial pressure points and the pinching that causes headaches.
Stability is the second big win. Comfort straps are usually more rigid or structured and often use secure clips, Velcro, or ratchet systems that keep the headset from wobbling during quick head turns or active play. That steadier fit preserves a clearer image and helps limit motion sickness caused by slippage. Who benefits most? Marathon gamers, users of fitness or active VR apps, glasses wearers who need a consistent clearance between lenses and lenses’ frames, and anyone prone to facial sensitivity. In short: if you play for longer than a half hour, have had forehead marks, or need a steadier rig, a comfort strap with a head cushion is worth the upgrade.
How to choose the right strap: official Meta options vs third‑party and Elite Strap comparison
Your choice comes down to three practical questions: how long do you play, do you want an integrated battery, and what’s your budget? Meta’s official Elite Strap (and the Elite Strap with Battery) deliver reliable compatibility and a predictable, sturdy design. The Elite Strap’s rigid band and rear cradle redistribute weight effectively and integrate visually with the Quest 2. The Elite with Battery adds runtime and counterweight in one purchase but increases the upfront cost and overall rear weight.
Third‑party brands like AMVR, KIWI DESIGN, and BoboVR tend to offer more variety: softer or thicker foam cushions, Velcro-based adjustments, and often a lower price point. Many third-party straps include adhesive or Velcro surfaces for small battery packs and sometimes add breathable fabrics or quick-release clips. The trade-offs are fit variance (third‑party shapes don’t always suit every head), potential long-term durability differences, and the occasional need for adapter pieces.
Quick selection rules:
- If you want guaranteed fit and build quality: choose the Meta Elite Strap (with Battery if you need extra runtime and don’t mind added weight).
- If budget or extra padding matters more: consider reputable third-party comfort straps (look for good reviews and clear return policies).
- If you plan intense active sessions and need the lightest option: favor minimalist straps with reinforced rear support or look for straps with detachable batteries so you can tune balance.
What to check and prepare before installation
Preparation saves time and prevents frustration. Start by laying out the headset and all strap components on a clean, flat surface in a well-lit space. A typical kit should include the head cushion (pad), top strap, rear strap or cradle, and the side connectors or clips. Some packages add screws, washers, or small spacers — check the product guide to confirm you have each piece. If anything is missing or visibly damaged, contact the seller before you begin.
Tools are rarely required, but keep a small microfiber cloth handy to wipe contact surfaces and a shallow dish to hold tiny parts. Some third‑party straps include small screwdrivers or hex keys; if yours does, place them next to the kit. If your strap includes a battery pack, charge it fully before installation so you can test weight distribution with the battery in place. Lastly, switch off the headset and, if possible, update headset firmware beforehand: you don’t want interruptions while fine‑tuning fit and testing visuals.
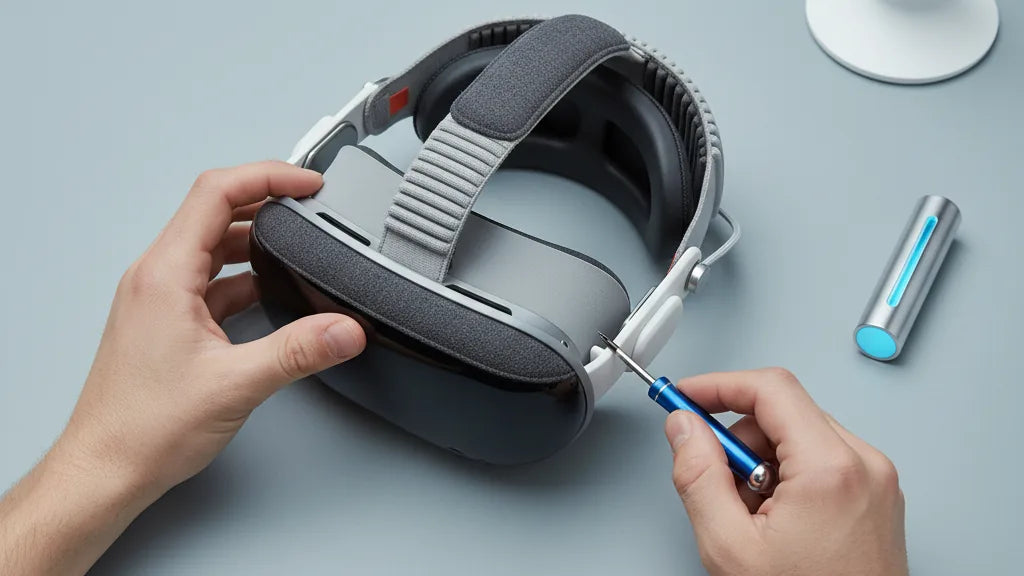
Step‑by‑step installation for beginners
Follow these numbered steps while holding your headset. Read one step at a time and keep the headset steady with one hand as you work the other hand through the process.
- Remove the stock strap: Press both side release buttons and slide the stock strap off the side pegs. If it seems stuck, wiggle gently while pressing the release; don’t force it.
- Inspect and clean mounts: Wipe the headset’s side slots and front facial plate with a microfiber cloth to remove oils or dust that could interfere with clips.
- Attach the side connectors: Line one side connector of the new strap with the slot and push until you hear a click. Repeat on the other side. Confirm both connectors are seated by giving each an upward tug.
- Mount the rear cradle/head cushion: Position the head cushion so it sits at the base of your skull. Attach it to the rear cradle or straps per kit instructions — brackets should lock or Velcro should adhere firmly.
- Add the top strap: Loop the top strap over the crown and secure it to the connectors or hooks. This strap prevents tilt and keeps the headset centered.
- Tuck cables and add battery (if present): If your strap uses a battery pack, secure it to the rear cradle with Velcro or the supplied mount. Route any cable along the strap channel and press into place to avoid pinches.
- Test basic security: Snap the headset onto your head gently and perform a few head turns. If there’s wobble or a loose clip, remove and reseat that side connector.
Safety tips: don’t over-tighten clips or straps; excessive force can deform connectors or pinch wiring. If a connector won’t seat cleanly, stop and verify orientation — forcing it can break the latch.
Adjusting fit, tightening, and balance for long gaming sessions
Getting the fit right usually takes small, iterative changes. The objective is to shift weight off your nose and cheeks and onto the crown and rear of your head so the headset feels light and stable. Start with everything loose, then tighten in stages.
Follow these adjustments:
- Top strap: Set the top strap so the headset doesn’t slide forward when you look down. It should be snug but not press hard on the crown.
- Rear strap/cradle: Gradually tighten the rear ratchet or Velcro so the back of the cushion supports the base of your skull. You want a cradle‑like feeling rather than a pinch.
- Side buckles/knobs: Use side adjustments to bring the display to a comfortable distance from your eyes. Adjust until the image is centered; visual clarity matters more than absolute tightness.
For glasses wearers: increase top strap tension slightly to raise the headset a millimeter or two away from your face, creating more clearance for frames. Check that temple arms don’t press into the strap or cushion; if they do, try angling the headset slightly or swapping to a thinner facial interface.
Test cues to confirm success: reduced nose pressure, no facial marks after a short session, and a stable view during quick head turns. If the view shifts when you shift posture, prioritize rear strap tightness over side tension — moving load rearwards preserves visual stability.
Troubleshooting common installation and fit problems
Even a careful install can produce a few niggles. Here are common problems and targeted fixes so you don’t waste time guessing.
Problem: Rear strap slips or loosens during play. Fix: Ensure Velcro surfaces are clean and fully engaged; press along the entire seam. If your strap uses a ratchet, tighten slightly beyond the point you think is necessary, then back off a hair. If slippage persists, attach a small counterweight or battery pack to add downward pressure that keeps the ratchet engaged.
Problem: Pressure point on forehead or temple. Fix: Loosen the top strap a little and tighten the rear cradle; you want the crown to take the load. Reposition the head cushion up or down an inch — a small shift often removes an uncomfortable pinch.
Problem: Misaligned cushion or headset fogging. Fix: Re-seat the cushion so it sits flush at the base of your skull. For fogging, try anti‑fog wipes and ensure air gaps aren’t blocked; adding a thin spacer facial interface can improve ventilation.
Problem: Connector won’t click in. Fix: Inspect the side peg and connector for debris or misalignment. If a clip is deformed or a screw is missing, stop and request a replacement; forcing a damaged clip can snap the headset’s mount.
When to return: persistent asymmetrical pressure after multiple adjustments, a connector that won’t lock, or a cushion that tears on first use — these indicate manufacturing defects and warrant exchange.
Compatibility with batteries, facial interfaces, wireless adapters and Apple Vision Pro accessories
Most comfort straps are designed to work with extra accessories, but compatibility details matter. The Elite Strap with Battery integrates a battery pack and counterweight engineered to mate with the Quest 2’s rear cradle — it extends playtime and shifts the center of gravity rearwards. Many third‑party comfort straps include Velcro patches or mounting plates to attach small battery packs; this is an affordable way to add runtime while using the strap that fits you best.
Facial interfaces (front pads) generally remain compatible because they mount to the headset’s front independently. If you swap to a thicker third‑party facial interface, expect slight changes in how the headset sits; you may need to loosen side adjustments or raise the top strap to maintain clearance for glasses.
Regarding adapters: the Quest 2 is a standalone wireless headset, so "wireless adapters" in the PC VR sense aren’t normally required. Networking or Wi‑Fi accessories operate separately and won’t interfere with the strap. As for Apple Vision Pro accessories (like FlitLift GraviPro), they’re designed specifically for Vision Pro geometry and won’t mount directly to a Quest 2. The useful takeaway is conceptual: counterweights, lift stands, and ergonomic cradle designs translate across devices — you can apply the same balancing principles even if the physical mounts differ.
Care, maintenance, and replacement options and reviews to consult
Routine care preserves comfort and extends the life of the strap and cushion. For surface cleaning, use a microfiber cloth dampened with mild soap and water; wipe the fabric and cushion surfaces and let them air dry completely before reassembly. Avoid soaking foam or submerging the cushion — trapped moisture breaks foam down over time. If your cushion cover is removable, unzip and wash per the manufacturer’s instructions, then dry fully in a shaded area.
Inspect seams, Velcro, and clips monthly if you use the headset often. Replace the strap or cushion when foam no longer returns to shape, webbing becomes frayed, or clips are loose. Signs you need replacement: persistent discomfort after multiple adjustments, a cushion that crumbles when compressed, or a rear cradle that won’t hold a battery securely.
Where to buy spares: official Meta replacement parts are the safest bet for guaranteed fit. For budget or upgraded materials, consult detailed product reviews from sources like VR-specific blogs, YouTube teardown videos, and community forums. Look for reviewers who test durability across weeks of use and show real-world fitting (including glasses and glasses-free comparisons). Prioritize sellers with clear return policies and warranties.
Best practices to reduce perceived headset weight and maximize comfort during long sessions
Reducing perceived weight is as much behavioral as it is hardware. Redistributing mass, scheduling breaks, and using support accessories together yield the biggest improvements.
Practical tips:
- Counterweights and batteries: add a small rear counterweight or battery pack to shift the center of gravity rearwards. Start light (100–200g) and increase only if needed.
- Take scheduled micro‑breaks: rest your neck and eyes for 60–90 seconds every 30–60 minutes to reset muscles and prevent strain buildup.
- Use an accessory stand or lift: during pauses, use a headset stand or lift system to remove weight from your neck entirely while keeping the headset accessible.
- Practice progressive tightening: tighten straps gently in stages rather than to a single “tight enough” setting — your muscles adapt and can feel pressure build over time.
- Measure improvements: record the time you can play before discomfort as a baseline, then re-measure after installing and adjusting the strap. A typical successful outcome is an increase from 30–45 minutes to 2+ hours before needing a significant break.
Quick exercise: wear the headset for five minutes, then remove and note any red marks or sore spots. Reconfigure straps and repeat. If marks vanish and stability improves during head turns, you’ve likely achieved an effective balance.
Next step: if you haven’t already, pick the strap that matches your priorities (Elite Strap for guaranteed fit, a padded third‑party strap for extra comfort, or the Elite with Battery if you want runtime built in). Gather your tools, charge batteries, and follow the step‑by‑step install above — then tweak fit using the balance cues in this guide until the headset disappears and the virtual world comes forward.


Share:
How head cushions relieve pressure points on Quest headsets
A buyer’s guide to third-party comfort straps that slash Quest 2 weight