

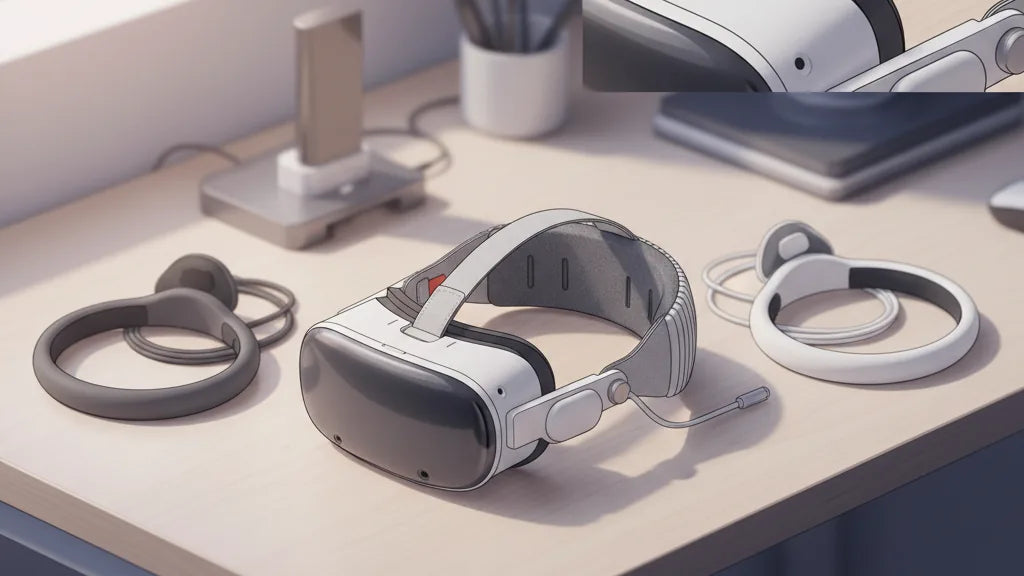
All-Day Comfort: A Practical Guide to Choosing, Installing, and Optimizing Quest 2 Comfort Straps
If you regularly spend hours in the Meta Quest 2—whether exploring VR worlds, doing design work, or grinding competitive matches—the stock strap will eventually show its limits. Pressure on the forehead, cheek rubbing, and a headset that slides or tugs during play are common problems that break immersion and leave you sore afterward. ⏱️ 10-min read
This guide walks you through choosing the right comfort strap, swapping it in, dialling in fit for marathon sessions, and caring for your headset so it stays comfortable for years. I’ll blend real-world recommendations (what works for glasses wearers and sweat-prone players), step-by-step installation, and troubleshooting so you can play longer without the usual aches and interruptions.
Choosing the Right Quest 2 Comfort Strap for All-Day Use
Begin with the simplest question: where does your current discomfort appear? The stock Quest 2 strap often channels weight into two trouble spots—behind the head and the face—resulting in forehead pressure, cheek rubbing, and chin pinching. Upgraded straps address those by changing how load is distributed, adding crown support, or shifting weight to the rear.
Consider three broad strap types:
- Halo-style (or cradle) straps: These wrap a band around the skull, spreading load away from the face and creating a “floating” feel. They’re excellent if you want minimal cheek pressure and a stable view during movement.
- Rear-counterweight straps: These place mass at the back—either a rigid plate with padding or a battery pack—to balance the headset’s front-heavy optics. They reduce downward pull on the face and neck strain over time.
- Padded/mesh fabric straps: Softer, breathable materials that use wider contact areas to reduce hotspots. Good for warm environments and extended sessions, though they don’t change center of gravity the way halo or rear-weighted systems do.
Match strap choice to personal factors: head shape and crown height affect how well a halo sits, glasses wearers often prefer halo or thicker padded straps to avoid temple pinch, and if you sweat easily, look for moisture-wicking or mesh padding. Finally, prioritize robust adjusters—a ratchet dial, secure Velcro, or durable buckles—so you can fine-tune tensions quickly during long sessions.
Quest 2 Comfort Strap vs Elite Strap: Ergonomics, Weight, and Fit
The Meta Elite Strap and many third-party comfort straps aim to solve the same problem, but they go about it differently. The Elite Strap offers a rigid shell and a ratcheting dial for adjustment; it’s stable but can feel firm and concentrate weight toward the front. By contrast, halo and rear-battery third-party options change the headset’s center of gravity or use softer padding to conform to the head.
Key differences to weigh:
- Weight distribution: The Elite Strap feels secure but sometimes leaves the Quest’s optics pulling on the face. Adding a rear battery (Elite Strap with Battery or third-party packs) moves center of gravity backward and eases facial pressure.
- Padding and materials: OEM straps use firm foam and plastic; aftermarket alternatives often feature memory foam, gel pads, or breathable mesh for longer comfort and better sweat management.
- Adjustability and fit: Dial systems give precise micro-adjustments; Velcro or sliders allow quick changes mid-session. Consider whether the strap allows top-strap height adjustment for crown support—small changes here make a big difference over hours.
Durability varies. The Elite Strap is known for a solid build, but some third-party options match or exceed that with better padding and breathable materials. If you want extended battery life and improved balance, a strap with an integrated or attachable battery is a useful upgrade—but remember that battery packs add mass; position matters more than raw weight (rear-mounted is best).
Step-by-Step Install and Initial Fit for Beginners
Swapping straps is straightforward if you proceed deliberately. Start by powering off the headset and placing it on a soft surface to protect the lenses and foam. Keep the original strap; it’s handy as a backup or for resale value.
- Remove the stock strap: Gently unhook one side from the headset post, then the other. Work slowly to avoid bending plastic posts. Inspect the posts and side slots for dust or lint.
- Seat the new strap ends: Align each end with the side posts and push until you hear or feel a click. For straps with a top band, ensure it sits flat behind the crown rather than twisted.
- Set the crown/top strap height: With the headset on, bring the top strap to the crown where the head naturally rests. A few centimeters higher shifts pressure rearward; lower increases frontal contact. Start mid-way.
- Tighten the side straps evenly: Draw the sides snug so the headset sits level. Don’t fully tighten—aim for a secure but unpinching hold.
- Run a quick stability test: Walk, look up and down, and shake your head gently. If the headset lifts from the face or slides, adjust side tightening and top band height in small increments.
Quick tips for first fit: ensure the face gasket sits against your cheekbones without squeezing your nose; adjust IPD and lens distance after you secure the strap; and give yourself 10–15 minutes of wear to let memory foam or padding settle before declaring the fit “final.”
Fine-Tuning: Height, Length, and Tightness for All-Day Wear
All-day comfort becomes a science of small adjustments. Height, length, and tightness are interdependent—changing one affects the others—so iterate slowly and test between changes. Start from a neutral baseline and make 0.5–1 cm adjustments.
Height: Raise the top strap to move weight balance toward the rear of the skull, easing pressure on the nose and cheeks. If the headset tilts upward or you see lens drift, lower the top strap slightly. Walk and bend forward to mimic in-game movement; if the headset shifts when you lean, raise the top strap another notch.
Length: Side straps control how close the headset sits to your face. Shorten evenly until the headset resists movement but doesn’t create hotspots along the temples or cheekbones. Do a slow head-shake test—if the image stays level, length is close to right.
Tightness: Aim for a snug, breathable hold. A helpful starting rule: you should be able to fit one or two fingers between the strap and the back of your head. For all-day sessions, err on the looser side and compensate with rear balance (battery or counterweight) rather than squeezing the strap tighter.
During long sessions re-tune every 30–60 minutes. Loosen by a notch if you feel pressure building; adjust padding placement if hotspots appear. If you experience consistent spot pressure, move the top strap a little forward or back—small changes compound over time.
Cleaning, Maintenance, and Longevity of Quest 2 Straps
Comfort over months depends as much on care as design. Sweat, oils, and dust degrade cushion materials and can make straps smell or lose shape. A simple maintenance routine keeps straps hygienic and functional.
- Daily: After each session, wipe pads and straps with a microfiber cloth to remove surface sweat and oils. Open windows or use a fan to let the headset air out before storing.
- Weekly: For fabric straps, use a damp cloth with mild dish soap to spot-clean. Rinse with a clean damp cloth and air dry away from direct heat. For silicone or synthetic parts, a mild soap solution works; a wipe with 70% isopropyl alcohol is acceptable for nonporous surfaces, followed by drying.
- Leather/faux-leather: Avoid soaking. Wipe clean and apply a small amount of leather conditioner sparingly when dry.
Inspect components periodically: look for fraying stitching, loosened buckles, or compressed foam. Replace pads that no longer spring back or that crack. Store the headset in a cool, dry place, ideally on a stand that supports both the headset and strap to avoid deforming foam or warping plastic. For battery-equipped straps, follow battery care: don’t leave packs fully discharged for months, and remove batteries if you won’t use the headset for an extended period.
Weight, Balance, and Reducing Headset Burden
After a couple of hours in VR, neck and trapezius fatigue usually comes from poor balance rather than absolute weight. The Quest 2’s front-heavy design concentrates force on the nose bridge and upper cheeks; the goal is to move that force rearward and distribute it across the crown.
Where to place mass:
- Rear-mounted battery packs: These are the most effective counterweights. Position them low on the occiput to create a lever that counterbalances the front optics.
- Rigid rear shells: A firm back plate with padding spreads contact over a larger area and reduces hotspots while improving stability.
- Halo designs: Rather than adding mass, they shift where the headset presses, transferring some load to the top and sides of the skull.
Practical setups: For light extended use (2–3 hours), a soft padded halo or fabric strap with good crown support suffices. For half-day sessions or heavy-motion games, pair a halo or Elite-style strap with a small rear battery or counterweight. If you add a battery, tune side strap length and top strap height to compensate for the new balance; you’ll usually need to loosen side tension slightly as the rear mass takes over more of the load.
To minimize neck strain, avoid over-tightening. If you feel a collar-raising pull, your strap is likely too tight or the balance is off. Opt for redistribution (height change or rear weight) before ever tightening further.
Compatibility, Third-Party Options, and Accessories
Third-party straps have become an ecosystem—some are plug-and-play, others require adapters. The Quest 2 uses simple side posts, and most aftermarket straps attach directly to these. However, watch for subtle fit issues:
- Mounting fit: Ensure the strap seat fully engages the side posts—partial seating can stress the plastic and cause slips. Adapters are available if a strap’s connectors don’t line up correctly.
- Mix-and-match hazards: Combining a third-party headstrap with an OEM facial interface or different foam can alter fit and clearance. For example, thicker facial interfaces reduce the amount of rearward movement you get from a counterweight.
- Cross-headset compatibility: Some straps designed for other headsets may fit mechanically but won’t shape or balance the Quest 2 optics well. Check reviews for fit on Quest 2 specifically before buying.
Popular third-party names to consider: BoboVR (M2 Pro), which offers a halo with an integrated battery; VarvVR and Kiwi design alternatives that use adjustable docks for batteries or custom foam. If you want an integrated battery, choose models designed for the Elite Strap form factor or those with secure rear mounts; avoid loosely attached packs which shift during movement.
Real-World Guidance: Reviews, Must-Have Accessories, and Glasses-Friendly Tips
User experiences highlight consistent patterns. Sarah, a VR explorer, solved forehead and temple discomfort by moving to a halo strap that distributed load across the crown. Mark, a competitive player, reduced neck strain by adding a rear battery pack that balanced his headset for longer play. Practical takeaways from these stories translate into concrete accessory choices.
- Recommended straps: The Meta Quest 2 Elite Strap with Battery offers solid stability and a straightforward battery solution for most users who want an OEM experience. The BoboVR M2 Pro halo-style strap is praised for its cradle comfort and counterweight battery—good for those who want less face pressure and more runtime.
- Glasses wearers: Look for thicker facial interfaces and wider temple clearance. Halo designs and softer cheek pads reduce temple pinch. Consider an extra spacer or a dedicated glasses-friendly foam insert to protect frames and keep lenses fog-free.
- Anti-slip and hygiene accessories: Silicone pad covers, moisture-wicking cloth covers, and replaceable memory-foam inserts extend comfort and manage sweat. A lightweight head strap pad or adhesive anti-slip strips can secure contact points without over-tightening.
Final practical note: read real-user reviews focused on long sessions, not just initial impressions. Many straps feel fine for 20 minutes but reveal pressure points after an hour. If possible, buy from retailers with reasonable returns so you can test fit during a real session and swap if it creates new hotspots.
Next step: pick a strap that solves your primary pain point—face pressure, neck strain, or sweat—install it using the steps above, then schedule a 60–90 minute test session with mid-session adjustments to confirm your all-day setup.


Share:
Compatibility Essentials: Upgrading Quest 2 with Third-Party Head Straps Without Slipping
The science of VR weight and balance: how headband design affects Quest 2 comfort