Master Ergonomic VR Sessions: Integrating Flit Lift and GraviPro with Vision Pro for Weightless Comfort
If you want longer, less fatiguing VR sessions with Vision Pro, pairing the Flit Lift dynamic support system with GraviPro counterweights transforms headset wear from a strain into something almost weightless. This guide walks VR gamers and developers through compatibility checks, setup, and real-world adjustments so your head stays centered, your posture stays neutral, and mid-session fiddling becomes rare. ⏱️ 11-min read
Expect practical, hands-on instructions—what to tighten first, how to route cables, which GraviPro extension to choose, and how to verify sensor clearance—plus developer tips for integrating system-aware apps. Whether you’re a competitive player chasing comfort across marathon sessions or a developer testing immersive builds, these steps will keep the weightless-comfort-with-flit-lift-opens-vr-to-more-users" rel="nofollow noopener noreferrer">Vision Pro balanced and your body happier as playtime stretches on.
Compatibility and Fit: Matching Flit Lift, GraviPro, and Vision Pro
Begin by confirming compatibility: check the Vision Pro model number, the Flit Lift frame version, and the GraviPro components you plan to use. Flit Lift and GraviPro are designed to work together—the lift provides the cradle and motion range while GraviPro supplies gravity‑assisted counterweights that redistribute load from the crown and face to the torso and shoulders. When all three are paired correctly, the headset’s center of mass stays closer to your spine, which reduces neck extension and improves steadier sightlines during rapid head movements.
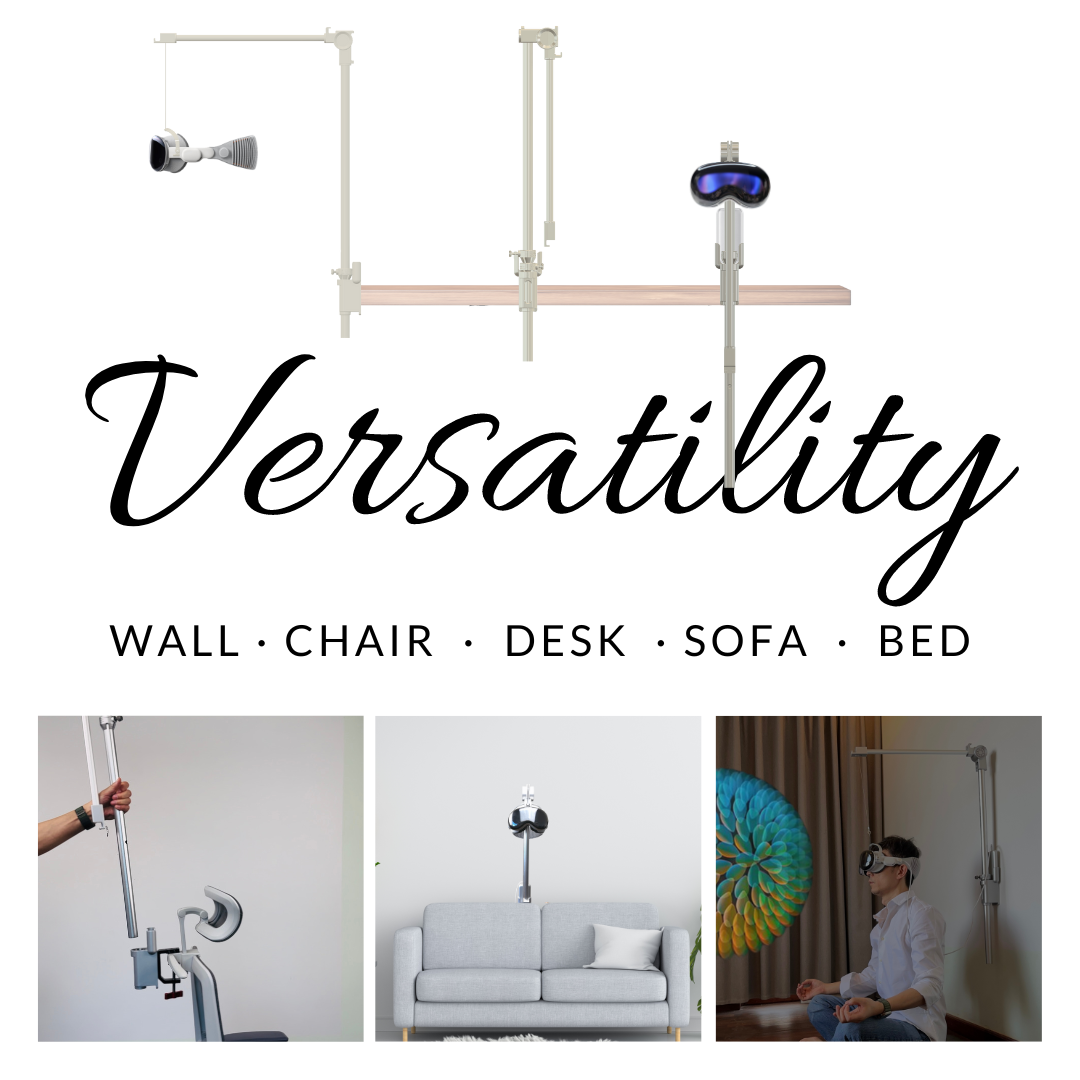
Fit is more than “it attaches.” Verify mounting points don’t obstruct Vision Pro sensors or block cable entry. The headband clamp should be snug enough to prevent slipping but avoid pinching—if the clamp digs in, you’ll fight discomfort later. Check that shoulder clearance is preserved; any straps or arms must allow natural shoulder rotation. Finally, ensure the Flit Lift’s available height and tilt range let your eye line sit near the lens midpoint while maintaining a neutral spine. If the lift can’t raise or angle the headset without forcing neck extension, swap a different mounting position or opt for a GraviPro extension to alter leverage.
Ergonomic Foundations of Flit Lift and GraviPro
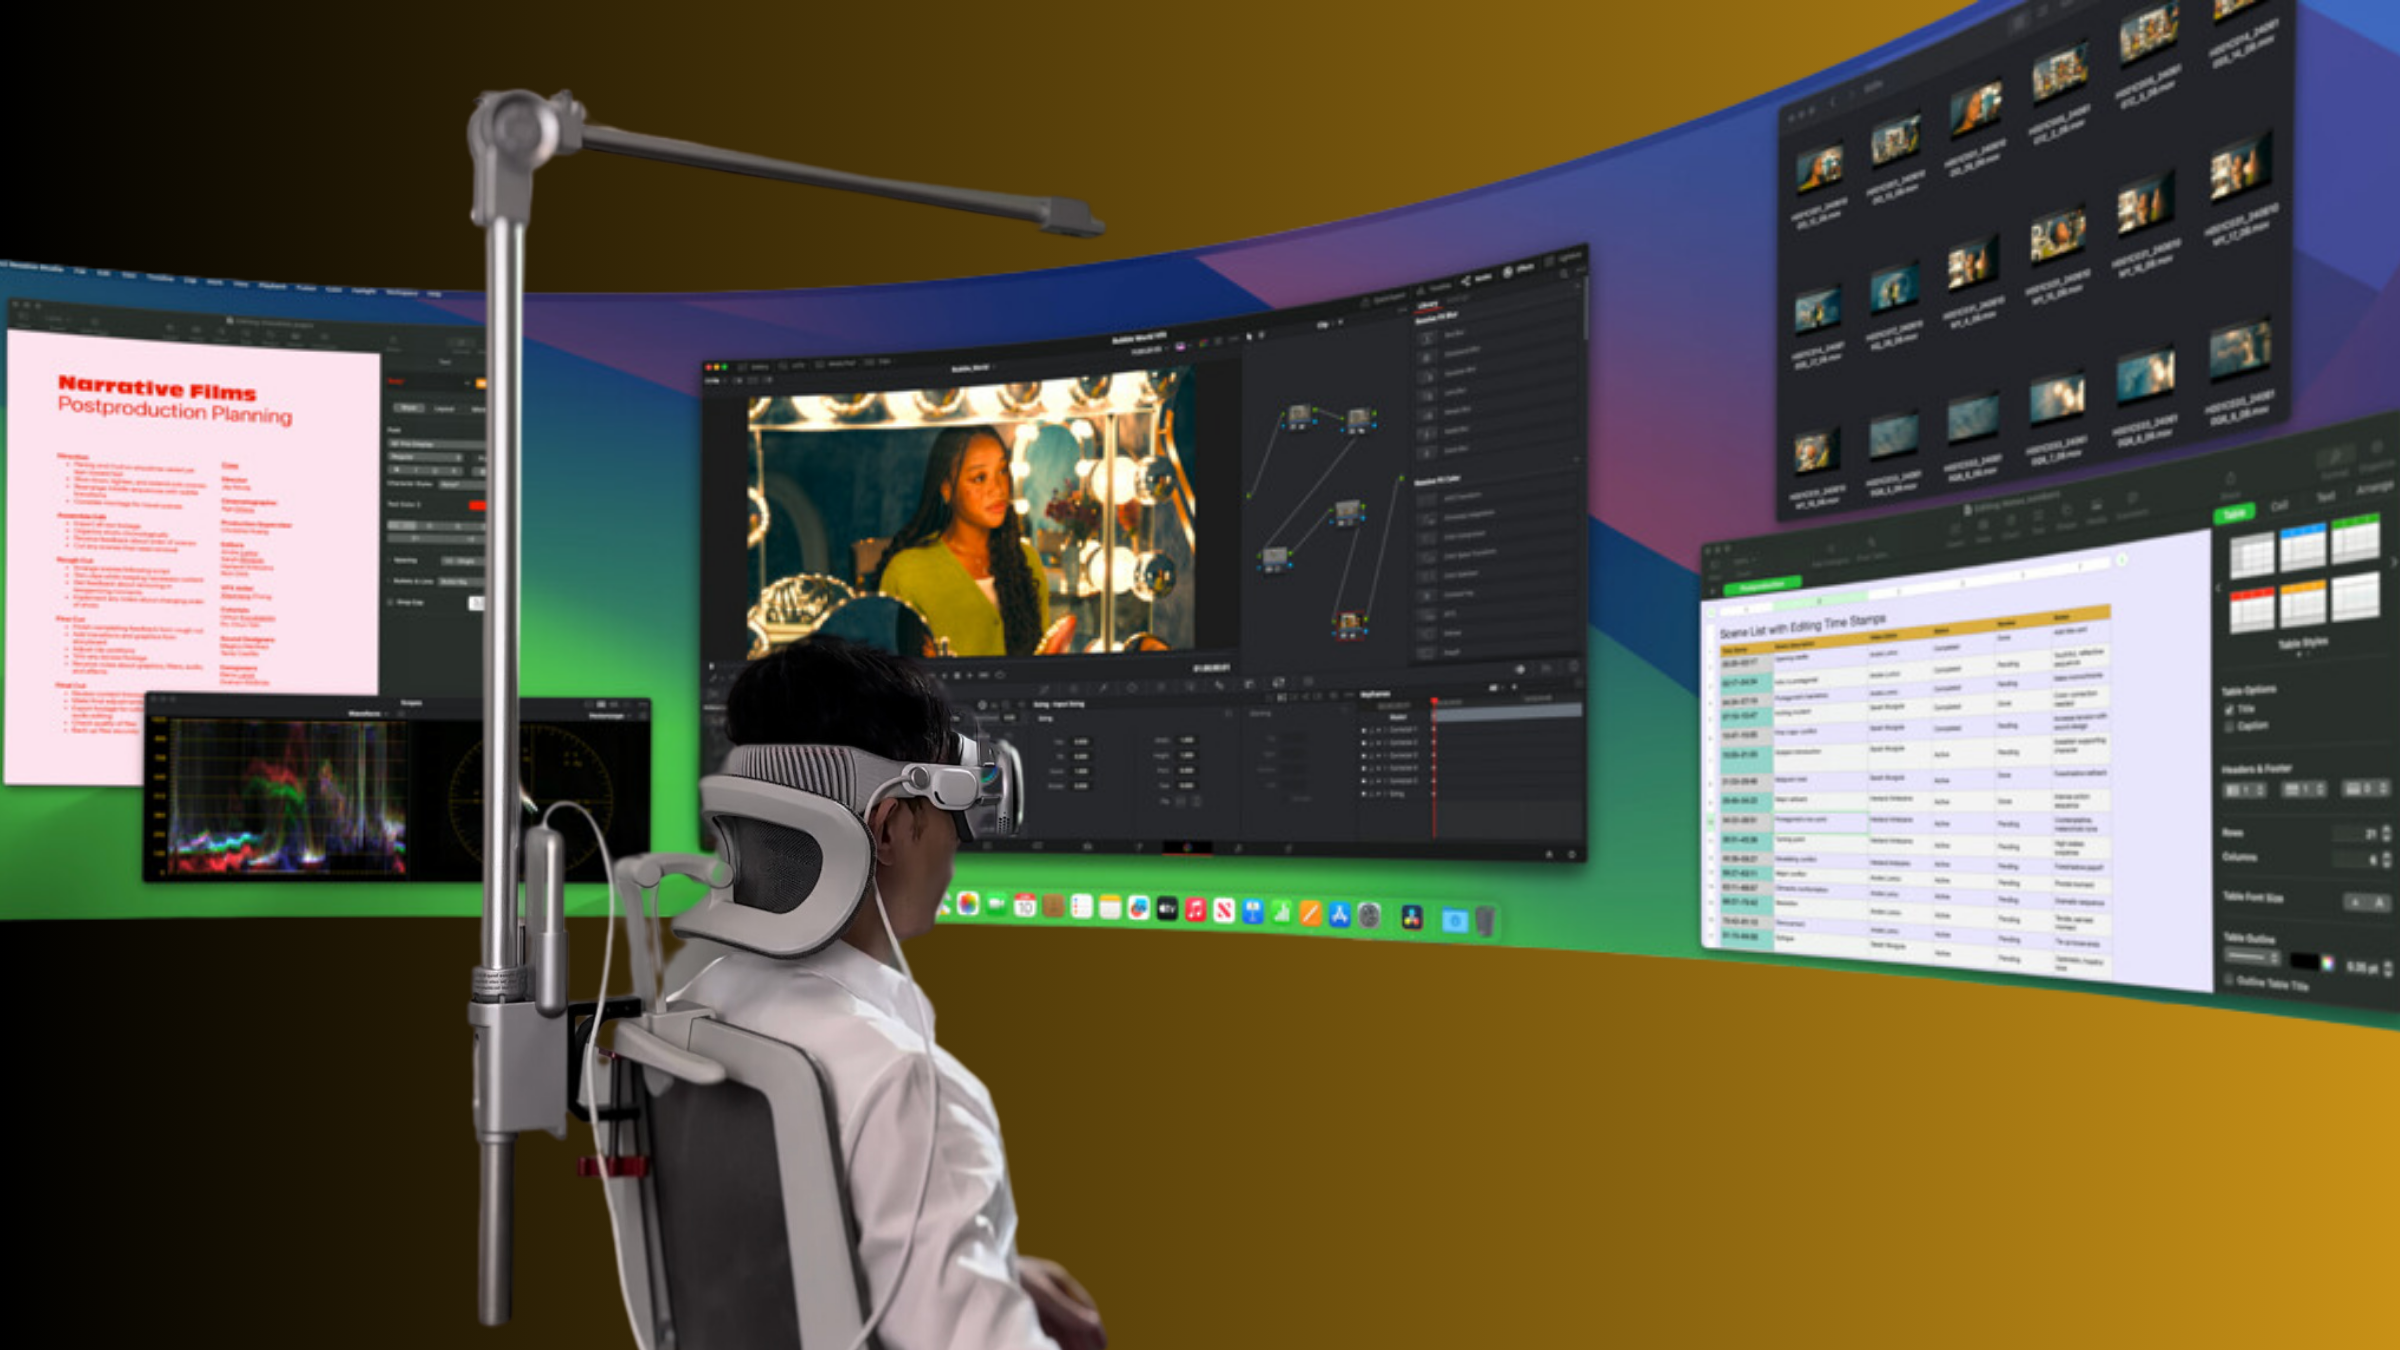
Ergonomics with head‑mounted displays is about redistribution: move load away from the facial bones and neck and into larger, stronger structures—the chest, torso, and hips—so muscles like the trapezius don’t fatigue as quickly. Flit Lift’s cradle and GraviPro’s gravity-assisted extenders accomplish this by shifting force vectors. Instead of the Vision Pro pulling the head forward, counterweights and precise pivoting let the headset float along an arc aligned with your spine.
Baseline posture cues matter. Aim for a neutral spine: ears aligned over shoulders, shoulders relaxed and slightly retracted, and a gentle chin tuck so your neck stays long rather than compressed. For handheld controllers, keep wrists neutral and forearms aligned—avoid bending wrists back or curling inward. Grips and padding design play a subtle role: breathable materials and textured contact points encourage a relaxed hold, reducing the instinct to clamp the controller and inadvertently pull the shoulders up.
Flexible joints in the GraviPro assembly preserve your range of motion while fixed anchors maintain overall balance; this combination means you can look up, side‑step, or lunge without the headset swinging or tugging. When ergonomics and hardware work together, users report less trapezius fatigue, steadier sightlines, and more consistent head alignment while scanning their virtual environment.
Initial Setup: Vision Pro with Flit Lift
Start with a clean, well-lit workspace and lay out the Vision Pro, Flit Lift frame, and GraviPro components. Inspect connectors, verify model compatibility, and read the quick-start notes. Mount the Vision Pro cradle on the Flit Lift at a height that places your pupils near the center of the lenses while seated. If the frame has a tilt feature, begin level—then fine-tune tilt in small increments so the headset sits naturally without forcing a chin tilt.
Install GraviPro counterweights per the manual: attach the base joint, secure the weight module, and confirm the pivot aligns with the Flit Lift’s axis. Calibrate lift limits and tension before strapping in—set soft stops where appropriate to avoid over‑rotation. Route power and data cables along the frame, using the lift’s cable channels when available, to keep lines off your chair and out of the play zone. Leave a generous loop of slack at joints to prevent tugging when the chair reclines or you lean forward.
Once mounted, don the Vision Pro and perform an initial fit: tighten the top strap first to center the headset, then adjust side straps for even cheek pressure. Power on and run Vision Pro’s alignment routine—confirm IPD and center view—and then perform a balance check by moving your head through slow, full-range motions. If the headset feels like it wants to rotate or pull, incrementally adjust GraviPro weight placement and Flit Lift tension until movement feels neutral and the headset returns to center without manual correction.
Fine-Tuning for All-Day Comfort
Comfort over hours is about micro‑adjustments. After your initial fit, schedule short checkpoints every 15–20 minutes to reset posture and reassess contact points—these small resets prevent cumulative drift and discomfort. Adjust the Flit Lift height and headset tilt until cheek pressure is minimal; a small gap at the lower foam usually indicates even pressure distribution rather than a single hot spot. If cheek or brow pressure persists, slightly raise the cradle and loosen the side straps to let the lift take more of the load.
Balance strap tension with back support. A stable pelvis and neutral lumbar curve reduce the chance you’ll lean forward and reintroduce neck strain. Set chair height so your feet sit flat, knees at roughly 90 degrees, and hips level. Use a footrest if needed to avoid dangling feet. For arm support, aim for elbows close to 90 degrees with forearms resting lightly—this reduces shoulder elevation and stabilizes the upper torso.
While in-session, tweak tension rather than reconfiguring hardware. If you find yourself gripping controllers tighter mid-session, check strap slack and consider a lighter GraviPro profile or adjust the lever arm. For longer play days, incorporate scheduled micro-breaks: stand, roll your shoulders, and reset the lift. Small habit changes combined with precise hardware tuning are what extend comfortable session length most effectively.
Cables, Ventilation, and Safety
Neat cable routing is both a comfort and safety issue. Run power and data cables along the Flit Lift frame, under the chair, or through a desk grommet to keep them out of foot traffic. Use magnetic cable clips or quick‑release sleeves at pivot points and strain relief clips near the power brick. Label lines and leave a service loop of slack where the lift pivots so movement doesn’t translate into a tug on the headset or power supply.
Ventilation reduces lens fog and facial heat. Position a quiet desk fan to circulate air across the head and neck without blowing directly into the eyes—side‑mounted airflow is best. Use breathable, moisture-wicking padding on any contact surfaces and clean pads and lenses after sessions with a microfiber cloth to maintain skin comfort and clear optics. Watch temperature around GraviPro modules: while they are mechanical, any external power bricks or motors can get warm; keep them off soft surfaces and provide airflow to avoid heat buildup.
Address fall and trip risk proactively. Keep the play area free of loose cables and clutter; use anti-slip mats and define a play boundary. For wired setups, avoid daisy-chaining power strips, secure bricks off the floor when possible, and adopt certified chargers. Finally, ensure quick-disconnects are accessible—test emergency stops and unplug procedures so you can cut power if something pulls unexpectedly or components overheat.
GraviPro Accessories: Gravity‑Assisted Extensions
GraviPro offers a family of extensions and weight profiles to tune leverage and stability. Shorter extensions reduce the arc and initial load; longer extensions increase reach and can improve stability for lower chairs or shallower desks. When selecting a profile, think of center of gravity: lighter weights reduce the overall load but require more precise positioning to keep the headset stable, while heavier modules dampen motion but can overburden the crown if not aligned with the Flit Lift pivot.
Install an extension by powering down the lift if required, removing the existing joint per the manual, and aligning the new extension with the pivot. Tighten fasteners to the recommended torque values in the guide and test balance incrementally. After any height or desk-depth change, re-check the extension length—what works at one chair height may throw the balance off at another. Users often find one or two millimeters of fore/back positioning at the pivot makes the biggest perceptible difference for stability.
GraviPro add-ons like soft grips and quick‑release counterweight plates let you tune mid-session without tools. They smooth wrist and forearm motion by shifting load to the torso and reduce the need for constant micro‑adjustments. Keep a small maintenance kit—hex keys, spare screws, and a microfiber cloth—nearby: swapping weights is faster and safer when you can verify torque and alignment on the spot.
Practical How-To: Step-by-Step Setup for a 60‑Minute VR Session
Use this checklist before a typical 60‑minute block to maximize comfort and minimize interruptions. Prepare the space: ensure steady lighting, clear the floor, and set your ergonomic chair so feet are flat and hips slightly higher than knees. Place a small fan to the side and keep water within reach. Assemble components: mount Vision Pro to the Flit Lift cradle, attach the chosen GraviPro weight or extension, and secure cables to the frame with clips.
- Initial alignment: Sit, don the Vision Pro, tighten the top strap first then side straps, and confirm brow clearance. Adjust cradle height until your pupils sit at the lens centerline.
- Calibrate the system: Power on, run IPD and center-view calibration, and confirm sensor visibility isn’t obstructed by the GraviPro mount or cables.
- Balance test: Slowly rotate your head 90 degrees left and right, look up and down, and note any pulling sensations—tweak GraviPro placement until the headset returns to neutral without manual correction.
- 15-minute check: Pause to re-evaluate cheek pressure, chair height, and strap tension. Make micro-adjustments; small changes beat large corrections later.
- Mid-session micro-break (after ~30 minutes): Stand for 60 seconds, roll shoulders, and reset the lift if needed. Resume with a short calibration check.
Keeping this routine makes a single hour feel effortless and trains you to spot the early signs of imbalance—hot spots on the face, pulled shoulders, or controller grip tightness—before they become fatigue problems.
Maintenance, Durability, and Developer Tips
Routine hardware checks protect both comfort and safety. After several sessions inspect screws, joints, and straps for looseness or wear. Tighten bolts to the torque values specified in the Flit Lift maintenance guide and replace compressed cushions or frayed straps—small part failures are the most common cause of suddenly degraded balance. Clean lenses and foam with a microfiber cloth and mild soap; avoid solvents that damage adhesives or fabrics.
Expect daily use to wear cushions and fade fabrics; joints should remain firm when tightened. If you notice wobble, cracks, or persistent looseness, stop using the affected part and consult support. Store components away from heat and direct sunlight to extend fabric and foam life. A brief weekly wipe-down and monthly deep-check—examining pivots and inspecting strain relief on cables—will keep the system reliable.
For developers: use the GraviPro API to build adaptive calibration into your app. Authenticate requests, respect rate limits, and prefer asynchronous or batched updates to avoid latency spikes during session start. Expose a calibration flow that can query current weight profiles and recommend UI prompts for users—e.g., “increase lift tension” or “attach light extension.” Test your software on a physical Flit Lift + GraviPro + Vision Pro rig and include fallback defaults for unrecognized hardware. These integrations let applications anticipate mechanical changes and present users with contextual setup guidance, reducing setup friction and improving comfort out of the box.
Case Study: Home Office Example with Flit Lift and Vision Pro
A compact home office can become a high‑comfort VR workstation with modest changes. In one 8×9 foot setup, an ergonomic task chair with adjustable lumbar support anchored a corner station. Desk height sat at 29 inches with a nearby sit‑stand surface; Flit Lift was positioned behind the chair, and GraviPro used a mid‑length extension tuned to the chair height. The user, 5'8" with average build, initially reported neck stiffness after two hours of VR.
Adjustments focused on posture and balance. Flit Lift height was tuned so the Vision Pro sat at eye level, gravitating the center of mass toward the spine. A medium-weight GraviPro profile smoothed head motion during quick turns without overloading the crown. Cable routing used the lift’s channels to keep the floor clear. The user adopted 15‑minute micro-breaks and positioned a small fan to maintain airflow at the temples rather than directly into the eyes.
Within two weeks the differences were clear: neck and shoulder complaints declined, tracking stayed stable through rapid head movements, and the user reported longer comfortable sessions with fewer mid-game adjustments. The lesson: combine mechanical balance, thoughtful cable management, and small behavioral habits—micro-breaks and posture resets—and a home office becomes a comfortable VR studio.
Next step: set up a single test session now—mount your Vision Pro, add the lightest GraviPro weight, run the calibration, and spend ten minutes moving through the full range of motion. If the headset drifts or you feel a pull, adjust in small increments until balance feels natural. This one experiment reveals more than hours of theory and sets the stage for truly fatigue‑free VR.



Share:
Staying Cool with Vision Pro: Using Flit Lift in Hot Weather
Vision Pro in the Gym: Managing Sweat, Strap Comfort, and Safety