

Choosing a Quest 2 Comfort Strap for Glasses Wearers: Fit and Clearance
If you wear glasses and use a Meta Quest 2, the right comfort strap can make the difference between a crisp, stable fit and sore cheeks, a fogged lens, or pinched frames. This guide helps glasses wearers choose and tune a Quest 2 comfort strap that clears your frames without sacrificing balance — so you can game longer with fewer aches. ⏱️ 7-min read
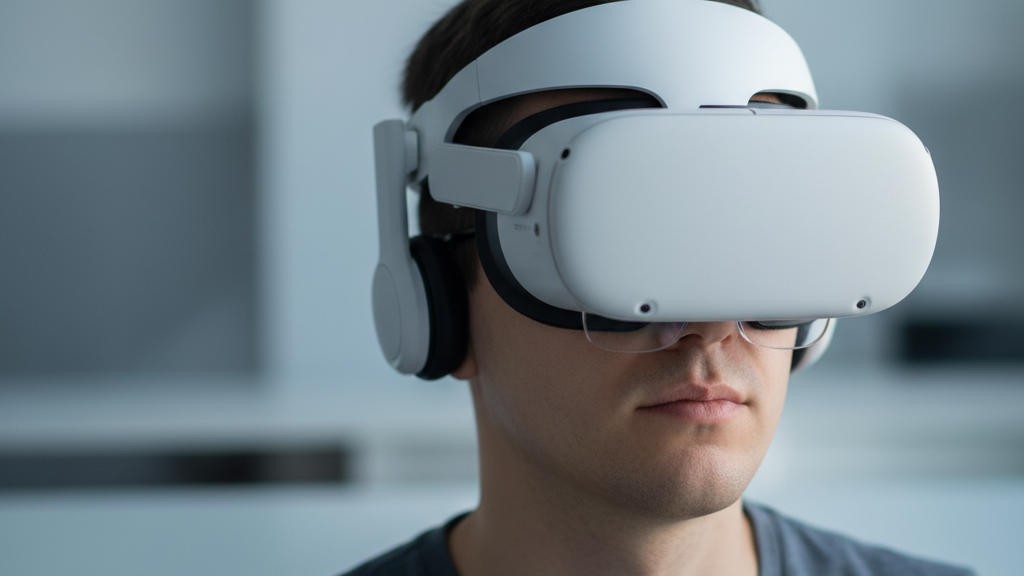
Assessing Glasses Clearance and Face Fit
Glasses clearance is about three things: the gap between the Quest 2 lenses and your glasses, how the headset contacts your nose bridge, and where straps route pressure across your brow and cheeks. Aim for a small but consistent gap so your frames never touch the headset lenses when you move. Too small and you get scratches and fog; too large and the headset loses stability or image alignment.
Frame size and temple depth shape how the strap sits. Large frames or deep-temple arms push the headset forward, increasing front weight on the nose and cheeks. Slim frames let the headset sit closer. Pay attention to these points:
- Lens gap: look for no contact when you tilt your head or nod — a few millimeters of clearance is ideal.
- Nose bridge contact: the foam should cradle the nose comfortably; if your glasses hit the foam, you need more vertical clearance or a different face pad.
- Strap routing and pressure: the height and angle of the rear strap change where pressure is applied on the brow and occiput (back of the head).
Strap Options: Elite Strap, Comfort Strap, and Third-Party Choices
Meta offers two common official paths: the Elite Strap (available with or without the built-in battery) and the Quest 2 Comfort Strap. Each has trade-offs for glasses wearers.
- Quest 2 Comfort Strap (official) — lightweight with extra padding and a Velcro rear adjustment. It improves comfort over the stock strap and raises stability without adding significant weight. Good for glasses users who want better padding and modest clearance increases.
- Elite Strap (official) — firmer, more rigid support and better stability, especially for active play. The Elite Strap with battery increases rear mass (improves balance) but adds weight overall; the battery can help offset front heaviness and keep the headset from sitting forward on your nose.
- Third-party straps — many reputable accessory makers offer variations: different pad thicknesses, higher rear arches, elastic or suspension-style mounts, and alternative materials. These can provide extra clearance or softer pressure points but check compatibility, return policy, and warranty before buying.
For glasses wearers specifically, the best choice balances padding, adjustability, and the option to shift weight backward (with a battery or counterweight) so frames don’t get pinched under pressure.
Step-by-Step Installation and Initial Tuning
Install and tune your comfort strap carefully — even tightening and simple checks will save you discomfort later.
- Remove the stock straps if needed and attach the new strap according to the manufacturer’s instructions, ensuring clips sit flush in the headset slots.
- Put the headset on gently and close the rear strap without fully tightening. Let the headset rest on your face to find a neutral position.
- Evenly tighten both side straps stepwise so the headset sits level, then adjust the rear band so the rear pad rests on your occipital bone (base of the skull).
- Check glasses sit flat against your face — they should not tilt forward or be pushed into your nose. If glasses pivot, loosen side straps slightly and raise the rear pad a notch for clearance.
Quick tests after initial tuning:
- Lens fog test: play for 2–5 minutes to see if lenses fog; persistent fog usually means poor airflow or headset sitting too close to glasses.
- Pinch points: run your fingers along the foam/brow line to find pressure hotspots.
- Strap slack at rest: when standing naturally, the headset should stay put without aggressive tightening — if it slides forward, add a small amount of rear tension or counterweight.
Weight, Balance, and Comfort During Long Sessions
Weight distribution determines how much the strap must do to keep the headset balanced. A forward-heavy setup increases brow and nose pressure, which aggravates glasses contact and facial soreness over time.
Options to manage front heaviness:
- Use the Elite Strap with battery or add a small counterweight pack at the rear — shifting mass back reduces pressure on the nose and can improve clearance for frames.
- Tighten the rear strap so the rear pad sits higher on the occiput; this lever arm helps counteract front weight without over-tightening the side straps.
- For minimal additions, inexpensive clip-on counterweights (a small metal puck or battery pack) can be attached to the back of many comfort straps to improve balance.
During long sessions, periodically loosen and re-seat the headset between matches to relieve pressure. Even with the best strap, micro-adjustments every 30–60 minutes reduce cumulative soreness.
Fine-Tuning Fit: Height, Length, and Nose Clearance
After a few sessions your fit should evolve. Start with a baseline, then make small, single-variable changes and test again.
- Height (rear placement): Aim for the rear pad to sit at the occipital bone. If the headset feels like it’s tipping forward, raise the pad one notch; if it pulls backward, lower it slightly.
- Length (overall tension): Adjust side straps so the headset is snug but not tight — you want stability for movement but no pressure that pushes frames forward. A good starting point is a secure fit you can hold by the front without it drooping.
- Nose clearance: If frames touch the foam, try a thicker face pad, a small spacer, or raising the headset slightly by altering the rear strap. Some users prefer thin silicone nose guards or third-party face cushions designed for glasses.
Practical targets for initial setup: a few millimeters of lens-to-glasses gap, rear pad on the occiput, and side straps tightened enough that aggressive movement does not shift the headset more than a few millimeters.
Care, Maintenance, and Replacement Guidance
Good maintenance preserves clearance and comfort. Sweat and oils compress padding faster and encourage odors and fogging issues.
- Clean fabric and foam weekly if you game often: use a mild soap solution on a lint-free cloth, gently wipe pads, and air dry fully before use. Avoid soaking foam or getting liquid inside the headset.
- Avoid excess moisture near lenses; persistent dampness can fog lenses and warp foam. Let any sweat-damp pads dry completely between sessions.
- Replace straps or pads when you notice fraying, hardened/compressed foam that no longer provides cushioning, persistent hotspots, or if the strap hardware loosens. For heavy daily use, expect foam/padding replacement every 6–12 months; lighter users may go 12–24 months.
Affordable Options and Pragmatic Buying Guide
You don’t need to overspend for a strap that works with glasses. Focus on padding quality, adjustability, and rear height rather than brand alone.
- Budget-friendly features to prioritize: thicker, breathable foam; a discrete rear adjustment (Velcro or ratchet); and a design that allows adding a small counterweight or battery.
- Avoid the cheapest straps with minimal padding or limited rear adjustment — they can worsen pressure or reduce clearance.
Quick buyer checklist:
- Compatibility with Quest 2 attachment points
- Padding thickness and breathable material
- Adjustable rear strap (height and tension)
- Ability to add a counterweight or battery pack if needed
- Clear warranty and returns from the seller
Vision Pro Cross-Compatibility: What Quest 2 Wearers Should Know
Apple Vision Pro is a fundamentally different headset in form factor and mounting approach, so direct strap swaps with Quest 2 gear are unlikely. Vision Pro uses its own band and magnet/attachment systems tailored to Apple’s goggles and optics.
If you’re investing in long-term comfort strategies, focus on solutions designed for Quest 2: aftermarket face pads, rear counterweights, and straps engineered to work with the Quest’s mounting points. Adapters for cross-compatibility are rare and often compromise fit; if you’re serious about mixed-device use, plan to buy device-specific comfort accessories.
With the right strap and a few minutes of tuning, glasses wearers can enjoy stable, comfortable Quest 2 sessions without constant lens or frame issues. Prioritize adjustable rear support, breathable padding, and the option to add rear weight — and remember to clean and replace pads before they lose their shape. Happy gaming.
Powered by Trafficontent


Share:
How to Fit Third-Party Quest 2 Straps Without Compromising Comfort
Glasses Friendly VR: Fitting Quest Two Comfort Straps for Spectacle Wearers