

Comfort vs. Standard: A Practical Guide to Quest 2 Head Straps and Real Comfort for Long Sessions
If you regularly lose yourself in hour‑plus VR sessions, the strap that holds your Quest 2 can make a bigger difference than you expect. This guide walks through how the stock fabric strap and dedicated comfort options (including the Elite Strap and popular third‑party designs) change pressure, balance, and overall endurance—then shows you exactly how to install, tune, and maintain a comfort strap so you can play longer without soreness. ⏱️ 10-min read
I'll focus on practical fixes and decision criteria: where straps apply pressure, how padding and frames redirect load, what to check if you get hotspots, and which features are worth paying for. Read this before upgrading so you pick the strap that fits your head, play style, and tolerance for weight.
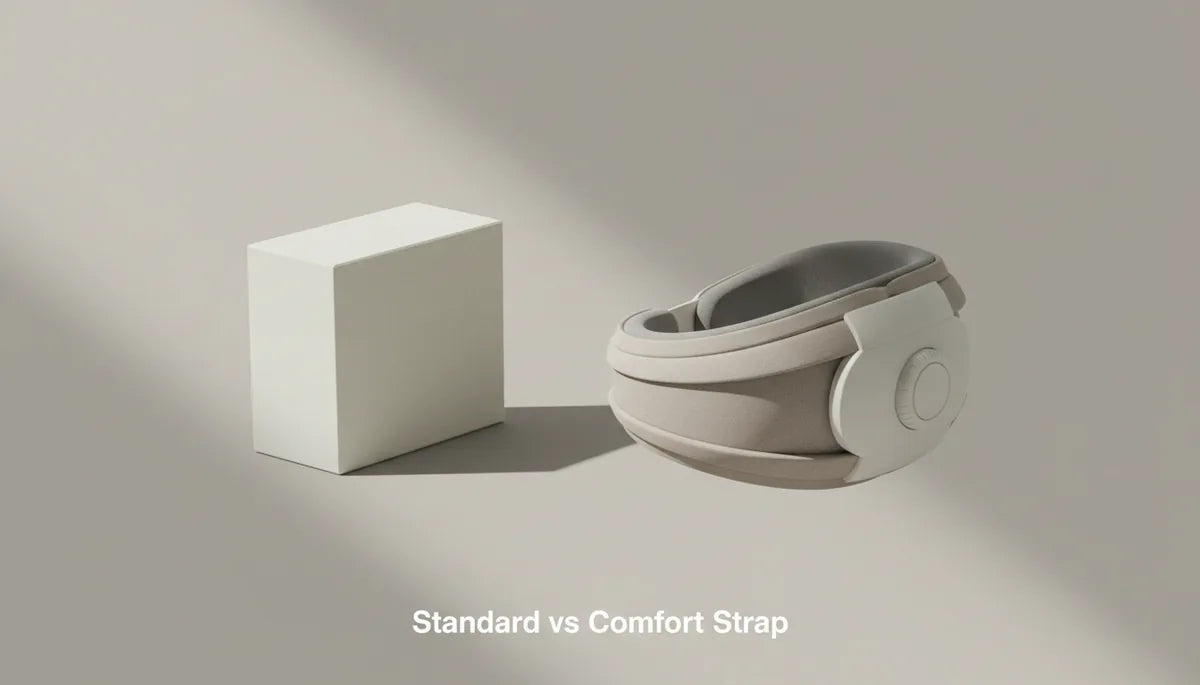
Understanding Quest 2 head straps: standard vs comfort strap
The Quest 2 ships with a simple, soft fabric strap: a single continuous loop of thin webbing with a small adjustable slider. It’s light, flexible, and unobtrusive—great for casual play or short sessions. But that flexibility is also the source of frequent complaints. Because the stock strap relies on a narrow contact area and tension from one loop, small shifts in head position or tension can redirect force onto the face. The result is hotspots at the nose bridge, cheeks, or a slipping headset that requires constant readjustment.
Comfort straps take a different approach. Most use a rigid or semi‑rigid frame that anchors around the crown and sides of the head, plus broader pads where the strap meets skin. The padding is usually denser and shaped to spread load across a larger surface—think crown, temples, and the rear occipital area—so pressure that once focused on the brow gets redistributed. Many designs add a top strap or widening of support to reduce cheek and nose load further. That stiffness trades a little flexibility for stability: fewer micro‑movements, fewer face pressure spikes, and a steadier visual seal during active movement.
How the comfort strap reduces pressure and improves stability
A comfort strap’s ergonomic advantage comes down to three principles: spread, counterbalance, and locking fit. First, spread: a wider contact patch and contoured foam move force away from a narrow band over the brow and onto the crown and sides. Instead of two or three concentrated points pressing into skin, the headset weight is shared across seenable surface area—this is what prevents the red marks that pepper short‑session users with the stock strap.
Second, counterbalance: many comfort straps are designed to shift mass rearward. Whether through a thicker rear pad, an integrated battery, or an optional counterweight, this rearward shift moves the headset’s center of gravity nearer the head’s natural pivot at the neck. That reduces the forward pull that causes chin‑tucking, eyebrow pressure, and neck strain during long sessions.
Third, locking fit: a dial, ratchet, or multi‑point fastening tightens evenly around the head and minimizes slip at the temples. Less slip means your lenses stay aligned during quick turns, preserving clarity and immersion. The combined effect is simple: fewer adjustments, less facial pressure, and a more consistent field of view when you’re active in VR.
Weight, balance, and long-session comfort: what changes with a comfort strap
Switching to a comfort strap changes how your Quest 2 feels more than simply adding foam. Many comfort designs add tens to a couple hundred grams of material—plastic frame, thicker foam, sometimes batteries—so the initial impression is "heavier." But it’s how that weight is distributed that matters. A well‑designed strap moves apparent weight from the nose and cheekbones to a larger area across the crown and rear, which reduces local pressure even if the absolute mass increases.
Consider two sensations: facial pressure and neck load. Facial pressure (numbness, red marks, pinching) responds to contact area and padding geometry. By increasing the contact footprint, comfort straps lower surface pressure per square centimeter. Neck load depends on how far forward the headset wants to tip. A rear balance—either through a thick rear pad or a small battery pack—reduces that forward torque, so your neck extensors don’t have to fight to keep your head level. Over multi‑hour sessions, that torque reduction is often the single biggest contributor to reduced fatigue.
Still, not all comfort straps behave the same. Halo or top‑heavy designs can relieve the face but place more force on the crown; users with sensitive scalp pressure may notice discomfort. The takeaway: prioritize how weight is distributed over raw weight numbers. If you play long sessions, a slightly heavier but better‑balanced strap will usually feel far more comfortable than a very light, poorly distributed one.
Step-by-step install and fit guide for Quest 2 comfort strap
Installing a comfort strap is straightforward, but small missteps make a big difference in comfort. Follow this sequence for a secure, balanced fit that minimizes hotspots from the first minute.
- Power down and prepare: Turn off the headset and remove any USB or accessory cables. Work on a soft surface and set aside the stock strap hardware in a labeled container to avoid losing pieces.
- Remove the stock strap: Find the release tabs on each side arm, press them, and gently pull to detach. Inspect the mounting points for dirt or damage before proceeding.
- Attach the new side arms: Align the comfort strap’s side arms with the headset slots and press until you hear a click. Avoid forcing parts—if alignment isn’t smooth, recheck orientation and hardware.
- Secure the top crown strap: Thread and fasten the top strap per the manufacturer’s instructions so the crown pad sits roughly at your head’s highest point. This top strap is the anchor for vertical stability.
- Initial tuning: Put the headset on and center the display. Start with moderate rear tightening—enough to hold the headset but not so tight it pinches. Then adjust the top strap tension to bring the display to a clear focus without pressing the foam into your cheeks.
- Fine adjustments: Move the crown pad slightly forward or back to shift pressure between forehead and occipital area. If you wear glasses, test with them on (see glasses section). Make micro‑adjustments in 5–10 second trials until the headset stays put during small head turns without redness.
After the first session, recheck fasteners and pad alignment—foam settles, and a second adjustment often produces the best long‑session comfort.
Glasses wearers: fit tips and hotspots
Glasses introduce extra contact points: frames on the temples and bridge. With a standard strap the headset often presses the frame into your face; with a comfort strap you usually get more room, but new hotspots can appear if you over‑tighten. Here’s how to keep frames comfortable while preserving a tight optical seal.
First, identify the hotspots. Most problems show up at the nose bridge and the temples—look for red lines or discomfort after a short test session. If the nose feels pinched, try loosening the rear strap and tightening the top strap slightly to move load off the cheeks. A small upward tilt on the front of the headset can open up the bridge area while keeping the lenses aligned.
If your frames are thick at the temples, consider lightweight or rimless frames specialized for VR. Another pragmatic option is a thin spacer accessory that adds a few millimeters between your face and the foam; this creates extra clearance for frames without compromising lens distance much. Many comfort straps also have thicker foam or replaceable cushions—swapping to a softer, deeper pad can completely eliminate pinch points.
Finally, clean lens edges and frame arms regularly; dirt or oils add grit that increases pressure. When testing seating and strap tension, always wear your glasses so you’re tuning for real conditions, not an idealized fit without frames.
Maintenance, cleaning, and longevity
Comfort and hygiene go hand in hand. Better foam and fabric need regular care to keep them performing and smelling fresh. A simple maintenance routine extends the life of your strap and prevents comfort degradation that looks like permanent wear.
Daily or weekly care: Wipe sweat away after sessions with a slightly damp microfiber cloth. For light cleaning, use mild soap and water on cloth—never saturate the foam or get electronics wet. Let parts air dry completely before reassembly. If your strap has removable cushions, pop them off for a deeper clean every few weeks; hand‑wash covers and lay flat to dry.
Materials to avoid: Do not use bleach, strong solvents, or machine washing/drying for foam or fabric parts; these degrade padding and adhesives. Avoid alcohol wipes on delicate breathable covers, as repeated use can dry and crack the material. For plastic frames, a diluted detergent solution and soft cloth is usually sufficient.
Signs it’s time to replace: compressed, crumbly foam that doesn’t rebound; pads that no longer maintain shape under light pressure; tears in the cover or straps; or any mechanical failure in dials, clips, or mounting points. Small upgrades—replacement face pads, gel sleeves, or new cushion covers—can revive an otherwise fine strap for a long time.
Choosing between Elite Strap, official Comfort Strap, and third-party options
Choosing the right comfort strap is a practical decision: prioritize the features that match your play habits. Below are decision points and how common options map to them.
Price vs. build quality: First‑party options like the Elite Strap (and the Elite with battery) are typically a safe bet for consistent fit and durability. They use a rigid frame and easy dial adjustments—good middle ground for most users. Third‑party makers (BoboVR, Kiwi Design, and others) often offer halo or hybrid designs that can improve comfort further or add value features—swappable batteries, thicker pads, or silicone grips—often at varied price points.
Weight and balance: If you prioritize minimal face pressure and stability, look for designs that explicitly move mass rearward or include a battery pack/counterweight. Halo‑style straps often shift load upward onto the crown, which is ideal for cheek and nose relief but can concentrate pressure on the scalp. If you have a sensitive crown, choose a strap with a larger, softer crown pad.
Compatibility and extras: Check that the strap mounts cleanly to Quest 2 arms and allows easy removal of the headset for cleaning. Battery‑equipped straps extend playtime but add complexity—confirm battery mount and cable routing. Durability also varies; read recent reviews for pad longevity and clasp reliability.
Example tradeoffs: Elite Strap—reliable, balanced, good padding; adds moderate weight. BoboVR/halo options—excellent facial relief, can be heavier at the crown; look for gel padding if you plan long sessions. Kiwi Design—robust padding and varied designs, often good value but check build tolerances.
Best practices for weight distribution and posture for all-day comfort
Even the best strap can’t fix poor posture. Comfort is a system: strap, headset, how you sit, and how you move. Use these practical habits to get the most from any strap during multi‑hour sessions.
- Anchor the crown high but comfortable: place the crown pad near the top of your skull so force is spread across the crown and rear, not primarily on the forehead.
- Balance rear and top tension: tighten the rear first for a seat‑belt style hold, then tension the top strap to control pitch. Avoid over‑tightening—less is often more for reducing hotspots.
- Use counterweights thoughtfully: small rear weights or battery packs reduce forward torque. Start small and increase until the headset feels level without excessive crown pressure.
- Mind your neck posture: keep the chin slightly tucked and the spine neutral. Frequent breaks (5–10 minutes every hour) with gentle neck mobility can prevent stiffness in the trapezius and extensors.
- Braiding or tying long hair and using a silicone‑lined strap can reduce slippage during active movement, maintaining fit without extra tension.
Finally, treat fit like an iterative process. Play for 20–30 minutes, stop, and tweak—small changes compound. If you’re still getting hotspots after several adjustments, try swapping cushion thickness or adding a thin gel sleeve; those micro‑changes often make the biggest difference.
Next step: measure your typical session length and note where pressure shows up. If you regularly play beyond 60–90 minutes or notice red marks and frequent readjustments, try a comfort strap for a week—use the installation and tuning steps above—and you’ll quickly tell whether the upgrade pays off for your head shape and play style.


Share:
Comfort, Stability, and Sweat: Testing Quest 2 Straps for Prolonged Sessions
Comparing Third-Party Head Straps to the Quest 2 Stock Strap