

How to Choose the Right Quest 2 Comfort Strap for Every Head Shape, Size, and Glasses
Picking the right Quest 2 comfort strap shouldn’t be guesswork. Whether you’re new to VR or you’ve been logging long sessions, the strap you choose determines how stable the view is, whether your glasses survive a playthrough unscathed, and how quickly neck and forehead fatigue set in. This guide walks you through a practical, head‑shape–aware approach to selecting, fitting, and maintaining a Quest 2 strap that stays comfortable during intense movement and marathon sessions. ⏱️ 10-min read
Read this if you want targeted advice for round, oval, or narrow heads; if you wear glasses; or if you’re weighing Meta’s official options against third‑party choices. Each section has actionable checks, real measurements, and simple tests you can perform in minutes to confirm a secure, long-lasting fit.
Assess head shape, size, and glasses fit
Comfort starts with measurement and observation. Use a soft measuring tape and note two dimensions: circumference (around the widest part of your skull just above the ears) and front‑to‑back length (hairline to the back of the head). Most adult Quest 2 users fall between about 20 and 24 inches (51–61 cm) in circumference. If you’re at the high end, prioritize straps with greater adjustment range and broader rear support.
Head shape affects where pressure will land. A round head disperses pressure near the midline, so look for straps that offer balanced side tension and a supportive crown pad. An oval head usually benefits from a slightly longer rear strap and symmetrical side adjustments. Narrow heads need shorter strap lengths and firmer anchors to stop slippage without over‑tightening behind the ears.
Glasses change the equation. Measure temple width and note how far lenses protrude. Temple widths vary, but many prescription frames have temple arms 125–140 mm long; wider temples or thicker frames need extra room at the sides and softer facial interfaces. When trying a strap, put your glasses on, wear the headset, and make sure the strap doesn’t press the frame into your cheeks or nose. A small gap at the temples—about a fingertip’s width—often makes the difference between tolerable and painful wear.
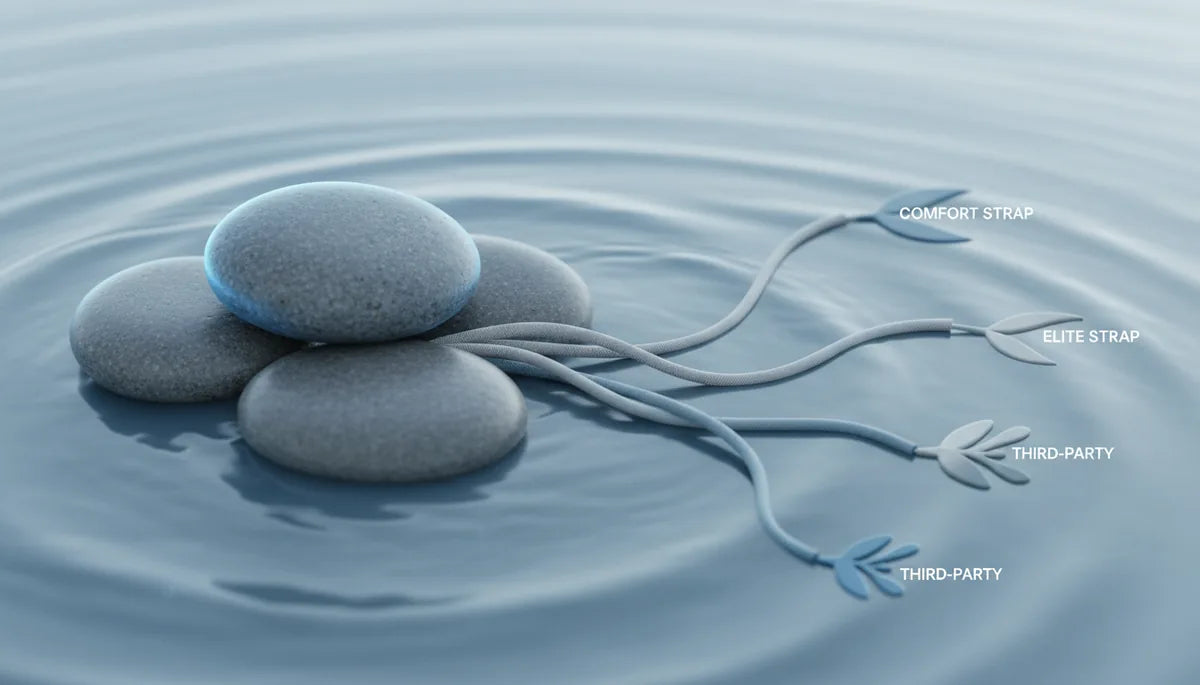
Compare Quest 2 strap options: Comfort vs Elite vs third‑party
Meta offers two official paths: the lightweight Comfort Strap and the firmer Elite Strap (available with or without an integrated battery). Third‑party makers add halo designs, battery-integrated alternatives, and memory-foam upgrades. Here’s how to weigh the choices.
The Elite Strap uses a rigid backplate that channels much of the headset’s weight toward the occiput (back of head). That reduces forehead and nose‑bridge pressure—useful during long plays and active movement. Its side sliders give precise tension control, so you can accommodate pronounced occipital bumps or wider foreheads. Players who move vigorously often report better stability with the Elite’s rigid frame.
The Comfort Strap takes the opposite approach: soft fabric, a curved foam pad behind the head, and less structure. It’s lighter and quicker to don, and its padding often plays nicer with glasses because it molds around temple arms rather than pushing them inward. However, when compared to the Elite, more weight can feel borne by the straps instead of the rear plate; some users notice increased movement during vigorous play.
Third‑party options span halo designs that wrap around the crown for broad load distribution, to battery packs and counterweights that attach at the rear to rebalance the headset. Halo straps can be excellent for people with sensitive forehead areas, while battery packs solve runtime problems and act as useful counterweights when properly balanced. When considering third‑party gear, check compatibility with Quest 2 mounting points, read multi‑year user reviews, and verify warranty terms—some third‑party additions can affect manufacturer support.
Fine‑tune fit: height, strap length, and tightening tips
Once you’ve chosen a strap, fit makes all the difference. Small adjustments create big comfort gains. Start with the top strap: position it so it sits just above the hairline, not on the brow. That raises the headset slightly and reduces pressure on the forehead. Use the slider or anchor points to move the top strap up or down in one‑notch increments, wear for 30–60 seconds, and re‑evaluate.
Side straps control lateral stability. Begin with equal lengths left and right, then tighten gradually until the headset feels secure but not constrictive behind the ears. The goal is stability—no image wobble during quick head turns—without red marks. If you feel pinch points at the temples, back off one notch on each side and test again.
Balance the load between top and side straps. If the front tilts down or feels heavy on the nose, shift more tension to the rear by lengthening the side straps or raising the top strap slightly. To test: put the headset on, nod, shake your head side‑to‑side, and walk a few steps. If the image stays steady and you don’t feel concentrated pressure, you’ve achieved a good tension balance. For glasses wearers, periodically check that lenses aren’t pushed inward; a slight loosening of the side straps often prevents frame pressure without introducing wobble.
Step‑by‑step installation for the Quest 2 Comfort Strap
Installing the Comfort Strap is straightforward but doing it carefully avoids twists and misalignment. Follow this sequence for a reliable fit:
- Power down and rest the headset on a soft, clean surface to protect lenses and foam.
- Locate the release tabs on each side of the original strap mounting points. Press the tab and slide the strap outward while applying gentle, steady pressure. Don’t yank; if it resists, rock slightly to loosen the post.
- Inspect the new Comfort Strap to orient the top and bottom edges correctly. The pad should sit centrally on the back of your head and not be upside down.
- Align the mounting posts with the headset slots. Push each post straight in until you hear a click; ensure the strap lies flat and isn’t twisted.
- Put the headset on and set side adjusters to an initial even tension. Tighten equally on both sides until the headset rests comfortably without tilting forward.
- Perform a stability check: nod, look sharply left and right, and jump lightly. If the headset shifts, loosen or tighten in small increments until stable.
After installation, check lens alignment. If the image seems off or your IPD feels different, adjust the strap and top position—sometimes raising the crown slightly corrects perceived image shift. If you feel persistent spots of pressure, re‑evaluate where the pad sits and reposition the strap posts if necessary.
Weight distribution and comfort during long sessions
One of the primary comfort goals is keeping the headset’s center of gravity close to the back of your head. When too much weight sits in front, you get forehead soreness and neck strain. The Elite Strap’s backplate does this by design; with softer straps, you can achieve similar balance using counterweights or a battery pack attached to the rear.
Counterweights are simple and effective: adding 100–180 grams at the rear shifts the balance enough for most users, reducing perceived front heaviness without creating new pressure hotspots. Battery packs serve the dual purpose of extended runtime and act as counterweights—just be mindful of extra weight since battery packs vary significantly. Start with lighter weights and increase only as needed; too much rear weight can create a new pressure point on the occiput.
Pair weight solutions with compatible padding. Softer memory or open‑cell foam behind the head reduces pressure concentrations that could otherwise make rear weights uncomfortable. If you’re playing high‑intensity games, consider breathable materials to prevent sweat buildup. When using any add‑on, recheck strap tension: a heavier rear requires slightly looser side straps and a raised top strap to maintain a comfortable seal without compressing your face.
Care, maintenance, and durability
Keeping a strap clean and well maintained preserves comfort and extends life. Materials differ in how they respond to sweat and cleaning, so match your routine to the strap type.
- Fabric and woven straps: clean with mild detergent and warm water. Gently scrub with a soft cloth, rinse, and air‑dry flat. Avoid machine‑washing unless the manufacturer explicitly allows it, because agitation can warp structural components.
- Silicone: wipe with a damp cloth or use 70% isopropyl alcohol for tougher grime. Silicone dries quickly and resists sweat, making it hygienic and durable.
- Foam pads: if they have removable covers, wash the covers regularly. Foam cores can degrade with moisture—avoid soaking. Replace foam that has lost resilience or shows rips.
- Leather or faux leather: wipe clean and avoid soaking. Use leather conditioner sparingly on genuine leather after drying.
Inspect hardware monthly—mounting posts, sliders, and any magnetic connectors. Replace worn fasteners or compressed foam to maintain consistent fit and safety. Store the headset in a cool, dry place away from direct sunlight. If you plan to use a weightless solution like a lift stand (for example, for extremely long sessions), detach the strap before long‑term storage to avoid creasing or deformation.
Affordable options and credible third‑party alternatives
If you’re budget‑conscious, several third‑party straps deliver strong performance without premium pricing. The best budget choices emphasize adjustability, decent padding, and low added weight. Halo‑style third‑party straps often provide good load distribution at a modest price; battery‑integrated alternatives can be more expensive but offer runtime and balance improvements worth the cost for many users.
When evaluating third‑party gear, verify three things: mechanical compatibility with Quest 2 mounting points, clear return and warranty terms, and a history of credible user reviews. Look for vendors that publish materials and weight specs—if a strap is heavily padded but adds substantial weight, it may trade one discomfort for another. Community feedback on head‑shape fit can be especially valuable: search for reviews from people who list their head circumference and glasses type.
A practical buying strategy: start with the strap style you think you need (rigid backplate vs. padded halo), read 10–20 user reviews highlighting head shapes similar to yours, and buy from sellers who allow easy returns. That way you can test at home with your glasses and play style and return if the fit isn’t right.
Compatibility with accessories and cross‑compatibility notes
Accessories—battery packs, counterweights, mounts, and wireless adapters—change how a strap performs. Before mixing and matching, consider three constraints: mechanical attachment points, total additional weight, and how the accessory shifts the center of gravity. For example, a heavy battery pack mounted high can create upward leverage that reduces forehead pressure but increases occipital compression.
Verify that any accessory uses Quest 2‑compatible mounting points or a secure strap attachment system. If a third‑party battery uses proprietary clips, ensure they don’t interfere with strap articulation or the joystick area. Pay attention to the combined weight: a 150–200 g battery plus a 120 g counterweight may rebalance perfectly for one user and be excessive for another.
Cross‑brand caution: accessories designed for other platforms—like Apple Vision Pro straps or lifts—are not necessarily safe or effective on a Quest 2. Mounting points, weight limits, and bracket geometry differ, so don’t assume interchangeable fit. When in doubt, use accessories explicitly stated to be compatible with Quest 2 or backed by user reports showing successful integration. Finally, if your headset is under warranty, check whether adding third‑party mounts or drilled‑on adapters voids coverage; some manufacturers are explicit about which alterations impact service.
Takeaway: Measure, match, and test—then iterate. Start with solid measurements of your head and glasses, choose a strap family (rigid backplate, padded halo, or lightweight comfort), and fine‑tune tension and padding. Use small counterweights or a battery pack to shift balance if the front feels heavy. Keep materials clean and inspect hardware regularly. With a little setup and the right strap, you’ll stop fiddling mid‑game and start staying immersed.


Share:
How to choose between the Oculus Quest 2 comfort strap and Elite Strap for your playstyle
How battery pack placement affects Quest 2 center of gravity and neck strain