Mastering Weight Distribution for All-Day VR Sessions
Long VR sessions are a joy—and a challenge. Whether you're marathoning a creative workflow on Apple Vision Pro, grinding through multiplayer matches on Quest, or exploring immersive narratives on PSVR, the physical reality of headset weight, strap fit, and posture determines whether you finish energized or aching. This guide gives device-agnostic principles plus device-specific tweaks so your headset feels stable, light, and unobtrusive from dawn till dusk. ⏱️ 13-min read
Read on for practical setup routines, accessory recommendations, and simple tests you can run in 10–15 minutes to dial a fit that lasts for hours. The goal: reduce neck load, avoid facial hotspots, and keep your head aligned so the virtual world stays steady—and comfortable—no matter how long you stay inside.
Foundations of All-Day VR Weight Distribution
Comfort in long VR sessions begins with how weight is balanced on your head. Think of the headset’s mass riding on two planes: a gentle lift at the crown and a stable lateral base along your temples and cheeks. When those planes are balanced, the headset feels like an extension of your head; when they’re not, you get neck fatigue, facial pressure, and image wobble.
Center of gravity matters more than total mass. A front-heavy visor will torque the head forward unless a rear anchor or counterweight pulls the center back toward your ear-eye plane. So the first task is to create balance: lift through the crown, stabilize at the sides. Strap tension, padding firmness, and gasket shape all interact to create that balance—too tight and you get hotspots; too loose and the display shifts.
Begin with these baseline goals: minimize neck torque, reduce concentrated face pressure, and maintain head alignment. Put the headset on, level your gaze, and check for subtle tilt or drift. If the unit leans left or right, or one temple bears more contact than the other, make tiny strap adjustments—small increments matter. A symmetrical left-right pull keeps the display steady and prevents compensatory shoulder or neck movements that multiply fatigue over hours.
Plan to iterate. After each tweak, test for 10–15 minutes to let padding settle and circulation return to normal. Use short, repeatable cycles: adjust, test, note, and repeat until the headset can sit for extended intervals without you needing to fidget. That habit keeps a fit that’s not just comfortable at first put-on but comfortable over the whole day.
Vision Pro-Centric Weight Management: Comfort, Padding, and Facial Interface
Apple’s Vision Pro feels different from many consumer headsets: a lighter band paired with a dense, compact facial interface that concentrates contact higher on the forehead and upper cheeks. That geometry is excellent for visual fidelity but requires deliberate tuning to avoid nose bridge hotspots, eyebrow pressure, and thermal buildup during marathon sessions.
Start by prioritizing even contact over perfect vacuum sealing. A stable seal that distributes pressure across the forehead and cheekbones is better than a tight seal that pinches the nose. After your first few minutes in Vision Pro, inspect for localized redness along the nose or cheekbones. If you find marks, relax the strap tension slightly and experiment with pad angle or thickness—adding a millimeter of foam at a hotspot often beats tightening the strap because it increases contact area and spreads force.
Vision Pro users should document a repeatable pad orientation. Small changes to pad placement dramatically alter where the weight sits: moving the gasket up a few millimeters shifts load from the nose to the brow; dialing strap height can lift the crown and relieve the neck. Make a simple note—pad orientation, strap notch, and top-band height—so you can reproduce the setting the next day.
Accessories that prevent shimmy and distribute load help for day-long use. A thin, breathable foam spacer behind the band reduces micro-slip without compressing skin, while a soft rear cradle or light counterweight can move the center of gravity rearward, reducing anterior neck torque. Keep an eye on thermal comfort: thicker, denser pads trap heat. Swap to perforated or moisture-wicking materials for longer sessions to reduce sweat-induced slipping and irritation.
Cross-Platform Comfort Upgrades: Straps, Cushions, and Gaskets for Quest, PSVR, and Vision Pro
No single cushion fits every headset. Geometry—how a headset transfers load—dictates which upgrades help. Quest’s halo-style designs channel force to the crown; PSVR tends to press against cheeks and the nose; Vision Pro pushes contact higher on the forehead. Recognize these profiles before choosing hardware: mismatched parts can increase hotspots rather than relieve them.
Here’s how to match upgrades to device profiles:
- Halo-style headsets (most Quest models): favor a padded crown band and a stabilizing rear anchor. Memory-foam top pads that spread pressure across the crown work well. Look for an adjustable halo that can shift weight back toward the rear to counter front-heavy optics.
- Wraparound gaskets (PSVR lineage): select broad, low-compression face cushions that distribute load across cheekbones. Softer, wider gaskets reduce nose loading and keep the view stable. Consider a nose cutout that reduces bridge pressure while preserving peripheral seal.
- Compact gasket/band models (Vision Pro): choose thin, high-density foam with moisture-wicking liners. Avoid very thick pads; they can alter optics alignment. Instead, fine-tune pad angle and strap height to move load evenly across brow and upper cheeks.
Decision criteria when shopping:
- Head shape and hair: round heads often benefit from broader contact areas; long hair or buns may require taller strap clearance.
- Session length: for hours-long sessions choose breathable materials and replaceable covers; for shorter bursts, thicker cushions that prioritize immediate comfort are fine.
- Device weight profile: a heavier front end needs a stabilizing top strap or counterweight; evenly balanced headsets tolerate slimmer cushions.
When testing accessories, don’t trust a five-minute trial. Wear the new cushion for at least 15–30 minutes and perform typical tasks—look up, down, and side-to-side—so you feel any slippage, nose pressure, or thermal discomfort. If possible, mix-and-match cushions and straps: the best fit often comes from pairing a strap from one aftermarket brand with a gasket from another.
Lifters, Stands, and Mounts: Reducing Neck Strain Through Positioning Aids
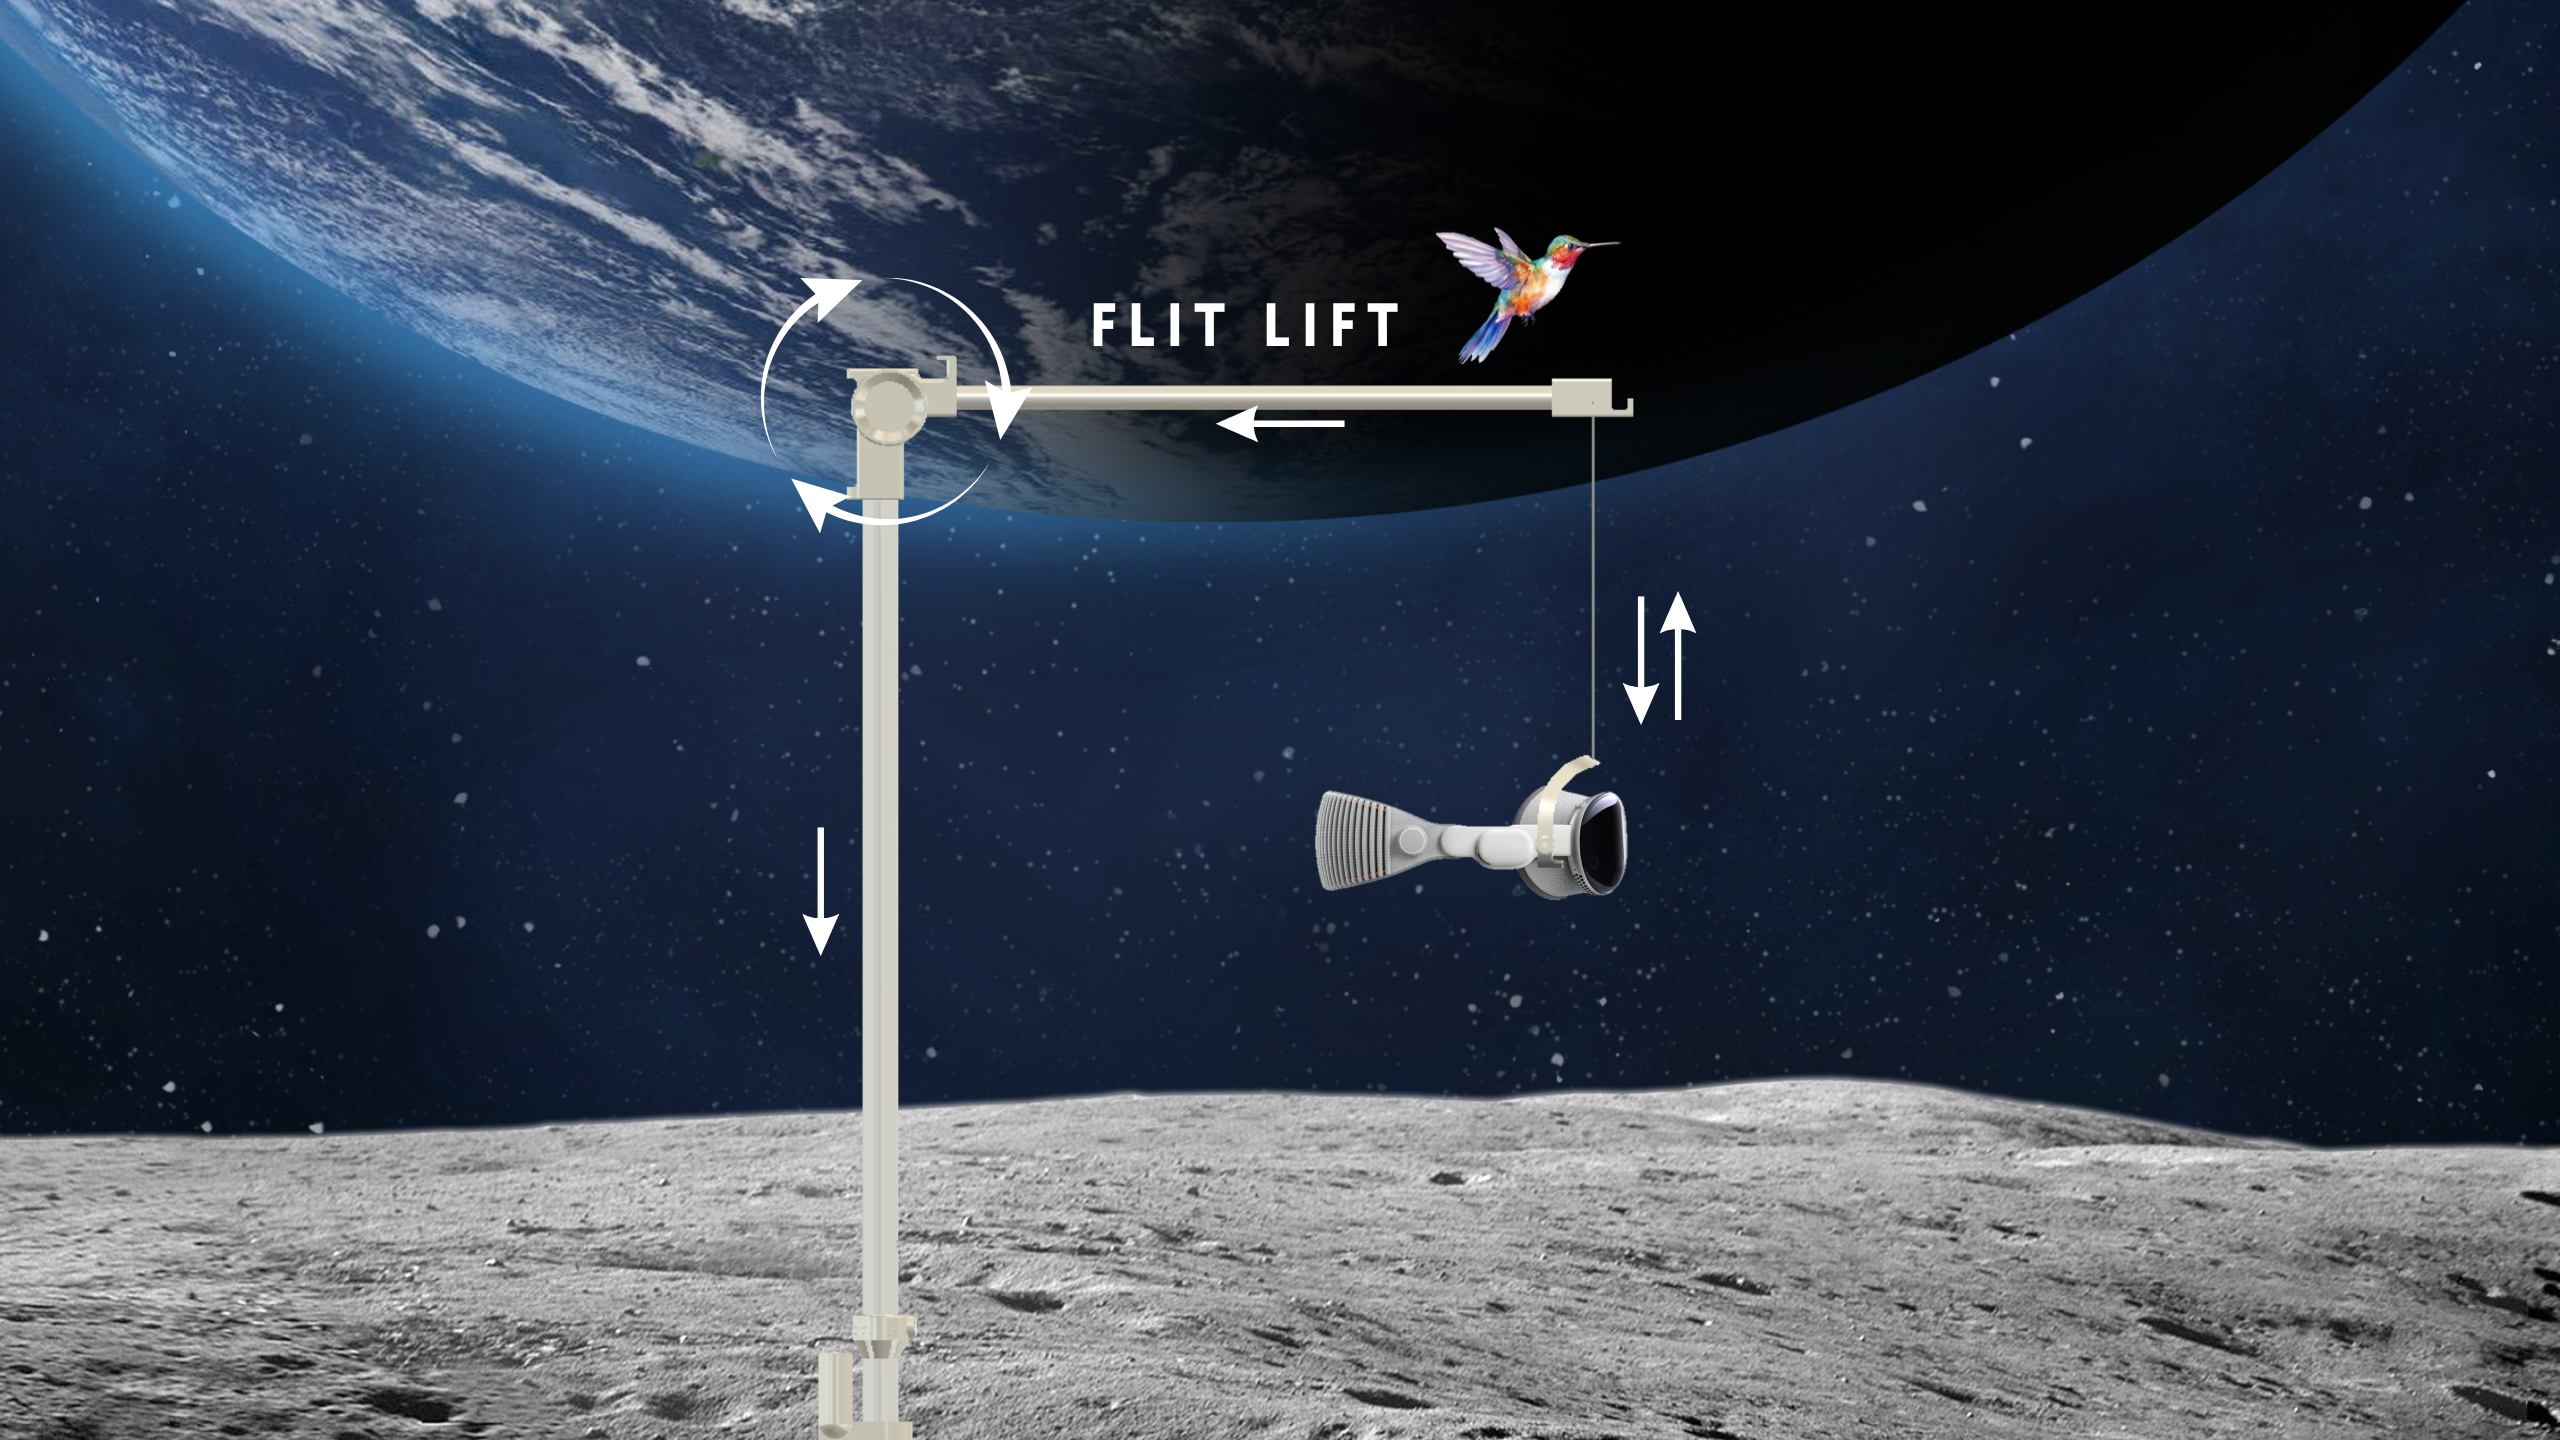
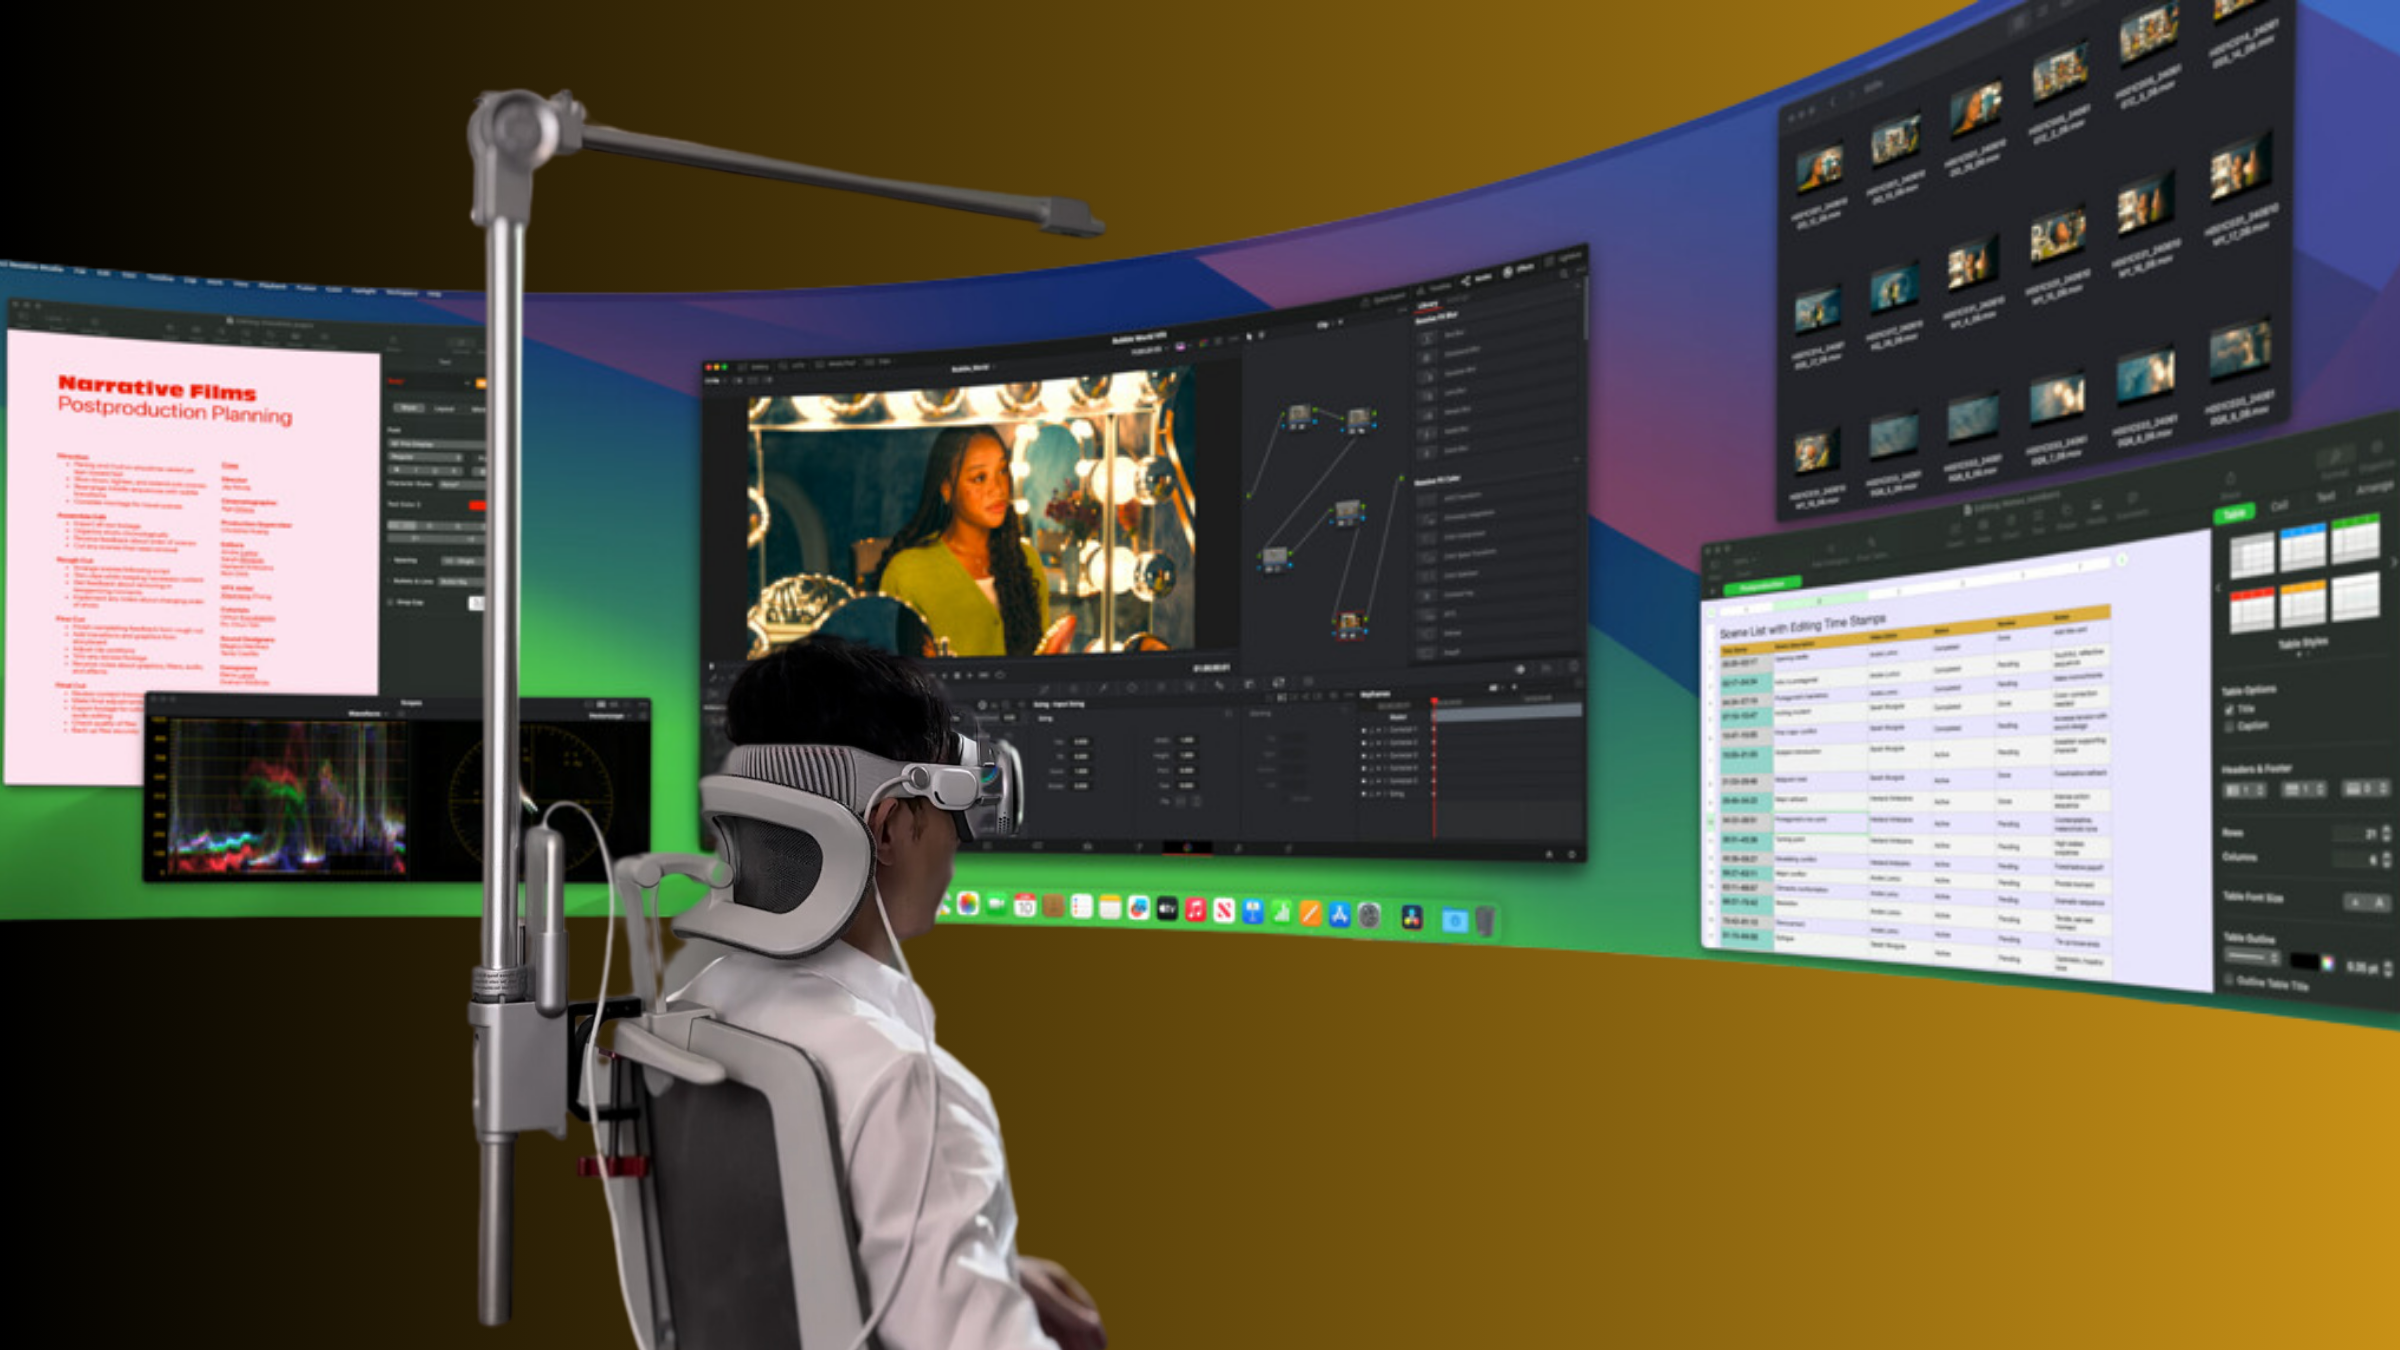
Positioning aids change the game by keeping the headset aligned with your natural eye-ear plane so you don’t have to crane or nod to see the display. A properly tuned lifter or mount keeps weight within your body’s center of gravity, reducing strain on the cervical spine. The principle is simple: if you can place the headset in front of your face with minimal head tilt, you’ll conserve muscular energy over hours.
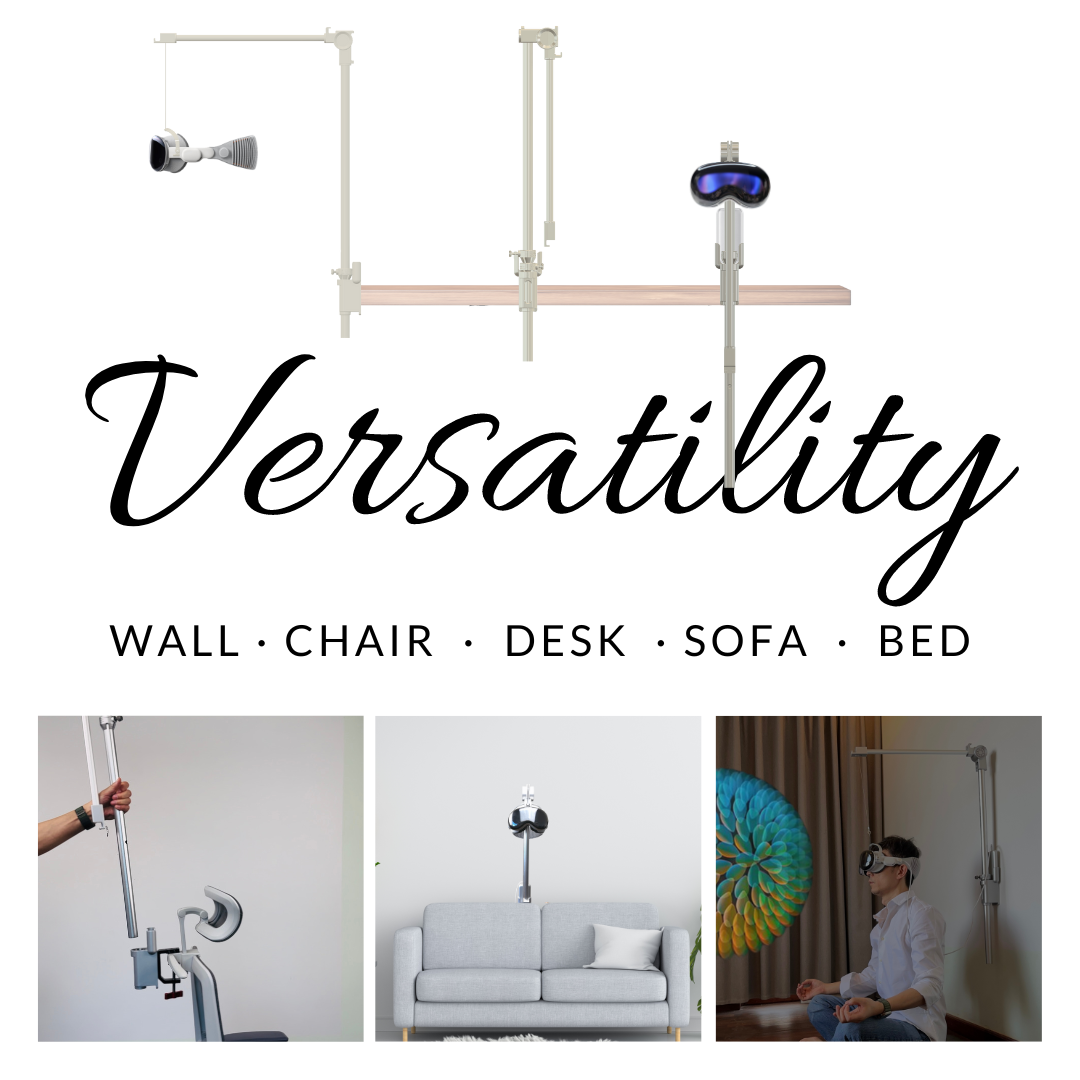
Types of positioning aids and how they help:
- Desk-mounted swing arms: great for seated workflows. They let you pull the headset in to don it and push it away while keeping it at the correct height. Choose arms with smooth, predictable articulation and dampers that hold position under load.
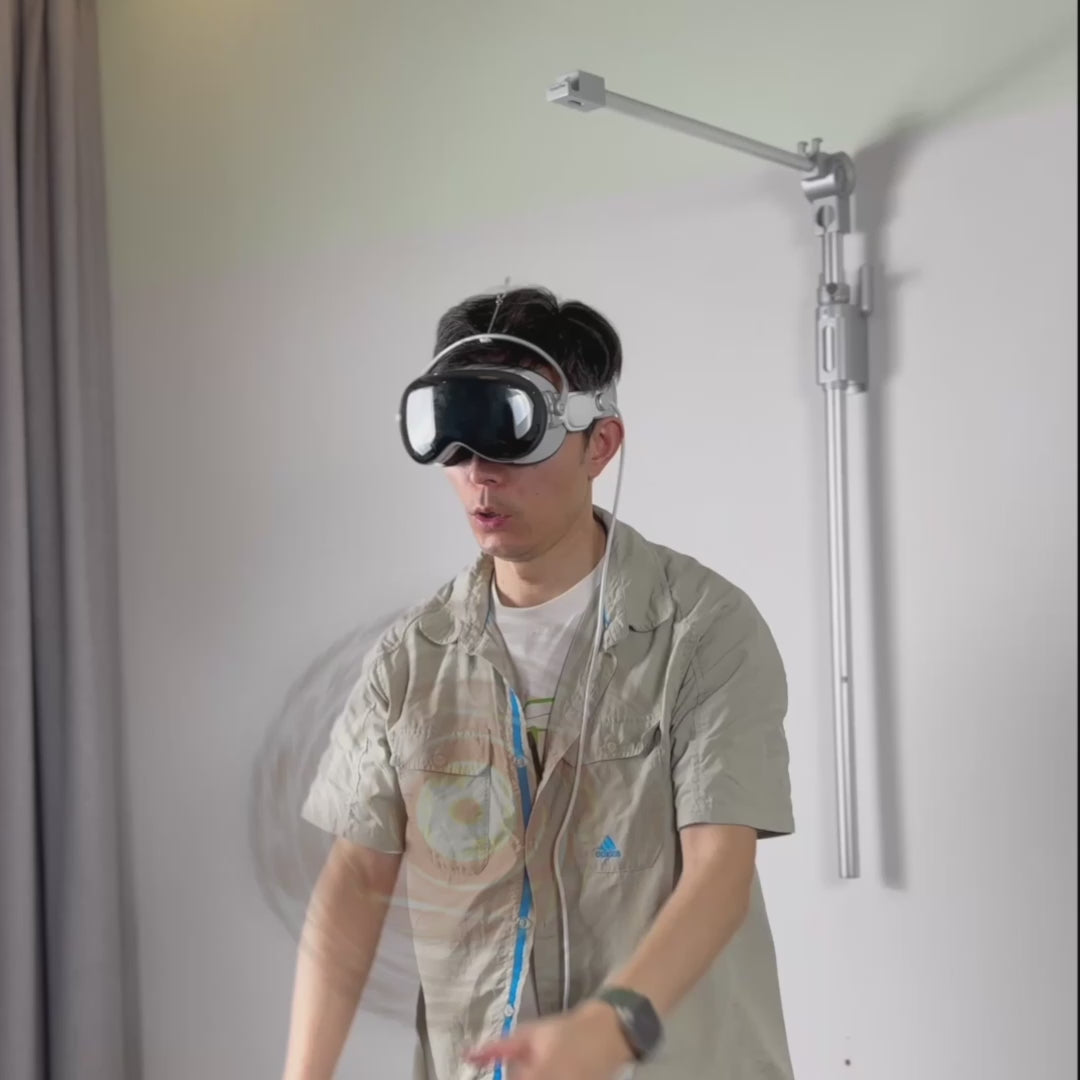
- Spring-loaded ceiling tracks: ideal for dedicated VR rooms. These keep the headset suspended and return it to a neutral position. They reduce the need to lift the unit from a shelf and are especially helpful for heavier headsets.
- Portable lifter stands and magnetic mounts: useful if you alternate rooms. They offer quick placement and can keep the headset at eye level without a rear cradle, which helps preserve a neutral neck posture during quick pickups.
Practical setup steps:
- Set the top edge of the display roughly at eye level when seated upright. A slight downward gaze (10–20 degrees) is comfortable for many people.
- Dial in tilt so the displayed horizon is natural—too much downward tilt forces a nod; too much upward tilt makes you raise your chin.
- Lock extension to a range that prevents sudden forward arcs when you grab the headset—smooth, damped movement is safer and more comfortable.
Mount safety and longevity: check the mount’s load rating and ensure attachments fit your headset’s weight and shape. Regularly inspect connections and dampers for wear. A quality mount reduces mounting friction and keeps your posture neutral across long sessions, which pays off in both comfort and concentration.
Stands, Cases, and Desk Setups: Space-Saving Solutions for Easy Access
How you store and stage your VR gear affects how often you’ll reach for it and how much effort it takes to start a session. Small inconveniences—bending awkwardly to pick up a headset, untangling cables—add friction that makes long sessions feel harder. A compact, organized setup keeps everything within reach and makes the headset easier to mount without compromising posture.
Choose stands and cases that prioritize fast access and protection. Cases with integrated stands and clamshell openings let you cradle the headset, controllers, and cables in one motion. Look for anti-scratch linings and labeled compartments for chargers and spare pads. For Vision Pro users, cases with gentle interior molds that hold the facial interface without rubbing lenses are a small but meaningful convenience.
Desk layout tips to reduce strain:
- Place the stand at arm’s reach on your dominant side—no twisting your torso to grab gear.
- Use a slim-footprint desk mount or wall anchor to keep the main surface clear for controllers and calibration items.
- Integrate cable channels and velcro wraps so cords aren’t catching on chair arms; routed cables reduce tugging that can pull the headset during wear.
If space is shared, a retractable arm or wall mount that folds flat keeps the area tidy while keeping the headset accessible. For portable setups, a roller-style case with quick-release compartments makes moving between rooms painless and prevents you from setting the headset down in suboptimal positions that crease pads or stress mounts.
Kickstarter and Third-Party Innovations: What Comfort-First Accessories Deliver (and How to Vet Them)
Third-party makers, including many Kickstarter projects, have pushed creative solutions—adjustable counterweights, modular harnesses, and breathable gasket systems—that exist outside mainstream supply chains. They can transform long sessions if they’re well-engineered; they can also be expensive experiments that underdeliver. Vetting is essential.
What comfort-first innovations typically deliver:
- Modular counterweights that let you fine-tune the center of gravity without major strap changes.
- Interchangeable gaskets in varied densities and shapes, targeting nose bridges, cheekbones, or brows.
- Lightweight exoskeletons that redistribute load to the skull circumference rather than the face.
How to vet a crowdfunded or third-party product:
- Seek independent, hands-on reviews that include multi-hour tests. Avoid relying solely on founder demos or short promotional clips.
- Look for clear materials and load-data: what foam density, what hardware rating, what weight limits? The best projects publish these details.
- Check warranty and replacement part availability. Cushion foam and straps wear—ensure spares exist or the company will support replacements.
- Read user threads for real-world compatibility notes: does the accessory truly fit Vision Pro, Quest, and PSVR, or only a narrow subset?
When trying a new accessory, treat it like an experiment: implement it alongside your baseline routine, run your comfort test (10–15 minutes), and log results. The most useful innovations are those that give reproducible, measurable benefits—longer pause times before you feel the need to adjust, fewer hotspots, and reduced neck torque—rather than subjective “feels better” claims without data.
Practical Tips for Long Sessions: Weight Tuning, Posture, and Safety Myths
Tiny adjustments often outperform radical changes. The difference between a sore neck and an enjoyable seven-hour session is usually millimeters of padding or a single strap notch. Here are specific, actionable rules you can apply right now.
Quick weight-tuning checklist:
- Symmetry first: make sure left and right straps are at identical lengths. Look for visual tilt; use a small mirror or phone camera for a quick check.
- Adjust crown lift: increase top-strap height until you feel a gentle lift at the crown without pressure points. This moves the center of gravity rearward.
- Soften hotspots with area, not force: add thin padding to spread pressure rather than tightening the strap to compensate.
- Counterweight sparingly: if the front feels heavy, add a small rear weight. Start with 20–50 g and increment by 10 g to find the sweet spot.
Posture cues that predict fatigue:
- Chin jutting forward—sign you’re compensating for forward torque. Fix center of gravity or add rear anchoring.
- Raised shoulders—sign of upper back tension from compensatory stabilization. Relax shoulders, adjust strap alignment, and take micro-breaks.
- Unstable gaze or display drift—indicates loose side supports. Tighten lateral straps incrementally.
Debunking common myths:
- Myth: lighter always means better. Reality: a well-balanced heavier headset can be more comfortable than a light but poorly balanced one.
- Myth: never put weight on the back of the head. Reality: a slight rear anchor reduces anterior neck torque and can lengthen comfortable session time.
- Myth: tightening straps eliminates all slippage. Reality: over-tightening creates hotspots and circulatory issues; spreading contact area is usually better.
Finally, adopt micro-breaks and active posture checks. Every 30–45 minutes, pause for 60–90 seconds: lower the headset, roll your shoulders, and do a chin tuck. These tiny resets prevent cumulative strain and let you spot fit issues before they become painful.
Practical Tests and Habit Tracking: Building a Personal Comfort Protocol
Comfort isn’t static; it changes with humidity, fatigue, and even haircut length. Building a repeatable testing protocol helps you measure which tweaks matter. A simple log gives you the data to make confident adjustments instead of guessing.
Baseline test (10–15 minutes):
- Set up in your normal posture (chair height, monitor position, lighting).
- Don the headset using your typical strap settings.
- Engage in a representative VR task—watch a 10-minute video, move through menus, or play a low-intensity scene.
- Record comfort rating (1–10), pause time (when you first wanted to shift), hotspots, and posture cues.
Adjustment and retest routine:
- Make one small change: ±1 strap notch, add/remove a thin pad, or move a counterweight 1 cm.
- Repeat the baseline test for 5–10 minutes and log results.
- Keep changes incremental and reversible so you can isolate what helped.
Weekly cadence and review: set a weekly check-in where you compare the logs. Look for trends: increasing pause time and fewer hotspots mean progress. If a previously good setting fails on hot days, note environmental variables; you may need a different gasket or liner for high-humidity sessions.
Use simple metrics: comfort rating, pause time, hotspot count, and neck torque feeling. Over a month you’ll learn how specific adjustments affect endurance. This evidence-based approach guards against over-correcting and helps you build a personalized setup that reliably delivers comfort for long sessions.
Maintenance and Longevity: Safety, Durability, and Care for Daily Wearables
Daily-use VR gear needs care. Worn straps, hardened foam, and cracked gaskets not only reduce comfort but can create unsafe pressure points. Regular inspections and smart storage extend life and preserve your tuned balance.
Inspection checklist before each week of heavy use:
- Straps: check for frayed stitching, stretched elastic, or cracked adjusters. Replace before functionality fails.
- Cushions: press the foam—if it doesn’t rebound or shows permanent creasing, it’s time to swap it out. Thin padding shifts load and creates hotspots.
- Gaskets and seals: look for cracks, deformation, or loss of pliability, especially along contact edges.
Cleaning and storage best practices:
- Wipe external surfaces after each session with a soft cloth. Use mild soap and water for foam covers and allow complete air-dry to avoid mold.
- Use gentle sanitizers on contact surfaces, but avoid alcohol or harsh solvents that can dry out foam and gaskets.
- Store in a breathable case away from direct sunlight and extreme heat. If you use rear counterweights or detachable straps, remove them for storage to avoid constant strain on buckles.
When to replace parts: as soon as a component alters fit or comfort. A crumpled pad or a stretched strap is not a cosmetic issue—it changes weight distribution. Keep a small kit of spare pads, a replacement strap, and a tiny screwdriver so you can restore your baseline setup quickly.
Finally, schedule a quarterly full check: reinstall parts, re-run your baseline test, and compare comfort metrics. Regular maintenance preserves the careful balancing work you’ve done and ensures every long session starts from a reliable setup.
Next step: run a baseline 10–15 minute comfort test today—log your results, make one small tweak, and repeat. In a few iterations you’ll have a setup that feels like part of you, not a burden to wear.



Share:
Accessibility First: How Weightless Comfort with Flit Lift Opens VR to More Users
The Ultimate Buyer's Guide to Apple Vision Pro Comfort Accessories