

Ergonomic Temples and Pressure Points: Reducing Quest 2 VR Fatigue with Better Straps, Padding, and Balance
Long VR sessions are a joy until the headset starts digging into your temples, forehead, or nose — that creeping discomfort that turns immersion into irritation. This guide walks Quest 2 users (and anyone logging multi-hour VR time) through a practical, step-by-step approach to mapping pressure points and optimizing strap design, padding, and weight distribution so you can play longer with less fatigue. ⏱️ 11-min read
You'll learn how to identify the exact contact points that cause hotspots, choose the right comfort strap, install and fine-tune it, pick cushioning that relieves temple pressure, and use counterweights or battery packs without trading one problem for another. Each section blends clear instructions, real-world presets, and routine maintenance tips that keep your headset working for you — not against you.
Understanding fatigue: pressure points and weight distribution
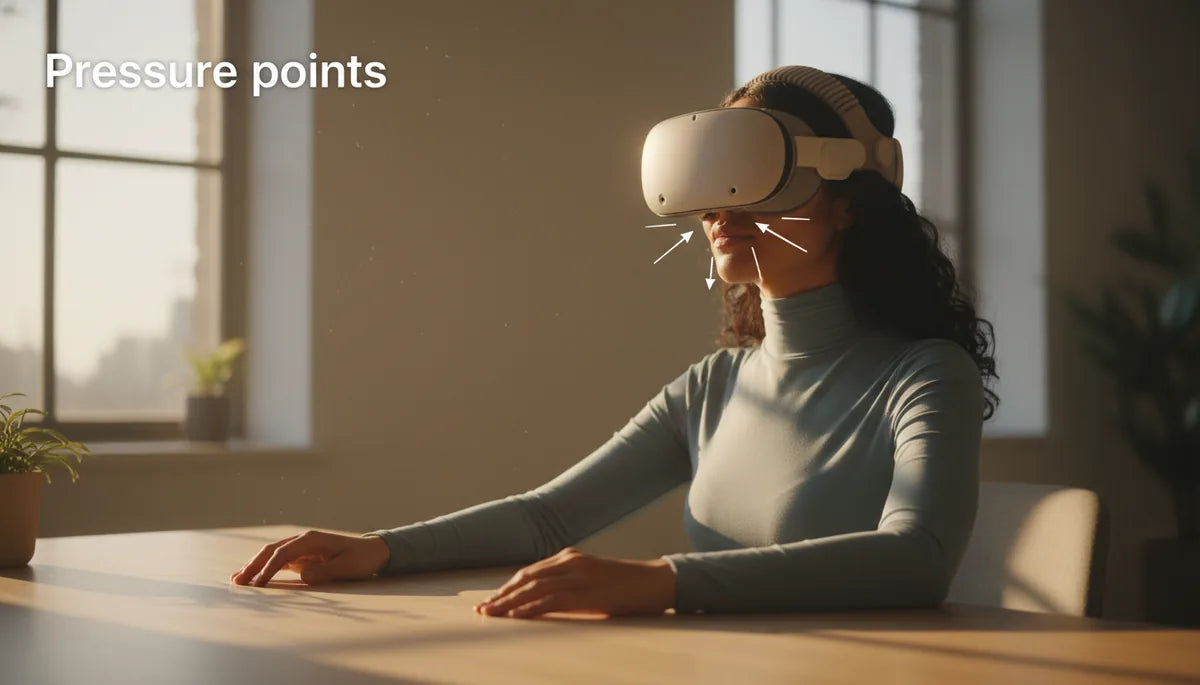
Most VR fatigue is twofold: where the headset presses on your skull and how its mass is balanced. Common hotspots are the forehead where the front edge meets the brow, the temples where side pads or rails contact bone and soft tissue, and the nose bridge where the facial interface pinches. Additionally, if the back strap or crown area bears excessive load, you'll eventually feel aching at the base of the skull or along the neck.
Pressure becomes painful because small contact areas focus force on nerve-rich spots; thick or rough edges exacerbate this, producing numbness or burning within 15–20 minutes for many users. To spot troublesome points, wear the headset for five minutes, then take it off and feel for red or tender zones. If you sense numbness, loosen the top strap and reposition padding so it avoids direct pressure on bony landmarks.
Weight distribution determines whether your neck muscles act as a passive support or an active brace. A front-heavy headset tilts forward and increases forehead and temple load; a balanced headset shifts a good portion of mass to the rear of the skull, reducing forward torque. Counter-balancing — by tightening a rear strap, adding a small weight near the occipital bone, or using an integrated rear battery — can markedly reduce neck strain and prevent hotspots from developing during long sessions.
Choosing the right Quest 2 comfort strap: stock, Elite Strap, and third-party options
The Quest 2’s stock fabric strap excels in breathability and low weight, making it a fine short-session solution. Its downside is stability: without a rigid frame, the strap can shift during play and concentrate pressure on small contact points, turning comfort into a constant adjustment chore. For anyone doing extended sessions, that wandering tension becomes a primary source of fatigue.
Oculus’ official Elite Strap upgrades to a semi-rigid frame and a dedicated top strap. The side rails interface more solidly with the headset body, and the top strap helps center the load. The net effect: weight migrates away from the forehead and temples toward the rear of the skull, reducing nose pressure and keeping the image steady during quick movements. If you prefer stock weight but want better balance, the Elite Strap is often the fastest comfort win.
Third‑party halo-style straps and modular harnesses take a different tack: they wrap under and around the back of the head, spreading load over a larger surface area. Many of these include integrated battery mounts or optional counterweight pouches, which are excellent for long sessions because they shift mass rearward. When choosing a strap, prioritize padding coverage (especially at the crown and occiput), compatibility with accessories like facial interfaces and battery packs, and simple installation. Avoid wildly cheap or poorly reviewed models that trade durability for low price — repeated micro-adjustments defeat the point of upgrading.
Step-by-step install for Quest 2 comfort strap (beginners)
Swapping straps doesn't have to be intimidating. Follow these concise steps to go from stock strap to a secure comfort setup, and avoid the common missteps that leave tension misaligned or clips insecure.
- Power down and prepare: Turn off your Quest 2 and place it on a clean, stable surface. Inspect the stock strap for frayed fabric or dirt. Detach any top strap last to keep the headset from falling forward.
- Remove the stock strap: Unhook each side loop from the side-arm notches and slide gently out. If a top strap is present, detach it after the sides. Wipe the frame contact areas with a microfiber cloth to remove oils and dust so the new strap seats cleanly.
- Align the new strap: Unpack the comfort strap and align the end loops with the side-arm channels. Slide each loop in until you hear or feel the click. Tug gently to confirm the lock; loose seating is the most common cause of slippage.
- Attach top/crown strap: Secure the top strap to its anchor and center it across your crown. Adjust it so the front edge of the headset lightly contacts your forehead without squeezing.
- Initial fit test: Don the headset and set a baseline: lenses centered, no pinch at temples or nose, and the rear strap snug but not overly tight. Move your head briskly to confirm stability. Recheck clip security after a short play segment.
Common missteps: forgetting to seat loops fully into the side arm channels; overtightening the top strap which creates forehead hotspots; and ignoring uneven side tension, which causes lens misalignment. Fixing those avoids most early failures and keeps the headset balanced for tuning.
Fine-tuning fit: height, strap length, and back-strap tension
After installation, fine-tuning is where comfort becomes custom. Small adjustments in height, side strap length, and rear tension change how pressure is distributed across the face and how much your neck is recruited to hold the headset. Approach these changes incrementally and test each setting with brief five‑minute wear checks.
Height: Start with the front of the headset positioned so the lower frame barely clears your cheekbones and doesn’t press into your cheeks. If the headset sits too high it will dig into your forehead; too low and the cheeks will rub and the field of view feel off. Move the front up or down in 3–5 mm increments until contact feels even.
Side straps: Loosen or tighten the side straps to center the lenses and reduce temple squeeze. If temples press when you blink or you notice lens drift, slightly loosen the sides and retest. Ensure both sides have nearly identical tension — uneven tension causes micro-shifts and hotspots behind the ears.
Rear strap tension and balance: Use the back strap for stability and counter-balance, not as a clamp. Tighten the rear strap until forward tilt stops, but stop before you feel a focal pressure point at the crown or occiput. For different head shapes, try these presets:
- Round head, low forehead: lower the front by ~5 mm, tighten rear strap moderately to transfer load to the occiput.
- High forehead, narrow temples: raise the front slightly, loosen side straps to avoid temple pinch, and add a small rear weight if forward tilt persists.
- Glasses wearers: raise the front by one notch for extra clearance and keep side strap tension gentle to avoid squeezing frames.
Recheck after 10–15 minutes: if a hotspot appears, re-balance height and rear tension rather than cranking one strap tighter — even pressure distribution is the key to sustained comfort.
Padding and temple relief: cushions, materials, and contact points
Where the headset meets skin makes a huge difference. Facial interfaces and temple pads come in PU leather, open- and closed-cell foam, memory foam blends, and silicone; each material balances durability, breathability, and pressure distribution differently. Choose materials based on how long you plan to play and whether you sweat heavily.
PU leather is durable, easy to wipe clean, and holds shape well — a solid everyday choice. Open-cell foam offers breathability but may absorb sweat over time; closed-cell foam resists moisture but can trap heat. High-density memory foam molds to facial contours and spreads pressure more evenly, often eliminating sharp temple hotspots. Silicone gaskets provide a soft seal around the cheeks, reducing slippage and letting you maintain a snug fit without much compression.
Temple-specific solutions: look for cushions with temple cut-outs or a recessed pocket that avoids direct pressure on the temple bone. Contoured pads that follow the cheekbone curve shift contact away from the hairline and onto more forgiving bone surfaces. Some replacement pads use a split design or layered foam to increase surface area without crowding the nose or eyes.
Care and replacement: wipe PU leather and silicone with a mild disinfectant weekly if you play often; let foam pads air dry overnight. Replace foam cushions every 6–12 months if they lose resilience or begin to smell. When trying new pads, aim for a thin break-in period — if a pad traps heat or causes sliding after a few sessions, swap to a different material rather than force it.
Weight distribution and battery management for comfort
Counter-balancing reduces neck torque and facial pressure by moving mass rearward. Integrated battery packs that clip to the back strap are a common solution: they both extend runtime and act as a purposeful counterweight. But they also introduce heat and extra load that need careful placement and management.
If you use a rear battery pack, place it low and close to the occipital area rather than high on the crown — this keeps the center of mass behind your ear line and reduces forward moment. Use Velcro or quick-release mounts to allow small positional tweaks; moving a 150–300 g pack 2–3 cm changes leverage enough to matter. Start with small weights, test for 15–30 minutes, and add incrementally rather than going heavy right away.
Clip-on weights and dedicated counterweight modules (100–300 g) give precise control without altering the headset’s fit. Brands such as FlitLift and similar third-party makers offer compact rear weights designed to sit against the occipital bone. For belt-mounted battery packs, route the cable to avoid pulling on the headset; secure excess cable so movement doesn’t tug and create new pressure points.
Heat and nose fatigue: batteries generate warmth — if you feel heat building at the back, choose packs with ventilation or use a thin insulating pad between the pack and strap. Avoid placing heat-generating packs directly against skin where it increases sweating and slip. If nose bridge fatigue persists after balancing, experiment with softer facial cushions and small rear adjustments rather than adding more forward or frontal padding.
Glasses wearers: clearance, nose pads, and lens distance
Wearing glasses adds another layer to fit challenges: you need enough internal clearance to avoid frame pressure while maintaining a comfortable seal to prevent light leaks and unwanted slipping. The right combination of strap height, facial interface, and temple-relief padding will let you wear spectacles without trading comfort for optical clarity.
Start with added clearance: choose a facial interface that gives more depth between lenses and your eyes, or use dedicated prescription lens inserts that remove the glasses entirely for a cleaner fit. If you must wear glasses, raise the front of the headset by one or two notches and loosen side straps slightly to prevent frame squeeze.
Nose pads matter: a softer or thicker nose cushion redistributes pressure away from the bridge, which can help if frames press into the skin. Some silicone nose gaskets come with adjustable profiles; try one that provides a small channel for the glasses’ nose bridge so frames sit comfortably without compromising the headset seal.
Temple and frame pressure: select temple-friendly pads with recessed temple pockets or cutouts that avoid pinching the arms of your glasses. For those with thicker frames, a deeper facial interface with an angled cheek recess prevents edges from rubbing. Keep an eye on anti-slip materials — they can help stabilize the headset but might also press frames into skin if overused; balance tackiness with softness.
Maintenance, compatibility, and longevity
Routine care keeps comfort consistent. Clean facial interfaces and pads after every session if you sweat heavily, or weekly for moderate use. Use a microfiber cloth and a 70% isopropyl wipe for PU leather and silicone; remove foam interfaces for air-drying. Inspect straps and clip points monthly for fraying, loose stitching, or plastic fatigue. Replace cushions when they no longer spring back — degraded foam concentrates pressure and undermines the rest of your setup.
Replacement timelines: foam and PU cushions usually last 6–12 months with regular use; straps and buckles can last several years if not overloaded. Battery packs should be checked for swelling, especially after heavy cycles — discard and replace any pack that deforms. Keep replacement parts on hand if you rely on long sessions: a backup facial interface or spare padding prevents a single failure from ending your play day.
Compatibility notes: Quest 2 straps are broadly compatible within a large third‑party ecosystem, but be cautious mixing components designed for different headsets (for example, Vision Pro accessories) — fit and load paths differ. Mismatched mounts can create unexpected pressure points or insecure attachments. When moving a strap between headset models, check that side-loop anchors, alignment rails, and top strap anchor points match the headset geometry. If in doubt, buy straps labeled for Quest 2 or modular designs explicitly supporting your model.
Final practical step: keep a simple testing routine after any change — 10–15 minutes of movement, a quick head-shake, and a focused feel-test on temples, nose, forehead, and back-of-head. If any spot lights up, adjust incrementally. Comfort engineering is iterative: small changes, repeated checks, and intentional counter-balancing deliver the biggest gains for long VR sessions.
Next step: pick one change — strap upgrade, a new facial cushion, or a 100 g rear weight — and test it for several sessions. Document what shifts in comfort; incremental wins compound into marathon-ready setups that let you stay immersed without the ache.


Compartir:
Choosing the right comfort strap for glasses wearers on Quest headsets
Comfort, Stability, and Sweat: Testing Quest 2 Straps for Prolonged Sessions