

Glasses-Friendly Vision Pro: Padding and Frame-Safe Solutions for Comfortable Long Sessions
Wearing glasses shouldn’t mean choosing between clear vision and long-term comfort in a headset. This guide breaks down practical, glasses-friendly approaches to padding, weight balance, stands, and safe upgrades that let Vision Pro users — from persistent gamers to ergonomics-minded professionals — wear the headset for hours without pressure points, lens contact, or frequent recalibration. ⏱️ 15-min read
Across the sections below you’ll find clear rules of thumb, material advice, strap and lift strategies, cleaning routines, and a step-by-step testing protocol so you can trial small, reversible changes and measure their effect. Think of this as a field manual: protective for your frames, kind to your skin, and tuned for long sessions.
Understanding glasses-friendly Vision Pro interfaces
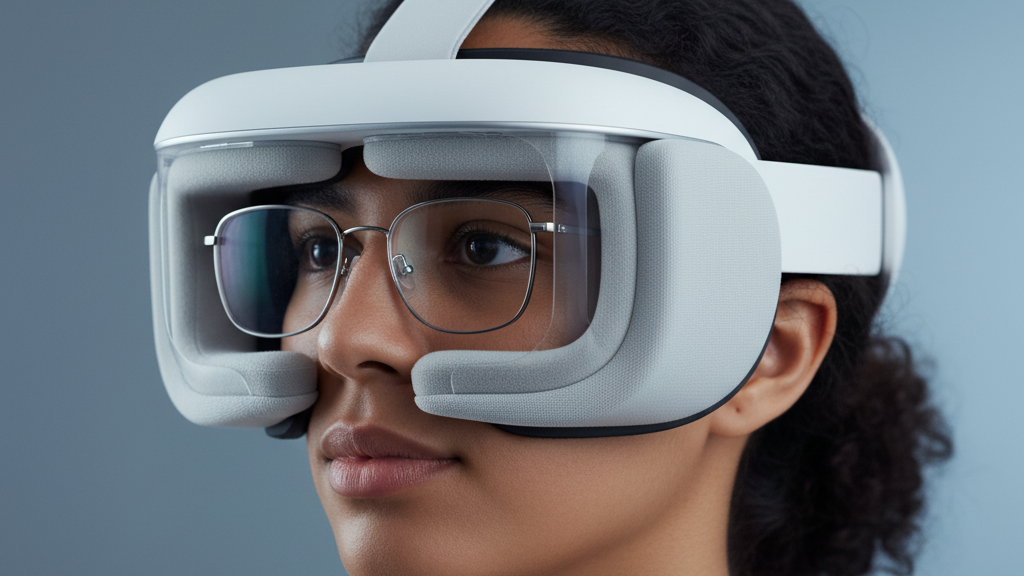
The first step to a comfortable glasses-and-Vision Pro setup is understanding how the facial interface interacts with frames. Two mechanics matter most: physical clearance and optical alignment. Physically, temple arms, nose pads, and brow contact zones must pass by or meet the interface without being pinched or pushed inward. Optically, prescription lenses—especially thicker or high-index lenses—change the distance and path between your eye and the headset optics, sometimes producing parallax that affects eye tracking or perceived gaze.
When evaluating padding or gasket designs, look for three characteristics: adequate recesses or cutouts where temple arms sit, a nose bridge profile that diffuses load rather than pinching, and a soft but supportive perimeter that seals around cheeks and upper face without squeezing frame edges. Padding that is unnecessarily thick at one point will tilt the headset, increasing the risk that frames brush the internal optics; padding that’s too thin risks sharp contact with frame temples or pressure on the nasal bridge. The most glasses-friendly interfaces combine recessed temple channels, a slightly raised cheek contour, and a forgiving nose pad that distributes load across a wider surface.
On the software side, eye-tracking systems can be thrown off by lens thickness. Professionals and advanced users should look for a quick calibration flow or a dedicated “glasses” profile that compensates for lens offset. If the device lacks such a mode, plan short, frequent recalibrations after donning the headset and whenever you swap pairs of glasses. That keeps gaze input accurate without having to physically reposition frames or the headset repeatedly.
Padding selection and placement for glasses compatibility
Choosing the right padding is less about brand names and more about the stack and geometry. The most successful solutions use a layered approach: a softer contact layer that cushions skin and conforms to facial topography over a firmer structural base that resists surge compression and keeps temples clear. Here’s how common materials behave against frames:
- Memory foam (soft inner layer): Molds to facial contours and forms a good seal around the nose and cheeks, lowering fog and gaps. It’s comfortable for long sessions but can compress over time and trap heat and oils where it meets your glasses arms.
- Firmer foam / closed-cell base: Preserves the interface geometry so frames don’t sink into the pad. It keeps a predictable temple clearance but can feel rigid on sensitive skin if used directly against the face.
- Silicone or low-friction skinned overlays: Offer durable, washable contact points that resist wear and help frames slide slightly instead of snagging. They can reduce abrasion against temples but may feel tacky to some users.
- Hybrid stacks (soft memory foam over a firmer base with a thin silicone skin) provide the best balance of comfort, shape retention, and frame protection.
Placement matters more than raw thickness. Add temple pads that sit above or behind the frame arm to relieve lateral pressure, and use a nose-bridge pad shaped to spread the load horizontally rather than localizing it at a small point. When adjusting pad thickness, aim for micro-adjustments: raising or lowering the contact surface by 1–2 mm can move the frame position enough to stop contact with headset optics without upsetting the seal. If you need to reduce lens contact, try thinning only the central nose-mating area while keeping cheek padding consistent to preserve seal integrity.
Materials science and skin-safe padding technologies
Comfort for glasses wearers is as much a materials problem as a mechanical fit problem. The ideal padding stack keeps your skin cool and dry, withstands repeated compression, and offers a low-friction surface where temple arms meet the pad. Modern designs mix open-cell foams, memory foams, and silicone skins for a balanced outcome.
Open-cell foams breathe: their interconnected pore structure channels heat and moisture away from skin, so the pad feels less clammy during multi-hour sessions. Memory foams adapt to unique facial contours and spread pressure across a wider area, which reduces hotspots near the nasal bridge and temples. A thin silicone skin or low-friction textile over the foam protects the foam from oils and sweat, increases durability, and allows glasses arms to move without snagging.
When selecting or evaluating aftermarket pads, check for these textile and safety features:
- Breathable face fabrics: spacer meshes or moisture-wicking weaves that move sweat outward and dry quickly.
- Hypoallergenic materials: dye- and latex-free coverings that reduce the risk of allergic contact dermatitis.
- Durability under compression: pads should recover shape after repeated pressure cycles; obvious flattening at cheek or nose areas signals replacement time.
- Cleanability: materials should tolerate mild soap and warm water or a textile-safe cleaner without losing shape or color.
Finally, texture and friction matter. A very smooth silicone skin lowers chafing but can encourage slippage; a micro-textured cover offers a balance of grip and movement so the headset remains stable but doesn’t pinch temple arms. Manufacturers often provide a material spec; choose pads that call out open-cell ventilation, a memory-foam core, or a washable silicone top layer.
Weight distribution and frame-safe design principles
Almost every comfort complaint from glasses wearers ties back to how the headset’s mass is distributed. The Vision Pro carries significant weight forward; if that weight isn’t counterbalanced the headset will pitch forward, pressing on the nose and temple arms and shifting frames. Good frame-safe design aims to center the headset’s center of gravity (CG) close to the natural rotational center of the skull and spread contact across broad, comfortable anchor points.
Practical balance strategies:
- Strap placement: Use a symmetric strap layout—two lateral anchors near the temples and a lightweight crown or rear strap—to pull the headset straight back rather than letting it rotate forward onto the nose. Avoid a single, tight top strap; it can increase downward pressure at the face if not balanced by rear tension.
- Even padding thickness: Keep a consistent padding profile around the cheeks and temples. Uneven thickness creates pivot points where the headset tilts, increasing pressure on one side and causing temples to press into the skin or frames to shift.
- Adjust rear tension gradually: Tightening the rear strap shifts load off the nose and onto the occiput (back of the head). Do this incrementally until the headset sits level with minimal forward tilt. You should feel gentle, distributed pressure across the crown and rear pads—no sharp points.
- Use lateral support clips or secondary straps: If you find the headset still pitches forward, consider low-profile lateral clips that anchor to a denser part of the skull around the temples. They distribute torque away from the nasal bridge.
People with higher cheekbones or wider frames may need slightly different tension patterns: increase crown support and decrease nasal pad compression. Those with low bridges should favor lateral cheek loading and possibly a lifter or rear counterweight solution (described below). Remember: small changes—millimeter shifts in padding height or a quarter-turn of a dial—often make the most difference.
Accessories and padding upgrades designed for glasses
Aftermarket accessories can transform the Vision Pro experience for glasses wearers, but they’re best chosen with a conservative, safety-first approach. Look for options explicitly marketed as glasses-friendly: curved pads that trace temple lines, anti-slip liners that cushion the temple arm, or modular pads with removable sections to create custom temple cutouts.
What to consider when choosing accessories:
- Contour-matched cushions: These follow the facial curve and the temple line so glasses slip in with minimal friction. Memory-foam tops with a firmer base are the most common, paired with a thin silicone or knit covering for durability.
- Temple cutouts and channels: Some pads include pre-formed, shallow channels behind the temples. These divert the frame arms away from the contact surface, preventing pinching and sudden frame shifts during head turns.
- Anti-slip liners and micro-sleeves: Thin (0.5–1 mm) silicone or microfiber sleeves that go over the pad edge reduce abrasion where glasses meet the cushion and make donning/doffing smoother.
- Modular thickness inserts: Removable shims enable quick, non-destructive adjustments in 1–3 mm increments to dial in clearance for thicker frames or different nose bridges.
Risks and compatibility notes: Third-party pads sometimes alter the seal geometry or increase the distance between your eye and the headset optics, potentially impacting field of view, eye tracking, or focus. Avoid pads that add excessive thickness in the central optical zone; use modular options that preserve the original gasket shape where it matters. Confirm that any adhesive-backed accessory is removable without leaving residue; prefer clip-on or sleeve-type solutions that don’t glue or tape parts of the Vision Pro. When in doubt, opt for reversible upgrades that keep the stock configuration intact and maintain the device’s warranty eligibility.
Stand, lifter, and desk setups to reduce pressure and neck strain
One of the simplest ways to extend comfortable wearing time is to remove the headset from your face during breaks without rebalancing straps and padding every time. A good stand or lifter lets you resume the exact setup you left, and a well-designed lifter can transfer much of the headset’s weight to your desk, allowing longer sessions for reading, social VR, or collaborative work.
Options and how to use them:
- Desk-height stands with tilt-adjustable arms: These hold the headset at eye height and adjust pitch so the headset rests on the cheeks/jawline rather than the nasal bridge when you briefly set it down. Use a low-profile base that won’t tip; quick-release mounts are useful for switching tasks.
- Lifter modules that share load across cheeks and jaw: These accessories clamp or cradle the headset’s sides and deliver a controlled, adjustable lift so the headset’s front is supported by the cheekbones and jawline instead of the nose. They’re particularly helpful for heavy, long-duration sessions.
- Wall or swing-arm mounts: If you alternate between headset and desktop work often, a swing-arm allows a smooth transition between in-use and resting position while keeping the headset aligned to your face at donning height.
Setup tips to optimize comfort and accessibility:
- Set the resting height so the headset aligns with your natural seated eye height—this minimizes neck flexion when you pick it up.
- Use micro-adjustments to set tilt so the headset, when placed on the stand, compresses the pads to the same degree as it would on your face. That saves readjustment time and maintains consistent balance.
- Where possible, rest the device on the cheek-support portion of a stand rather than the face cushion; this preserves pad shape and reduces repeated deformation of the gasket.
Finally, keep posture in mind: stands remove the immediate pressure, but do not substitute for periodic breaks and neck stretches during marathon sessions. If you feel neck fatigue despite good padding, shorten sessions or alternate tasks to let cervical muscles recover.
Care, durability, and safety when padding and standing accessories
Good cleaning and inspection routines keep pads hygienic and reliable—especially when they’re pressed against both skin and glasses. The basic regimen is simple: wipe daily, sanitize weekly, and inspect monthly.
Cleaning recommendations:
- Daily: Wipe contact surfaces with a soft microfiber cloth dampened with mild, fragrance-free soap and lukewarm water. Focus on areas where frames sit and where skin oils concentrate.
- Weekly: Use a textile-safe cleaner appropriate for your pad material (check the accessory spec). Rinse thoroughly and air-dry completely before reattaching.
- Avoid: Alcohol, bleach, solvents, and abrasive scrubbing—these accelerate foam breakdown, detach silicone skins, and fade fabrics.
- Test first: Apply any cleaner to a small, hidden section to confirm colorfastness and material compatibility.
Durability checks and replacement cues:
- Compression set: If pads don’t spring back after light pressure and show permanent dents, they’ve lost resilience and should be replaced.
- Tears and seam failure: Frayed edges or splitting around adhesive zones risk exposing foam to oils and dust and can snag glasses arms.
- Loss of seal: If you notice increased fogging or audible air leaks around the nose or cheeks, the pad geometry has likely shifted and needs replacement.
Warranty and safety cautions: Avoid permanent modifications such as gluing new foam directly onto the headset or cutting the factory gasket. Such changes can void warranties and may compromise the structural seal that interfaces with the optics. When testing third-party pads, keep original components: you should be able to restore the device to stock configuration quickly if a return or repair is needed. If you have skin sensitivities, choose pads with an explicit hypoallergenic rating and keep a log of any irritation, addressing it with a dermatologist if persistent.
DIY tweaks and testing protocol for glasses-friendly comfort
Small, reversible tweaks are the fastest path to finding what works for your face and frames. Here’s a safe, step-by-step approach that preserves the hardware and gives you repeatable data you can act on.
Safe, reversible tweaks
- Micro-shims: Use thin foam or textile shims (1–3 mm) tucked into pad seams to raise/shift contact points. These are removable and reversible.
- Sleeves and clips: Add thin silicone sleeves over pad edges or clip-on temple channels to redirect frame arms without altering core geometry.
- Replaceable modular pads: Swap in manufacturer-approved pads with different thickness or contour; this keeps warranty intact and is fully reversible.
- Strap reconfiguration: Change strap tension and anchor positions before altering any pad. Small strap changes often solve balance problems without tactile modifications.
Step-by-step testing protocol
- Baseline check: Put the headset on with your usual glasses and set straps to comfortable tension. Note any hotspots, fogging, or visual misalignment.
- Make one change: Add a single, reversible tweak—e.g., 1 mm shim behind the temples or a thin sleeve over the pad edge.
- Short-session test (15 minutes): Play or perform a typical task. Log sensations: pressure hotspots, frame shift, fogging onset, and any eye-tracking oddities.
- Adjustment and retest: If improvement is seen, keep the tweak and move to a longer session. If worse, remove the tweak and try another single change.
- Long-session test (60–120 minutes): Track comfort, seal integrity, and neck strain. Break every 20–30 minutes to note recovery and skin marks.
- Document and iterate: Photograph pad alignment, measure shim thickness, and log strap settings. Use these records to reproduce the successful configuration later.
When testing, focus on three outcome measures: comfort (subjective pressure ratings), functional fit (fogging and seal), and interaction with optics (eye-tracking stability, visual clarity). Make only one change at a time so you can attribute improvements accurately. Keep original parts in a labeled kit so you can always restore the stock setup.
Examples and case studies of glasses-friendly Vision Pro configurations
Real-world examples help translate principles into practical setups. Below are condensed case studies reflecting common frame types and the small adjustments that delivered the biggest gains.
Case 1 — Thick temple arms, standard nose pads
Problem: Thick plastic temple arms were being squeezed by the cheek pad, causing frequent lens contact and hotspots near the brow.
Adjustment: The user raised the central nose-pad contact by 1.5–2 mm using thin shims under the nose cushion while adding a narrow temple channel behind each arm to prevent inward compression. Rear strap tension was increased slightly to pull the headset back rather than let it pivot forward.
Result: Reduced temple pressure, fewer adjustments during head turns, and less fogging owing to a better seal. Comfort improved substantially over 2-hour sessions.
Case 2 — Rimless frames with low bridge
Problem: Rimless glasses transfer pressure directly to the temple arms, and a low bridge meant the nose pad was either too high or too low, causing tilt.
Adjustment: The user switched to a thinner peripheral pad with a slimmer edge profile and created 2–3 mm extra temple clearance. A crown strap was added to reduce nasal load, and a lifter was used for long sits to carry the front weight to the cheeks and jaw.
Result: Stable alignment, less nose pressure, and longer comfortable sessions. The lighter pad preserved visual alignment and reduced eye-tracking recalibration frequency.
Case 3 — High prescription lenses
Problem: Strong prescription lenses shifted optical alignment and caused eye-tracking to misregister without repeated recalibrations.
Adjustment: The user selected a pad with a slightly recessed central optical zone to restore a consistent eye-to-optic distance, and used a software-based glasses calibration profile where available. Testing protocol included short recalibrations at donning.
Result: Eye-tracking reliability improved and recalibration frequency dropped. The recessed pad avoided pushing lenses closer to the optics, preserving both tracking and visual comfort.
Comprehensive testing protocol: metrics, iterations, and field trials
For teams, advanced users, or anyone wanting quantified results, a structured test protocol provides reproducible outcomes. Combine simple subjective logs with objective measures where possible to understand how padding and accessories affect performance.
Core metrics to collect:
- Pressure map readings (if available): Identify hotspots and distributed load across cheeks, nose, and temples.
- Weight distribution metrics: Track front-to-back and lateral balance, aiming for minimal forward torque.
- Fit stability: Record micromovements during standardized head motions (nods, shakes) and note any frame slippage.
- Fogging frequency and time-to-fog: Run the headset in controlled temperature/humidity conditions and log the onset of condensation.
- Eye-tracking accuracy: Use built-in diagnostics or simple on-screen tests to compare gaze stability before and after changes.
- Subjective comfort scores: Use a simple 1–10 scale for pressure, skin irritation, and neck fatigue at multiple time points.
Iteration plan:
- Define baseline using current pads and straps. Collect all core metrics.
- Introduce a single design variable (e.g., temple channel, different pad material) and re-run the metric suite.
- Compare results and keep the change only if it improves the primary metrics without creating new problems.
- Repeat with additional changes, maintaining rigorous notes and versioned photos or sketches of pad geometry.
- Field trials: After lab or personal testing, scale to a broader user pool with varying face shapes, glasses types, and usage patterns to validate generalizability.
Version control and documentation are vital. Tag builds with a clear identifier (Pad_V1_TempleShim_2mm, for example) and archive metric results and photos. This makes it easy to revert to prior configurations and analyze which combinations work best across diverse users.
Next step: pick one small, reversible tweak from this guide—add a 1–2 mm shim, switch to a hybrid pad, or try a lightweight crown strap—and run a 15–minute trial following the testing steps above. Document what changes, and iterate only after you have objective and subjective notes. With patient, measured adjustments you’ll preserve both your frames and your comfort for the longest possible Vision Pro sessions.


Compartir:
Storage and Travel Care to Preserve Vision Pro Comfort on the Go
Weight distribution tips for lighter VR headsets to ease neck load