

Choose a Quest 2 Comfort Strap by Weight Distribution and Back Support to Cut Neck Strain
If you play VR for long sessions, comfort isn't a luxury — it's a performance metric. The way a Quest 2 strap routes weight across your skull and anchors at the back of the head determines whether you finish a marathon session or pull the headset off after twenty minutes. This guide takes a practical, weight-distribution–driven approach to selecting and tuning a Quest 2 comfort strap so you can minimize neck strain, reduce facial pressure, and stay immersed longer. ⏱️ 11-min read
Read on for clear explanations of how strap geometry moves the headset’s center of gravity, how rear nape cushions act as a comfort lever, which strap types best solve specific balance problems, and step-by-step tuning, maintenance, and troubleshooting you can use today.
Understanding Weight Distribution in Quest 2 Comfort Straps
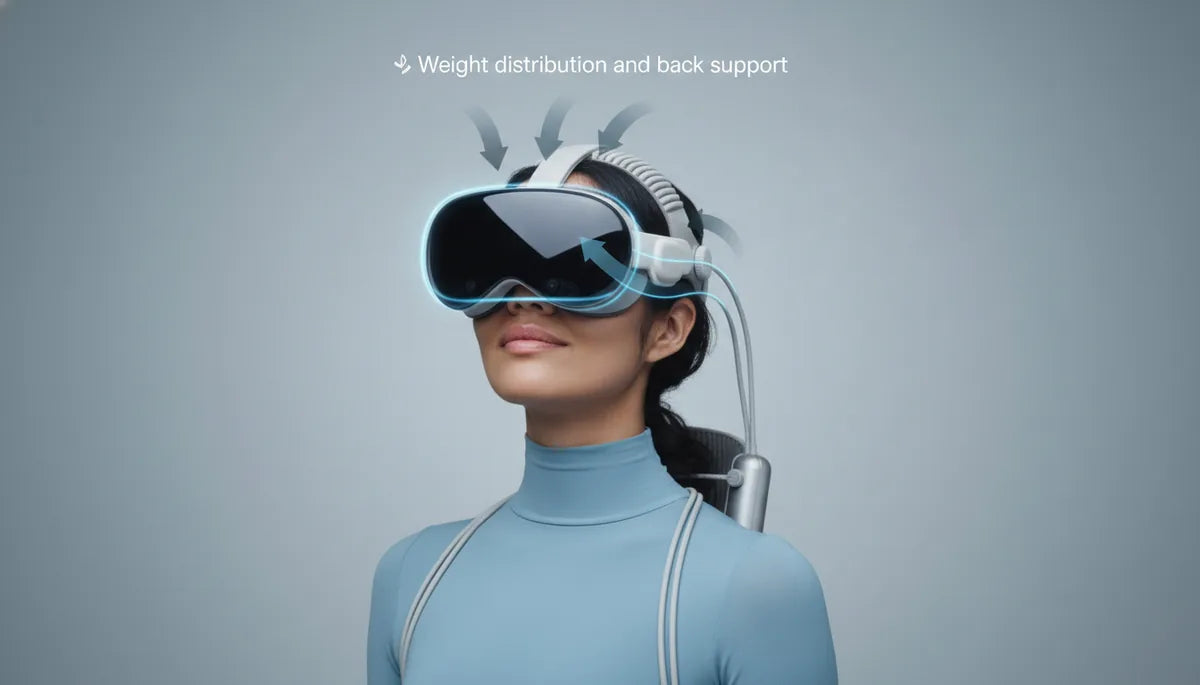
The Quest 2 is inherently front-heavy: the display, lenses, and electronics sit forward of your face and pull the headset toward your forehead and cheeks. A comfort strap's primary job is to shift that center of gravity rearward or upward so your neck and face don't bear the whole load. How the strap routes force — across the crown, around the sides, or into a rear cradle — decides how much your neck feels.
The main mass contributors are the headset body itself, any attached battery packs, cable adapters, and the strap hardware and padding. When weight remains concentrated at the front, pressure accumulates on the nose bridge and forehead; when redistributed, it spreads across the crown and occipital region, reducing hotspots.
Three simple physics notes to keep in mind: a) lifting the support point higher on your skull reduces torque on your neck; b) adding a rear anchor counterbalances forward weight; and c) expanding the contact area converts peak pressure into comfortable, even support. In practice, a strap that combines a well-positioned crown band and a padded rear cradle will lower neck load and let you play longer with fewer micro-adjustments.
Back Support as a Comfort Lever: Nape Cushions, Straps, and Posture
Back-of-head support — the nape, occipital area, and lower skull — acts like a lever that counters the headset's forward torque. When the rear pad sits beneath the occipital bone and spreads force across a crescent-shaped cushion, it anchors the headset and dramatically reduces forward tipping. That’s why some designs emphasize a rigid cradle; when well-tuned, it absorbs forward torque so your neck doesn’t.
Materials and shape matter. Memory foam conforms to your skull and offers pressure relief, dense foam resists quick compression and keeps the headset stable, and gel-infused pads add cooling for sweaty sessions. Crescent or horseshoe profiles cradle the base of the skull; flatter pads can work, but they may require tighter tension to avoid slippage. The best rear pads strike a balance: firm enough to act as a counterweight, soft enough to avoid hotspots.
Proper interaction with the occipital bone also improves posture. A secure rear fit pulls the headset slightly back, encouraging a neutral head position instead of a forward-tilted posture that strains the neck. For active games, a snug, adjustable rear band prevents downward drift and reduces the micro‑corrective head movements that add fatigue over hours of play.
Strap Types and Their Impact on Weight and Balance
Not all Quest 2 comfort straps solve balance problems the same way. Knowing the design category helps you match a strap to your needs.
- Stock / Soft straps: Lightweight and flexible, these emphasize comfort at the temples and cheeks but rarely shift the center of gravity far from the face. They’re fine for short sessions but often cause front pressure and more frequent readjustments.
- Halo / ring straps (halo-style): These loop around the back and sides of the head and put a crown strap across the top. They move load to the sides and reduce facial pressure. Halo designs are excellent for active play and racing titles, where lateral stability matters, though fit can vary by head shape.
- Elite-style rigid straps: A firm frame and rear cradle push load into broader contact areas on the sides and back. Examples like the Meta Elite Strap and rigid BoboVR frames provide stability during rapid movement and extended seated sessions, at the cost of slightly higher strap weight.
- Hybrid/soft upgrades: These combine a flexible band with targeted padding. They’re a middle ground: more conforming than rigid frames but better at counterbalancing than the stock strap.
Practical balance outcomes: choose halo-style if you want to reduce face pressure and need lateral stability; choose rigid if you want minimal movement during fast gameplay and long seated sessions; choose hybrid if you need comfort for glasses wearers and moderate rear support.
Fit Metrics: Head Size, Glasses, and Strap Height
Your head shape, forehead curvature, and whether you wear glasses change where a strap should sit. Correct strap height and length align force vectors so the headset rests evenly instead of tilting forward or sliding down.
Start with this checklist to avoid front-heaviness and improve contact stability:
- Measure crown clearance: the top strap should rest gently on the crown without digging into hair or scalp; adjust so the headset’s faceplate sits level, not tipped up.
- Set rear cradle one finger’s width below the occipital ridge: this aligns the counterweight with the skull’s base and prevents forward torque.
- Ensure even lateral tension: tighten left and right side straps symmetrically to avoid a tilt that increases facial pressure.
- If you wear glasses, create extra forehead clearance: raise the strap height slightly to prevent the headset from pressing glasses into the face and to reduce lens fogging.
- For high foreheads, move the crown strap back a little so the top contact point catches more of the skull and less of the forehead.
Practical rule of thumb: if you still feel pressure on the nose after adjusting, shift the load backwards by increasing rear-cradle tension or adding a slim rear counterweight. Conversely, if the headset feels too rear-heavy (a rare but possible issue with heavy battery packs), lower the crown strap or loosen the rear pad slightly until balance returns.
Step-by-Step Installation and Fine-Tuning
Installing a new comfort strap is the first step; tuning it properly is where the comfort gains appear. Follow this beginner-friendly sequence and checklist to get the headset balanced fast.
- Power off the headset and remove the original strap (if replacing). Clean the temple mounts before attaching the new anchors.
- Attach side anchors and loop the top/crown strap through both sides, leaving the rear cradle loose for now.
- Put the headset on and position the rear cradle so it will sit about one finger’s width below the occipital ridge when tightened.
- Tighten the side straps in small, equal increments until the headset seals comfortably to your face without pinching. Keep symmetry by adjusting one side a little, then the other.
- Adjust crown strap height so the headset faceplate is level. If it tilts forward, raise the rear cradle or increase rear tension; if it tilts back, lower the cradle or reduce rear tension.
- Do a motion test: look left and right, nod, and simulate quick turns. If the headset shifts, increase rear strap tension or reposition the rear pad deeper under the occipital bone.
- Fine-tune micro-adjustments after a 10–15 minute wear test: small changes to crown height or rear pad angle usually fix lingering hotspots.
Adjustment checklist (use this each session): crown height, rear pad position, even side tension, lens alignment, and comfort after 10–15 minutes. Small, symmetric tweaks beat large one-sided corrections.
Maintenance, Durability, and Longevity of Comfort Straps
A comfort strap is only as effective as its upkeep. Pads compress, fabric accumulates sweat, and buckles loosen — all of which degrade even force distribution and can reintroduce hotspots or instability.
Cleaning: wipe foam and fabric with a damp cloth and mild detergent after intense sessions. For removable covers, follow the manufacturer’s wash instructions. Avoid soaking memory foam; instead, spot-clean and air-dry fully before reattaching. Regularly wipe plastic and Velcro contact points to prevent slippage from buildup.
Durability signs: flattened or uneven padding, loose or cracked strap anchors, and fraying webbing indicate it’s time to repair or replace. If the rear cradle starts to compress more on one side, the headset’s center of gravity will shift forward and cause strain. Replace pads when they no longer return to shape quickly; a 10–20% compression loss can measurably increase facial pressure over long sessions.
Longevity tips: rotate between two straps if you VR daily to let materials decompress; avoid leaving straps compressed under heavy objects; store in a cool, dry place to preserve foam and adhesives. Treat Velcro sparingly — constant overuse shortens life. With mindful care, quality straps last a year or more under heavy use and much longer for casual players.
Recommended Comfort Straps: Case Studies
Different real-world options excel depending on whether you prioritize rear support, minimal movement, or soft comfort. Here are case studies tying design to outcomes so you can pick by need.
BoboVR M2/M3 Pro (rigid frame): The firm frame spreads weight across a wider surface and includes an adjustable rear plate. Result: fewer readjustments and less neck fatigue during long, seated sessions. Trade-off: slightly heavier crown and a short break-in to find the sweet spot.
Kiwi Design Halo Strap (halo-style): Distributes force around the sides with a crown strap. Players report lower facial pressure during active play, with reliable stability for fast movements. Trade-off: fit can vary with unusual head shapes — try before you buy if possible.
VR Cover Soft Strap Upgrade: Focuses on plush cushioning and breathable fabric. Ideal for glasses wearers and those who prioritize softness over absolute stability. It reduces facial hotspots but may require more frequent retightening during vigorous play.
Meta Quest Elite Strap (official, rigid): Balanced approach with strong rear support and durable build. It’s a solid middle ground for players who want official compatibility and consistent performance across titles.
Use-case guidance: choose rigid for long, competitive sessions where tracking stability matters; choose halo for active movement and lower facial pressure; choose soft for casual, glasses-friendly comfort. If you alternate between playstyles, a hybrid strap offers flexible compromise.
Common Pitfalls and Troubleshooting
Even a high-quality strap can feel off if not tuned correctly. Here are the most common problems and practical fixes.
Front-heavy feeling: If the headset pulls forward, first confirm the rear pad sits beneath the occipital ridge. Tighten rear tension slowly and evenly. If that doesn’t help, add a slim counterweight (some users attach a lightweight battery or small weight to the rear cradle) or try a strap with a larger rear cradle.
Strap slipping or loosening: Check that anchors are fully seated in the temple mounts and that Velcro or ratchets are clean. Slightly increase side-tension symmetry; persistent slipping may call for a grip-enhancing sleeve or a strap with a more robust locking mechanism.
Hotspots behind ears or at temples: Widen the contact area by adjusting side straps or swapping in thicker side pads. If the pressure is localized near your ears, move the rear cradle higher or lower by one notch — small vertical moves can shift where force lands.
Lens alignment issues after adjustments: When you change strap tension, re-center the lenses so clarity and IPD remain accurate. Use the headset’s built-in IPD and clarity checks after final tuning.
Persistent discomfort after troubleshooting: rotate to a different strap type. A user who struggles with a rigid halo might find a hybrid or soft strap alleviates the problem entirely.
Compatibility, Accessories, and Real-World Trials
Accessories change balance. Battery packs, audio modules, and wireless adapters add weight and move the center of gravity. A rear-mounted battery pack is a deliberate counterweight tactic: it shifts mass back toward the rear cradle and reduces frontal torque. Conversely, front-mounted accessories exacerbate forward weight and should be paired with stronger rear support.
Cross-compatibility: most Quest 2 straps and accessories are designed specifically for the headset’s temple mounts. While some third-party or modular accessories advertise compatibility with other headsets (including premium devices like the Apple Vision Pro), physical fit and electrical connections often differ. Adapters exist, but check mounting geometry — a clamp that works on one skull shape can change leverage and introduce new pressure points.
Real-world trial notes: test a new strap with your typical session setup — include glasses, your usual audio module, and any battery pack. Wear it for at least 30–60 minutes to reveal hotspots and balance shifts you won’t feel in a five-minute trial. For active games, simulate quick turns and jumps to confirm the strap resists forward tipping. For lengthy seated experiences, verify that padding maintains its shape after an hour; if it flattens, consider denser foam or a replacement pad.
Finally, if you’re buying online, look for retailers with friendly return policies so you can trial a strap in real use without commitment. Real-world comfort is personal; clean shop photos and specs help, but the final verdict comes after a long session.
Practical next step: pick one strap type that addresses your biggest pain point — facial pressure, neck fatigue, or movement instability — and test it with your full accessory stack for at least an hour. Use the checklists above to tune it, and keep a maintenance routine so your chosen strap continues to deliver balanced support over time.


Compartir:
Weight distribution vs neck strain: ergonomic insights for Quest two and Vision Pro setups
Design and material choices that cut VR headset weight without sacrificing durability