

How Smart Padding and Material Choices Make Quest 2 Comfortable for Long Sessions — Even If You Wear Glasses
Long VR sessions can be magical — until pressure points, slipping glasses, or a hot, sweaty face turn immersion into distraction. With the right padding, straps, and a few simple tweaks, you can transform a Quest 2 into a headset that stays balanced, breathable, and gentle on frames for hours at a time. This guide walks through the materials, strap geometry, installation steps, maintenance, and third‑party options that matter most for glasses wearers and anyone who spends long stretches in VR. ⏱️ 10-min read
Read on for practical choices and small adjustments that preserve the Quest 2’s fit and balance while dramatically reducing nose pain, temple pressure, fogging, and heat build‑up — plus real examples you can copy in minutes.
Padding materials and fabric choices that boost comfort
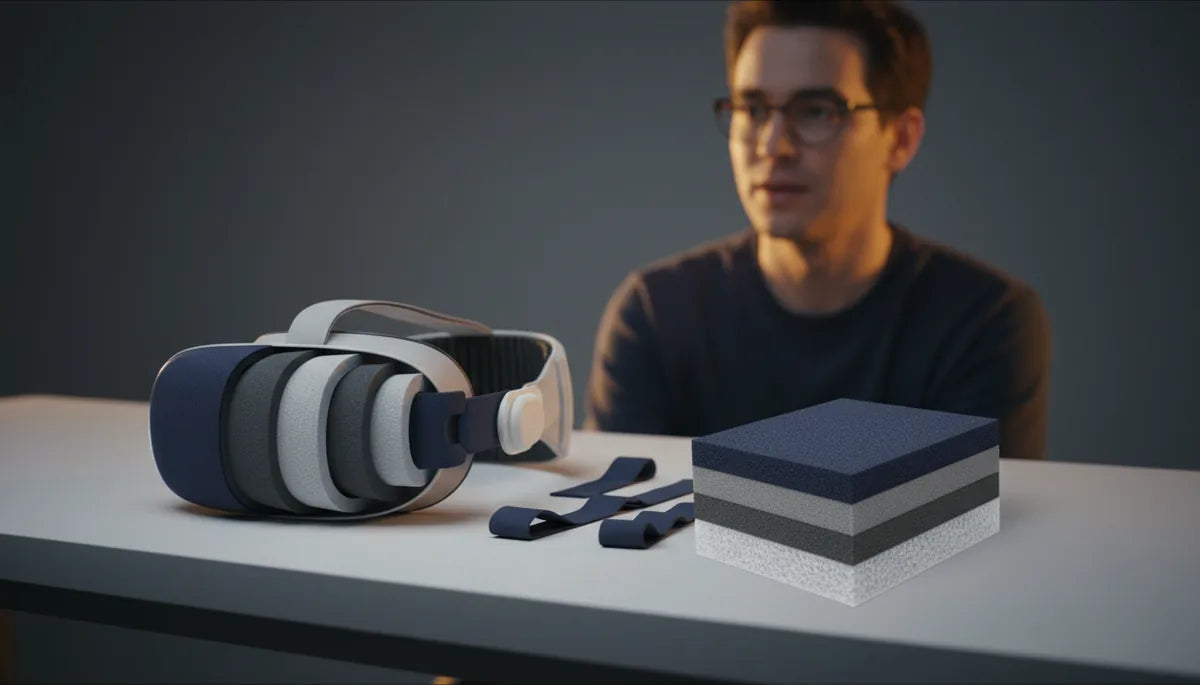
Comfort starts where the headset touches your face. Think of padding as a three-layer system: the surface fabric, the foam core, and any moisture barrier or gasket beneath. Each layer influences pressure distribution, breathability, and how long you can comfortably play.
Foam type is the foundation. Memory foam contours to your unique facial anatomy, spreading load across a wider surface and minimizing painful hot spots. For long sessions where gentle pressure is key, medium‑density memory foam often hits the sweet spot — soft enough to mold, firm enough to keep a consistent seal. Open‑cell foams breathe better than closed cells; they compress more gradually and let air flow, which reduces heat buildup.
EVA or closed‑cell foams are firmer and deliver stability; they work well when designers layer them beneath a softer top layer so you don’t trade stability for a sharp pressure point. The fabric that covers the foam matters as much as the foam itself. Microfiber is soft and absorbs light moisture; velour feels luxurious but can trap heat. For long, sweaty sessions, polyknit or moisture‑wicking fabrics are generally superior because they draw sweat away from skin and promote airflow.
Finally, consider gasket‑style cushions. These create a deeper eye recess and can increase clearance for glasses while improving the seal around lenses. A gasket with a moisture‑wicking surface plus an open‑cell foam core is an excellent combination: it keeps the headset cooler, reduces sweat transfer to your glasses, and spreads pressure evenly so the headset doesn’t pinch the bridge of your nose.
Back/top strap design for even weight distribution
Even the softest padding can fail if the headset rocks forward or concentrates load on the crown. That’s where strap geometry and materials come in: they move weight away from the face and across the skull so glasses aren’t crushed and the headset stays level.
The stock Quest 2 strap is lightweight and elastic, but it often lets the front sag slightly, increasing nose pressure. Upgrading to an Elite Strap or a Deluxe Audio Strap (DAS) changes the game. The Elite Strap is a firmer band that anchors around the back of the head, reducing forward tilt and improving lateral stability. The DAS adds a more substantial backplate and integrated audio — its wider contact area spreads weight across the occiput and temples, which helps keep glasses aligned and reduces temple pinching.
Y‑strap vs single‑strap setups matter too. A Y‑strap routes tension over the crown and behind the head, distributing load over a larger surface and resisting tilt. Single‑line straps concentrate pull along one axis and require more frequent micro‑adjustments. Ideally, a comfort strap should combine a wide rear pad, an adjustable top strap, and medium‑stiff material that resists sag without digging in.
Practical tips: position the rear pad so it sits low on the skull (just above the nape) instead of high on the crown; this shifts weight rearward and counters front heaviness. Use the top strap as a fine tuner — tighten it until the headset is secure in fast head turns, then back off one notch if you feel pressure on your temples or glasses. Look for straps with soft, chamfered edges so they don’t create sharp pressure lines near the ears.
Glasses‑friendly padding and eyewear ergonomics
Glasses introduce three main pain points: frame pressure on the temples, bridge pinching, and lens fogging. The right padding shape and materials address each without compromising the seal or image alignment.
Nose relief and pad depth are critical. A deeper, gasket‑style pad provides more clearance for lenses and the bridge of your glasses, keeping frames from contacting the display. Look for pads with a stepped or crescent‑shaped inner profile that matches common frame arms and hinges. Those small cutouts around the temple area prevent the padding from compressing against metal or thick plastic frames, reducing pinching and abrasion.
Pad taper and curvature matter too. A gently curved edge that angles away from the nose bridge preserves space for upper frames and keeps the headset seal intact. A thin, well‑placed nose pad can shift some load off the glasses and onto the foam, decreasing the tendency for frames to slide. Soft silicone inserts — either integrated into the pad or applied as adhesive nose grips on your glasses — can stabilize frames and reduce slippage, as in a simple silicon‑pad solution many users report as transformative.
Choose low‑friction coverings to protect lens coatings. Smooth microfiber or silicone surfaces minimize rubbing on frame coatings, while moisture‑wicking layers help avoid the abrasive effects of sweat. If you’re using prescription inserts or lens adapters, confirm the pad profile still provides enough distance to avoid scraping. Finally, small customizations — self‑adhesive velour strips, temple cutouts, or a slightly thicker nose bridge — often solve fit problems faster than wholesale replacements.
Installing and adjusting the Quest 2 comfort strap
Installing a comfort strap correctly is half the battle. A few simple steps ensure a secure mount, balanced weight, and minimal interference with glasses. Below is a quick, practical procedure most users can follow in five minutes.
- Remove or loosen the original elastic strap. If you’re swapping straps, unclip the side connectors by pulling the band gently away from the headset until it clicks free.
- Align the comfort strap’s connectors with the headset slots. Press each end into the side until you hear a solid click — don’t force it past that click. Over‑tightening can stress the connector tabs.
- Center the toppad across your crown. The pad should sit above the hairline, not on the neck. Slide the rear pad so it rests low on the back of your skull, just above the nape.
- Adjust the top strap for even tension. Tighten until the headset stays stable during quick head turns, then loosen one notch if you notice red marks or pressure on your glasses.
- Fine‑tune the side sliders so the headset sits flush against the face without overcompressing the foam. Ensure straps don’t hang or rub against your temples or glasses frames.
- Secure loose ends. Tuck extra strap length under the rear pad if possible, or use small Velcro ties. Loose straps can snag or shift during play.
Common pitfalls: over‑tightening to eliminate wiggle will often increase nose and temple pressure — aim for stability, not immobility. If connectors feel loose, remove and re‑seat them; if they still wobble, inspect for debris or damage before continuing. Remember that the top strap and rear pad work together: small adjustments on both yield the best balance without sacrificing comfort.
Maintenance, cleaning, and longevity of padding
Pads and straps are living parts — they absorb sweat, oils, and dust. Regular maintenance keeps materials performing and extends their life. A simple routine prevents odor, breakdown, and hygiene issues.
Daily and weekly care: after heavy sessions, wipe the fabric surfaces with a damp microfiber cloth to remove oils. For straps and plastic components, a soft cloth with mild soap and water or a 70% isopropyl alcohol wipe works well; avoid soaking foam. If you use removable covers, wash them based on manufacturer guidance — many polyknit or microfiber covers tolerate a gentle cold machine wash, but always air‑dry flat.
Deep cleaning: detach removable foam inserts when possible. Rinse open‑cell foam briefly under lukewarm water and squeeze gently; do not twist aggressively. Hand‑wash covers in mild detergent, rinse thoroughly, and let both pieces dry fully in a ventilated, shaded area. Avoid direct sunlight which can harden foam or fade fabrics. Never use bleach or harsh solvents that degrade padding.
Replacement cues: flattening of the foam, persistent odor after washing, visible tears, or loss of seal are signs it’s time to swap pads. For frequent users, expect face pads to need replacement every 6–12 months; casual users may get longer. Keep a spare face pad and an extra cover on hand — swapping a worn pad for a fresh one is a fast way to restore comfort.
Weight, balance, and battery‑pack considerations
The Quest 2 is comparatively light, but even a half‑kilogram headset will feel heavy after extended play if the weight isn’t balanced. The complaint is usually “front‑heavy” — the display and optics pull forward, increasing pressure on the nose and temples. The right strap and a rear counterweight solve this without adding uncomfortable load.
Where to add mass: many VR users attach a small battery pack to the rear pad to create a counterbalance. Placing weight behind the head shifts the center of mass closer to the skull’s midpoint, dramatically reducing nose pressure. Use a short, flexible cable to power the headset so the battery pack can sit at the rear pad rather than dangling by your neck. If the pack is too heavy, however, it trades one pressure point for another — aim for a modest counterweight rather than a large battery.
Strap choices affect balance too. The Elite Strap and Deluxe Audio Strap both provide a wider rear interface to accept battery packs or rear plates; they keep added mass from creating point load on your scalp. Third‑party straps designed with a rear battery pocket provide a neat, secure mounting point and help keep cables out of the way.
Tips to minimize neck load: prefer low, rear placement to high crown mounting; use a flexible, short power cable to keep the battery close to the rear pad; and distribute any additional accessories (audio modules, fans) symmetrically when possible. Small adjustments — a millimeter of strap repositioning or shifting the battery a few degrees — can change perceived balance more than you’d expect.
Third‑party options, compatibility, and cross‑brand notes
A lively aftermarket exists for Quest 2 comfort upgrades. Popular face pads include VR Cover, AMVR, and Kiwi Design: they offer foam thickness options, silicone alternatives, and moisture‑wicking covers. For straps, options range from budget comfort straps to premium solutions that mirror the Elite Strap/DAS ergonomics, some with integrated battery pockets or quick‑release mechanisms.
Compatibility is mostly straightforward: Quest 2 replacement pads and straps are designed to clip into the headset’s existing mount points. When choosing third‑party gear, confirm it’s marketed for Quest 2 (or Meta Quest 2) specifically — small changes in connector geometry between headset revisions can make a difference. If you plan to use prescription lens inserts, buy pads that advertise compatible clearance or are gasket‑style to maintain lens distance.
Cross‑brand notes: avoid assuming accessories for other headsets (PC tethered headsets, Valve Index, or Apple Vision Pro) will work with Quest 2. The Apple Vision Pro is a fundamentally different device with unique mechanical and optical designs; Quest 2 pads and straps are not designed for Vision Pro and, beyond cosmetic or temporary fits, adapters are not a practical or supported solution. Focus on Quest‑specific accessories for reliable fit, warranty safety, and consistent results.
Finally, the little hacks matter: adhesive silicone nose pads, self‑adhesive velour strips, and temple cutouts are inexpensive fixes that many users (like Sarah and Mark) find more effective than expensive swaps. Read reviews that describe glasses compatibility explicitly — many vendors test with a range of frames and list maximum temple thickness or bridge dimensions to help you choose.
Next step: identify your biggest pain point — pressure on the bridge, slipping glasses, fogging, or heat — and pick one targeted solution from this guide (gasket pad for clearance, rear battery for balance, moisture‑wicking cover for heat). Small changes compound: the right pad plus a balanced strap usually yields the largest comfort gains for long Quest 2 sessions.


Compartir:
Custom fit for diverse heads: adjusting elite head strap to suit different head shapes
Budget Quest 2 Strap Upgrades: Top Replacement Straps for Thrifty Builds