

Dialing In Meta Quest 2 IPD and Lens Comfort: A Practical, Step‑by‑Step Guide for Sharper, Longer Sessions
Sharp visuals and sustained comfort in the comfort-strap-for-a-secure-fit" rel="nofollow noopener noreferrer">Meta Quest 2 start with two simple things: correct interpupillary distance (IPD) and a headset that sits where it should. Get those right, and games pop, reading is easy, and fatigue and headaches drop away. Get them wrong, and you’ll fight blur, double images, and soreness long before your session reaches its best part. ⏱️ 11-min read
This guide walks you through IPD fundamentals, a quick alignment routine, strap options and installation, glasses-friendly tweaks, balancing with battery packs, small lens-and-facepad habits that make a big difference, and how to maintain everything over time. Each section gives clear steps and real-world tips so you can test changes, compare results, and create a setup that keeps your virtual world sharp and comfortable for hours.
IPD fundamentals and lens clarity
Interpupillary distance (IPD) is simply the distance between the centers of your pupils. On the Meta Quest 2 you don’t have a continuous slider—there are three fixed lens positions: 58 mm, 63 mm, and 68 mm. That limitation makes choosing the right setting critical: when lenses line up with your pupils, the image is sharp from center to edge and your eyes don’t fight to fuse two slightly different images. Misalignment produces blur, ghosting at the edges, and eye strain that builds into headaches.
Lens condition also matters. Even small smudges, dust particles, or fine scratches soften contrast and make text and thin lines look washed out, much like trying to read through a fogged window. Clean your Quest 2 lenses with a dry microfiber cloth—power off and remove the headset first—wiping in small circular motions from the center outward. If you must use moisture, apply a lens‑safe cleaner to the cloth, never spray liquid directly on the lens. These two fundamentals—correct IPD and clean lenses—are the foundations of crisp VR.
Quick IPD check and lens alignment routine
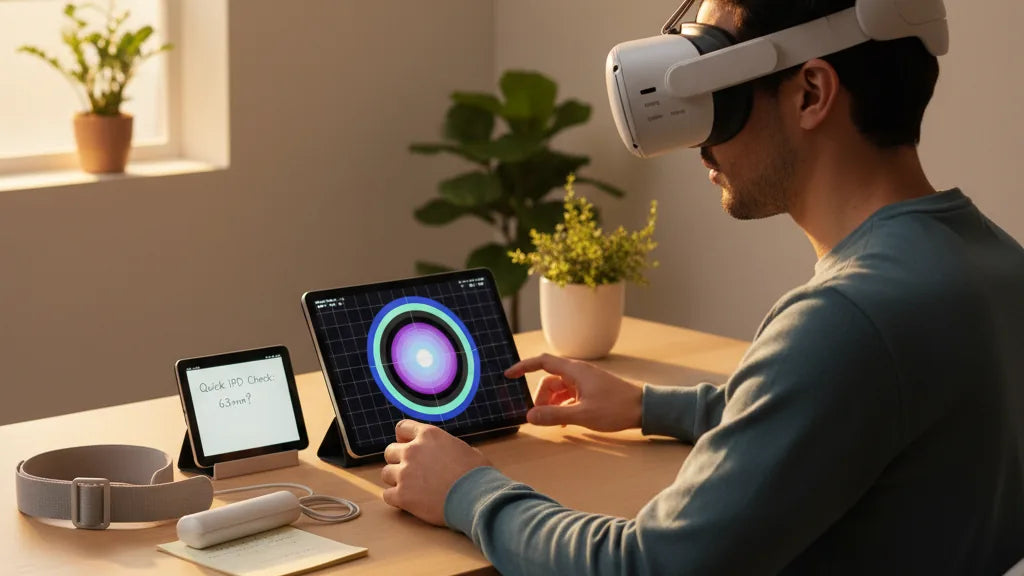
Before a long session, spend three to five minutes confirming your IPD and lens alignment. Treat this as your “sharpen and settle” routine: it takes little time and prevents headaches later. Start with the closest Quest 2 preset to your measured IPD, then validate with a simple visual test.
- Estimate or measure your IPD. If you don’t have a recent optometrist reading, stand about 8–10 inches from a mirror, hold a millimeter ruler flat across your brow, and close one eye while aligning the ruler’s zero with the center of your open pupil. Switch eyes and read the millimeter mark that lines up; repeat and average. This gives a usable home estimate.
- Put on the Quest 2 and set the lenses to the closest preset (58, 63, or 68 mm). Look at a static scene with fine lines or text—menus, a web page, or an in‑game grid work well. If you see double, change to the next preset and repeat.
- Center on a target at about arm’s length, then shift focus to a target 1–2 feet away; the image should remain stable. If it shifts or becomes double, adjust tilt and strap tension to center the lenses over your pupils.
- Hold the headset steady and wear each candidate IPD for 5–10 minutes. Note when clarity starts to degrade or when you feel strain—that’s your comfort boundary.
When the image is a single, crisp point and comfortable for several minutes, you’ve found a stable baseline. Small adjustments to strap tightness and headset tilt can improve edge‑to‑edge clarity; think of IPD as the horizontal alignment and tilt/height as the fine centering that eliminates parallax.
Choosing the right comfort strap for long sessions
The bracket that holds your Quest 2 in place is as important as the lenses. A strap that balances weight, cushions pressure points, and allows repeatable adjustments keeps your head in the same sweet spot so your IPD setting stays effective. There’s no one‑size‑fits‑all, but a few proven options cover most needs.
The stock strap is light and simple—good for short sessions and portability—but it leaves a lot of pressure on the face and can let the headset drift during movement. The official Elite Strap adds a rigid rear band and often includes a dial for micro adjustments; it’s a marked upgrade for stability. Third‑party solutions from Kiwi Design, AMVR, and others tend to emphasize thicker padding, crown support, or halo‑style designs that redistribute pressure across the top of the head instead of the forehead.
When choosing, prioritize:
- Weight distribution — straps that shift support toward the back reduce front‑heavy tipping.
- Adjustability — a reliable rear dial or multiple attachment lengths helps you lock in fit without overtightening.
- Padding and breathability — memory foam or ventilated fabric for long sessions and less sweat.
- Glasses clearance — if you wear frames, choose a strap that allows more vertical space and pairs with a glasses spacer.
Think of the strap as a stability system: better balance reduces micro‑movement, preserving the lens sweet spot and making IPD settings consistently effective throughout a session.
Step‑by‑step install for Quest 2 comfort strap (beginner guide)
Upgrading the strap is straightforward and reversible. Follow these steps to swap the stock strap for an Elite Strap or a popular third‑party alternative without stressing connectors or your headset.
- Prepare your workspace: power off the headset and set it on a soft, clean surface. Have your new strap ready. A microfiber cloth under the headset prevents scuffs.
- Remove the old strap: gently pull the side plastic arms outward from the headset’s side posts until they detach. Unthread the top strap from its central loop. Don’t yank—work slowly to avoid bending plastic tabs.
- Attach the new side arms: align the strap’s arms with the connection points and push firmly until you hear or feel a click. Confirm both sides are seated; a loose arm will let the headset shift.
- Thread and secure the top strap: feed the top portion through the loop on the headset. Adjust basic length now; fine tuning happens with the headset on.
- Fit and test: put the headset on, tighten the rear dial (if present) until secure but not squeezed. Adjust crown straps so weight feels distributed—aim for even contact across forehead and back of head.
- Perform a pull‑test: with the headset on, give a gentle forward tug. The strap should hold without sliding and the headset should return to the same position. If it shifts, recheck attachment clicks and strap routing.
After installation, repeat the quick IPD and alignment routine. New straps can change tilt and distance slightly; verifying ensures your visual sweet spot remains centered.
Glasses‑wearer fit and eye‑relief optimization
Wearing glasses in the Quest 2 is possible, but it requires attention. The headset includes a glasses spacer that increases clearance between your frames and the headset lenses; use it if your frames sit close to your face. Installing the spacer is a small tradeoff: you’ll lose a little peripheral view, but you protect both your prescription lenses and the headset’s optics.
If you rely on glasses, consider these steps and options:
- Install the glasses spacer before your first session. Place the headset over your glasses gently—front to back—so frames settle naturally and aren’t forced against lenses.
- Adjust strap height and crown positioning to ensure the headset doesn’t press frames into your nose or temples. A higher rear strap can lift the whole unit away from the cheekbones.
- Use foam spacers or replace the facial interface with a slightly thicker or custom gasket to increase eye relief without overly pushing the headset forward.
- Consider prescription lens inserts that clip into the headset. They eliminate contact between frames and native lenses and are ideal for frequent wearers.
- Prevent fogging and smudges—use a dedicated anti‑fog wipe designed for eyewear and avoid touching the headset lenses with your glasses. If fogging persists, short breaks and a quick wipe keep clarity high.
These adjustments preserve comfort and prevent scratches to either pair of lenses. If you’re still uncomfortable, prescription inserts are the best long‑term solution for combining optical precision with comfort.
Weight, balance, and battery‑pack considerations
How heavy the headset feels has less to do with absolute mass and more to do with where that mass sits. A front‑heavy headset tugs at your face and forces you to grip with the strap, which increases pressure and changes lens alignment. A simple and elegant fix is to move some weight to the back so the headset’s center of gravity sits nearer to the crown of your head.
A rear‑mounted battery pack does double duty: it extends playtime and provides a counterweight. Choose a power bank designed to clip to the rear strap or one that comes with a secure pouch. Position it low on the strap so it balances the front; experiment moving it slightly up or down to find the most stable position. The goal is not just less pressure on the face but reduced forward rotation during movement, which keeps your lenses aligned and your chosen IPD sweet spot steady.
Practical considerations:
- Keep total weight reasonable—many users aim to keep the headset and accessories under about 600 g for comfort, though comfort thresholds vary by person.
- Use straps with rear padding or a halo structure to spread contact and avoid a single pressure point at the base of the skull.
- Secure the battery pack with a strap or pouch so it doesn’t swing—dynamic motion can defeat the balance you’re trying to create.
- Be mindful of cables—if you use an external battery with a USB‑C cable, route it cleanly to avoid tugging on the headset.
Seen practically, weight management is about stability. When the Quest 2 sits stably, your eyes stay in the sweet spot, IPD alignment stays valid, and sessions last longer without soreness.
Fine‑tuning sharpness beyond the strap: lens and comfort tweaks
Even after setting IPD and choosing a great strap, small tweaks further sharpen visuals and increase comfort. These are the habits and inexpensive accessories that deliver outsized benefits.
Keep lenses pristine. Power off and use a high‑quality microfiber cloth to wipe in small, circular motions from the center outward. For stubborn smudges, dampen the cloth with distilled water or a lens‑safe solution—never spray directly on lenses, and avoid solvents that may strip coatings. Clean regularly; once smudged, the headset tends to show blur especially in high‑contrast scenes.
Facepad and gasket choices matter. A breathable, thin facepad reduces lens‑to‑eye distance and heat build‑up; a thicker pad may improve comfort for some faces but can push lenses further away and change perceived sharpness. Try one or two aftermarket facepads—foam density and thickness affect both comfort and optical distance, so pick according to how your IPD check looked with different pads.
Other fine tweaks:
- Adjust nose gap: if the pad presses on the bridge, opt for a thinner gasket or move the headset slightly higher on the face to relieve pressure.
- Maintain consistent strap tension—too loose introduces micro‑movement; too tight creates pressure points and reduces blood flow around eyes.
- Lower brightness for long reading sessions to reduce eye fatigue; increase for visually dense games where crisp contrast matters.
- Take short breaks every 45–60 minutes to reset focus and check fit; small adjustments mid‑session can prevent gradual slippage.
These tweaks are low cost and reversible. Test one change at a time so you can identify what actually improves clarity and what merely feels different.
Maintenance, compatibility, and accessory ecosystem
Maintaining the Quest 2 and choosing the right accessories keeps your investment working well and avoids surprises. Regular cleaning, proper storage, and attention to compatibility will extend both optical clarity and hardware life.
Lens and faceplate care: use a dry microfiber for lenses and a damp cloth with mild, alcohol‑free soap for the facial interface. Never leave the headset in direct sunlight; concentrated sunlight through lenses can damage displays and coatings. Replace face pads and straps when foam compresses or fabric shows wear—worn padding alters fit and alignment.
Accessory compatibility: the Quest 2 has a rich third‑party ecosystem—comfort straps, battery packs, foam replacements, and prescription lens inserts are widely available. Verify that third‑party parts are specifically designed for the Quest 2; some accessories for other headsets (for example, Apple Vision Pro) are not compatible. Also check how mods affect warranty—most cosmetic accessories don’t void warranty, but anything that requires opening the headset certainly can.
Finally, be pragmatic about upgrades. A small investment in a balanced strap, a rear battery, or prescription inserts often produces much more comfort and sharper visuals than chasing incremental in‑software tweaks. If you’re unsure, try gear with a reasonable return policy so you can test it with your personal IPD and play style.
Next step: run the quick IPD check, install the strap most aligned with your comfort priorities, and keep a microfiber cloth handy—those three moves alone will make your next Quest 2 session noticeably sharper and more enjoyable.


Compartir:
Ventilated Cushions and Sweat Management for Vision Pro Comfort
Comparing Quest 2 Strap Options: Original, Elite Strap, and Third-Party Alternatives for Balance