

The Glasses‑Ready Comfort Setup for Oculus Quest 2: A Practical Guide to Straps, Fit, and Long Sessions
If you love long VR sessions but hate the pressure on your nose, temple marks, or glasses rubbing the lenses, this guide is for you. I’ll walk you through choosing a Quest 2 strap that prioritizes weight distribution and durable cushions, show an unambiguous install routine for beginners, and share tested tweaks that keep glasses wearers comfortable for longer playtimes. ⏱️ 9-min read
Read this as a single, practical checklist: pick the right strap, install it predictably, tune the balance, and maintain the kit so each session starts with confidence rather than the constant urge to re‑adjust.
Choosing the right Quest 2 comfort strap for long sessions
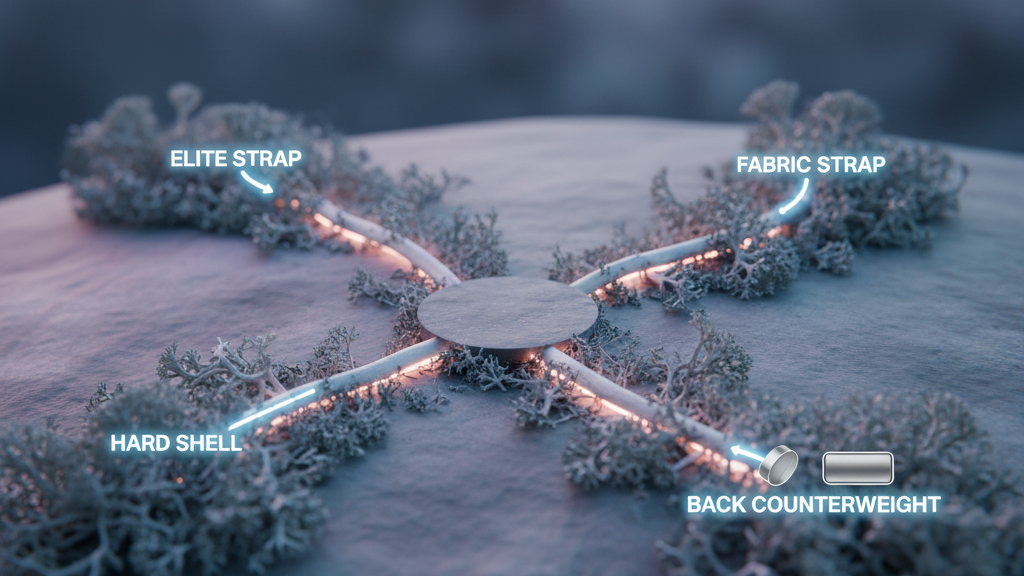
Comfort straps for the Quest 2 fall into a few clear families: Meta’s Elite Strap (and Elite Strap with Battery), halo or hard‑shell designs, fabric/back‑strap options, and a wide range of third‑party solutions. The right choice comes down to four core criteria: weight, adjustability, cushion material, and how well it plays with glasses and aftermarket face gaskets.
Use this quick framework to compare models for long sessions:
- Weight and center of gravity — lighter crown pieces are easier to stabilize; straps that add rear mass can balance the headset without increasing front pressure.
- Adjustability — multiple, independent adjustment points (top, rear, and side) let you dial vertical load and tilt separately.
- Cushion type and durability — memory foam molds to your face, silicone resists sweat and wipes clean, and replaceable pads extend a strap’s life.
- Glasses compatibility — check lens gap and frame clearance; some straps include spacers or are designed to work with glasses‑friendly gaskets.
Functionally, choose a strap that stays steady during quick turns and reduces forehead bounce. Halo‑style or hard‑shell straps often move with your head and reduce facial hotspots, while fabric straps are lightweight and breathable. Third‑party options can offer thicker padding or modular replacements, but weigh warranty and build quality against cost.
Step‑by‑step install and initial fit for beginners
Keep the first install simple and methodical. A predictable routine prevents cross‑compatibility surprises and saves time later.
- Unbox and inventory: lay out the strap, mounting bracket, screws, pads, and any spacers. Confirm fasteners turn smoothly and adapters (if included) match your headset model.
- Mount the bracket: attach the strap’s mounting bracket to the Quest 2 using the supplied screws or clips. Don’t tighten fully yet—leave a little play for later angle tweaks.
- Fit the strap on your head (without the headset): slide the rear pad to rest on the occiput and move the top pad over the crown so it feels even left‑to‑right.
- Put on the headset: close it until it sits level. Tighten the side straps until the headset stays in place without pressing painfully on your nose.
- Quick checks — center of gravity, strap symmetry, nose gap, and comfortable tightness: look down and side‑to‑side to ensure no tilt or pronounced forward pull. With glasses on, confirm a few millimetres of clearance between frames and the Quest lenses.
- Finalize fasteners: once the headset sits level and stable, snug the mounting screws fully and secure any Velcro or clasps.
If you have a third‑party product like a lift‑style adapter, follow its included instructions for any special spacers or mounting plates. After the first wear, test for 5–10 minutes, then tweak strap heights and pad positions before a longer session.
Balance, weight, and pressure distribution for all‑day comfort
Comfort is primarily about the weight path: from the forehead across the temples to the crown and finally into the back of the skull. A balanced path means less nose and cheek pain and no constant need to push the headset up.
Practical tips to shape that weight path:
- Add a small counterweight or a rear battery pack to pull weight rearward. Typical packs are in the 100–250 g range; position them low on the occiput to get leverage without creating a new hotspot.
- Adjust crown strap tension to control vertical load — it should be snug enough to stop forward tilt but not so tight it compresses the crown. If you feel pressure on the top of your head, back off a bit.
- Set side strap angles so they pull slightly forward over the temples, not back behind the ears. That forward angle distributes force across a larger surface instead of pinching a small point.
- Validate progressively: start with 5–10 minute sessions, note any red marks or numb patches, make small (1–2 notch/turn) adjustments, and extend session length only if comfort holds steady.
Small changes add up. Often moving a pad 5 mm backward or rotating a rear pad 10–15 degrees eliminates a hotspot without changing the strap radically.
Glasses wearers: comfort solutions for Quest 2
Glasses add two constraints: lens clearance and temple pressure. The goal is to create a small, consistent gap so frames don’t rub the Quest lenses and air circulates to reduce fog.
What to try:
- Use a glasses‑friendly face gasket or an offset spacer that pushes the headset outward slightly. Even a few millimetres can stop rubbing on thicker acetate frames.
- Choose thicker or differently contoured pads for more bridge clearance when frames are wide. For narrow frames, standard pads with careful crown adjustment usually suffice.
- Anti‑fog is a simple fix: treat your glasses with anti‑fog wipes or spray and avoid putting those products on the Quest lenses themselves. Proper strap tension and a small lens gap reduce fog just by improving airflow.
- Consider prescription lens inserts if you use the headset frequently; they remove the frame variable entirely and pair well with a rear counterweight to keep balance.
Real users report that swapping the facial interface for a glasses‑friendly gasket, adding a thin spacer, and pairing with a light rear counterweight can raise comfortable session length from 20–30 minutes to 40–45 minutes or more.
Elite Strap vs. third‑party options: what to choose
Meta’s Elite Strap and Elite Strap with Battery are the obvious starting points: designed for compatibility, backed by Meta’s accessory support, and simple to install. The Battery model extends playtime and doubles as a rear counterweight, which helps balance the headset front‑to‑back.
Third‑party options bring variety: memory foam pads, thicker crowns, quick‑swap cushions, and alternative mounting geometries. Pros include lower cost, replaceable cushions, and sometimes better tilt control. Cons are variable warranties, differing build quality, and occasional fit quirks with official mounting points.
Choose based on what matters most to you:
- If you want plug‑and‑play reliability and warranty comfort, the official Elite Strap variants are safe bets.
- If you prioritize long‑term cushion replacement, different foam profiles, or a lighter crown, reputable third‑party straps are worth considering—verify return policies and compatibility first.
- For battery needs, compare on‑strap battery vs. external packs: on‑strap batteries are tidier and designed to work with the headset, while external packs give modularity and can be positioned for better leverage.
Fine‑tuning fit: height, strap length, and tightening tips
Adopt a repeatable adjustment routine so you can quickly get the same comfortable fit each session:
- Set the top (crown) strap first to control vertical placement—enough so the lenses sit squarely in front of your eyes.
- Adjust side straps to remove tilt—work left and right alternately until the headset is level.
- Tighten the rear strap so the back pad rests snugly on the occiput; this transfers weight away from the nose.
- Final micro‑tune while wearing glasses: if frames touch the lenses, back off the crown a notch and add a thin spacer or adjust the facial interface thickness.
Signs you’re over‑tightening: red marks on the forehead, headaches, numbness around the temples, or breathing restriction around the nose. Signs of under‑tightening: visible wobble during quick turns, light leaks around the nose, or constant need to push the headset up. Correct those by small incremental adjustments, not large ones—comfort is rarely fixed by brute force.
Care, cleaning, and maintenance of Quest 2 straps
Caring for cushions and straps extends their life and keeps hygiene high. Follow these simple rules:
- Detach the strap and wipe plastic parts with a soft cloth and mild soap solution. Avoid abrasive cleaners.
- Foam cushions: wipe gently with a damp cloth; never soak. Allow air‑drying completely before reattaching.
- Fabric straps: spot‑clean or hand‑wash with mild detergent and lay flat to dry away from direct sun or heat.
- Leather accents: clean lightly and use a small amount of conditioner occasionally—do not overapply.
- Odor control: sprinkle baking soda on dry fabric pads overnight, then brush or vacuum away.
- Inspect every 2–3 months for frayed stitching, compressed foam, or cracked plastics—replace any worn component rather than forcing a marginal fit.
Accessories that boost comfort: cushions, battery packs, and more
Small accessories can change comfort dramatically:
- Memory foam cushions mold to your face and reduce focal pressure points; silicone cushions resist sweat and clean easily—choose based on personal sweat profile and how much seal you want.
- Rear battery packs or counterweights (100–250 g) move the center of gravity back. Mount them low and centered for best leverage and minimal neck strain.
- Ventilated housings and slim cables reduce heat buildup—avoid bulky packs that trap heat against your head or crowd the strap attachment area.
- Quick‑release clips and replaceable pads simplify swaps and prolong strap life; always keep spare foam or silicone pads on hand if you play frequently.
Safety notes: heavier packs increase neck load—if you feel persistent neck strain, reduce weight or redistribute it. Also monitor for heat transfer from batteries during long sessions and allow cool‑down breaks.
Cross‑headset perspectives: Vision Pro compatibility and takeaways for Quest 2
Lessons from higher‑end headsets like the Vision Pro emphasize two comfort truths that translate directly to the Quest 2: distribute load away from the face, and use a strap geometry that moves with the head. Vision Pro’s halo and crown supports reduce facial pressure by routing forces to the skull; you can mirror that on Quest 2 with a lightweight crown pad plus a rear counterweight or halo‑style third‑party strap.
Practical takeaways:
- Prefer straps that create a broad contact area at the crown and occiput instead of a single tight band across the forehead.
- Use rear mass (battery or weighted pad) rather than cranking side straps to reduce nose pressure—leverage beats brute force.
- Consider modular, replaceable padding and quick‑swap solutions; ergonomic adjustments pay back in longer, less interrupted sessions.
Takeaway: before you buy anything else, run a five‑minute fit check using the routine above and add a small rear counterweight if your sessions still end with nose pressure. If you wear glasses, prioritize a glasses‑friendly gasket or spacer and anti‑fog for the lenses—these choices deliver the biggest practical gains for long sessions.
Powered by Trafficontent


Compartir:
Stock vs aftermarket head straps: which keeps Meta Quest stable during intense play
Counterweights and Cushions Upgrades for Extended Comfort in VR