

Upgrade Your Quest 2 with Third‑Party Straps for Better Balance and All‑Day Comfort
If your Quest 2 starts to feel front‑heavy after an hour of play, a strap swap can be the simplest, highest‑impact upgrade you make. Third‑party straps change where the headset presses on your skull, add padding where you need it, and—when chosen carefully—let you game comfortably for marathon sessions without a sore neck or fogged lenses. ⏱️ 8-min read
This guide walks through strap types, what to look for when shopping, the best third‑party options and price bands, a clear install and adjustment routine, tips for glasses wearers, and practical notes on weight and battery balance. Read on to pick a strap that shifts weight where you want it and keeps you in the headset longer.
Understanding Quest 2 strap options and balance
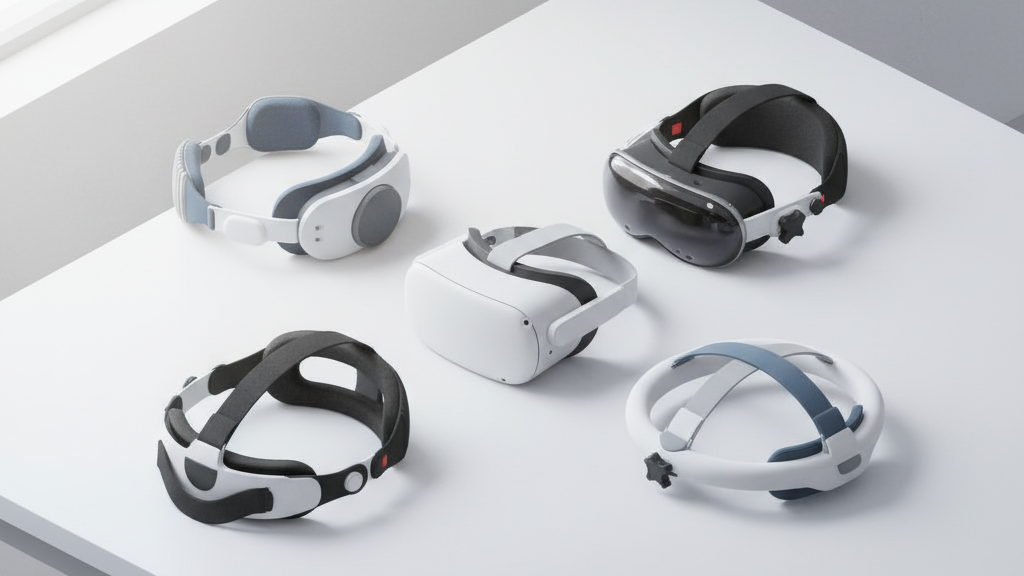
The stock Quest 2 strap is minimalist: lightweight with limited padding and decent for short sessions or quick swaps. But strap design dramatically alters balance. Three common approaches are worth knowing:
- Halo/halo‑style (e.g., Kiwi Design Halo Strap): places mass around the sides and crown for stability; it keeps the display steady but can trap heat around the ears and feel snug.
- Headband/crown strap: spreads pressure across the top of the head and reduces cheek and brow pressure; on narrower heads it can shift or slide if not clamped properly.
- Battery/back‑weight straps: mount weight at the rear to counteract the front heft of the headset; very effective for balance but can introduce neck strain if the weight is too low or swings when you move.
Your balance goals should be clear: move mass away from the face where it causes forward tilt, support the crown so pressure is distributed, and choose padding that keeps contact points comfortable for hours. In practice that means looking for straps that combine rear counterweight or a rigid yoke with breathable foam at contact points.
How to choose a comfortable Quest 2 strap for all-day wear
Comfort for long sessions comes down to three practical details: how the strap shifts weight, how it cushions the head, and how it manages heat.
- Lightweight with effective distribution: Lighter materials reduce overall mass, but the strap must still push weight toward the back or crown. Avoid “light” designs that simply move weight forward — you'll feel the front pull after 30–60 minutes.
- Padding and materials: Aim for 8–12 mm of foam and a soft, washable cover. Mesh or perforated foam helps airflow — dense, non‑vented foam will trap sweat and heat on long sessions.
- Adjustability and quick‑release: Ensure a wide adjustment range to fit different head sizes and hairstyles. Quick‑release connectors or modular rails speed on/off and let you swap accessories without fuss.
- Glasses and neck comfort: Check temple clearance and consider a small padded neck section or raised rear clamp so the headset rests under the occipital bone without pinching the neck.
Also weigh practical concerns: price, ease of installation, and whether you want an integrated battery. If you play seated for long stretches, a rear battery or external off‑head pack can be worth the added cost; for active, room‑scale play you may prefer a lighter strap without a heavy rear pack.
Best third-party straps for Quest 2: top picks and price ranges
Several brands balance cost and comfort well. Here are categories and what you can expect to pay:
- KIWI Design: Offers halo and battery straps. Standard Elite‑style shells typically fall in the $25–35 range; Pro variants with extra padding or battery options climb to $40–50.
- AMVR: Known for practical, budget‑minded shells and bands priced around $18–28. Some battery‑enabled AMVR models push into the $45–60 range.
- BOBO VR and similar brands: Provide alternative mount styles and foam options often in the $15–40 band.
- VR Cover and accessory makers: Focus on face pads, silicone covers, and washable fabrics ($10–25) that pair with most third‑party straps to improve hygiene and comfort.
Rough price bands to expect: budget picks under $25, solid mid‑range options $25–45, and premium or battery‑integrated straps $60–80. If you want a battery, budget another $20–60 depending on capacity and mounting style.
Quest 2 comfort strap vs Elite Strap: comparison, pros, and fit tips
The official Elite Strap lends sturdy rear support and a rigid feel; it’s reliable for stability but often criticized for minimal padding and a heavier profile without a balanced rear battery. Third‑party straps take two different tacks: some add plush padding and breathable materials to reduce hot spots, while others use lighter frames and rear counterweights to improve balance.
Which to choose depends on use case:
- Casual gaming or short sessions: a lightweight third‑party band with modest padding will do.
- Marathon sessions or seated experiences: choose a strap with strong rear support or an integrated battery to counterfront weight; breathable padding matters more here.
Fit tips to get the best out of any strap:
- Start with the top strap slightly higher to lift pressure off the brow.
- Seat the rear clamp under the occipital bone so it supports rather than pinches.
- Tighten side straps gradually: secure the headset with minimal wobble, then test movement and adjust until forward tilt disappears.
Step-by-step install and adjustment guide for Quest 2 straps
- Power down the headset and remove the face cushion if needed to access attachment points.
- Clean the mounting areas with a microfiber cloth and 70% isopropyl alcohol to remove oils and dust — this helps new connectors seat firmly.
- Release the stock strap from side clips or quick‑release pivots, following your replacement kit’s instructions.
- Align the new strap to the same mounting points. Seat the top strap first, then snap the side connections into place until you hear a click.
- Put on the headset and start with the top strap at moderate tension. Tighten side straps evenly until the headset is secure but not pinching.
- Do a light head shake and move your head around. If the front tilts down, raise the rear clamp slightly or loosen the top strap a notch; if it tilts back, reduce rear tension.
- Fine‑tune for lens clearance and minimal gap. Adjust facial interface foam or swap to a deeper nose cutout if needed.
Always recheck after a few minutes of use — padding settles and small readjustments often make the biggest comfort difference.
Glasses wearers: fit tips for Quest 2 straps and long sessions
Glasses change how a strap feels because frames add thickness and pressure points. Small adjustments make a big difference:
- Choose a strap with a wider internal gap or an offset design so the band sits away from temple arms.
- If frames touch the foam, swap to a face pad with a deeper nose cutout or add a thin foam spacer behind the pad to gain 1–2 mm clearance.
- Position the top strap slightly higher on the back of your head so the band rides over your temples, not against them.
- Use anti‑fog wipes or an approved spray and take regular short breaks to reduce lens fogging during extended sessions.
Checking fit with your glasses on is essential — do a quick breath and lens‑fog test before diving into a long play session.
Weight, balance, and battery considerations for lighter Quest 2 wear
A lighter strap will reduce overall mass but can move your headset’s center of gravity forward, making the front feel heavier. The solution is not always more padding but smarter placement of mass:
- Mount batteries or counterweights high and low on the rear of the strap rather than at the top center to counterbalance the front without swinging.
- Consider off‑head battery packs or belt‑mounted packs for very long sessions to keep weight off your skull entirely.
- Test balance in neutral posture: look straight ahead, then tilt up/down and side to side. If the headset pulls forward, shift rear mass lower or increase rear clamp support.
Small adjustments — moving a pack down a few centimeters or changing strap tension — often fix balance problems faster than buying another strap.
Maintenance, compatibility, and cross‑compatibility notes
Basic care extends strap life: wipe straps and foam with a damp cloth and mild soap, remove detachable pads for washing when possible, and replace worn padding every 6–12 months. Keep spare clips or small screws in a container so you can repair mounts quickly.
On compatibility: third‑party Quest 2 straps are built for Quest 2 anchor points. They generally won’t fit Apple Vision Pro or other headsets without an adapter, and adapters can be hit‑or‑miss for both fit and warranty. Likewise, wireless adapters and battery add‑ons can alter balance — verify that any accessory is designed for your Quest 2 firmware and mounting geometry before buying.
Finally, keep firmware updated for wireless peripherals, and avoid mixing incompatible power packs that could stress connector points or void warranties.
Next step: pick one mid‑range padded strap with good rear support or a battery option, install it using the steps above, and test for 30–60 minutes with your usual glasses and play style. Small tweaks to strap height and rear position will usually get you to comfortable, balanced all‑day wear.
Powered by Trafficontent


Compartir:
How to choose a Quest 2 head strap: stock versus third-party for diverse use cases
How to Pick an Oculus Quest 2 Strap for Glasses Wearers: Comfort Without Pressure