Keeping your Vision Pro and its protective case clean isn’t just about looks—it's about preserving fit, function, and hygiene. A considered maintenance routine reduces wear, prevents odors, and stretches the time between replacements. This guide walks you through material‑specific cleaning, daily habits, safe tools and cleaners, drying and storage strategy, and when to inspect or replace components. ⏱️ 14-min read
Read on for clear, tested steps you can adopt today: quick daily care that takes 30 seconds, deep‑clean techniques for silicone, polycarbonate/TPU and fabrics, stain and odor fixes, and practical tips to protect the built‑in stand and hardware while you work.
Assessing Case Material and Cleaning Compatibility
The first rule of caring for any Vision Pro protective case is simple: know your materials. Cases come in silicone, polycarbonate (hard shell), TPU (thermoplastic polyurethane), woven fabrics, and often mixed constructions with foam or padding. Each material responds differently to water, detergents, alcohols and solvents—so the way you clean should match what the case is made of.
Start by locating the manufacturer’s care guidance. Check the case packaging, product page, or included datasheet for explicit instructions or prohibitions; many makers will say whether immersion is allowed or if only dry wiping is recommended. If official guidance is unavailable, inspect the case closely: look for printed fabrics, heat‑set inks, glued seams or padded liners. These features will often limit liquid exposure and point to spot‑cleaning only.
When you can’t find clear manufacturer advice, use a compatibility map in your head: silicone tolerates mild soap and water well; hard polycarbonate and TPU handle gentle detergents and brief alcohol wipes (used sparingly); fabric panels require less water and more targeted, gentle stain treatment. Avoid high‑strength solvents (acetone, high‑ppm alcohols) and aggressive abrasives on any finish—these can strip coatings, fade dyes, and make seams fail.
Before any full cleaning pass, perform a small test on an inconspicuous corner—especially on dyed fabrics, printed areas, and coated plastics. Look for discoloration, softening, blooming (whitish residue), or textural change. If you see negative effects, stop and switch to a dryer, more conservative method.
Daily Cleaning Routine for Quick Hygiene
Daily maintenance is the easiest way to keep grime from setting in. This isn’t deep cleaning; it’s a fast habit that prevents oils, dust and sweat from migrating into seams, textured grips, and padding. Think of it as preemptive care: a 30–60 second wipe that preserves the case’s look and function.
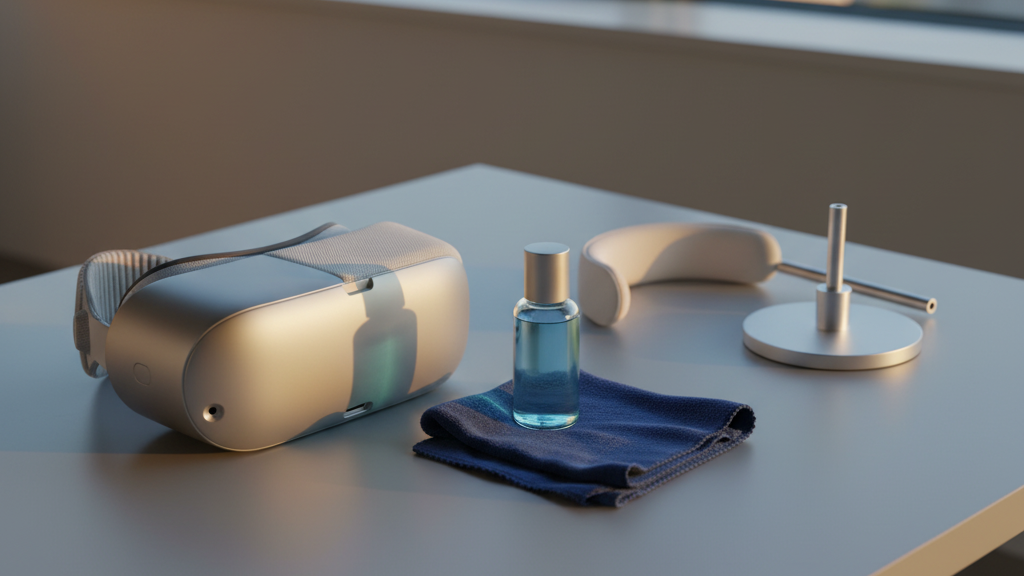
What you need: a lint‑free microfiber cloth and an electronics‑safe, alcohol‑free wipe or a small spray of mild, pH‑balanced soap solution (a few drops dish soap in a cup of warm water). Keep materials handy near your charging area or wherever you typically remove the headset.
- Remove the case from the Vision Pro before starting—don’t clean the case while it’s still fitted to the device.
- Lightly dampen the microfiber cloth; never spray liquid directly onto the case. Wring the cloth so it’s only slightly moist.
- Wipe high‑contact zones: handles, edges, the screen surround, and the stand contact points. Use gentle, even strokes—no scrubbing.
- Finish with a dry microfiber pass to pick up residual moisture and lint. Ensure creases and seams are dry before reassembly.
For quick sanitizing after public use, an alcohol‑free disinfectant wipe is preferable. If you must use isopropyl alcohol, keep it at 70% or less and limit contact to tough‑to‑clean hard plastics only; avoid silicone, fabric or foam. The key on daily routines is frequency and gentleness: regular light cleaning prevents the need for aggressive measures later.
Deep Cleaning Techniques by Material Type
Deep cleaning is for scheduled maintenance or when the case shows visible grime, transfer stains from clothing, or persistent odors. Disassemble only what the manufacturer allows; forcing components apart risks warping, torn seams or broken clips. Below are step‑by‑step approaches for common materials used in Vision Pro protective cases.
Silicone
- If detachable, remove silicone panels from the frame by easing with a plastic card—don’t pull hard or stretch seals.
- Soak silicone parts in warm water with a few drops of mild dish soap for 5–10 minutes.
- Use a soft brush or microfiber to work into creases and hinge areas. Avoid abrasive scouring pads.
- Rinse thoroughly to remove soap, pat with a lint‑free towel and air‑dry completely away from direct sun or heat.
- Reassemble when fully dry; test fit and hinge motion before reuse.
Polycarbonate and TPU (Hard Shells)
- Wipe with a microfiber cloth dampened in warm, soapy water. For stubborn smudges, a cloth lightly moistened with 70% isopropyl alcohol can be used sparingly on rigid plastics.
- Avoid prolonged soaking; TPU can trap water in recessed seams and soften glue lines.
- Dry thoroughly with a microfiber cloth and allow additional air‑dry time to ensure internal cavities are moisture‑free.
Fabric and Padded Liners
- Spot‑clean with a gentle, color‑safe detergent. Apply detergent to the cloth—not onto the fabric—and dab stains; don’t saturate padding or seam areas.
- For removable liners, follow manufacturer laundering instructions; many are hand‑wash only and should be reshaped and air‑dried.
- For persistent odors, use baking soda or an enzyme cleaner designed for fabrics (test first).
Across all materials, the reassembly rule is the same: ensure absolute dryness, confirm clips and seals are undamaged, and test mechanical parts for smooth operation. If any component feels brittle, distorted, or loose, stop and consider repair or replacement rather than forcing it back into service.
Stain, Odor, and Moisture Management
Stains and odors often signal underlying issues—sweat and oils can discolor silicones, inks from clothing can transfer to light fabrics, and trapped moisture fosters musty smells. Tackle these with materials‑appropriate methods to remove the cause without causing collateral damage.
Stains: identify the source. For oil or skin‑based stains on plastic or silicone, a mild detergent soak and gentle brushing usually suffices. For ink or dye transfer on plastics, a lightly dampened cloth with 70% isopropyl alcohol can lift marks—test first in a hidden spot. For fabric panels, use a color‑safe spot remover and dab gently; rubbing spreads pigments and can fray fibers. Avoid bleach on colored fabrics and any solvent that the manufacturer specifically forbids.
Odors: odors live where oils meet fabric. Baking soda is a low‑risk, effective option—sprinkle on fabric sections, leave overnight in a breathable area, then vacuum or brush off. Activated charcoal sachets are excellent for storage: place one near the case to absorb volatile odors. Enzyme cleaners specifically formulated for gear remove the biological source (sweat, oils) and are preferable to masking fragrances.
Moisture: prevent permanent damage by ensuring the case dries fully before storage or reassembly. For damp interiors, prop the case open on a clean, elevated rack in a well‑ventilated room. Turn it periodically so hidden cavities can release trapped moisture. Never use direct heat (hairdryers, heaters) or prolonged sunlight—these warp plastics and fade dyes.
If persistent mold or a strong odor remains after cleaning, it may mean padding or adhesives are compromised. In that case, replacement of the affected component is usually safer than trying increasingly harsh chemicals that could wreck the case.
Safe Tools, Cleaners, and First‑Test Guidance
Choosing the right tools and cleaners is where most long‑term damage happens or is prevented. The right brush lifts grit without scratching; the wrong solvent dissolves coatings. Keep your toolbox lean and material‑sensitive.
- Microfiber cloths: the workhorse—lint‑free, soft and safe on all finishes. Keep several clean cloths and rotate them so you’re not spreading grime.
- Soft‑bristled brushes: an electronics or makeup brush works well for seams, textured grips and around logos. Replace when bristles splay.
- Lint rollers or a small vacuum with a soft brush attachment are useful for fabric fibers and dust in cavities.
- Mild, pH‑balanced soaps: small amounts in warm water are effective for general cleaning. Avoid detergents with strong dyes or perfume.
- 70% isopropyl alcohol: use sparingly and only on hard plastics that tolerate it. Do not use on silicone, foam, or delicate fabric trims.
- Avoid acetone, nail polish remover, high‑ppm solvents, bleach, and abrasive scouring pads. These can discolor, soften, or crack materials.
Always perform a first‑test: pick an inconspicuous area—inside flap, underside of a strap, or along the edge—and apply your chosen cleaner with a microfiber. Wait a few minutes and inspect for color change, softening or residue. If the sample passes, you can proceed. If you see any adverse effect, stop and choose a gentler method.
Label and store your cleaners separately and keep isopropyl alcohol capped and away from sunlight. When using any liquid, apply it to the cloth—not to the case—and wring the cloth well to avoid over‑moistening seams, welded joints, or glued pads.
Drying, Storage, and Humidity Considerations
How you dry and store a cleaned Vision Pro case determines whether your work endures. Proper drying eliminates trapped moisture; proper storage reduces dust, UV exposure and humidity‑related degradation.
Drying protocol: after cleaning, blot excess moisture with a microfiber towel—don’t rub. Place the case on a clean, lint‑free surface in a well‑ventilated spot, ideally elevated so air can circulate underneath. Turn the case every few hours so seams and chambers release trapped dampness. If you used only a light damp cloth for daily cleaning, a few minutes of air drying is usually enough. For deeper cleanings or soaked components, allow at least 24 hours of shaded, room‑temperature drying until the inside feels bone‑dry.
Avoid heat: never use hairdryers, space heaters, ovens, or direct sunlight to speed drying. Heat softens polymers and can warp shells or shrink fabric. UV exposure also accelerates discoloration and embrittlement of plastics over time.
Storage: store the case in a breathable pouch or its original box to keep dust off while allowing moisture exchange. Add a small silica gel desiccant if you live in a humid climate—replace the packet when it becomes saturated. Keep the stored case away from radiators, windows, and chemical storage (cleaning agents can off‑gas and affect plastics).
Humidity control: aim for a relative humidity between 40–60%. If you live in a high‑humidity area, use a dehumidifier in the room where you store sensitive gear. A hygrometer is an inexpensive tool that helps you spot problematic moisture levels before they cause mildew or adhesive failure.
Protecting Built‑In Stand and Hardware During Cleaning
The built‑in stand and hardware on Vision Pro cases include hinges, retractable limbs and small fasteners that require special care. Rough handling during cleaning—forcing joints, over‑tightening screws, or allowing liquid into pivot assemblies—can create alignment issues or premature wear.
Preparation: before cleaning, collapse or lock the stand in its neutral position if the design permits—it reduces accidental bending. If your case includes removable stand limbs or hardware covers, remove and clean them separately. Use a soft sleeve or folded microfiber to shield exposed screw heads and hinge bearings while you wipe surrounding surfaces.
Cleaning technique: use a soft brush to remove dust and grit from hinge gaps; then wipe with a slightly damp microfiber, following the hinge lines so water runs away from bearings and fastener heads. Avoid soaking around pivot points—liquid will travel into bearing areas and glue joints. If a hinge is particularly dirty, a precision cotton swab dampened with a tiny amount of mild soap solution can be used to lift grime, followed by a dry swab to remove moisture.
Mechanical inspection: while cleaning, check for play or looseness. Small screws can loosen over time—tighten only if you’re comfortable and use the correct tool and torque. Over‑tightening is worse than slightly loose hardware: it can strip threads or deform plastics. If a fastener seems compromised, replace it with the manufacturer’s part or consult service rather than improvising with a random screw.
Storage and transport: when storing or transporting, lock or secure moving parts where possible. Use protective inserts or foam to prevent limbs from flopping and stressing joints. During deep cleans, place small hardware pieces on a magnetic mat or marked tray so reassembly is straightforward.
Inspection and Replacement Timing
Routine inspection is how you catch small problems before they become failures. Establish simple check points and a sensible replacement cadence based on usage and visible wear.
Monthly checklist:
- Look for hairline cracks near stress points and around seam lines.
- Check the integrity of seals and glued edges—softening or separation indicates adhesive failure.
- Operate hinges and stands through their full range; feel for roughness, binding, or unusual play.
- Inspect fabric panels for thinning, fraying, or permanent stains that don’t respond to cleaning.
- Verify zippers, snaps and magnetic closures work smoothly and hold securely.
Replacement triggers: replace parts or the whole case if you find cracked shells, compressed or degraded padding that no longer cushions the device, loose fits that allow the Vision Pro to move inside the case, or persistent odors that survive multiple cleanings. For many users, 12–24 months is a practical replacement window—sooner if your case sees heavy use, frequent outdoor exposure, or salt‑air environments.
Usage‑based approach: rather than strictly following a calendar, tie a replacement decision to changes in performance. If the case no longer absorbs shocks as before, if fasteners wear loose, or if the fit slips, it’s time. The longevity gains described by other owners who kept a steady cleaning cadence show fewer repairs and a typical replacement frequency reduced by about 40% compared with neglected gear, a useful benchmark when balancing cost and protection.
Step‑by‑Step Practical Cleaning Plan
Here’s a compact, repeatable cleaning plan you can follow for a full maintenance session. It’s designed to be material‑aware, protective of hardware, and thorough without risking damage.
- Prepare your workspace: clean flat surface, good light, a non‑slip mat and a small tray for screws or parts.
- Gather tools: multiple microfiber cloths, a soft brush, mild dish soap, a small bowl of warm water, 70% isopropyl alcohol (optional, limited to rigid plastics), cotton swabs, and a dry towel.
- Remove the case from the Vision Pro and detach any removable limbs, liners, or magnetic covers per the manufacturer instructions.
- Perform a quick test: in an inconspicuous spot, test your chosen cleaner for staining or coating changes; proceed only if the test is clean.
- Daily or light clean: wipe all surfaces with a slightly damp microfiber. Use a dry cloth to finish.
- Deep clean (periodic): for silicone, soak parts 5–10 minutes in warm, soapy water; for hard shells, wipe with soapy water and sparingly use 70% isopropyl on tough marks; for fabric, spot‑treat and air‑dry. Brush seams and hinge areas gently.
- Rinse or remove soap with a clean, damp cloth only where safe. Pat dry and allow complete air‑drying (at least overnight for soaked parts).
- Reassemble carefully: ensure no moisture remains, align parts and confirm clips/hinges engage without force.
- Final checks: operate moving parts, inspect seals and test fit on the Vision Pro before returning it to regular use.
Keep a cleaning log or calendar reminder for deeper sessions—monthly for heavy users, quarterly for moderate use. Small, consistent actions are what prevent larger problems down the road.
Real‑World Case: Longevity Gains from Routine Care
Practical experience backs the care routine: owners who followed a monthly deep clean and daily quick wipe showed markedly longer service life for their Vision Pro cases. One user reported only faint yellowing at exposed edges after 12 months and no cracks, while tactile grip and snug fit remained intact. The routine was routine: no solvents, no heat, and minimal mechanical stress during cleaning. The attention was focused on keeping oils off seams and ensuring full dryness before reassembly.
Quantitatively, consistent maintenance translated to half as many repairs over a year relative to neglected counterparts and about a 40% reduction in replacement frequency. Those savings came not from miracle cleaners, but from sticking to a gentle regimen: mild soap, soft brushes, targeted alcohol use on hard plastic only, and patient air‑drying. This is a useful demonstration that proper care avoids the cumulative damage caused by ad‑hoc, aggressive cleaning attempts.
Lessons learned from real users:
- Test everything first and use the gentlest effective method.
- Pay attention to seams and hinge areas—dirt hides there and accelerates wear.
- Store thoughtfully with a silica sachet in humid climates.
- Replace components proactively when cushioning or fit degrades—don’t wait for catastrophic failure.
Adopting these practices will keep your Vision Pro case performing and looking better, longer—reducing downtime, repair headaches and replacement costs.
Next step: take five minutes now—remove your Vision Pro case, inspect seams and moving parts, and perform a quick microfiber wipe. If anything looks questionable, schedule a deeper clean this week and place a silica packet in your storage pouch. Small, regular habits are the single best investment in prolonging both hygiene and protection.









Share:
Exploring Gaming with Apple Vision Pro: Comfort Features You Can’t Ignore
Kickstarter Spotlight: Comfort-First VR Projects That Prioritize Balance and Easy Use