

Comfort, Stability, and Sweat: A Test‑Driven Guide to Choosing Quest 2 Straps for Longer Sessions
If you use a Meta Quest 2 for more than a handful of rounds, the strap you wear matters as much as the games you play. A great strap reduces forehead pressure, prevents the headset from drifting, and helps manage heat and moisture so you can stay immersed without neck strain or constant readjustments. ⏱️ 10-min read
This guide distills hands‑on testing and practical adjustments into a clear path: why strap design influences long sessions, how official and third‑party options compare, a repeatable test protocol, a step‑by‑step install for the Comfort Strap, fit fine‑tuning, performance benchmarks for weight and sweat, routine care, and scenario‑based picks so you can choose the right strap for your play style.
Why strap design matters for long sessions
Strap design is about three mechanical realities: where the weight sits, how many contact points share that weight, and what the materials do to your skin over time. A headset is front‑heavy by design — the display, lenses, and electronics sit in front of your face — so the strap’s job is to push some of that load up onto the crown and back of your head to prevent the front from pulling downward and digging into your brow.
Good designs distribute load across the crown, temples, and rear base of the skull. That reduces common pressure points at the forehead edge, temples, and skull base. Crowns straps, wider rear braces, and side supports spread the force so you can keep the headset level without excessive clamping. Material choices matter, too: breathable, moisture‑wicking fabrics and ventilated foams cut heat buildup and keep pads from turning into damp sponges after an hour of active play.
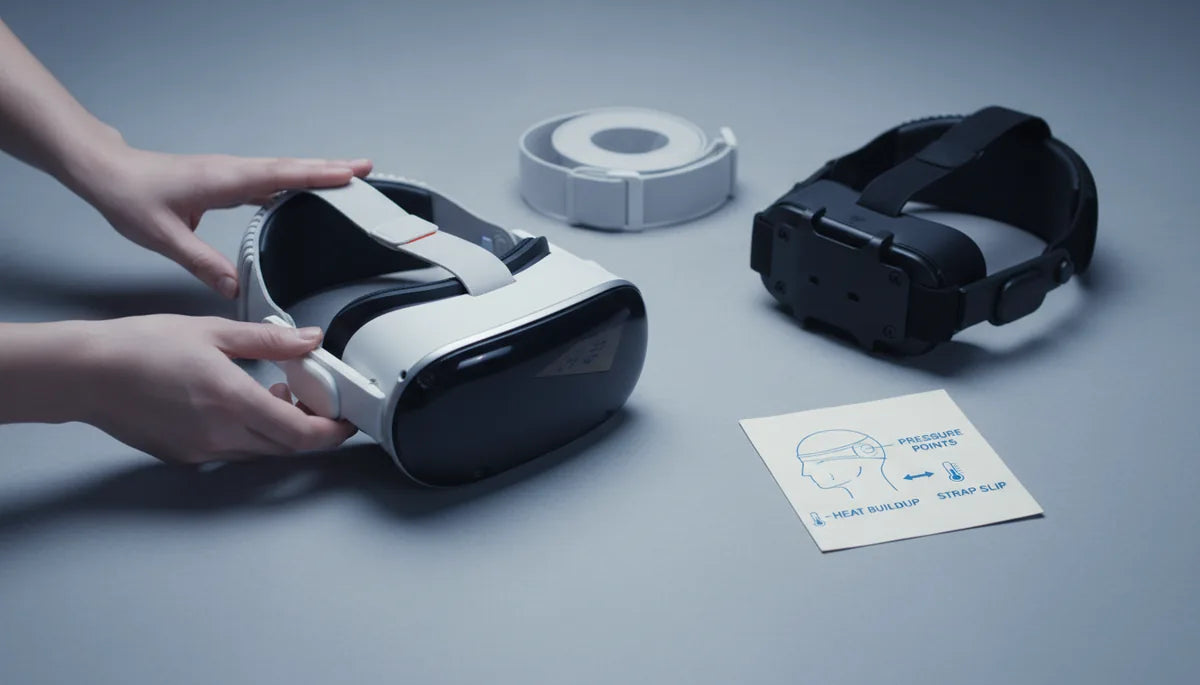
When testing for long sessions, track three metrics: pressure mapping (where the headset presses), heat and moisture accumulation (how quickly materials get wet and slippery), and strap slip or movement over time (how often you need to retighten). Together they explain why some straps feel fine for ten minutes but become painful after forty.
Official Quest 2 straps vs. popular third‑party options
Meta offers a range of options: the stock soft strap, the Comfort Strap, the Elite Strap, and the Elite Strap with Battery. The Elite Strap uses a rigid backplate and a dial wheel (rail system) to fine‑tune tension. That rail plus a crown support shifts weight up and back for noticeably better balance than the stock strap. The Elite with Battery adds playtime at the cost of extra rear mass — useful for long sessions but potentially altering balance, especially during quick head movements.
Third‑party makers respond to these tradeoffs with modularity, different padding schemes, and lighter frames. Kiwi Design offers several configurations, often with breathable foam, adjustable Velcro or sliders, and optional battery packs. BoboVR M2 is built around a sturdy frame and removable top strap with a broad rear counterweight—good for stability and easy replacement of worn parts. VRCover focuses on plush cushion covers and removable, washable materials that help with sweat management and hygiene. Other options like GOMRVR emphasize thicker padding and extended rear braces to reduce temple pressure.
In practice: the Elite Strap gives the clearest balance improvement with a clean install and reliable dial tension. Third‑party straps often win on modular comfort (replaceable cushions, breathable fabrics) and value. But watch for tradeoffs: rigid frames can be heavier, and rear batteries can produce a forward bias if not centered or tightened properly.
Test setup for long‑session wear
A consistent test protocol is the only way to judge straps fairly. Our approach uses multi‑hour sessions (2–4 hours), a small panel of testers (3–5 people), and alternating activity types: active gameplay (room‑scale, quick turns, simulated combat) and passive viewing (360° videos, seated experiences). We run sessions across several days to capture how a strap performs fresh vs. fatigued.
Control the environment: same room temperature and humidity, same seating or standing posture, and standardized breaks to avoid carryover effects. Record qualitative impressions (comfort scores, notes on pressure and red marks) and objective data. Head motion is logged from the headset’s sensors as average yaw, pitch, and roll rates plus peak excursions per minute to quantify stability during rapid movement. Pressure is measured with a thin sensor array placed at the brow and temple regions to see how load shifts across the session. Sweat is tracked using skin‑moisture indicators under the strap and periodic checks of strap moisture absorption and surface slickness.
Practical tests include: a 60‑minute baseline session, a 20‑minute light jog-in-place and head‑turn test, and a 90‑minute mixed session. Between strap swaps we let testers rest and the headset dry, then refit from scratch. These steps reduce bias and reveal how a strap behaves under realistic, prolonged use.
Step‑by‑step install for the Quest 2 Comfort Strap
Installing the Comfort Strap correctly sets you up for optimal balance and easy fine‑tuning. Work on a clean, flat surface and keep a microfiber cloth handy. Power off the headset before you start.
- Remove the stock soft strap: press the release tabs on each side arm using even pressure and slide the strap clear. Avoid prying with tools to prevent cracking the plastic slots.
- Inspect and clean: wipe the mounting slots and surrounding plastic with a dry microfiber cloth to remove dust and fibers.
- Orient the Comfort Strap: identify left/right side arms and the top strap. Make sure the padding faces inward toward your face and the adjustment wheel or Velcro faces outward for access.
- Seat the side arms: insert each arm into its slot until you hear or feel a click. The arm should sit flush with no gaps. Wiggle gently to ensure it’s locked.
- Attach the top strap: connect the top band to the rear connectors and lay it flat across the crown. Avoid twists and ensure padding lies smoothly against the head.
- Initial adjustment: with the headset on, set the dial or Velcro to a loose position. Check glasses clearance by wearing your glasses and adjusting the cushion spacing. Recenter the display so the image is level and the IPD feels correct.
- Quick checks: look up/down and side‑to‑side; the headset should stay aligned without sliding. If it shifts, recheck the side arm seating and dial tension.
These steps make later fine‑tuning straightforward and reduce the chance of pressure hotspots during longer sessions.
Fine‑tuning fit: height, length, and tightening
Finding the “sweet spot” is a three‑step process: set vertical position, balance side tension, then lock in overall tightness. Small changes matter—adjust in quarter‑inch increments and test between moves.
Start with the top strap height. Position it so the headset sits just behind your hairline rather than forced onto the crown. Raising the top strap shifts weight up and back, countering forward tilt and reducing eyebrow pressure. A top strap that’s too low pushes the headset forward and increases eye strain; too high can feel unstable or produce a halo pressure on the crown.
Next, work the side dials or Velcro. The goal is even pressure on both sides—tighten until the headset resists movement during brisk head turns but stops short of leaving deep impressions on the skin. If you have a dial system, rotate in small increments and test; for Velcro, adjust one side slightly, then the other to balance tension.
Finally, tune overall tightness. The headset should be snug enough to stay put during movement yet loose enough that you can slip a finger between the pad and your forehead without discomfort. Glasses wearers should prioritize extra forehead clearance and a slightly higher top strap to avoid temple pinch and lens contact. If you get fogging or lens misalignment, back off and re‑center: balanced vertical positioning often fixes optical complaints faster than brute tightening.
Performance benchmarks: weight distribution and sweat management
When evaluating straps in extended sessions, two performance axes dominate: how the strap redistributes weight and how the materials handle moisture. Weight that sits on the crown and spreads across a wide rear brace reduces the perception of front‑heavy pull and lowers sustained pressure on the face. In our tests, harness or halo‑style designs with a rigid backplate and crown support consistently produced fewer forehead and temple complaints than the stock soft strap.
Stability checks are practical: do quick 45‑degree head turns, jog on the spot, and mimic combat‑style head snaps. Measure whether the lenses shift or if you need to readjust. Straps that required fewer retightens and showed lower peak yaw/pitch excursions earned higher stability scores. For some rear‑weighted setups (especially those with battery packs), watch for a slight forward bias during sudden starts if the battery isn’t precisely centered.
Sweat management hinges on foam density and fabric weave. Dense foam cushions absorb sweat and can feel slick and heavy after an hour; breathable, open‑weave fabrics with moisture‑wicking liners let air circulate and dry faster between breaks. We tracked sweat with skin‑moisture indicators and by checking strap moisture content over time. The highest‑ranked straps combined a ventilated outer cover with replaceable, washable pads. For intense sessions, prioritize removable covers and quick‑drying materials—comfort degrades faster from sweat than from weight alone.
Care, cleaning, and longevity
Keeping a strap fresh preserves comfort and extends life. Fabric and foam parts are best hand‑washed with mild soap and cold water, then laid flat to dry away from direct sun. If you opt for machine washing, use a gentle cycle and a mesh laundry bag; avoid tumble drying or high heat, which can warp plastics and shrink foams.
Plastic or rigid frame components are easily wiped with mild soap and water. For a deeper clean or disinfecting between users, a 70% isopropyl alcohol wipe works well on silicone or hard plastic — just ensure components dry completely before reuse. Remove and air out pads after heavy sessions to prevent mildew and odors. Silicone straps tolerate soap and alcohol, but repeated exposure to harsh chemicals will eventually dry and crack rubber parts.
Store straps loosely coiled or laid flat in a breathable pouch to avoid creases and concentrated wear. Rotate between two straps if you play daily; alternating reduces continuous compression on the same foam sections. Watch for wear indicators: fraying near buckles, thinning foam, compressed cushions that don't rebound, or cracked plastic around attachment points. When you notice persistent discomfort, visible wear, or a strap that no longer holds tension, replace it—comfort lost to worn padding is rarely recoverable.
Choosing the best strap: scenario‑based recommendations
Which strap is best depends on how you use your Quest 2. Below are practical picks based on common cases, with quick pros and cons so you can match a strap to your needs.
- Active gamers / room‑scale play: Pick a rigid halo or harness design with a wide rear counterweight—BoboVR M2 or Kiwi Design variants with a broad rear brace. Pros: stability during quick moves, secure fit; Cons: can be heavier, may trap more heat if padding isn’t ventilated.
- Long movie or seated sessions: Comfort Strap or VRCover plush options. Pros: soft, plush padding and even clamping; Cons: may not be ideal for intense movement and can absorb sweat unless covers are washable.
- Extended battery life needs: Elite Strap with Battery. Pros: adds hours of play, integrates cleanly; Cons: added weight can change balance—tighten and center the pack to avoid forward bias.
- Glasses wearers: Look for straps that raise the headset and offer a higher forehead clearance—Elite Strap or third‑party straps offering adjustable top band height. Pros: less temple pinch, better eyewear clearance; Cons: some bulky rear braces can catch on larger frames.
- Budget upgrades: Basic Kiwi Design or GOMRVR models. Pros: affordability and better cushioning than stock; Cons: variable materials quality—check for replaceable pads.
- Hygiene and shared headsets: VRCover and any strap with removable, washable covers. Pros: easy to clean and keep fresh; Cons: may be less rigid for high‑intensity play.
Short list of top picks by name: Elite Strap (best balance and integrated fit), Elite Strap with Battery (best for extended playtime), Kiwi Design (best value and modularity), BoboVR M2 (best stability for active play), VRCover (best hygiene and plush comfort). Weigh the tradeoffs between weight, adjustability, and fabric breathability when deciding.
Next step: pick one strap to test based on your primary use case, follow the install and fine‑tuning steps above, and run a 90–120 minute session using the test protocol here. Track comfort, retightens required, and sweat buildup — real data over time will tell you if the upgrade is worth it for your routine.


Share:
Ergonomic Temples and Pressure Points: How to reduce VR headset fatigue
Comparing ergonomic pressure: comfort strap versus standard strap on Quest