

Dial in Quest 2 Comfort: Tune Strap Fit, Cushioning, and Weight Distribution for Marathon VR Sessions
If you love long VR sessions but end them with sore temples, a numb forehead, or constant readjustments, the problem is rarely the headset alone—it's how the Quest 2 sits on your head. This guide walks Quest 2 owners through a practical, shot-by-shot approach to reduce hotspots and fatigue by tuning strap fit, upgrading cushions, and balancing weight. Expect step-by-step checks, realistic targets, and tested swaps (official and third‑party) so your next 2–3 hour session feels like one continuous, comfortable experience. ⏱️ 12-min read
Think of comfort as a system: strap geometry, padding, and mass distribution interact. I’ll help you map where the system fails, choose the right hardware (Elite Strap, halo, or aftermarket), install it cleanly, and maintain a routine that keeps comfort consistent over time. Small micro-adjustments between sessions—not dramatic one-off fixes—are the reliable path to marathon-ready fit.
Baseline assessment and comfort goals
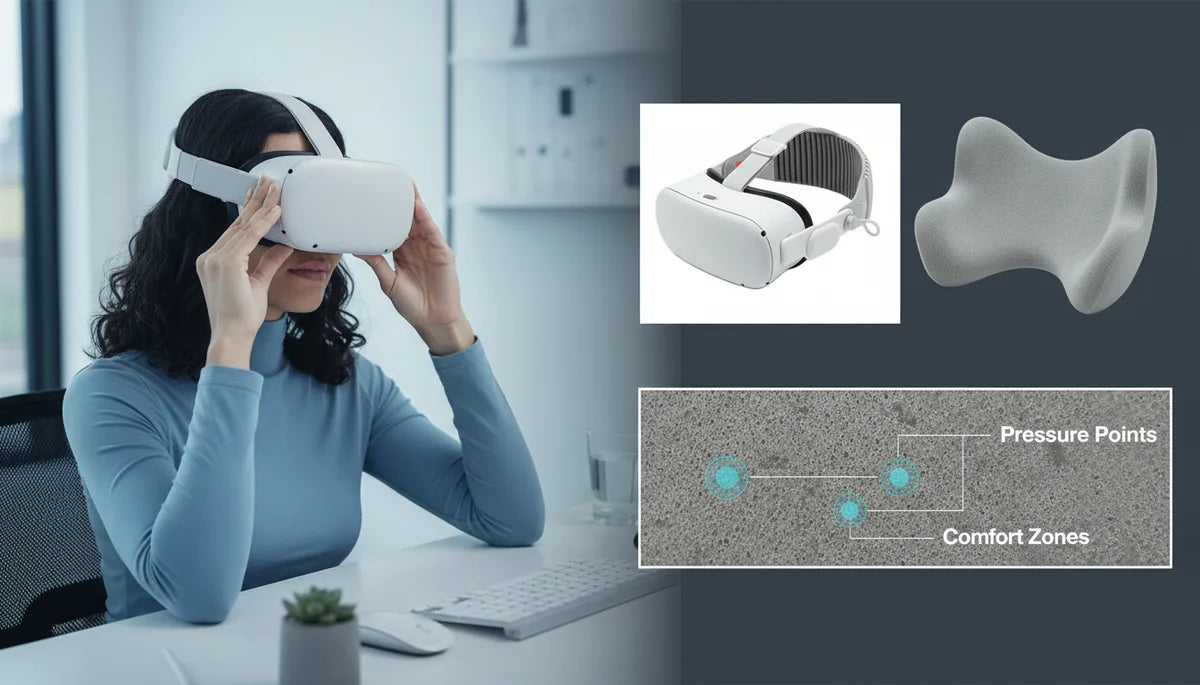
Start by treating your first session like a short diagnostic run. Put the Quest 2 on for 10–20 minutes and take notes: where does the strap dig in? Do you feel pressure across the forehead, at the temples, under the cheekbones, or through the nose? Common hotspots are the forehead crown (where the top strap/foam meets skin), the temple edges where side straps bite, and cheek seals where the facial interface presses. Map these locations mentally or on paper so you can target solutions precisely.
Time how long before discomfort appears and what it feels like—numbness, tingling, or localized warmth. If you notice pain within 15–20 minutes, you likely need immediate redistribution of contact and better padding. If discomfort appears after an hour, focus on balance and sustained pressure management. Convert those observations into concrete comfort goals: examples include “no forehead pain for two hours,” “no more than one small readjustment every 30 minutes,” or “no cheek pinch after 90 minutes.”
Include a personal tolerance window in your goals—how long you’re willing to tolerate minor adjustments during play. It helps to benchmark the stock strap’s performance: most owners find the default Quest 2 strap is lightweight and functional but concentrates weight on a few contact points and lacks fine-tuning. Use that baseline to judge upgrades: does the Elite Strap or a third‑party cushion actually extend your no‑pain time from 20 minutes to 2 hours? If not, you’ve identified the specific area—padding, crown support, or rear counterweight—that still needs improvement.
Setting measurable targets keeps experimentation productive. Rather than chasing “more comfort,” you’ll iterate until the headset meets the goals you actually feel—fewer hotspots, stable balance, and minimal adjustments—session after session.
Strap options: when to choose Elite Strap, third-party, or a hybrid
Choosing between the official Elite Strap, a third‑party option, or a hybrid approach depends on what’s causing your discomfort. The Elite Strap family is designed to improve rear support and offer a firmer, more stable connection than the stock webbing. The Elite Strap with Battery adds mass behind the head—delivering both longer battery life and an effective counterweight. That dual-purpose design is a fast, tidy solution if you want fewer modifications and longer play time without a dangling power bank.
Third‑party options span halo-style bands (BoboVR M2 and similar), comfort-focused straps (Kiwi Design), and modular foam-based systems. Halo straps use a ring behind the head to shift load away from the forehead; they often give the best immediate relief from brow fatigue because they distribute support around the skull rather than pinning weight to the face. Comfort-focused straps emphasize plush memory foam or neoprene and intuitive adjusters that suit varied head shapes. Look for sturdy connectors, breathable materials, and a reputation for durability.
Hybrid setups—mixing an Elite Strap with a third‑party facial interface or adding a small rear-mounted battery—are common for enthusiasts who want the best of both worlds. Compatibility matters: confirm the strap can accept a battery pack, won’t block IPD adjustment, and leaves sufficient clearance for glasses. If you wear glasses, pick straps and facial interfaces explicitly labeled “glasses-friendly” or that have recessed padding to avoid lens contact. Finally, consider weight: a heavier strap with a built-in battery improves balance but raises the total headload, so weigh trade-offs in real terms by trying each option for a controlled session and logging the results against your comfort goals.
Installation basics for beginners
Installing a new strap is simple if you proceed deliberately. Start by reading the manufacturer’s guide—some Elite Strap variants have quick-release features or specific clip orientations. Lay the headset on a soft surface, align the strap’s mounting tabs with the headset’s attachment points, and seat them until you hear or feel a secure click. If a battery module is involved, ensure the cable routing follows the manual to avoid pinching or unexpected tension.
After initial attachment, verify alignment visually and by feel. The headset should sit level: the top of the displays should be parallel to your forehead, and the facial cushion should make even contact around the nose and cheekbones. Don’t fully tighten any strap at first. Instead, follow a staged tightening approach: secure the rear/back band, then set the top/crown strap, then adjust the side straps for symmetry. Test fit after each step and look for binding (hard contact spots), loose loops, or uneven pressure points.
Use this quick checklist during installation:
- Confirm clips are fully engaged and not rotated or misaligned.
- Seat the facial interface flush with the headset; check for gaps that can cause light leaks or uneven contact.
- Tighten incrementally and re-test fit after each adjustment.
- If you wear glasses, insert them before the final tensioning to ensure clearance.
Small issues early—like a misaligned clip or a twisted strap—become larger problems in long sessions. Take five to ten extra minutes during installation to eliminate these issues; it pays off in comfort and stability across hours of use.
Adjusting height and strap tension for even pressure
Properly adjusted crown height and balanced side tension are the foundation of evenly distributed pressure. Start with a fully loosened harness, place the headset on your head, and then follow the prioritized tightening routine: first, raise and secure the top strap so it handles the majority of vertical load; second, tighten side straps evenly to stabilize the headset fore‑to‑aft; third, fine-tune the rear band to center the helmet on your skull.
Set the crown strap so the headset sits level; aim to have the display plane parallel to your face rather than tilted down. This prevents the lenses from pushing forward and reduces the tendency for the device to dig into the forehead. If you have a halo or adjustable height system, use the height increments to move the support point slightly rearward if your forehead is still taking too much load—shifting even 5–10 mm can change contact dynamics substantially.
When tightening side straps, use an alternating approach. Tighten left a little, then right, then left again, checking fit and comfort after each small increment. The straps should angle from the ears toward the crown rather than pulling straight back; this geometry spreads force more evenly over the skull. If you feel a concentrated pinch at the temples, the side straps are likely too snug or improperly angled—loosen them and redistribute tension to the top strap.
Micro-adjustments matter during long sessions. Small tweaks—loosening a side strap by a notch or lifting the crown by a millimeter—can relieve pressure points without losing stability. Make these adjustments during short breaks and track which change relieves which hotspot. Over time, you’ll build a repeatable setup that minimizes mid-session fidgeting.
Cushioning and padding upgrades
The Quest 2’s stock foam face cushion is functional but thin and can trap heat. Upgrading to a thicker, better-shaped facial interface or swapping the strap padding for memory foam or silicone can solve cheek pinches and reduce sweat. Memory foam offers pressure relief by conforming to facial contours, while silicone (or PU leather with ventilation) focuses on easier cleaning and less moisture retention. Choose materials that match your priorities—pressure relief, hygiene, or breathability.
When selecting a replacement cushion, check the geometry carefully. A pad that is too thick can press your face forward, interfering with IPD settings or risking lens contact. Conversely, a shallow cushion might not seal properly, leading to light leaks and uneven pressure. Aim for a thin-but-structured interface that lifts the headset slightly off your cheeks while maintaining a consistent seal around the nose. Some aftermarket pads are designed specifically for the Quest 2 and offer recessed centers to protect glasses and preserve IPD adjustment range.
Installation is often a simple swap using Velcro or clips, but always test for lens proximity and comfort before a long session. For high-sweat users, breathable fabrics and antimicrobial options reduce irritation and odor. Removable covers or washable pads are a practical choice: you can machine-wash a cloth cover, or wipe down silicone faces with a microfiber and mild soap after each session.
Finally, combine cushioning strategies with strap tweaks. A thicker pad without rear counterweight can make a headset feel even more front-heavy. Pair padding upgrades with weight redistribution—either an Elite Strap with Battery or a small rear-mounted counterweight—to maintain a neutral center of gravity.
Weight distribution and long-session strategies
Addressing the Quest 2’s front-heavy nature is crucial for marathon comfort. The headset’s bulk sits forward of your face, creating a levering effect that increases pressure on the forehead and cheeks. The most effective fix is shifting mass rearward so the headset’s center of gravity aligns closer to the back of the skull. A rear-mounted battery is an elegant dual-purpose solution: it adds counterweight while extending playtime.
If you don’t want an official battery module, small counterweights work well. Users have successfully used compact power banks clipped to the rear, automotive adhesive lead weights, coin pouches, or metal washers in a velcro pouch. Start with 50–150 grams and adjust—too little does nothing, too much adds strain. Place the weight centered on the rear strap and test for balance while mimicking typical head movements to ensure it doesn’t shift during play.
Micro-adjustments during long sessions are a simple but underused tactic. Take 1–2 minute breaks every 15–20 minutes to re-center the fit, wipe sweat, and check rear weight position. These brief pauses protect against gradual slippage and let you correct small shifts that otherwise become painful. In addition, use cues like heavy breathing or jaw clenching as indicators you need to loosen the forehead contact slightly.
Real-life examples prove the value of incremental fixes: one user swapped the stock strap for an Elite Strap and clipped a 10,000 mAh power bank to the rear. The shift halved forehead pressure and extended comfortable wear to 2–3 hours. Another favorited a halo strap with a sewn-in foam pad behind the crown—this eliminated temple hotspots while keeping movement stable. Your best long-session strategy will likely be a combination: better strap geometry, targeted cushioning, and a modest counterweight to neutralize the forward pull.
Glasses-friendly setup and clearance
Many Quest 2 owners wear glasses, and improper clearance causes rubbing, lens contact, and discomfort. Start by measuring frame thickness and comparing that to the facial interface depth. If you notice temples pressing on the cushion or the frames hitting the lenses, swap to a recessed or spacer facial interface designed to create extra eye relief. Some aftermarket pads offer cutouts or channels that prevent frame arms from being pinched while maintaining a good seal.
When fitting the headset with glasses, insert them before tightening the straps fully. This ensures the glasses sit naturally in place and that padding doesn’t push them forward. If your frames still contact the lenses, consider thin spacer pads or a slim silicone insert that raises the headset slightly. Be cautious: too much spacing reduces field of view and can worsen light leaks. Test until you find the minimal spacer that removes contact without compromising visual quality.
Another effective trick is using slimmer temple-arm frames or prescription lens inserts designed for the Quest 2. Prescription inserts eliminate the need to wear glasses under the headset entirely and often provide the most comfortable solution for long sessions. If inserts aren’t an option, look for facial interfaces explicitly labeled “glasses-friendly” or with a shallow center profile.
Finally, maintain glasses hygiene. Sweat and oils transfer to frames and cushions, increasing friction and irritation. Clean lenses and temple arms regularly, and choose washable cushion covers or silicone pads for easier maintenance. A small investment in the right pad or insert can turn glasses-wearing sessions from a nuisance into an afterthought.
Maintenance, compatibility, and longevity
Comfort is sustained by maintenance. Sweat, skin oils, and dust degrade cushioning over time and change how the headset contacts your face. Wipe facial pads and strap surfaces after each heavy session with a damp microfiber and mild soap; allow full air drying before reattaching. For foam pads, consider replacing them every 6–12 months if you use the headset regularly—look for visible compression, tears, or odor as replacement cues.
Check compatibility whenever you add accessories. Battery packs, mounts, or 3D‑printed add-ons can alter strap geometry and pressure points. Before committing to gluing or sewing, test temporary mounts with velcro or clips for a few sessions. For DIY counterweights, secure them firmly and insure they cannot shift and produce new hotspots. If you print or buy custom parts, choose durable materials (PETG or ABS) and moderate infill to balance strength and weight.
Plan for upgrade paths: straps that accept future battery modules or accessory clips extend the headset’s usefulness. Brands often release improved cushions and modular bands; keep an eye out for accessories built specifically for the Quest 2 ecosystem. Read user reviews for longevity insights. For example, some foam pads compress rapidly after heavy use, while silicone alternatives resist wear but can feel warmer.
Document your setup. Keep a short record of strap model, cushion type, and counterweight mass. Note the session length you can comfortably sustain. This simple ledger turns trial-and-error into an evidence-based process, so when a new accessory claims to improve comfort, you’ll be equipped to judge it quickly and objectively.
Takeaway: start with a quick comfort audit, set measurable goals, and iterate one variable at a time—strap geometry, padding, then weight. Test each change for a controlled session and log results; your ideal setup will be a tailored combination of parts and micro-adjustments that keeps the Quest 2 balanced and comfortable through marathon play.


Share:
How to choose the right Quest 2 comfort strap for long gaming sessions and heavy use
How to choose a lightweight battery pack for Meta Quest 2 without sacrificing safety