

If you own an Apple Vision Pro and bought the FlitLift (Flit Lift) accessory to improve long‑session comfort, this guide walks you through compatibility checks, a careful installation, fine tuning for balanced pressure, and troubleshooting so you get secure, stable wear without harming fit or tracking. ⏱️ 6-min read
Confirm compatibility and inspect parts
Before you start, verify the FlitLift kit is the Vision Pro‑specific version. Check the product page, the packaging label, and any model designation in the manual to ensure the mount matches your Vision Pro hardware. Using the wrong bracket can stress the optical housing or interfere with sensors.
Open the box and lay out every component on a clean surface. Compare parts to the manufacturer checklist: bracket(s), screws or clips, straps or tension lines, padding pieces, and any small tools provided. If anything is missing, contact FlitLift support before proceeding—don’t improvise with non‑OEM screws.
Prepare your workspace and tools
Create a calm, well‑lit workspace on a flat surface. Place a soft towel or microfiber cloth down to protect lenses and the headset finish. Good lighting makes it easier to align small clips and spot sensor placements.
- Gather tools: microfiber cloth, small Phillips screwdriver (if required), plastic‑safe isopropyl wipes, and a soft brush or compressed air for dust removal.
- Power down the Vision Pro and set the headset on the protected surface. Remove any loose accessories (third‑party pads, covers) so they don’t get in the way.
Pre-install safety steps for the Vision Pro
Safety first: power off the headset completely and place the lens cover on if you have it. Handle the unit by the plastic housing and headband—avoid placing pressure on the glass or camera modules. If you have nitrile or lint‑free gloves, wear them to keep oils off lenses and plastic.
Follow Apple’s handling guidance: don’t twist the display, avoid sharp torque on connectors, and keep liquids away. If the headset was recently used, let it cool to body temperature before working on mounts or adhesives.
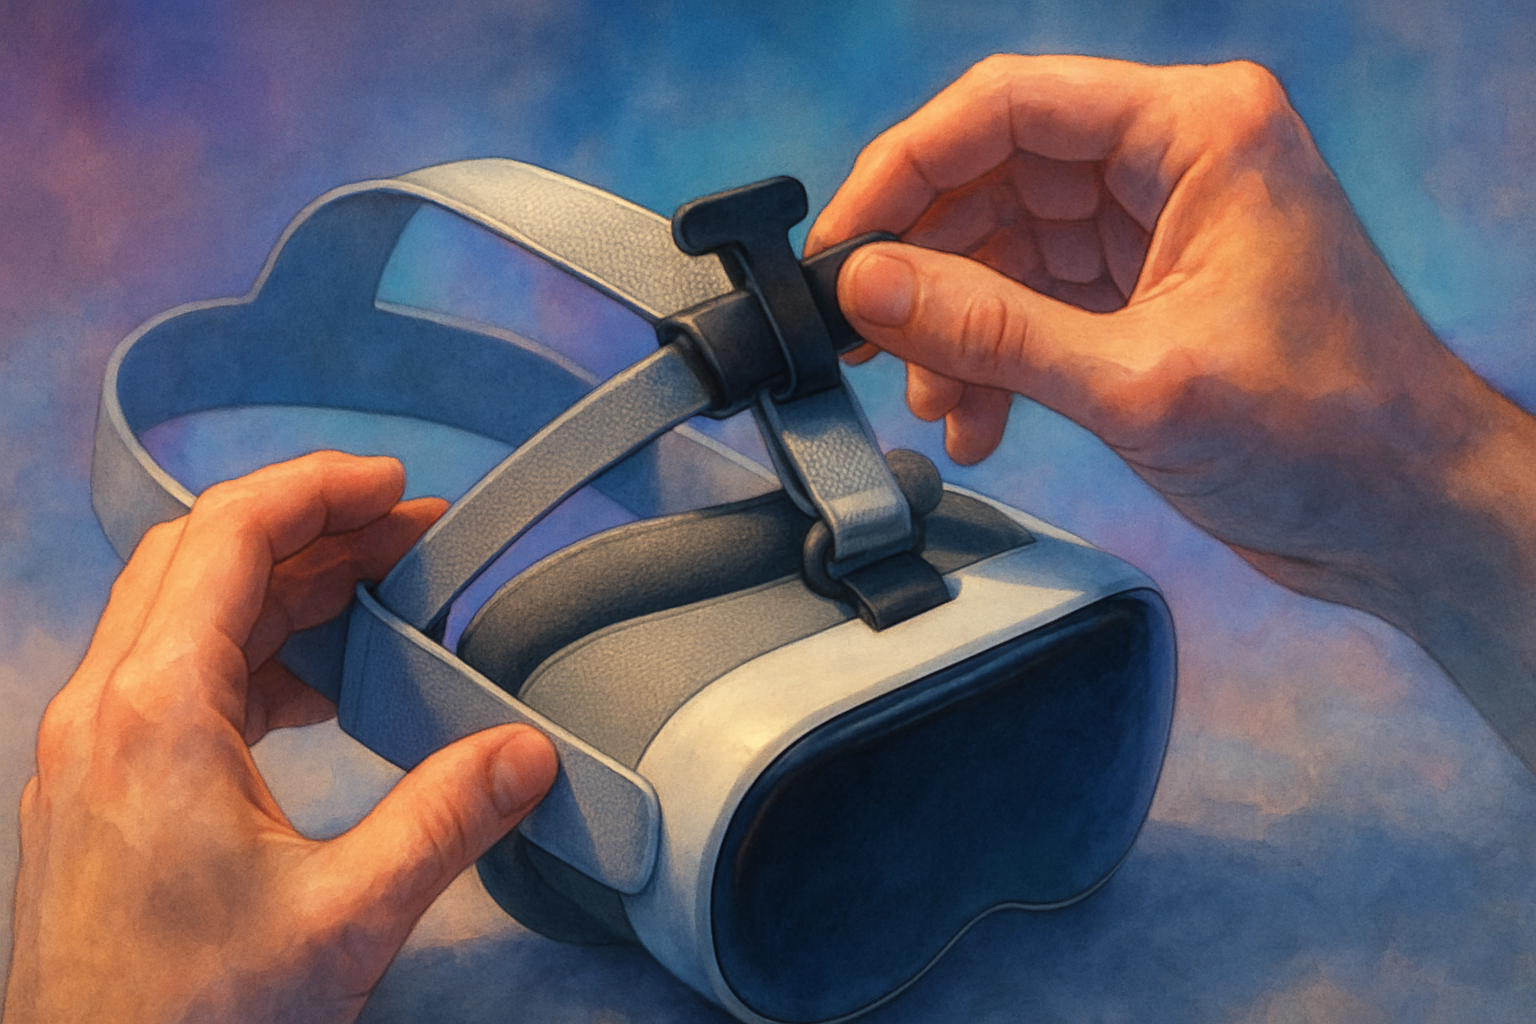
Step-by-step FlitLift installation (core procedure)
Installation should be methodical—align first, fasten second. Below is a typical installation flow; always cross‑check with the FlitLift manual for kit‑specific steps.
- Locate the designated attachment points on the Vision Pro headband or rear cradle. These are typically reinforced areas away from cameras and optical housing.
- Align the FlitLift bracket so clips or screw holes match the headset points. Ensure no cable passages or vents are pinched.
- Insert clips or screws and tighten by hand until snug. Start with minimal tension—do not fully torque at first.
- Route straps or tension lines so they apply lift to the headband/occipital area rather than pulling on the display housing. If the kit includes a counterweight or rear anchor, position it on the occipital pad area.
- Once everything is aligned and loosely fitted, perform a low‑tension fit check: place the headset on your head just enough to feel how the lift distributes load. Adjust clip positions before final tightening.
- Finish by tightening screws incrementally—small turns, even progression across attachment points—to avoid twisting the housing. Do not overtighten; stop when parts are secure and there’s no movement between bracket and headset.
Balance and adjust for even pressure distribution
The goal is an even load between the forehead, the rear headband, and the cheeks, eliminating concentrated pressure on the nose or brow. Use these steps to dial in balance:
- With the headset on, adjust the FlitLift tension little by little—make micro adjustments and wear the headset for a minute between changes.
- Move the counterweight or rear anchor forward or back in small increments to shift the center of gravity. The rear headband should take a meaningful share of the load.
- Test through natural movements—look up, down, and side to side, nod, and shake your head gently. Confirm the headset stays stable and that hand tracking or eye tracking doesn’t flicker when you move.
- If you see any tracking drop or camera occlusion during movement, stop and reposition the bracket so no FlitLift component covers sensors or cameras.
Comfort tweaks for longer sessions
For extended use, small comfort changes make a big difference:
- Swap or add pads: thicker forehead or occipital pads redistribute pressure. Use breathable, sweat‑wicking materials when possible.
- Tweak strap tightness to prevent sliding without over‑clamping—aim for secure but not pinching.
- Manage heat and sweat: breathable pads, short breaks every 30–45 minutes, and an anti‑fog wipe for the interior if you experience condensation.
- Rotate contact points: if you have removable pads, alternate between them between sessions to avoid pressure sores on one spot.
Troubleshooting common issues
Most issues are solvable with a few targeted checks:
- Slipping or forward tilt: tighten the lift anchor slightly, reposition the occipital pad lower on the skull, or move the counterweight rearward.
- Hotspots or pain: loosen the main strap a notch and increase forehead or rear padding. Shift load side‑to‑side by asymmetric micro‑adjustments rather than large changes.
- Tracking or sensor degradation: inspect for occlusion—ensure cameras and sensors are fully visible and free of FlitLift parts. Clean sensors with a microfiber cloth and avoid adhesive or pads that extend onto camera areas.
- Unusual noises or creaks: retighten fasteners evenly and check that no small parts are rubbing against the optical casing.
- Persistent problems: contact FlitLift support and Apple support if you suspect hardware compatibility issues. Keep photos and notes about what you changed—these speed up assistance.
Care, storage, and warranty checkpoints
Proper care keeps both the Vision Pro and the FlitLift accessory working long term.
- Cleaning: use a microfiber cloth and plastic‑safe cleaners recommended by FlitLift or Apple. Avoid harsh solvents on pads and printed labels; isopropyl wipes can be used sparingly on hard plastic but keep liquids off electronics and lenses.
- Storage: store the headset on a molded stand or padded case so the headband and lift don’t warp. Don’t hang the headset by straps alone for long periods.
- Warranty and returns: save your receipt and register the FlitLift product. Note the return window and FlitLift contact details. If installation appears to risk your Vision Pro, stop and consult both companies—better to confirm compatibility than to force a fit.
Following these steps will help you install and fine‑tune your FlitLift accessory for the Apple Vision Pro so you can enjoy longer, more comfortable sessions without compromising fit or tracking. If you run into anything unusual, document the setup and reach out to FlitLift and Apple support—most problems are solvable with a small adjustment.


Share:
Best Apple Vision Pro comfort accessories compared: Flit Lift vs straps, cushions, and counterwei...
Teaching and Presentations with Apple Vision Pro: How to Stay Comfortable During Demos