

Fine-tune Your Quest 2 Face Interface: Evenly Distribute Pressure and Eliminate Hotspots for Longer, More Comfortable VR Sessions
Long VR sessions shouldn’t end in forehead aches, cheekbone pinches, or a raw nose bridge. With a few intentional adjustments to padding, geometry, and strap tension you can dramatically reduce pressure points and play longer without discomfort. This guide walks Quest 2 users through a practical, repeatable process: find the hotspots, choose the right materials, tweak the interface geometry, and maintain cushions so comfort lasts. ⏱️ 9-min read
Every recommendation below is framed around concrete steps, real-world examples, and easy checks you can perform in 10–20 minutes. Whether you’re a marathon multiplayer fan or a creator testing long runtimes, follow these techniques to balance pressure, prevent soreness, and make comfort a predictable part of your VR routine.
Baseline assessment and hotspot mapping
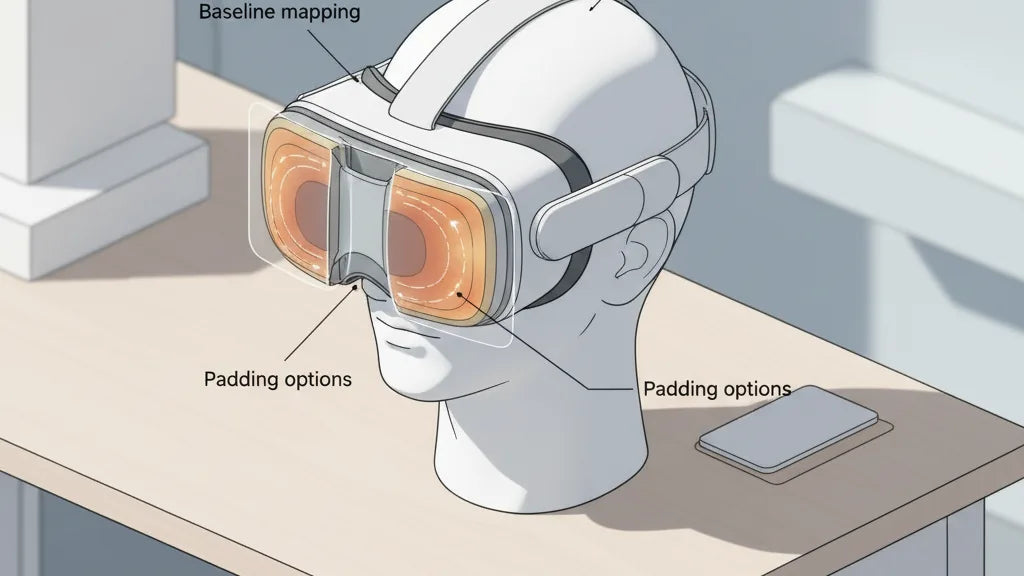
Start by mapping where your headset contacts your face. Create a baseline: note red marks, tender spots, lingering numbness, and any asymmetry after a standard play session (30–60 minutes). This isn’t guesswork — it’s data you’ll use to choose padding and make adjustments that actually work.
Simple, repeatable methods are best. Wear your Quest 2 for a typical session, then remove it and inspect the forehead, cheeks, and nose under good light. Look for redness, indentations, or areas that feel tender to the touch. If you want a visual record, dust the face interface lightly with cosmetic powder before a short try-on; high-pressure areas will rub off more. If you have access to flexible pressure film (consumer Tekscan-style), it gives an objective map of load distribution — useful if you swap cushions often.
Keep a short log: date, session length, where pressure showed up, how it felt (tingle, numbness, sharp pain), and any temporary fixes you tried. Over a week you’ll see patterns — for example, repeated forehead marks mean strap or forehead pad issues; cheek redness suggests edge pressure or too-firm cheek pads. A baseline map saves time and lets you test whether a new cushion or strap tweak truly reduces the problem.
Padding materials: foam, gel, and fabric covers
Material choice determines how pressure is spread and how hot the interface gets during long plays. The three common families are memory foam, gel or silicone inserts, and durable synthetic padding with fabric covers. Each has trade-offs in contouring, heat management, and longevity.
Memory foam (slow-rebound) excels at contouring. It molds to facial curves and spreads pressure across a larger area, which reduces sharp hotspots on the nose and cheekbones. For VR, choose medium-density memory foam: soft enough to contour, but firm enough to avoid bottoming out during long sessions. Typical useful thicknesses run from 8–15 mm for forehead and cheek pads; for the nose area, thinner, more shaped foam (3–6 mm) prevents bulk and breathing interference.
Gel and medical-grade silicone inserts are excellent for targeted relief. Gel behaves like a fluid under load, absorbing concentrated pressure points — ideal for cheekbones or temple contact. Use thin gel pads (2–6 mm) placed over the highest-pressure points, either incorporated into a foam pad or applied as small shims on the interface. Silicone cushions are hygienic (non-porous), easy to wipe, and durable; they can add a tactile, skin-friendly barrier where foam wears fastest.
Cover fabrics matter for heat and hygiene. Velour and breathable knit covers reduce sweat and skin friction; PU leather or coated fabrics are easiest to sanitize but trap more heat. A good compromise is a velour face cover that’s removable and machine-washable. For heavy players, choose modular pads with replaceable covers so you can rotate, wash, and dry without losing cushioning properties.
Face interface geometry: nose relief, cheek pads, and seal
Beyond material, the shape of the interface determines how pressure is distributed. The headset must make contact without concentrating force at a single ridge or edge. Three geometric elements to focus on: nose relief, cheek curvature, and edge/ seal relief.
Nose relief is crucial. A snug vertical seal around the nose prevents light leak and helps tracking, but a tight or blunt nose pad will press sharply on the bridge. Opt for pads with a carved nose cutout or low-profile nose channel. If you’re modifying pads, cut a shallow relief (1–3 mm) into the foam where it meets the bridge — small ramps redirect pressure around the bone instead of pressing into it.
Cheek pads should match the cheek’s natural curve and spread load across the soft tissues, not the bone. Look for pads with outward curvature and a slightly tapered edge. Rigid, flat faces push into the cheekbone during movement; flexible foam or gel with a rounded profile reduces point loading. If your cheeks keep getting red along a frame edge, add a thin silicone lip or soft liner around the interface perimeter to soften the transition from pad to plastic.
The seal between pad edge and skin also affects perceived tightness. A tight, narrow seal prevents light and improves sound isolation, but it concentrates force on a thin rim. Wider, slightly thicker seals distribute the same retention force more evenly. Aim for a balance: a seal that’s broad enough to spread load but not so thick that it forces the headset forward or causes heat buildup.
Adjusting strap tension and pad positioning for even weight distribution
Strap tension and pad positioning are where small changes yield big comfort gains. The goal is to center the headset’s weight over the head’s center of gravity so padding carries load evenly without pinching specific zones.
Use this practical adjustment flow:
- Loosen all straps. Place the headset on so the lenses align comfortably with your eyes and the cushion sits flat against your face.
- Tighten the rear strap until the headset feels secure but not snug. Close the top strap last to remove sag; the rear strap should do most of the work holding the device back, minimizing forehead pressure.
- Fine-tune the side/top straps to eliminate tilt. A properly balanced headset shouldn't pull you forward when you look down or backward when you look up.
- Use a simple finger test: you should be able to slide one index finger between the strap and your head comfortably. If the strap compresses the temple or skin when you move, it’s too tight.
Preventing tilt matters: if the headset tips forward, users instinctively tighten the top or front strap, which presses the forehead. Instead, move padding rearward on the faceplate slightly, or use a thicker rear pad to shift contact points back toward the crown. If the headset rocks during head motion, add small foam shims behind the highest-pressure zones on the interface (applied to the headset, not skin) to create a slight ramp that keeps the device centered rather than wedged forward.
Glasses wearers and diverse face shapes: optimizing fit
Quest 2 users with glasses or unique facial geometry need targeted fixes. Preserving clearance, avoiding frame pinch, and maintaining an even seal are the priorities. Begin with the manufacturer’s glasses spacer if available; it usually increases forehead-to-lens distance and prevents frames from rubbing against foam.
Specific tips:
- Measure and add clearance: If your glasses sit high, add 1–3 mm of foam or a thin spacer along the top of the face pad to stop temple pressure. Conversely, if the lenses are low and touch the foam, shave a shallow channel into the pad’s lower area to make room.
- Choose low-profile frames: Round or narrow frames reduce the chance of pressure or pinch. If you can, use frames with flexible temples that bend without stressing the nose bridge.
- Prescription lens inserts: For heavy or frequent use, prescription inserts eliminate glasses entirely and greatly reduce pressure points. They keep the facial interface flush against the skin while keeping optical comfort consistent.
- For narrow or wide faces: Swap modular cheek pads. Narrow faces benefit from thicker cheek pads that close gaps and stop cheekbones from hitting hard edges; wider faces usually need thinner or more contoured pads to avoid compression on the temples.
Always ensure modifications don’t push lenses out of alignment. After any spacer or pad change, run a short calibration check in headset and confirm visual clarity in all gaze directions. If you feel frame pinch or uneven pressure after adjustments, revert and try a smaller tweak — small incremental changes prevent new hotspots from appearing.
Maintenance, replacement, and lifecycle of cushions
Comfort declines slowly as padding compresses, the fabric traps oils, and seams loosen. A simple maintenance routine keeps cushions hygienic and performant for longer.
Cleaning schedule and methods:
- Light-clean after each heavy session: wipe foam edges and fabric covers with a damp cloth and mild soap; avoid saturating foam. For silicone or gel, use a medical-grade wipe or 70% isopropyl alcohol lightly applied and then air-dried.
- Weekly: remove and launder removable covers on a gentle cycle (cold water, mild detergent); air-dry away from direct heat. Replace non-removable fabric cushions with careful surface cleaning and a soft brush to lift oils and debris.
- Monthly deep clean: fully remove pads where possible, let them air out for 24 hours, and inspect seams and foam resilience.
Signs it’s time to replace pads:
- Foam permanently compressed or crumbling edges
- Fabric pilling, torn seams, or persistent odor after cleaning
- Reduced ability to hold a seal or new hotspots appearing even after adjustments
For regular players, plan to replace face cushions every 6–12 months. Light users can stretch that interval. Keep spare removable covers and a backup cushion kit so you can swap parts quickly between deep cleans or when the foam shows wear. Always choose replacements compatible with the Quest 2 mounting system and consider higher-breathability materials if you sweat heavily.
Step-by-step installation and calibration for Quest 2 face cushions
A careful install is the last step between you and long-term comfort. Follow this checklist to remove old pads, attach new ones, and confirm fit quickly and safely.
- Prepare your workspace: clean, flat surface and a soft towel to avoid scratching the lenses or faceplate.
- Remove the old cushion: gently peel the facepad away from the Quest 2 faceplate. If it’s Velcro or adhesive, pull evenly along the seam to avoid tearing.
- Clean contact areas: use a lint-free cloth with a small amount of isopropyl alcohol (70% or less). Wipe away oils and residues on the plastic faceplate and any Velcro surfaces. Let everything dry completely (5–10 minutes).
- Align and attach the new pad: match any slots or notches to the headset — correct alignment prevents lens interference. Press firmly around the perimeter so snaps or Velcro take full contact.
- Tighten straps using the adjustment flow above: rear strap first, then top, then sides. Run a short calibration session and reposition if images feel off-center.
- Perform a brief comfort check: wear the headset for 15–20 minutes and monitor for immediate red marks or pressure points. Use the powder test or visual inspection to confirm pressure distribution.
- Make small tweaks: if you find a hotspot, add a 1–3 mm closed-cell foam shim to the headset (not the skin). Re-test in 10-minute intervals until pressure is balanced.
Document the final configuration in your log: pad type, thickness, strap settings, and any shims used. A repeatable setup saves time the next time you switch pads or hand the headset to another user.
Your next step: run a 45–60 minute session with the new configuration and revisit your baseline map. If any pressure returns, adjust iteratively — the most reliable comfort solutions come from small, well-documented changes rather than big, one-off mods.


Share:
How to choose a Quest 2 comfort strap for different head shapes
Adjusting Quest 2 Comfort Straps for Even Pressure Across the Skull