

How to Retrofit an Apple Vision Pro Comfort Strap to a Meta Quest 2: A Safety‑First, Step‑by‑Step Guide
If you own a Meta Quest 2 and the Apple Vision Pro comfort strap (or plan to buy one), you can dramatically improve long‑session comfort by retrofitting the Vision Pro strap to the Quest 2. This guide walks a practical, safety‑first path: how to evaluate compatibility, choose or fabricate adapters, install the strap, balance the headset, and test for sensor and display integrity — all while minimizing risk to your headset and warranty where possible. ⏱️ 11-min read
What follows is a hands‑on walkthrough written for DIY VR tinkerers. Expect detailed tool lists, clear prep steps, three adapter strategies (clip‑on, 3D‑printed, soft‑mount), a sequential install checklist, balance and battery tips, and troubleshooting advice you can act on immediately.
Compatibility, risks, and safety checklist
Start by confirming which Quest 2 revision you have and which Vision Pro comfort strap variant — Solo Knit Band or Dual Loop/Band. Physical compatibility isn’t guaranteed: the Vision Pro uses its own end fittings and geometry, and Quest 2’s side anchors, faceplate contours, and passthrough cameras must remain unobstructed. Before you cut, drill, or glue, verify the Vision Pro strap’s end connectors and the Quest 2’s strap mounting points for potential mechanical match points.
Understand the main risks: voiding your warranty, cracking plastic anchor posts, blocking passthrough cameras or IR sensors, and introducing cable strain or heat issues if you mount batteries. If you see abnormal heat, sparking, or loose connectors during or after installation, stop and reassess. Document the device condition with photos before you begin — useful if you need to revert to stock or claim a warranty.
Safety checklist:
- Work on a clean, well‑lit bench; protect lenses with a microfiber cloth.
- Power down the Quest 2 and remove chargers; use an anti‑static mat and wrist strap for electronics work.
- Wear eye protection and keep screws and small parts labeled and contained.
- Use non‑magnetic screwdrivers and avoid excessive heat near plastics and adhesives.
- Plan your routing so no padding or adapter sits over cameras or proximity/IR sensors.
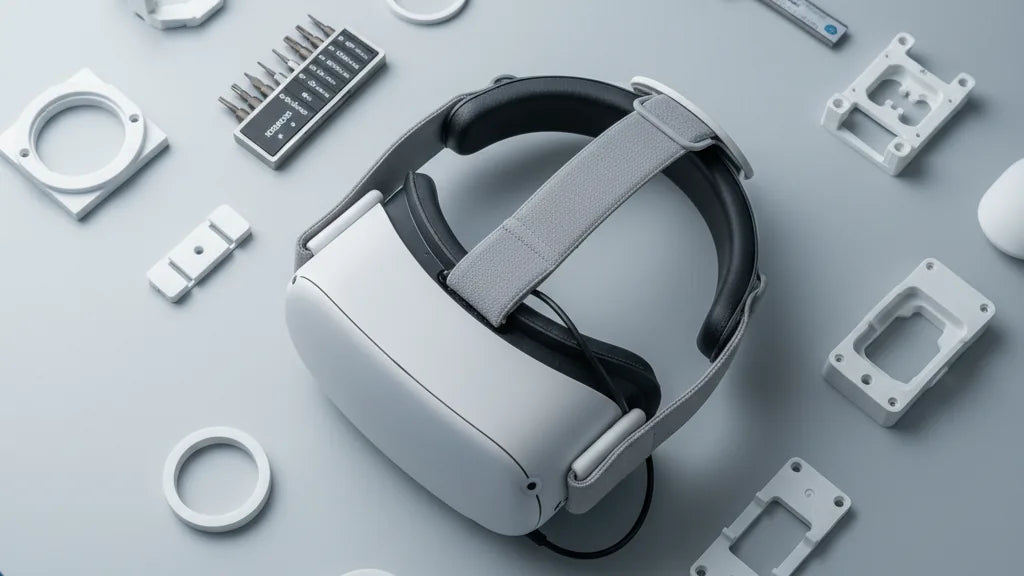
Tools, parts, and replacement options you’ll need
A tidy retro‑fit job needs a few precision tools and the right parts. Tools to have close at hand include: a micro screwdriver set (Phillips and Torx where appropriate), small hex drivers, precision calipers for measuring anchor posts, a utility knife for careful trimming, precision snips, small pliers, and an optional low‑temperature heat gun for mild shaping of plastic adapters. An anti‑static mat and wrist strap are recommended when you touch internal surfaces.
Parts list:
- Apple Vision Pro comfort strap (Solo Knit or Dual Loop) — the source of padding and headband.
- Quest 2 faceplate and strap anchors (stock parts) — remove carefully and keep intact in case you revert.
- Adapter solution — one of: clip‑on brackets, a 3D‑printed mount, or soft‑mount hardware (Velcro/nylon webbing).
- Fasteners: short machine screws, nylon spacers, and low‑profile washers sized to your adapter design.
- Velcro strips, cable ties, thin foam pads, and small adhesive-backed cable clips.
- Optional adhesives: neoprene glue, and for permanent fixes, epoxy or super glue (used only if you’re prepared to void reusability).
If a retrofit isn’t ideal, consider commercial alternatives: the Meta Elite Strap (with optional battery) or third‑party comfort straps explicitly made for Quest 2. These preserve warranty more cleanly and are often easier to install.
Inspecting and prepping the Quest 2 and Vision Pro strap
Begin with a visual and tactile inspection of both items. On the Quest 2, look for cracks in the shell, warped anchor posts, damaged foam, or loose screws. Inspect the lens area, cameras, and side ports to map areas that must remain clear. For the Vision Pro strap, check stitching, sliders, and attachment ends for corrosion or weak spots — and note whether the strap variant has rigid anchors (Dual Loop) or a softer knit band (Solo).
Remove stock parts carefully: with the headset off, detach the Quest 2 original strap per Meta’s removal method — usually by depressing release tabs or sliding the strap off the peg. Keep all fasteners and the face interface in a labeled tray. Clean contact surfaces with a microfiber cloth slightly dampened with 70% isopropyl alcohol; let them dry completely. Check screw hole threads and the recesses where adapters will sit.
Disassemble any detachable Vision Pro components you plan to use. If your strap has removable end caps or sliders, take them off so you can mock‑fit to your adapter. Measure critical dimensions with calipers: anchor post diameter, distance between side anchor centers, and the depth of mounting recesses on the Quest 2. These measurements determine whether off‑the‑shelf adapters fit or if a custom 3D print is necessary.
Adapter options: clip-on brackets, 3D-printed mounts, and soft-mount conversions
There are three practical adapter strategies, and the right one depends on how permanent you want the change, your fabrication skill, and how important sensor clearance is.
Clip‑on brackets: These clamp onto the Quest 2 frame or slide into the stock strap channels, avoiding drilling. They’re quick to install and reversible if well‑designed. Metal clips add strength but increase weight; high‑strength plastics (ABS or PETG) are lighter but can flex. Look for designs with padded contact points and locking screws or thumbscrews to eliminate play. Clip‑ons are ideal if you want a low‑permanence mod that’s easy to revert.
3D‑printed mounts: Custom brackets let you match the Vision Pro strap geometry precisely and control load distribution. Use PETG or a nylon blend for strength and moderate heat resistance; print with higher infill (30–50%) and consider reinforcing thin clip fingers. If you don’t own a printer, local print services can produce parts from vetted STL files. The trade‑off is permanence and time — expect some trial fits and post‑processing (sanding, drilling) to get perfect alignment.
Soft‑mount conversions: Velcro, nylon webbing, and fabric wraps prioritize comfort and adjustability. These avoid hard anchors and reduce stress on the Quest 2 shell, but they can creep or stretch over very active play. Soft mounts are best when you want minimal modification and maximum adjustability, especially with the Solo Knit Band; reinforce attachment points with a small patch of adhesive‑backed nylon or a lightweight plastic plate to spread load.
Step-by-step retrofit installation
Follow this sequential checklist to install your chosen adapter and Vision Pro strap. Read the list through before beginning and prep all parts and tools.
- Power down the Quest 2 and remove any cables. Place the headset face‑up on a soft microfiber pad to protect lenses.
- Dry‑fit the adapter to the Quest 2 strap anchors without tightening. Confirm the adapter body sits flush along the chassis and does not overlap cameras or vents.
- Measure clearance between the adapter and the lens area. Ensure no part sits within the proximity sensor field or blocks passthrough cameras; adjust position if necessary.
- Attach the Vision Pro strap ends to the adapter. If you’re using screws, thread them by hand first and then tighten incrementally to avoid stripping. If using Velcro, align and press firmly for full contact.
- Route any strap tails and cables along the inside edge of the strap and use cable clips or ties to secure them. Keep cabling away from lens ports and heat vents.
- Perform a torque/strain‑relief check: with the headset off, hold the Eclipse strap and gently tug to check for movement. Tighten fasteners in small increments — “snug” is better than over‑torqued, which can crack plastic.
- Place thin foam pads where the adapter meets the shell if you detect hard contact points. For soft‑mounts, add a backing plate behind the webbing for load spreading.
- Final dry fit: wear the headset briefly and check that the display is unobstructed, IPD adjustment moves freely, and passthrough images remain undistorted. If any sensors report errors, remove and recheck alignment.
Measurement checkpoints to prevent pressure points: ensure the rear strap pads rest at the occipital ridge rather than pressing into the skull crown; confirm the front foam contacts evenly across the forehead and that the nose area is free from extra downward torque.
Balancing weight, battery pack integration, and chinstrap alternatives
One common result of retrofitting a heavier, padded Vision Pro strap is front‑heavy torque that presses the face cushions into your nose and forehead. Counterweighting is the cleanest fix: start with a small weight (60–100 g) positioned low at the occiput until the headset sits level. Use Velcro pockets or a slim rear mount that shares load with the strap rather than clamping into the Quest 2 ports.
For extended play, a slim external battery pack mounted at the rear can both power the Quest 2 and act as an effective counterweight. Secure the pack on a small Velcro pad or bracket and route a USB‑C PD cable along the strap using cable clips. Avoid pinching the cable or routing it through tight bends — strain relief is critical. Keep the pack away from vents and lens areas to prevent heat transfer to optics.
If you prefer harness alternatives, halo‑style or rear‑sling chinstrap systems increase stability and reduce jaw fatigue. These attach at the same side slots and redistribute tension around the crown and the rear. For very long sessions or professional setups, external lift systems (e.g., GraviPro‑style supports or ceiling arms) eliminate headband pressure entirely, though they’re less portable than a battery/elite strap solution.
Fine-tuning fit and comfort for long sessions
Comfort tuning is iterative. Start every session with the straps slightly looser than you think you need, then tighten incrementally until the headset feels secure without pinching. The Vision Pro padding excels at distributing pressure, but you must align it properly: the primary band should carry most of the weight across the rear skull while the forehead pad provides gentle forward stabilization.
Key adjustments and tips:
- Pad placement: move the rear pad to sit on the occipital protuberance (the bony ridge at the lower rear skull) rather than the crown. This gives a stable fulcrum and reduces nose pressure.
- Top strap height: if your Vision Pro mount allows vertical adjustment, raise or lower it a few millimeters to eliminate any cheek or temple pressure. Small changes often have outsized comfort effects.
- Glasses wearers: create a slightly wider gap by loosening the straps and adding a 2–3 mm foam shim at the nose bridge to avoid temple contact. Use anti‑fog wipes to manage humidity build‑up.
- Hot spots: thin neoprene or leather covers on the forehead pad reduce local hot spots; breathable cotton covers wick sweat during long sessions.
- Rotation: when moving between seated and standing play, redistribute strap tension to prevent the headset from sliding — a quick micro‑adjustment keeps balance consistent.
After any adjustment, wear the headset for 10–20 minutes and note pressure points. Make small corrections and retest rather than large, sudden changes.
Testing, troubleshooting, and maintenance
Testing should progress from gentle static checks to dynamic motion tests. First, verify the headset boots cleanly and that the IPD adjustment moves across its range without binding. Launch a passthrough or calibration app and check for distortion, vignetting, or partial occlusion of the side cameras. If passthrough looks clipped or darker on one side, the adapter is likely encroaching on a sensor—reposition immediately.
Run through a short motion test: tilt, nod, and shake your head lightly to confirm there’s no slippage, and that the adapter doesn’t flex under load. Common failure modes and fixes:
- Slippage: re‑seat the adapter, tighten fasteners evenly, and add a thin anti‑slip rubber pad between adapter and shell.
- Sensor occlusion: move padding away from camera bores or thin the adapter wall where it overlaps the camera field.
- Cable strain: add a small loop of slack and secure with cable ties; if a battery cable rubs a port, route it differently or add a strain relief clip.
- Adapter cracking: switch to a stronger material (PETG or nylon) or replace the clip design with a larger contact footprint.
Maintenance: wipe fabric and foam with a mild detergent, and disinfect plastic with isopropyl as needed. Inspect fasteners for loosening every few sessions. If you used adhesives, monitor the bond over time — heat and sweat can degrade glues. When comfort starts to decline or if sensors intermittently fail, revert to the stock strap and troubleshoot in a static setting.
Warranty, legal, and alternative recommendations
Modifying your Quest 2 or attaching third‑party hardware can affect warranty coverage. Removing the stock strap generally doesn’t void warranty on its own if you don’t damage the headset, but drilling, gluing, or breaking the shell will. Keep the original parts and document the headset’s pre‑mod condition with photos. If warranty is a major concern, prefer reversible methods like clip‑on brackets or soft mounts, and avoid permanent adhesives.
Know when to stop: if you can’t get a secure, sensor‑clear fit without aggressive modification, choose a commercial product designed for Quest 2. Recommended alternatives:
- Meta Elite Strap (stock alternative) — integrated design, optional battery, preserves warranty life if installed per instructions.
- Third‑party comfort straps made for Quest 2 — often cheaper and reversible with tested mounts.
- External support systems (ceiling or desk mounts) — best when you want to eliminate head load entirely in a dedicated play area.
Final legal note: assume any damage from a DIY retrofit is your responsibility. If you’re uncomfortable diagnosing sensor issues or fabricating mounts, enlist a community modder with proven builds, or opt for a commercial upgrade that carries its own warranty and support.
Takeaway: retrofitting a Vision Pro comfort strap onto a Quest 2 can transform multi‑hour VR sessions if you plan carefully, use reversible mounting strategies where possible, and prioritize sensor clearance and load distribution. Your next step: measure your Quest 2 anchor points, choose an adapter strategy (clip‑on for reversible, 3D‑print for custom fit, Velcro for comfort), and perform the install with the safety checklist in hand. Start small, test often, and enjoy a more comfortable VR experience.


Share:
Step by Step Guide to Adjusting Your Oculus Quest 2 Head Strap for Maximum Comfort
Materials, Padding, and Durability: What Makes a Quest Two Comfort Strap Last