

Weight Matters: How Quest 2 Strap Design Shapes Comfort and On‑Head Balance
Small strap-design choices have outsized effects on how the Quest 2 feels during a long session. Whether the headset tilts forward when you look up, grinds into your forehead after 90 minutes, or feels rock-solid during fast turns—those sensations come down to where the weight sits and how the strap manages it. This article breaks down the real-world differences between strap systems, what to look for when upgrading, how to fit and maintain straps, and smart accessory strategies that reduce neck strain without sacrificing stability. ⏱️ 11-min read
Read on for clear, practical advice you can use today—step-by-step installation, targeted comfort upgrades, and safety-minded accessory picks—so you can stay immersed in VR longer and with less fatigue.
Understanding Quest 2 Strap Systems: Comfort vs Elite
On the Quest 2, a strap is more than a fastener—it's a balancing mechanism. Meta’s stock elastic strap is light and portable, ideal for short sessions or travel, but it prioritizes simplicity over distribution. The Quest 2 Comfort Strap and the Elite-style strap represent two different trade-offs: softness and lightness versus rigidity and precision.
The Comfort Strap emphasizes soft contact and gentle adjustment. Typically built from fabric over foam padding with a flexible rear piece, it sits lower on the occipital bone (the back of your skull) and reduces hot spots. The lighter mass and breathable materials often translate into less sweat and lower perceived neck strain during marathon sessions. However, its flexible nature can mean slightly more movement when you swing your head fast.
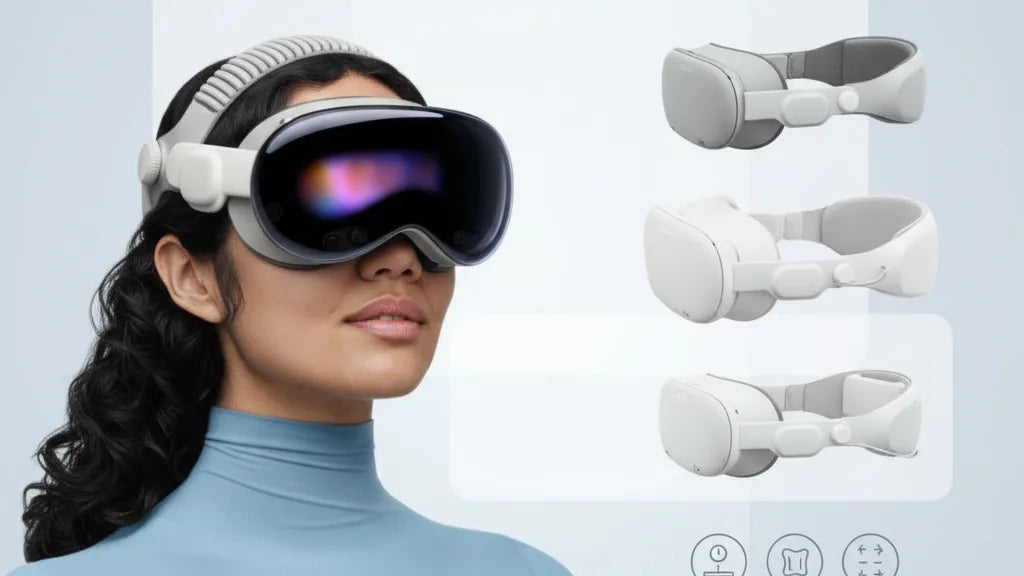
By contrast, the Elite-style strap introduces a rigid frame and a ratcheting or dial-adjust mechanism that locks tension with repeatable precision. This rigidity stabilizes the headset during rapid locomotion, reducing forward tilt by shifting more weight rearward. Many Elite setups also add a lower back pad or integrate a battery pack—both effective ways to change the center of gravity. Material choices (soft fabric vs hard polymer or metal frame) and padding density will determine whether you feel more supported or more constrained.
In short: pick Comfort for lighter, breathable wear and fewer hot spots; pick Elite for repeatable fit, stability in active play, and easier counterbalancing with accessories.
Weight and Balance: What Changes Feel Like in Practice
Total weight is visible on a spec sheet, but distribution is what you feel after 30–90 minutes. A front-heavy headset pulls on your forehead and cheeks, encourages you to tighten straps, and forces your neck muscles to fight a forward torque. Overtightening to stop forward tilt relocates pressure to the back of the skull, which can produce headaches or a bruised sensation after long play.
Users describe the common sensations well: a slow forward tug during seated sessions, a lurching wobble during fast head turns, and a nagging need to readjust mid-game. Those are not only annoying—they break immersion and shorten sessions. In practice, an Elite-style strap that moves mass rearward tends to make the headset feel “centered” and secure, so you don’t instinctively brace against it. A Comfort Strap does the opposite by reducing hot spots; it’s better at long-duration comfort if your game content isn’t full of quick head whips.
How this plays out over time: short sessions may mask these differences. But past the one-hour mark, poor balance is measurable—more frequent adjustments, increased neck fatigue, and sometimes a slight forward lean to counterbalance the headset. Test yourself with a long, head-movement-heavy title: if you find yourself readjusting, consider whether the strap is sending weight where your neck doesn’t want it (usually forward).
Mini-case: one user switched from the stock strap to an Elite band and reported an immediate reduction in forehead pressure and less head movement during room-scale play. Another kept the stock strap but added a small rear counterweight and experienced markedly less neck soreness—showing you can tweak balance without fully replacing the strap.
Design Elements That Improve Comfort
Comfort is layered: padding, width, crown support, adjustability, and breathability all contribute. Here’s how each design element affects real-world wear.
Padding distribution matters more than thickness. Well-placed foam or silicone pads that spread pressure across a broader area reduce sharp hot spots. A wide rear pad on the lower occipital region prevents the headset from digging in when you look down, and forehead padding with moderate density avoids a “see-saw” feel.
Crown support—the strap that crosses the top of your head—stabilizes the headset vertically. A top strap reduces downward sag without requiring a heavy clamp around the back of your skull. For many head shapes, a well-tensioned crown strap eliminates cheek pressure because the headset no longer needs to press into your face to stay in place.
Quick-adjust hardware (dial systems, ratchets, or click-stops) enables micro-adjustments that matter during gameplay. Instead of guessing a tightness level, you can dial in a reproducible setting that stays constant through fast motions. Materials matter too: breathable fabrics and moisture-wicking covers reduce sweat buildup, keeping pads from compressing and losing support over long sessions.
Finally, wide straps and broader contact surfaces distribute force evenly. A narrow strap will create concentrated pressure points that become painful after time. Look for straps with broad contact patches, replaceable cushions, and modular adjustments—these give you options to tune comfort by swapping pads or altering tension points.
Installation and Fit: Step-by-Step Guide
Swapping straps is straightforward but doing it right ensures even tension and minimal slippage. Below is a clear, step-by-step process to remove the stock strap and install a Comfort or Elite strap so your fit is secure and balanced.
- Prepare the headset: Lay the Quest 2 face-up on a soft surface. Remove any clip-on accessories or face covers to access strap mounts cleanly.
- Remove the stock strap: Gently unthread the elastic mounting bands from the left and right bayonets. Keep any small clips or mounting pins if the replacement strap uses them.
- Attach side arms: Align the replacement strap’s side arms with the headset mounts. Push until they click or fasten according to the kit’s instructions. Ensure each side is seated symmetrically—mirrored placement is crucial for even pressure.
- Install the top strap/crown: Attach the top strap to the side arms or designated top mounts. Start with it slightly loose; you’ll adjust on-head to avoid compressing the skull area excessively.
- Fit and balance: Put the headset on. Tighten the side or rear dial until the headset feels secure without digging into the forehead. Adjust the crown strap so the weight is distributed between the crown and the rear pad. The headset should sit level and gently touch your face without squishing.
- Fine-tune while playing: Launch a short experience with active head movement. If the headset tips forward, tighten the rear dial or add a small back counterweight. If the headset feels too tight, loosen the dial and increase crown support slightly.
Glasses wearers: leave slightly more eye relief than you think you need. Many straps have depth or spacer options—use them. Move the headset forward on the face until you have the clearest view without contact with glasses arms, then lock tension. Consider low-profile temple arms to reduce pinch; if your frames are bulky, a halo-style strap with rear-mounted support is often kinder.
Choosing the Right Strap: Comfort, Elite, and Third‑Party Options
Choosing a strap is about matching usage and priorities. For casual, portable play, the stock elastic strap still wins for lightness and convenience. For extended sessions or fast-paced, room-scale titles, consider an Elite-style or a well-made third-party alternative.
Official Comfort Strap: Best for people who prioritize breathability and low bulk. It reduces heat and softens contact. It’s lighter than Elite and feels kinder during seated RPGs or long social VR meetups.
Official Elite Strap: Best for stability and precise fit. Its rigid frame and dial reduce wobble during physical experiences. If you’re active in rhythm games, shooters, or mixed reality capture, Elite-style straps maintain consistent eye-to-lens alignment, which preserves clarity during dynamic movement.
Third‑party straps: These vary widely. Reputable brands like BoboVR, Kiwi Design, and other ergonomic designers create hybrid options—rigid frames with breathable pads, integrated battery packs, or detachable rear weights. When evaluating third-party options, check build quality, return policy, and compatibility with Quest 2 mounts. Look for replaceable padding, secure mounting mechanisms, and reviews that reference long-term durability rather than only initial comfort.
Battery integration: If you want extended play, a rear-mounted battery pack is an elegant accessory because it simultaneously extends runtime and shifts weight rearward—an effective counterbalance for a front-heavy headset. Consider battery size: heavier packs provide better counterbalance but add inertial load during quick turns. Try a smaller battery or a slim counterweight first if you primarily care about agility.
Decision guide: pick Comfort for long, low-movement sessions; Elite for high-movement stability; choose third-party if you need a specific mix of features like battery integration, modular pads, or a lower price point than official options.
Maintenance and Longevity: Cleaning, Care, and Replacement
Straps are in direct contact with skin and sweat, so maintenance matters both for hygiene and for preserving material properties. A weekly maintenance habit keeps foam resilient and mechanisms working smoothly.
Cleaning routine:
- Remove the strap from the headset whenever possible. Separate pads and covers if the design allows.
- Hand-wash fabric and foam with warm water and a mild dish soap or gentle fabric cleaner. Avoid solvents, bleach, aerosol disinfectants, and alcohol-based cleaners that degrade adhesives and foam.
- Use a soft brush to reach seams and Velcro channels. Rinse thoroughly and pat dry with a towel.
- Air-dry completely in a ventilated, shaded area. Do not machine wash, tumble dry, or use direct heat—these damage elastic fibers.
Regular inspection: weekly checks for fraying, cracked plastic, or sticky dials. Run your fingers along adjustment rails to feel for grit; a quick blow or compressed-air burst clears dust that causes ratchets to bind. Replace Velcro covers before they become threadbare—once Velcro loses grip, tension slips and fit becomes unpredictable.
Replacement timeline: with heavy daily use and sweaty sessions, expect cushions and elastic elements to show fatigue around 6 months. For moderate users, 6–12 months is reasonable. Signs you need a new strap include visible cracking, loss of elasticity, persistent odor after cleaning, or slippage that you can’t fix with adjustment.
Storage: store headsets and straps in a cool, dry place away from UV light and extreme heat (a hot car will accelerate foam breakdown). If you own multiple straps, rotate them to spread wear. Use a breathable bag or dedicated shelf rather than compressed plastic bins.
Weight Reduction and Accessory Strategy
If your aim is to reduce neck strain and maintain stability, consider a purposeful accessory strategy rather than simply buying the heaviest or lightest strap. The simplest trick is to move mass rearward: a small back-mounted battery or compact counterweight balances a front-heavy headset without needing to overtighten straps.
Counterweights and battery packs:
- Small rear weights (100–200 g) can neutralize front torque and are subtle enough to not impede movement. Start small and increase in 50 g increments until the headset feels neutral.
- Battery packs that attach to the rear serve double duty: more playtime and better balance. Choose packs with secure mounting and short, unobtrusive cables; avoid dangling solutions that snag during room-scale movement.
Lightweight accessory choices:
- Choose slim rear pads and lightweight side arms when traveling.
- Swap to a minimal strap for long seated sessions where peripheral stability isn't critical.
- Consider silicone or low-profile glasses spacers to keep the headset at the optimal distance from lenses, which can reduce the need to tighten the strap for visual clarity.
Compatibility & safety: always check that third-party accessories are designed for the Quest 2 mounting system. Poorly fitting counterweights can shift during play, creating unpredictable balance changes. For glasses wearers, ensure any battery or weight pack doesn’t press lenses into frames; use a larger facial interface or spacer to keep clearance. Be cautious drawing parallels to other ecosystems (like Vision Pro): accessory ecosystems differ—don’t mix mounts or jury-rig attachments that weren’t tested for torsional stresses.
Practical sequence to experiment safely:
- Install a rigid strap or adjust your current strap for even tension.
- Test play for 15 minutes and note where pressure accumulates.
- Add small rear weight or slim battery and re-test in 15-minute increments.
- Adjust crown support to fine-tune vertical stability without tightening the rear dial excessively.
Next step: if you struggle to dial in comfort, try a hybrid approach—Comfort Strap with a small rear weight or Elite strap with breathable pads—to get the benefits of both worlds.
Takeaway: Start by identifying whether your sessions suffer from heat and hot spots (favor breathable, padded Comfort options) or from forward tilt and wobble (favor rigid Elite-style frames and rear counterweights). Test changes in small increments, prioritize even weight distribution, and keep a simple maintenance routine to extend the life and comfort of your setup.


Share:
Upgrading Your Quest Two Facial Interface: Silicone Gaskets and Eye Comfort
How to adjust straps for glasses wearers on Meta Quest