

If you own—or are thinking about buying—an Apple Vision Pro, comfort quickly becomes a top priority. This guide compares the main comfort fixes (FlitLift-style lifts, head straps/halo harnesses, facial cushions, and counterweights) so you can pick the right solution by session length, activity, and budget. ⏱️ 8-min read
What truly determines Vision Pro comfort
Comfort isn’t just about weight listed on the spec page. For the Vision Pro, the important, measurable factors are:
- Weight distribution / center of mass: where the headset’s weight pulls—forward torque on the nose/cheeks or balanced across the skull. You’ll notice this as a constant downward pull or frequent need to re-seat the device.
- Facial pressure points: pressure on the bridge of the nose, upper cheeks, and forehead that shows as red marks or soreness after short sessions.
- Seal and breathability: how well the facial interface seals against light leaks while allowing airflow; poor seals cause fogging, sweat, and heat.
- Stability during movement: how much the view shifts when you nod or turn—important for mixed activity or active experiences.
- Heat buildup: localized warmth on skin or inside the headset that limits session length.
- Ease of cleaning and durability: whether pads trap sweat or degrade quickly—this affects long-term comfort.
Simple ways to check these in real use: wear the headset for 10–20 minutes and note red marks or soreness, do a head-turn test to check slippage, look for fog or sweat after 15 minutes, and try adjusting straps to see how the balance changes. These quick checks point you to whether you need redistribution (straps/counterweight), pressure relief (cushions), or active lift (FlitLift).
Quick overview of accessory types and trade-offs
Each accessory targets a different cause of discomfort:
- FlitLift (external lift/dynamic support): reduces perceived headset weight and counteracts forward torque by providing an upward force. Great at making long seated sessions feel lighter but adds setup and some bulk external to the headset.
- Head straps / halo harnesses: improve stability and move load away from the face to the crown and back of the head. Fast on/off and low profile or more secure depending on design.
- Facial cushions / seal upgrades: soften pressure points and improve light sealing. Small, inexpensive, and travel-friendly but won’t fix leverage from a heavy front.
- Counterweights / torso mounts: rebalance the center of mass by shifting weight to the back or torso. Very effective for extended use, but add bulk and sometimes cable routing or heat issues.
Typical trade-offs: portability (cushions win), long-session comfort (FlitLift and counterweights win), setup time (straps and cushions are quickest), and cost (cushions and basic straps are lowest).
FlitLift (dynamic lifting systems): how it works and when to choose it
FlitLift-style solutions attach an external support to the headset and provide upward lift or a counterforce that neutralizes forward torque. The result is a marked reduction in perceived weight on the nose and cheeks—especially during long, seated sessions. For more detailed specs and user impressions, check the manufacturer's product page (for example, the FlitLift product page) and hands-on reviews like Ascent of VR’s coverage.
Best-fit scenarios:
- Long seated sessions such as movie watching, productivity, or creative work where you want the headset on for 1+ hours without facial soreness.
- Users sensitive to cheek/nose pressure who have already tried thicker cushions but still feel leverage.
- Desk-based setups where a small amount of external hardware and slightly longer setup time is acceptable.
Trade-offs: less portable, requires mounting or an anchor point, and typically costs more than cushions or basic straps. But for users who need extended comfort without sacrificing seal or stability, it’s one of the most effective options.
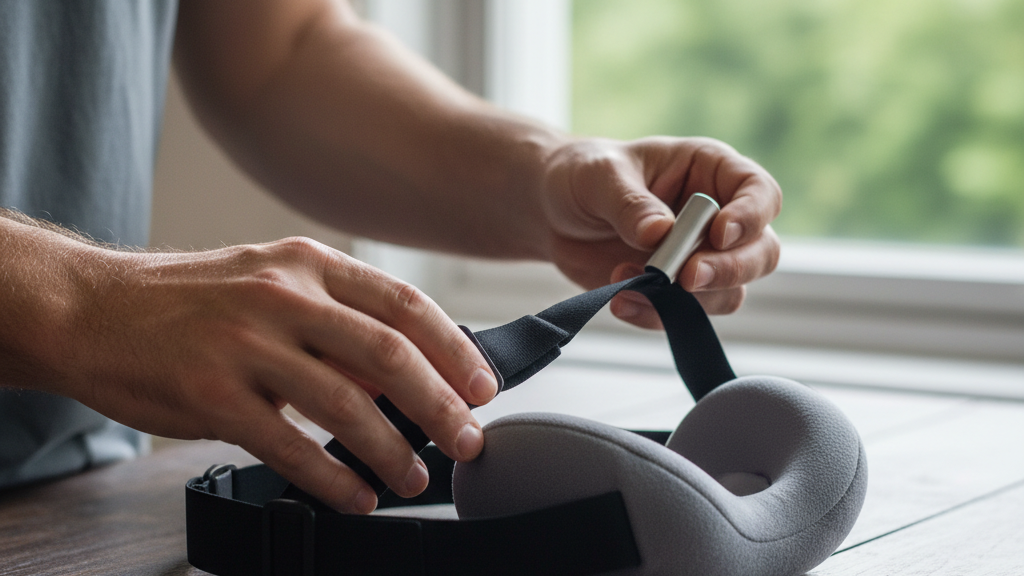
Head straps and halo-style harnesses: types, fit, and adjustments
Head strap designs vary and each redistributes load differently:
- Top-sling (single strap over crown): lifts some weight off the face by bearing it on the crown; simple and low profile but can still allow forward torque.
- Rear-anchored straps: wrap around the back of the head to pull load rearward—reduces cheek and nose pressure efficiently without too much bulk.
- Halo/rigid ring harnesses: create a ring that sits around the skull, distributing weight across a larger surface area; excellent for stability and active movement.
Fitting steps that produce the best results:
- Start with the facial cushion that matches your nose/cheek shape.
- Tighten rear straps first until the headset stays in place without sliding forward—avoid overtightening forehead straps which cause headache points.
- Adjust top or halo tension to take remaining slack and stabilize the view during head movement.
- Perform a head-turn and nod test—if the headset shifts, increase rear/halo tension rather than tightening the face seal.
Who benefits most: active users or those who favor quick on/off use and low-profile solutions. Straps are generally the best all-around starting upgrade.
Facial cushions and seal upgrades: materials and hygiene
Cushion options and what they change:
- Memory foam: contours to facial anatomy, reducing concentrated pressure but can trap heat and may need regular replacement.
- Latex-free gel or cooling pads: spread pressure and add cooling comfort for longer sessions; heavier and require careful cleaning.
- Silicone seals: provide a tighter light seal and are easier to wipe clean, but they can concentrate pressure if not the right thickness.
How thickness and edge shape affect performance: thicker cushions reduce pressure but can increase perceived weight by changing leverage; wide, tapered edges reduce light leaks more effectively. Cleaning tips: use a lint-free cloth and mild soap or alcohol wipes depending on material; avoid soaking memory foam. Replacement cadence: foam inserts often need replacement every 6–12 months with regular use; silicone and gel can last longer if cleaned and stored properly.
When cushions alone are enough: short to moderate sessions (under an hour) where the main complaint is localized pressure or light leakage. When you need more: if you still feel forward pull or leverage after trying several cushion profiles, add a strap or counterweight solution.
Counterweights and torso mounts: moving mass off the head
Counterweight approaches rebalance the headset by placing mass behind the head or on the torso. Options include clip-on rear weights attached to straps and chest/back-mounted systems that connect the headset to a belt or rig.
Pros and cons:
- Pros: very effective for eliminating nose/cheek pressure during long sessions; simple clip-on weights are inexpensive and reversible.
- Cons: add bulk and can create heat on the back or chest; may interfere with movement or clothing; torso mounts require more setup and sometimes cable management.
Who should consider them: users doing extended seated work, simulation rigs, or anyone who wants a low-tech way to rebalance mass without external anchors. If you need mobility or travel frequently, choose smaller clip-on weights or adjustable strap-based rear ballast.
Side-by-side selection guide: which accessory for which use case
Match the accessory to your priorities:
- Best for long seated viewing / productivity: FlitLift or torso-mounted counterweight—prioritize balance over portability.
- Best for mixed movement / active experiences: Halo-style harness or rear-anchored straps—stability and quick adjustments matter most.
- Best for travel / quick fixes: Facial cushions and a lightweight rear strap—minimal bulk and fast on/off.
- Best budget pick: Aftermarket cushions and clip-on rear weights—low cost but can significantly improve comfort.
Quick criteria to decide: session length (under 1 hour = cushions/straps; over 1 hour = lift or counterweight), activity level (high movement = halo/straps), and tolerance for bulk (low = cushions/straps; high = counterweights/FlitLift).
How to combine accessories and tune fit step-by-step
Follow this practical setup sequence for the best outcome:
- Fit the facial cushion and adjust IPD/visual alignment until the image is sharp and centered.
- Set rear strap tension so the headset stays in place without pressing the face—aim to transfer most load to the skull band, not the cheeks.
- Add a top-sling or halo and fine-tune to eliminate vertical bounce during nods.
- If forward torque remains, attach a small clip-on rear weight and recheck balance; if you're still uncomfortable, consider an external lift (like FlitLift) for sustained lift.
- After each change, do a 10–20 minute session and note hot spots, slippage, or fogging; small iterative tweaks beat large changes.
- For heat and sweat: use breathable cushions, a small desk fan for long sessions, and schedule short breaks every 45–60 minutes to let skin cool.
These steps let you combine cushions, straps, and countermeasures for a tailored fit that addresses both pressure and stability.
Purchase checklist and maintenance essentials
Before buying, confirm these concrete points:
- Compatibility with Apple Vision Pro: attachment method and cutouts must match the Vision Pro facial interface.
- Attachment method: quick-release, clip-on, adhesive, or strap—pick what fits your usage and swapping needs.
- Weight specs: if adding counterweights or mounts, check total mass and distribution so you don’t introduce new strain.
- Return policy and trial period: test fit at home—many comfort decisions are personal and benefit from easy returns.
- Durability and replacement parts: availability of replacement foam pads, straps, or adhesive parts.
Maintenance essentials:
- Cleaning materials: mild soap, isopropyl wipes for silicone, and a soft brush for foam dust removal.
- Storage: keep cushions in a cool, dry place to prevent mold or foam degradation.
- Replacement cadence: foam pads ~6–12 months with regular use; straps and clips checked every 6 months for wear.
Buying the right Apple Vision Pro comfort accessories is about matching the problem (pressure, balance, stability, heat) to the solution and then iterating. Start small—cushions and straps—then add counterweights or a lift if you need sustained comfort for long sessions.


Share:
Mapping Your Apple Vision Pro Journey to Weightless Comfort
Best Apple Vision Pro comfort accessories compared: Flit Lift vs straps, cushions, and counterwei...