

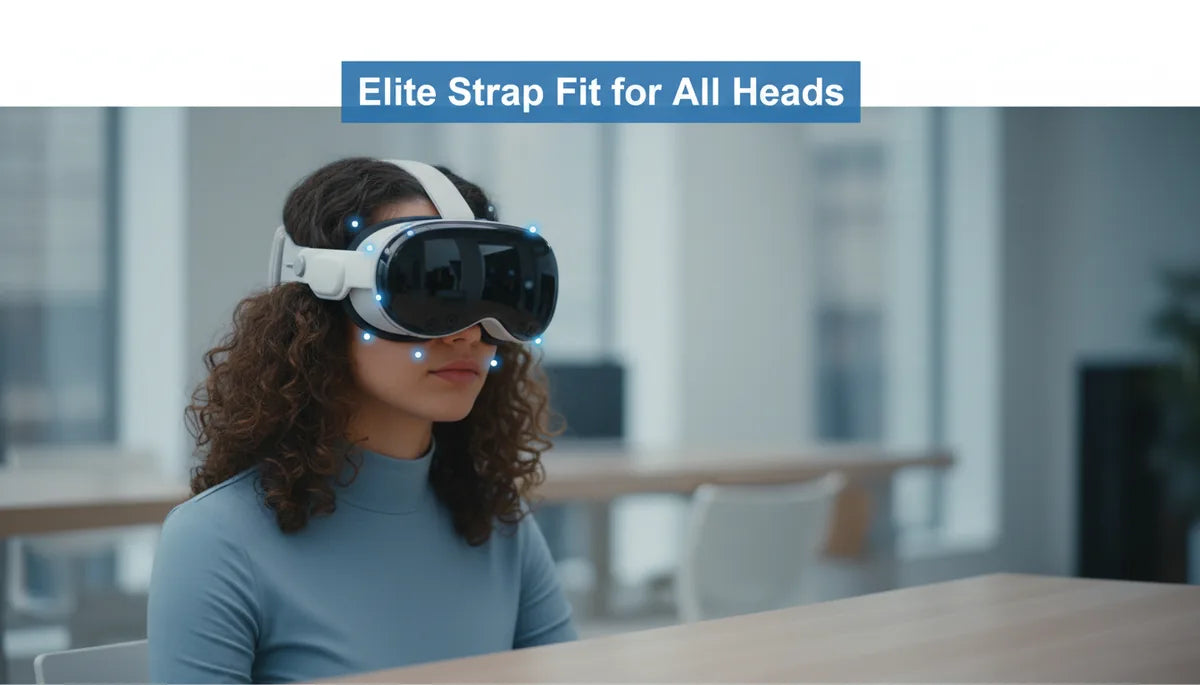
Dialing the Quest 2 Elite Strap for Every Head: Height, Tension, and Padding Strategies for Balanced Comfort and Stability
Long VR sessions demand a fit that disappears. The Quest 2 Elite Strap gives you mechanical control—rigid frame, rear dial, and defined contact points—but that control only pays off when you tune the strap to your head’s unique shape. This guide walks Quest 2 users through a practical, repeatable process: assess your head, prepare the headset, dial in height and tilt, pick cushions that work for your contours, and maintain the system so it stays comfortable session after session. ⏱️ 11-min read
Expect concrete tests you can run in five minutes, troubleshooting steps for common pressure points, and real-world examples from narrow, round, and long-headed users. Follow this path and you’ll reduce forehead pinching, stop mid-session slips, and keep glasses clear—all without guessing or over-tightening.
Assess head shape and fit goals
Start by identifying the broad shape of your skull—round, oval, or elongated—and what you want most from the fit. A round head often concentrates pressure at the temples and forehead; an oval head usually spreads load more evenly and may tolerate a slightly higher crown; elongated or narrow heads can feel pinch above the ears or a sharp brow pressure. Knowing which category you fall into narrows your choices for strap height, rear contact, and padding.
Map pressure points quickly: put the headset on with minimal padding for 5–10 minutes, then lean forward, shake your head, and gently run your fingertips across the forehead, temples, and back of the skull. Note where contact feels sharp, where the headset slides, and whether your cheeks or nose catch on the face gasket. Your comfort priorities—stability for active games, reduced top pressure for long seated sessions, glasses clearance, or a lighter feel—should guide each tweak. For example, if you prioritize stability during VR fitness, aim for a firmer rear contact and slightly higher crown support to keep the visor from lifting during sudden movements.
Elite Strap vs standard strap: fit implications
The Elite Strap changes the game because it moves much of the load rearward with a rigid yoke and integrated dial. Unlike the flexible fabric bands of the standard strap, the Elite Strap’s strong frame resists sagging and locks contact points in place. That means once you find the right tension and height, the headset is less likely to drift or require mid-session retightening.
The trade-offs are important to understand. The Elite Strap’s rigidity makes crown positioning and cushion choice more consequential: a wrong top-strap height can concentrate load on the brow, and a dense forehead cushion can turn a small annoyance into a hot spot. The standard strap, while simpler, can stretch over time and leave gaps across the crown or create uneven pressure on narrow heads. In practice, the Elite Strap offers better adaptability across diverse head shapes because the rear dial micro-adjusts circumference and the frame keeps lateral fit predictable. But that adaptability depends on dialing in the top strap height and choosing the right cushion density—lighter, softer pads for delicate foreheads; firmer padding for heavier visors or active use.
Preparation before adjustment
Good adjustments start with good prep. Power down your Quest 2 and either loosen or remove the current strap so you can see attachment points and cushions clearly. Clean all contact surfaces with a microfiber cloth; if needed, apply a mild, device-safe cleaner and let everything dry completely. Dirt, sweat residue, and hair products change friction and can mask whether a fit issue is mechanical or merely slippery.
Familiarize yourself with the Elite Strap components: the top strap, the rear dial, side arms and buckles. Understand which control alters crown pressure, which changes rear pad height, and how the side anchors affect tilt. Establish a neutral baseline: set the rear dial to a loose setting, lower the top strap so it barely rests on the crown, and leave side tension minimal. Put the headset on and align the lenses with your eyes. This baseline helps you judge the effect of each change rather than compounding multiple tweaks at once. If you use support gear like a headset stand, set the headset on it to free both hands and keep adjustments precise. Finally, decide which cushions to try—a thin foam for wide heads, thicker or gel-infused pads for narrow or bony foreheads—so you can swap parts as you learn what your head prefers.
Step-by-step adjust: height, rear tilt, and strap length
Follow a deliberate sequence: top-strap height, rear dial, then side/tension. This order keeps one adjustment from undoing another and helps you home in on a balanced, comfortable fit.
- Top strap height: Place the headset so the display aligns with your pupils. Slide the top strap until it sits evenly across the crown—not too close to the forehead, not too far back. The goal is equal front-to-back weight distribution so the visor doesn’t tilt when you nod. After setting, scan left-to-right and gently nod—if the image tilts, nudge the strap up or down in small increments.
- Rear adjustment dial: Turn the dial in small steps until the rear pad hugs the occipital ridge (the base of the skull). It should feel snug without painful pressure behind the ears. Test by shaking your head; if the headset shifts, tighten one notch and retry. If you feel a localized hotspot at the back, adjust the rear pad angle or consider a thinner rear cushion.
- Side straps and tilt: With height and rear set, tighten the side anchors evenly to control tilt and depth. Increasing side tension pulls the visor toward your face—use this to reduce cheek pressure or move the sweet spot into focus. If vision blurs or cheek pressure appears, loosen slightly and re-balance height and rear tension.
Small, repeated tests—30 seconds of active head turns, a quick VR demo, or a short video—are more effective than long, single adjustments. Lock in each change only after confirming the headset stays level and you don’t feel a single painful pressure point.
Cushions and padding for diverse heads
Cushion selection is where fit becomes personal. Materials and shapes change how pressure is distributed across the forehead and temples—sometimes more than strap tension does. The common options each have strengths: memory foam gives even pressure distribution and a soft feel; gel-infused foam adds cooling for long sessions; silicone pads conform and are easy to wipe clean; PU leather covers are durable and resist sweat but can trap heat.
Match cushion to head shape. For narrow heads or pronounced brow bones, choose a thicker, softer forehead pad to prevent bone-to-pad pressure. If you have a broad forehead or do a lot of active VR, a firmer pad can stop the headset from sliding forward while keeping the face gasket at a comfortable distance. Temple gaps on people with less prominent side contours benefit from contoured pads that fill space without crowding. Multi-layer or tapered designs can give a combination of front support and a softer crown contact.
Also consider replaceable pad covers and hygiene: removable, washable fabric covers reduce sweat buildup and extend the useful life of foam. Try swapping one cushion at a time and testing for 15–30 minutes; that single change often reveals whether your pressure complaints are padding-related or a symptom of poor strap height or rear tilt.
Glasses-friendly fit
Many Quest 2 users need a fit that accommodates prescription glasses. The Elite Strap helps by stabilizing the headset, but achieving glasses clearance requires careful alignment and tension control to avoid pinching temple arms or pressing the glasses into your nose.
- Start with slightly looser side tension to create a small face gasket gap. Once you have lens alignment, tighten the rear dial only enough to prevent slippage—over-tightening will press the glasses inward.
- Position the top strap so that the front pad sits a finger-width above your brow bone rather than directly on it; this reduces pressure that would drive glasses into the cheeks.
- If your frames are wide, use a thinner forehead cushion or a face-pad spacer to increase internal depth. For thick temple arms, route the arms neatly between the face gasket and the strap anchors to avoid pinching.
Test with short sessions and small head movements. If you feel pressure on the nose bridge or the glasses fog up, loosen side tension slightly and consider a gel or flatter foam face pad that increases distance between your face and the lenses. Some users find modestly elevating the rear yoke reduces forward pressure, which in turn keeps glasses seated more comfortably. If you frequently switch between glasses and contacts, label a “glasses” preset for quick re-fit—loosen the top strap slightly, set the rear dial to a specific click, and mark side anchor positions with a small sticker or piece of tape.
Care, maintenance, and replacement parts
Regular care preserves both fit and hygiene. Wipe the strap frame and cushions after heavy use with a microfiber cloth dampened with mild soap and water; avoid alcohol or harsh solvents that can degrade foam and adhesives. If your cushions are removable and washable, hand wash gently and air-dry completely before reassembly. Never tumble-dry or use heat near padding—it can compress foam and change cushion thickness.
Store the headset so the strap keeps its natural curve: either on a supportive stand or in a padded case. Avoid folding the strap tightly or placing heavy items on top of it. Over time, fabric frays, foam compresses, and dial mechanisms can loosen; inspect monthly if you use the headset regularly. Signs that replacement parts are needed include visible foam thinning, loose buckles that no longer hold tension, frayed stitching, or a dial that skips clicks. Manufacturer parts and reputable third-party cushions are widely available; choose replacements that match the Elite Strap’s dimensions to preserve the intended geometry.
When replacing parts, keep a small kit of spare screws, adhesive strips, and a basic set of cushions—this makes it quick to restore a familiar fit. Re-evaluate fit after any replacement: a new, thicker pad can require a slight change in top-strap height or rear dial setting to maintain balance.
Troubleshooting and long-term optimization
Even a well-tuned Elite Strap can loosen or feel off after heavy use, changes in hairstyle, or when switching between users. Troubleshoot methodically: start from your clean baseline (loose dial, neutral top strap) and reapply settings. If the headset slips during activity, increase rear dial tension one click at a time and lower the top strap a notch to shift load rearward. If you develop a persistent hotspot, identify whether it’s the pad or the strap by swapping cushions or slightly altering strap height—padding changes usually fix soft pressure, while strap alignment corrects hard pressure points.
For long-term optimization, keep a short test routine: a five-minute sequence of head-turns, nods, and a quick virtual demo after each adjustment. Log your preferred settings: top-strap position, rear dial clicks, and side-anchor notch. This makes transitions between long and short sessions predictable and helps households sharing a headset. If fit changes gradually, check for material fatigue—foam compresses, elastic stretches—and replace parts before the changes force over-tightening, which creates new hotspots. Finally, incremental tuning is your friend: small changes repeated produce a durable setup without surprises in the middle of a session.
Compatibility and future-proofing
Think beyond the Quest 2—selecting cushions and accessories that fit a range of head shapes and are compatible with third-party solutions extends the value of the Elite Strap. Many third-party straps, battery packs, or counterweights attach to the same anchor points, but their weight and geometry change how you tune the system. A strap with an integrated battery adds rear mass that can improve front-to-back balance for users who struggle with forehead pressure; it will, however, require softer forehead padding or a slightly different top-strap height to avoid new rear hotspots.
When evaluating accessories, prioritize modular components that let you swap cushions and fine-tune the rear pad angle. Some manufacturers sell detachable counterweights or low-profile pads designed to work with the Elite Strap’s frame—these are particularly useful if you plan to use future headsets or accessories like a Vision Pro stand or similar devices where redistributed weight alters the fit dynamics. Check compatibility specs and user reviews to ensure attachments don’t obstruct the dial or side anchors.
Finally, future-proofing includes keeping spare parts and noting the settings that work best across devices. If you anticipate moving to a heavier headset or using an add-on battery, plan for firmer rear support and experiment with gel-infused pads to manage heat. A small, labeled card in your storage case with recommended top-strap and dial settings for different scenarios (glasses, fitness, long seated sessions) makes switching seamless and prolongs the life of both your Elite Strap and headset.
Next step: run a five-minute baseline check now—clean your strap, set the top strap to a neutral height, loosen the rear dial, and try the step-by-step sequence above. Adjust one parameter at a time and record your preferred clicks and notch positions to create a repeatable, comfortable setup tailored to your head.


Share:
Long-Session Comfort: Best Practices for Wearing Quest 2 All Day
Materials and padding that boost glasses comfort on the Quest 2