

How to Adjust Your Quest 2 Strap for Fewer Pressure Points and Longer, Comfortable VR Sessions
If your Quest 2 leaves you with forehead aches, temple numbness, or cheek chafing after an hour of play, the solution is often not a new headset but a better strap setup. Small, deliberate adjustments—choosing the right strap style, aligning the center of gravity, and placing padding where it matters—can turn sessions from uncomfortable to effortless. ⏱️ 10-min read
Below you'll find field-tested techniques for evaluating strap options, installing and tuning a comfort strap, selecting cushions, and balancing weight for extended play. These steps are practical and repeatable, designed for newcomers upgrading from the stock strap and veterans chasing pressure-free VR.
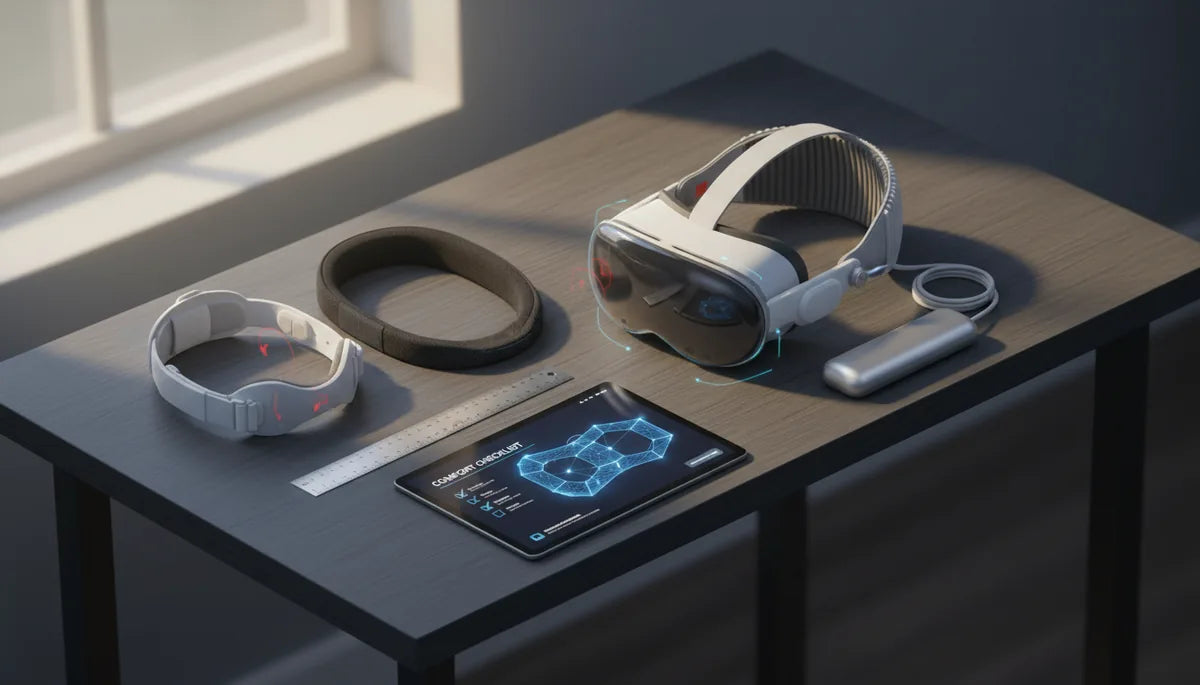
Evaluating Quest 2 comfort strap options
Start by mapping the problem before buying. The stock elastic strap is light and simple but tends to concentrate load on the forehead and cheeks because it grips the face rather than spreading weight. The official Halo-style (or Elite-style) straps wrap around the back and crown, shifting force to the skull and reducing frontal pressure. Elite variations add adjustable hardware and sometimes a rear-mounted battery that doubles as a counterweight—useful for balancing a forward pull.
Third-party options vary widely. You’ll find minimalist two-strap designs for active play, padded halo-style straps with thicker foam, and full Elite-like rigs with easy micro-adjusters. When comparing, check three things: how the strap anchors to the Quest 2 clips, how broadly the contact area is (wider contact reduces hotspots), and the materials used for padding and breathability. Memory foam gives plush comfort but compresses over time; breathable mesh covers help vent heat. Durable stitching and solid buckles matter if you game daily.
A quick physical test: with each candidate strap in hand, imagine the headset pulled forward an inch—does the strap naturally drive the pressure into your forehead, crown, or temples? That tells you where it will create hotspots during long sessions. For glasses wearers or anyone sensitive to facial pressure, prioritize halo-style or straps with rear counterweights to shift load off the face.
Sizing, height, and center-of-gravity setup
Fit begins with measurement. Use a flexible tape and measure around your head about an inch above the ears; that gives a baseline for strap length so the headset sits secure without pinching. The aim is a snug fit you can slip a finger under—tight enough to prevent wobble, loose enough to avoid constant pressure.
Height matters as much as tightness. Start with the bottom edge of the facial interface around the cheekbone level and raise or lower the headset until contact points feel even. If you see a shallow red line on the forehead or a crease across the nose after a short wear test, raise the headset slightly and recheck. The ideal placement keeps the screen centered in your vision while avoiding concentrated pressure on the brow or nasal bridge.
Center of gravity (CG) determines whether the headset pulls forward or sits naturally. Align the headset’s CG over the top center of your head by tuning the top strap and rear anchor points: loosen the top strap to let the front sit lower; tighten it to pull weight rearward. A balanced CG means less neck strain and less tendency to clench jaw and brow. Quick fit-check checklist:
- Measure head circumference and set baseline strap length.
- Place the facial interface so the bottom edge rests near cheekbone level.
- Slip one finger under the strap—fit should be snug, not tight.
- Adjust top strap to center CG over the crown; test by looking straight ahead—headset should be level.
- Move eyes and shake your head gently; watch for hotspots or slippage and readjust.
Install a comfort strap: step-by-step guide
Installing a replacement comfort strap is straightforward, but handling the clips with care preserves the plastic mounts. Follow this controlled sequence to avoid damage and achieve a reliable baseline fit.
- Power off the headset and clear a soft workspace. Hold the Quest 2 steady with one hand on the body to prevent twisting its clips.
- Gently unclip the stock strap from the side mounts. If the stock strap has a connector tab, lift it straight out—avoid twisting or forcing the clips.
- Align the new strap’s side arms with the headset’s side clips. Push them in until you hear or feel a soft click; don’t overforce the fit.
- Attach the top strap or yoke to the rear mounting points per manufacturer marks. Ensure the yoke sits flat and doesn’t bind on the back shell.
- Before final tightening, do an initial loose adjustment. Place the headset on with gentle pressure and set strap length so the headset rests lightly across the temples and crown.
- Test movement: look up/down and side-to-side, nod your head, and perform a few turns to feel for hotspots or slippage.
- Lock any latches and check that the strap pivots freely and doesn’t snag the facial interface or lenses.
Sanity checks after installation: confirm the field of view isn’t obstructed, lenses are scratch-free, and you can remove the headset quickly without catching hair. If something pinches or binds, remove and re-seat the side arms to ensure correct alignment.
Fine-tuning fit: even tightening and anchor-point adjustments
Once the strap is installed, fine-tuning is where comfort gains happen. Heavy-handed tightening creates new hotspots; instead, use gradual, even adjustments across the crown and sides. Start by setting the crown tension to a middle position, then work the side anchors in small increments so the load is shared evenly across forehead, temples, and rear scalp.
A simple routine helps: tighten the top strap a quarter turn, then the right side a quarter turn, then the left side a quarter turn. Repeat until the headset feels stable. If you detect temple pressure or numbness, back off the corresponding side anchor slightly and test again. Anchors should rest on bone, not soft tissue—if they press into the side of the head or ears, reposition them a half inch up or back so they contact the skull.
Micro-adjustments are critical for hotspots. Use thin adhesive foam (1–2 mm) to relieve sharp points or reposition the contact patch away from sensitive areas. Adjust the top strap tension to shift weight: loosen it slightly to let the headset ride lower, or tighten just a hair to pull the front upward and move weight rearward. Test each tweak in short five- to ten-minute sessions—comfort often changes after a few minutes as foam compresses and skin settles.
Cushions and padding: selection, install, and care
Facial interfaces and cushions are the frontline of comfort. Choices boil down to material, thickness, and breathability. Memory foam offers plush relief and molds to contours well, but it compresses over multi-hour sessions. High-density foam or layered foam retains support longer and reduces the need for frequent repositioning. Breathable covers—moisture-wicking fabric or meshed surfaces—help substantially with heat buildup, which can intensify perceived pressure.
When selecting a cushion, consider the areas you want to shift pressure from: broader, thicker pads disperse weight across a wider area and relieve nose/cheek hotspots, while thinner, firmer pads keep the headset closer to the eyes for better IPD alignment and less wobble. Installing a new interface is typically a snap-fit: remove the old gasket, align the new one to the lens frame, and press evenly around the perimeter. Avoid forcing corners—if it doesn’t seat smoothly, rotate and realign.
Care extends life and comfort. Hand-wash removable covers with mild detergent and air dry; do not use high heat. Replace foam every 6–18 months depending on frequency of use and sweat exposure. If pads start to flatten, develop odor, or the fabric shows thinning, swap them before comfort degrades. Keeping spare cushions on hand lets you rotate and dry parts after sweaty sessions, which prevents permanent compression and bacterial build-up.
Glasses-friendly configuration
Glasses wearers face two recurring issues: nose bridge pinch and temple rubbing. Start with an interface that offers extra nose clearance or a deeper nose bridge cutout. Many third-party gaskets are designed specifically for spectacles, increasing the gap between lenses and glasses while maintaining a seal against stray light.
Additional practical strategies:
- Use a slimmer facial interface or thin foam strip along the nose bridge to avoid pressing glasses into your skin.
- Reposition side anchors slightly higher so they contact bone near the crown rather than the temporal region where glasses arms sit.
- Install soft temple pads to cushion the glasses' arms where they touch skin, or use thin adhesive covers on the glasses' temples to reduce sliding.
- Consider a halo-style strap that transfers load onto the crown instead of the brow; that often reduces nose pressure because the front clamp can be relaxed slightly.
When fitting glasses, put them on first, then don the headset. Adjust the strap until the headset seals without pinching the spectacles. If fogging becomes a problem, check the interface seal and ventilation—reducing tightness slightly can improve airflow while still maintaining stability. Test in 10–15 minute increments; small adjustments often yield big comfort improvements.
Weight distribution and balance for long sessions
Even a well-fitted strap can feel heavy after hours if the headset’s weight pulls forward. That forward pull makes you tighten the strap, which in turn increases frontal pressure—creating a vicious cycle. The antidote is deliberate balance: shift the center of gravity rearward so the headset wants to sit level without clamping the face.
Options for balancing:
- Rear counterweights: small adhesive weights or battery packs that clip to the back of a halo or Elite strap can pull the CG toward the rear. Start light (50–100 g) and increase in 25 g increments while testing stability.
- Built-in battery straps: these replace the rear of the strap with a heavier battery module that both extends battery life and counterbalances the front.
- Top strap tuning: micro-adjust the top strap to lift or lower the headset relative to the crown; a small change here can move perceived weight substantially.
- Positioning: move the facial interface slightly higher or lower on the face to alter leverage; higher placement reduces the moment arm of the headset pull.
Neck comfort matters. If your neck tires quickly, reduce front clamp by shifting weight rearward rather than tightening. For seated experiences, small rear weights often make the biggest positive difference; for active, standing play, focus on secure anchoring so the headset doesn’t shift during movement. Always test balance changes in both seated and standing play to ensure the setup performs across activities.
Maintenance, compatibility, and upgrade paths
Consistent maintenance preserves fit and prevents surprises. Clean removable foam and fabric according to manufacturer guidance—spot-clean or hand-wash covers, air-dry away from heat, and never saturate internal foam. Inspect attachment points and elastic bands monthly for fraying, cracking, or stretched elasticity. Replace worn parts before they fail; stretched elastic or failing clips cause sudden slippage and create new hotspots.
Compatibility matters when upgrading. Most Elite-style and halo-style third-party straps are designed to snap into the Quest 2’s side mounts, but some accessories—battery packs, custom faceplates, or aftermarket shrouds—may interfere with clip clearance or change how a strap sits. Check accessory overlap before purchase and look for straps advertised as Quest 2–compatible. If you’re still under warranty, note that third-party modifications can sometimes complicate claims—keep original parts and be ready to reinstall stock components if service is needed.
Upgrade paths are incremental: start with a high-quality padded strap or halo. If that doesn’t fully solve your issues, add a thicker facial interface geared to your face shape, then trial a rear counterweight. Keep an inventory of spare cushions and an adjustable rear weight so you can fine-tune without buying everything at once. Regularly rotate and air out components after heavy sessions to extend their useful life.
Next step: pick one change—strap style, one cushion swap, or a 25 g rear weight—and test it in a 30–60 minute session. Small, measured adjustments and short testing cycles are the most reliable route to comfortable, pressure-free VR.


Share:
Comfort or Stability? How Strap Choice Affects Weight Distribution on Meta Quest
How Headset Weight Impacts VR Fitness: Endurance, Form, and Movement