

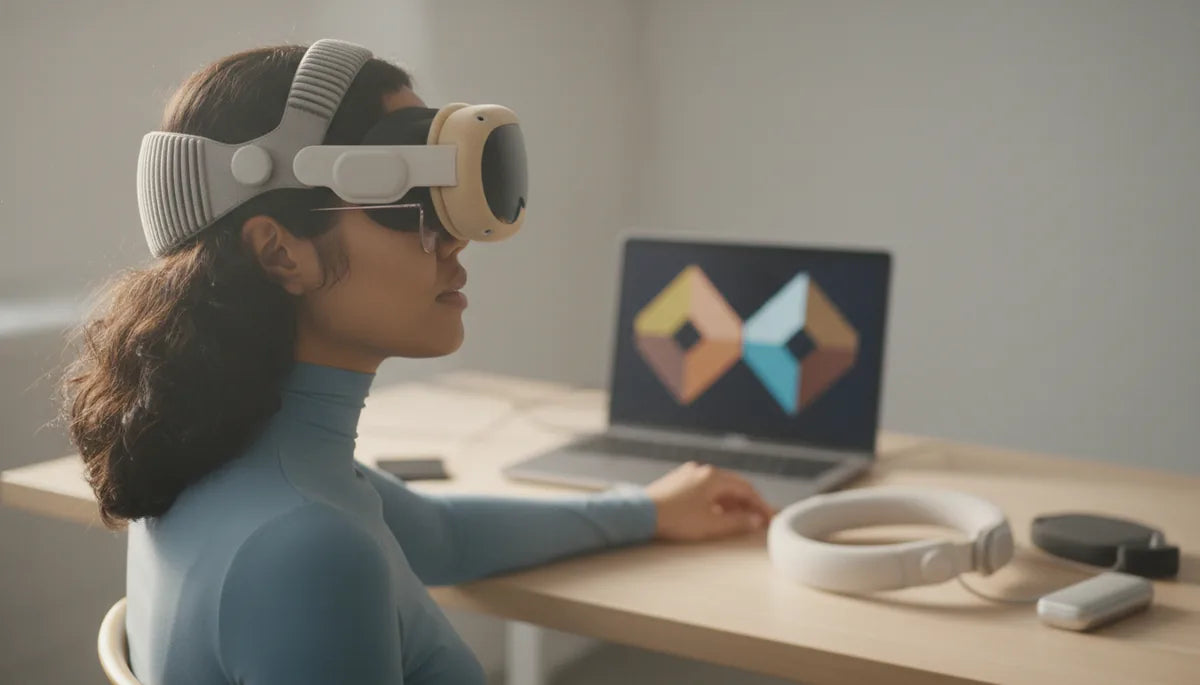
How to Choose a Glasses-Friendly Oculus Quest 2 Strap: Prioritize Fit, Balance, and Padding for Long Sessions
If you wear glasses, the right Oculus vr-comfort/lightweight-vr-vs-bulkier-sets-choosing-comfort-for-extended-training-sessions" rel="nofollow noopener noreferrer">Quest 2 strap transforms VR from a short, awkward experiment into several hours of comfortable immersion. Picking a strap isn’t just about soft materials or a flashy design — it’s about the way the strap positions the headset relative to your face, how it spreads weight, and whether it creates safe clearance for your frames. ⏱️ 11-min read
This guide walks you through practical, actionable steps: how to measure for clearance, what different strap styles do to comfort, which padding materials work best for temples and nose bridges, how to tune balance and weight, step‑by‑step installation and adjustments, upkeep, accessory compatibility, and simple best practices to stay comfortable during long sessions. By the end you’ll know what to test in-store or what to look for online before you buy.
Assess Fit for Glasses Wearers: Frame Clearance, Head Size, and Strap Anchor
Start with measurement, because what feels comfortable on paper can quickly become uncomfortable on your face. The most reliable check is the temple-to-face clearance: measure from the side of your head near the temple to the front of your face where the Quest 2 facial interface sits. Standard eyeglass frames commonly range 12–16 mm in frame depth, so aim for a headset setup that leaves at least that much room between the headset foam and your temple arms. If you have thicker frames, plan for a few extra millimeters.
Head circumference and strap anchor points matter just as much as depth. A strap that pulls primarily from the sides can squeeze the temple arms inward; straps that distribute force across the crown and back of the head tend to keep frames stable. Try to visualize how the strap changes the headset’s angle: top-anchored designs lift the front slightly and create more forehead pressure, while rear-anchored systems pull the visor straighter onto your face.
When trying a strap, wear your glasses and test for hotspots: any point where the frames press the skin, fogging starts, or vision shifts. If the headset consistently nudges the temple toward the lens, look for straps with adjustable anchor positions or ones that give additional clearance via thicker facial interfaces. These small geometry changes usually solve more problems than merely cranking down on the strap tension.
Strap Options and How They Change Comfort
Not all straps are created equal. The Quest 2’s original soft strap is lightweight and simple but offers limited lift and balance. The official Elite-style straps and many third-party comfort systems add a rigid rear plate, wider bands, and thicker pads — changing where pressure lands and how the headset reacts to movement.
Two-strap systems pair a top crown strap with a rear sling. The crown strap bears some of the vertical load and reduces pressure at the nose, while the rear sling stabilizes horizontal movement. This spread of load tends to be kinder to glasses because it reduces localized temple squeeze. But it’s essential that tension is even: an overtightened top strap can press the forehead and rotate the headset, pushing glasses inward.
Single rear-sling or “halo” designs focus support at the back of the head and often include a rigid plate to create a counterbalance. These are excellent at moving weight away from the face and therefore reducing nose pressure. The trade-off can be slightly more noticeable torque changes when you move quickly — a reason to pair them with a well-matched facial pad.
Third-party comfort straps vary widely. Low-cost fabric or neoprene options add cushioning at the face, but may not shift the center of mass much. Mid-range and premium straps bring memory-foam pads, adjustable hinge points, and optional battery mounts that alter balance. Match the strap type to how you use the Quest 2: casual short sessions may only need improved face padding; longer sessions benefit from a rigid rear support and adjustable crown anchor.
Padding, Foam Density, and Contact Points
Padding is where comfort is won or lost for glasses wearers. The Quest 2’s factory foam is thin; upgrading the facial interface can add critical millimeters and change how the temples and cheeks interact with the frame. Two key traits to consider are foam density and the geometry of the pad edge.
Low-density, softer foam spreads pressure and feels plush against the temples and cheeks, reducing pinching and red marks. That softness, however, can allow a small amount of wobble; if you notice slippage, consider a slightly firmer pad or pairing soft foam with a snug strap. Memory foam offers a middle ground: it conforms to facial contours while resisting excessive compression. Gel inserts or silicone facial masks are good at distributing pressure and handling sweat, though they can feel warmer against the skin.
Thickness matters: increasing the distance between the lenses and your glasses by about 4–10 mm often prevents frames from contacting the headset lenses and relieves pressure on the bridge. But don’t overdo it — too thick a pad can move the Quest lenses out of alignment with your eyes, introducing vignetting or blur at the edges. Make incremental changes and check the interpupillary distance (IPD) and clarity after every adjustment.
Look for pads with temple relief — a cutaway shape or thinner section where the glasses’ temple arms sit. This design reduces lateral pressure and keeps frames from being pinched. Also evaluate the pad’s edge finish: a soft, tapered edge minimizes sharp contact against your frames and reduces hot spots that get painful during long sessions.
Weight Distribution and Balance
Balance determines how much of the headset’s weight presses on your nose and temples. A front-heavy setup increases facial clamp force; shifting some mass rearward lowers pressure on the nose and temples. A single counterweight, even a small battery pack, can substantially reduce perceived squeeze — but it must be tuned to avoid swapping one hotspot for another.
Think in terms of torque: adding or removing a few dozen grams at the rear changes the rotational force around the nose bridge. The goal is neutral balance so the headset sits flush without needing excessive strap tension. If the device tilts forward, tighten the rear attachment or add a modest counterweight. If it tilts backward and pulls on the crown, reduce rear mass or raise the front slightly with the top strap.
Strap geometry plays a role too. Wider bands distribute load over a larger area of the head, reducing pressure points. Rigid rear plates convert downward pull into a more even lift across the back of the skull. For glasses wearers, a stable rear plate is often preferable to simply tightening the sides — it reduces lateral squeeze against the temple arms and keeps the lens alignment steady through movement.
When testing balance, perform dynamic checks: look left and right, shake your head, and lean forward. If glasses slip or you feel torque about the nose, tweak the weight distribution first, then adjust strap tightness. Stability should come from balanced geometry and rear support, not brute force applied by overly tight straps.
Installation, Adjustment, and Glasses-Safe Setup
A careful install and methodical adjustments prevent common problems like smudged lenses, fogging, and pinched temple arms. Follow these steps when swapping straps or changing pads to keep your glasses safe and your headset comfortable.
- Inspect and clean: Wipe lenses and glasses with a microfiber cloth. Check strap anchors and plastic edges for burrs that could scratch frame arms. Smooth or replace any rough hardware before first use.
- Measure and simulate clearance: Fold a microfiber cloth or use a corrective-lens spacer to simulate the thickness of your glasses between your face and the headset. This shows whether the existing pad gives you adequate room.
- Seat the headset: With the spacer in place, put on the Quest 2 and set the rear and top straps so the headset rests flush on your face without depressing the spacer. Adjust incrementally; small changes make big differences.
- Fine-tune IPD and lens distance: Ensure your IPD setting and lens distance keep the image centered and sharp. If clarity shifts after changing pads, tweak pad thickness or strap angle before altering the headset frame itself.
- Movement test: Nod, turn, and briskly shake your head to check for frame movement. If the glasses slip or the headset tilts, adjust rear tension and try again. Only tighten until stability is achieved — over-tightening creates new pressure points.
If you use corrective lens inserts (WidmoVR, VR Lens Lab, or similar), install them before the final fit test — inserts reduce the need to accommodate frame depth and can simplify dialing in comfort.
Maintenance, Durability, and Replacement Parts
Routine care extends the life of straps and pads and keeps a glasses-friendly fit consistent over time. Clean soft plastics and straps with 70% isopropyl wipes to remove oils and sweat without saturating foam. For removable foam covers, wash gently with mild soap and lukewarm water, rinse thoroughly, and air-dry before reassembling. Avoid solvents and aggressive chemicals that degrade adhesives and Velcro.
Expect foam to compress with regular use. Typical lifespans: facial foam pads 6–12 months with daily wear, and silicone or fabric straps 12–24 months depending on care and intensity of use. Compression and seam wear are the main culprits — if your foam feels significantly flattened or the strap’s anchor stitching frays, it’s time to replace parts. Compressed foam changes headset geometry and can reintroduce temple pressure for glasses wearers.
Plastic components near hinges or high-torque zones can crack under repeated stress; inspect these areas periodically. Official replacement parts are available from Meta/Oculus for facial interfaces and some strap components. Many third-party vendors also sell compatible plates, pads, and straps — but check return policies and compatibility notes carefully, since aftermarket plates can alter facial clearance or IPD alignment.
Keep a small kit of supplies: a microfiber cloth, lens-safe anti-fog wipes, a backup thin foam spacer, and the appropriate screwdriver or release tool for your strap. Quick fixes like swapping in a thicker cushion or tightening a rearmount can get you back into VR comfortably without a full replacement.
Accessories, Compatibility, and Budget Guidance
A glasses-friendly setup often involves accessories beyond just a strap. Corrective lens inserts from brands like WidmoVR or VR Lens Lab eliminate external frames from the equation, letting you maintain a slim profile and clearer optics. Temple-relief pads, vented facial interfaces, and adjustable top straps address specific pressure points without breaking the bank.
Compatibility checklist before you buy:
- Mount type: confirm the strap or accessory uses the Quest 2’s clip system or a supported adapter.
- Faceplate shape: aftermarket plates can change foam clearance; verify they won’t push lenses out of alignment.
- IPD range: ensure inserts and thicker pads keep the lenses within your interpupillary distance range.
- Battery and wireless modules: if you plan to add a rear battery pack or third-party wireless module, make sure the strap supports the extra mount or rear weight.
Budget tiers to consider:
- Under $30: Basic replacement pads, simple top straps, and temple-relief cushions. Good for casual users needing small comfort gains.
- $30–$80: Mid-tier padded straps with memory foam, wider bands, and better build quality. Ideal for frequent players looking for a balance of comfort and cost.
- $80 and up: Premium straps with rigid rear plates, replaceable foam, and built-in battery mounts. Best for long sessions or prosumers who demand consistent balance and durability.
When in doubt, prioritize straps that advertise replaceable pads and clear compatibility notes. A mid-range strap with a planned upgrade path often outperforms a cheaper band whose pads wear out quickly.
Best Practices for All-Day Comfort
Even the best strap needs sensible habits behind it. For extended VR sessions, take micro-breaks every 30–60 minutes. These pauses let your eyes rest and give you an opportunity to re-seat your glasses, check strap tension, and wipe lenses if fogging starts. Small adjustments during a session prevent pressure from building into soreness.
Practical day-of tips:
- Start with the straps slightly loose and tighten gradually until the headset feels stable. Over-tightening causes hotspots and can push frames inward.
- If you experience fogging, loosen the top strap slightly, improve airflow with a vented interface, and use anti-fog wipes made for optics.
- Watch for signs of trouble: persistent red marks at the temple, numbness or tingling, recurring headaches, or blurred vision. These are cues to stop, reassess fit, and possibly switch pads.
- Re-center the headset after intense movement. A quick re-seat prevents asymmetrical pressure that pinches one temple more than the other.
Finally, if you plan marathon sessions, consider corrective lens inserts. They eliminate the variable of frame depth entirely and often yield the best long-term comfort and optical clarity for serious players. If inserts aren’t an option, prioritize a strap with a rigid rear plate and temple relief pads — that combination gives the most predictable comfort for glasses wearers.
Next step: measure your frame depth and head size, then test a strap with a spacer in place. If you’re buying online, choose a vendor with a generous return policy and a clear compatibility list so you can iterate until you find the fit that keeps both your glasses and your immersion intact.


Share:
Lightweight VR vs Bulkier Sets: Choosing Comfort for Extended Training Sessions
How to choose between the Oculus Quest 2 comfort strap and Elite Strap for your playstyle