

Upgrade Your Quest 2 Facial Interface: A Practical Guide to Silicone Gaskets, Fit, and Long-Session Comfort
If your Quest 2 leaves red marks on your cheeks, foggy lenses after a ten-minute sprint, or a lingering sweaty smell, a facial interface upgrade is one of the highest-impact mods you can make. This guide walks you through why silicone gaskets are worth considering, how they change fit and eye comfort, what to look for when choosing one, and the small tuning steps—IPD, straps, and lens inserts—that turn a good headset into a comfortable one for marathon sessions. ⏱️ 10-min read
Think of this as a gear-first manual: clear, practical advice and examples you can apply tonight, whether you wear glasses, play for hours, or just want a cleaner, more immersive headset. I’ll cover installation, fitting rules, cleaning, and troubleshooting so you don’t trade one problem for another.
Why upgrade the Quest 2 facial interface?
The Quest 2’s stock foam works well enough out of the box, but it shows its limitations quickly for anyone using the headset for more than short sessions. Foam compresses and takes shape, leaving uneven pressure points on the cheeks and nose. That creates red marks, pressure sores, and a sensation of “pinch” around the bridge of the nose. The foam is also porous: it soaks up sweat, face oils, and makeup, which means odors, bacterial buildup, and a hygiene problem if you share the device.
Aftermarket facial interfaces—especially non-porous silicone gaskets—address several measurable issues. They distribute pressure more evenly, reducing hotspots and the sharp edge feeling you get from compressed foam. They form a more consistent seal, lowering light leaks and preserving immersion. Because silicone is wipeable and doesn’t absorb moisture, cleaning becomes simple: a quick wipe or rinse removes sweat and oils. Finally, aftermarket designs last longer before sagging or losing shape, so you replace pads less often and keep a consistent fit over time.
Silicone gaskets vs stock foam: what changes for your face and eyes
Material matters. Stock Quest 2 pads are polyurethane foam wrapped in fabric: soft at first but prone to compression set—after weeks or months those plush initial qualities fade, leaving uneven, sticky surfaces that soak up grime. Silicone gaskets are molded, closed-cell silicone rubber. They don’t absorb sweat, they resist permanent flattening, and they keep their shape across long sessions.
How does that feel at the skin and to your eyes? Silicone redistributes pressure across a wider surface, which often removes the “pinch” on the nose and reduces cheek pressure. Because the seal is more stable, you’ll get fewer light leaks around the edges and less lens fogging from exhaled breath. On the flip side, silicone can feel firmer to the touch and may trap more heat against the skin for some users—though many brands design channels and inner lips to encourage airflow.
Common silicone options include VR Cover silicone gaskets and Kiwi Design–style replacements, along with AMVR and other aftermarket models. Each trades a slightly different firmness and lip profile. If you want the softest initial contact, look for silicone with a softer durometer or hybrid PU leather + silicone solutions; for durability and a tight seal, denser silicone is the winner.
Choosing the right silicone gasket: thickness, eye relief, and fit rules
Choosing the right gasket is about three core variables: thickness, eye relief (the internal pocket depth between your eye and the lens), and the inner lip shape that blocks light. These elements determine how the headset sits on your face, how far your eyes are from the Quest 2 lenses, and whether your glasses will fit comfortably.
Thickness ranges you’ll see: thin (≈1.2–1.5 mm), medium (≈1.5–2.0 mm), and thick (≈2.0–2.5 mm). Thin gaskets keep your face closer to the lenses—useful if you wear glasses or if you need the shortest eye-to-lens distance. Medium offers a balance for most faces. Thick options add padding for sensitive skin or long sessions and can help prevent light leaks at the nose but may push your eyes slightly further from the lenses.
Eye relief matters because the optical sweet spot on Quest 2’s lenses is fixed. Shorter eye relief reduces peripheral edge glare but must be aligned carefully to avoid pressure. Longer relief increases comfort and room for lashes or glasses but may make edge clarity and vignetting more noticeable. Measure your face width and nose bridge gap roughly: place a finger horizontally across the bridge to note how deep your nose sits relative to the headset rim, and choose a gasket that doesn’t press into your nostrils. Also consider your IPD setting (58/63/68 mm)—if you use an extreme IPD, favor gaskets that won’t alter the headset’s seating in a way that shifts your eyes off the lens centers.
Step-by-step installation and getting a proper seal
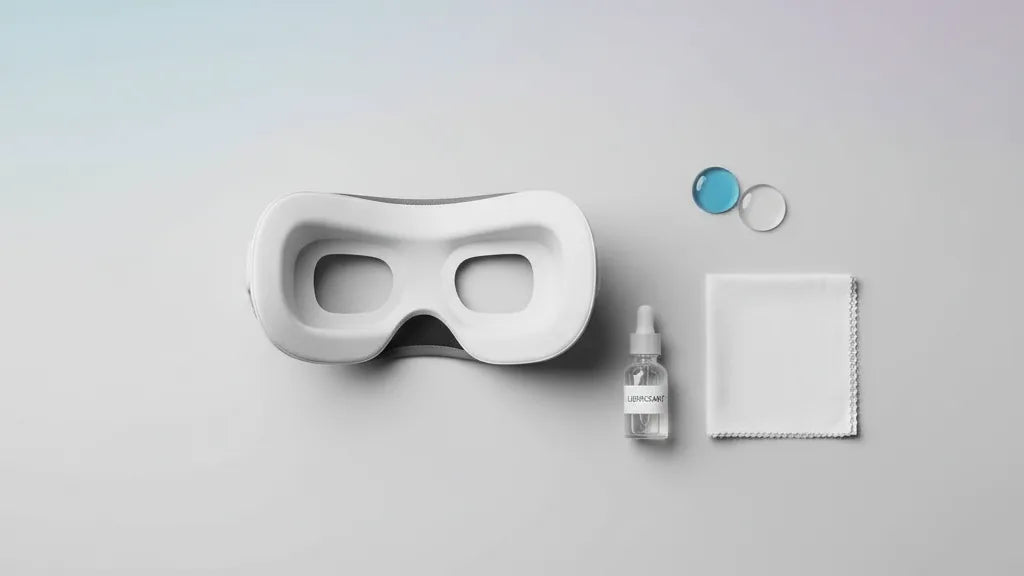
Installing a silicone gasket is straightforward but benefits from a methodical approach. Gather the gasket, a soft microfiber cloth, mild soap and water (or a wipe), and a soft pry tool or fingernail for removal. If your gasket has adhesive backing, have the liner and any clips ready.
- Power down and remove the stock foam. Gently pry at the edges with fingers or a soft tool to avoid scratching the plastic frame.
- Clean the headset contact surface. Wipe with a microfiber cloth and mild soap or a 70% isopropyl wipe—avoid soaking. Let the surface dry completely.
- Orient the gasket. Line up the nose bridge and eye holes. Make sure the inner lip that blocks light faces inward and the gasket isn’t twisted.
- Attach the gasket. For clip-on designs, press evenly around the perimeter until all clips snap in. For adhesive-backed designs, peel a small section of the liner, stick that segment in place, then slowly remove the rest while smoothing to avoid bubbles.
- Seat and test. Put on the headset, adjust straps to a comfortable baseline, and check for light leaks around the nose and temples. Move your head and nod to ensure the seal stays consistent.
Small adjustments matter: a marginally misaligned gasket can cause pressure in one spot or allow a light sliver. Trim only tiny sections if necessary, and prefer repositioning over cutting when possible. Most silicone gaskets remain compatible with Meta’s Elite Strap and many third-party comfort straps, but if you use a rear-mounted battery or a thick comfort strap, re-check alignment after installing because the added pull may change how the gasket meets your face.
Optimizing eye comfort: IPD, lens distance, and prescription inserts
Eye comfort is a balance of optical alignment and physical fit. The Quest 2 has three fixed IPD settings—roughly 58, 63, and 68 mm. Start at the middle (63 mm) and test for clarity: text should be sharp in the center, and objects should not appear doubled. Switch to an adjacent setting and retest for several minutes. If one setting gives noticeably crisper center focus and less strain, stick with it.
Gasket thickness changes lens-to-eye distance. A thicker gasket can push your eyes back a few millimeters, affecting perceived sharpness and edge clarity. If you notice softness at the edges after installing a thicker gasket, try a thinner model or reduce top strap tension to bring the headset slightly closer. Conversely, a thin gasket that causes nose pain could be swapped to a medium thickness for better pressure distribution.
Prescription lens inserts (WidmoVR, VR Lens Lab, and similar brands) are an elegant solution for glasses wearers and anyone needing optical correction. They sit between your eyes and the headset lenses and prevent contact between your glasses and the optics, reduce smudging, and preserve correct focal distance. Use inserts if you experience eye strain, persistent blurring, or cannot comfortably fit glasses with the gasket and spacer in place. They’re especially valuable with silicone gaskets because they remove the tradeoffs between glasses comfort and lens protection.
Glasses and silicone gaskets: spacers, cutouts, and preventing smudges
Wearing glasses in the Quest 2 is solvable but requires planning. The single most basic tool is the official glasses spacer that comes with the headset—it creates needed distance between the internal lenses and your frames. Many aftermarket silicone gaskets also include a deeper internal pocket or dedicated cutouts to accommodate temple arms and wider frames; look for products labeled “glasses-friendly.”
If your frames are large, pick a gasket with extra eye relief or a glasses spacer that sits under the gasket without compressing into your cheekbones. Some gasket designs offer a removable insert or a raised nose channel to keep the glass frames clear of the internal lenses. If you still feel rubbing at the temples, gently bend the temple arms outward (small adjustments only) or trim micro-millimeters off the gasket’s inner lip—test slowly to avoid creating light leaks.
To prevent smudges and scratches, follow these habits: always put the headset on and off deliberately with two hands, center the glasses before seating the headset, and consider prescription inserts to remove lenses from the equation entirely. A microfiber cover for the silicone gasket or a soft sleeve over temple arms can mitigate scratches. Finally, when using anti-fog products, choose ones safe for coated lenses and test on a small area first; many anti-fog wipes work well without damaging coatings.
Long-session comfort: straps, weight distribution, and battery packs
Switching to a silicone gasket often improves facial comfort but can change how the headset balances on your head. Because silicone can create a firmer, more consistent seal, you may feel subtle shifts in how weight pulls on the nose and forehead. For long sessions, addressing straps and balance is crucial.
Strap choices matter. Meta’s Elite Strap and the Elite Strap with Battery provide rigid rear support and an integrated counterweight—good for reducing front-face pressure. Third-party comfort straps and halo-style designs spread load across a larger area of the skull, which reduces hotspots. If you add a rear battery pack for longer runtime, place it low and secure (waist- or back-mounted options are excellent for balance) and manage cables so they don’t tug the headset forward.
Practical tuning: start with a snug but not tight front strap, then tension the crown or rear strap incrementally until the headset sits level. If you feel forward tilt, shift weight backward or add a small counterweight to the rear band. For marathon sessions, consider a lightweight rear-mounted battery with a short tether; it removes forward pull and gives you more time between charges without stressing the face. Test with the headset loaded: nod, shake your head lightly, and play for a 20–30 minute block to confirm the fit remains comfortable throughout.
Cleaning, maintenance, and troubleshooting common issues
One of the biggest practical wins of silicone gaskets is easier cleaning. For routine care, remove the gasket and wash with warm water and mild, fragrance-free soap. Rinse thoroughly, blot with a microfiber cloth, and air-dry completely before reattaching—moisture left against electronics invites problems. For quick wipes between users, a 70% isopropyl wipe applied briefly and allowed to evaporate is usually fine; avoid soaking the gasket or using harsh solvents like acetone, which can degrade silicone.
Inspect your gasket every few weeks for tears, hardening, or compression set—replace it if the seal is compromised. Fogging or heat buildup can be reduced by loosening the top strap slightly to increase airflow, using anti-fog wipes on the lenses, or choosing a gasket with airflow channels. Persistent light leaks typically come from poor alignment or a torn inner lip—reseat the gasket first, then test in a dark room to find gaps. If you get pressure sores, try a thicker or softer gasket, redistribute strap tension, and take frequent breaks to let the skin recover.
If you hit a problem you can’t solve—persistent double vision, chronic fogging despite adjustments, or ongoing pain—try swapping gasket thickness or testing with prescription lens inserts before assuming a hardware defect. Most issues are tuning problems, and a small change in strap tension, IPD setting, or gasket model will fix them quickly.
Next step: pick a medium-thickness silicone gasket and the official glasses spacer if you wear eyewear, install it following the steps above, and spend 30 minutes tuning IPD and strap tension. That single session will reveal whether you need a different thickness, lens inserts, or a rear-weight solution to get comfortable for hours of VR.


Share:
A Practical Guide to Installing the Elite Head Strap on Oculus Quest two
Weight Matters: How Quest 2 Strap Design Affects Comfort and Balance