

The Apple Vision Pro is an impressive piece of wearable technology, but like any head-worn device, its comfort boils down to how its weight is distributed across your head. Small changes in balance or padding can turn a pleasant 20‑minute demo into an hour of neck fatigue — or, with the right adjustments, turn long sessions into something you barely notice. ⏱️ 14-min read
This guide walks Vision Pro owners and VR enthusiasts through the practical ergonomics of reducing neck strain. You’ll learn how the headset’s mass maps to your skull, which accessories genuinely help, how stands and cases reduce repeated lifting, posture and fit strategies that matter most, and simple routines to keep extended sessions comfortable. Expect concrete examples, step-by-step checks, and real-world setups other users rely on.
Understanding Vision Pro Weight Distribution
To improve comfort, start by understanding where the Vision Pro’s weight goes. The headset’s mass is concentrated in three zones: the faceplate that meets your nose and cheeks, the crown band that presses onto the top of your skull, and the rear strap that seats against the occipital bone at the base of the skull. Those three contact points are how the headset shares its load; the total weight figure on paper matters less than whether the load is concentrated on the nose, the top of the head, or spread evenly across the back and crown.
Front-loaded headsets put more mass toward the display, creating forward torque. When the center of gravity sits ahead of your ears, your neck extensor muscles must work continuously to maintain a level gaze. Over long sessions, that constant contraction causes fatigue, tightness and, in some people, morning stiffness. A balanced design shifts some of that forward mass rearward — either by moving weight to the crown or adding a small counterweight at the back of the strap — so the headset’s center of gravity aligns closer to the ears or occiput. The difference is dramatic: the same device that feels tiring after 30 minutes can feel steady and almost weightless once balance is corrected.
With Vision Pro, you have practical levers to change balance: strap tension, the crown pad position, and how the rear strap seats. Small adjustments — moving a strap half an inch, rotating the rear pad, or tightening the top band — change how the load transmits into your skull and neck. The goal is simple: share the pressure across broad surfaces (forehead, crown and occipital) rather than concentrating it on the nose or temples.
Ergonomic Accessories that Improve Balance
Accessories are where most users find the quickest wins. The right additions redistribute weight away from the nose and jaw, smooth contact points, and reduce micro-slippage that increases perceived heaviness. Focus on two types of accessories: balance helpers (counterweights, rear clips) and comfort enhancers (cushions, breathable liners).
Counterweight concepts are straightforward: add minimal mass behind the head to offset the front-heavy faceplate. Popular approaches include small rear-clip weights that attach to the strap, strap-integrated weight pouches, or modular plates that nestle against the occipital bone. The principle is gradual: start with a light addition — just a few grams — and test with gentle head nods. Increase until the headset no longer tips forward when you look straight ahead, but stop before the rear begins to pinch or the crown bears all the load. Ideally, the center of gravity ends up near the ear line or occipital curve; that alignment minimizes muscle outreach and keeps your neck neutral.
For contact-surface upgrades, consider memory-foam or gel face cushions, contoured crown pads, and temple-friendly side padding. Dense foam spreads pressure over a wider area, reducing hotspots at the nose and cheekbones. Gel inserts add localized cushioning where needed and can be shaped to avoid pressure against the bridge of the nose. Look for breathable, moisture-wicking covers—sweat build-up amplifies discomfort and can slip straps, increasing torque. Finally, prefer accessories explicitly designed for the Vision Pro or labeled as compatible: ill-fitting third-party parts can change balance unpredictably or interfere with tracking, defeating their purpose.
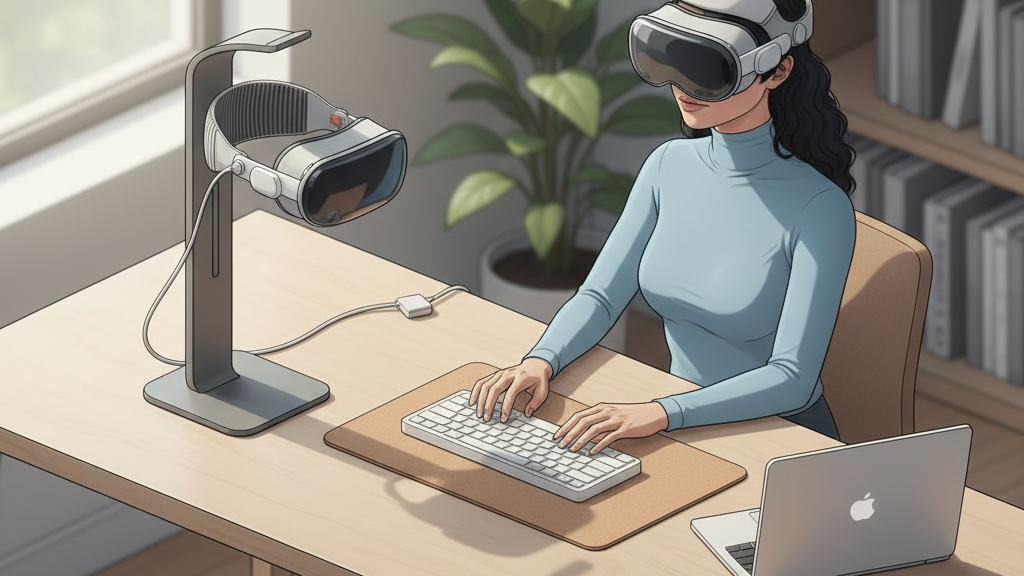
Lifting and Stands: Reducing Neck Load
Every lift and re-mount of a headset is a potential neck strain event. If you routinely pick Vision Pro up from a table or reach to mount it, a poorly positioned dock forces you to flex or extend your neck awkwardly. A lift or stand that places the headset at eye level — or at an easily reachable, repeatable position — reduces that cumulative strain.
Desktop stands are the most flexible solution for home setups. A low-profile cradle that holds the headset at roughly your seated eye height allows you to lift directly forward rather than up and back. Choose a stand with a stable base, gentle padding where the band rests, and enough vertical adjustment to match different seating positions. Many stands also route chargers cleanly, meaning you don’t have to tug on a cable while mounting the device.
Wall or ceiling mounts are an excellent option for studio or shared spaces. They free surface area and keep the headset consistently at the right vertical alignment. A swivel-and-tilt arm lets you angle the display so you can lift the headset with a single, straight forward motion. The key features to watch for in any mount: predictable balance (it should return to the same spot every time), smooth vertical adjustment, and a fast-release interface that doesn’t require awkward re-threading of straps. If you move between standing and seated work, pick a mount with at least 20–30 cm of vertical travel and a locking mechanism to secure your chosen position.
For people who use Vision Pro multiple times a day, a quick-locking mechanism is invaluable. It reduces the time you have the headset away from neutral posture and prevents the small but repeated head flexion that compounds into neck fatigue. In short: align the device with your habitual eye line and remove the need to reach or lift around it.
Posture, Fit, and Alignment for Long Sessions
A comfortable headset starts with your body. Even the best accessories won’t help if you’re slumped forward or craning your chin down. Adopt a neutral neck posture: ears stacked over shoulders, chin level, shoulders relaxed. Think of a vertical line from the crown through the spine; keep that alignment while you fine-tune the Vision Pro fit.
Begin fit adjustments with strap tension. Set the rear strap snug enough to hold the headset steady without squeezing the occipital area. The top/crown strap should distribute load across the skull rather than pressing into one narrow strip. Side straps should stabilize the headset laterally — firm, but not pinching behind the ears. If you feel tilt or light seal creep, loosen and redistribute rather than tightening a single strap; uneven tension creates torque and shifts the center of gravity forward.
Vision Pro users must also dial in eye relief and IPD. Proper eye relief prevents the lenses from pressing into the nose while maintaining crisp optics. Use Apple’s IPD calibration to align the lenses with your pupils; when pupils sit at the lens centers, images remain sharp and the eyes don’t compensate with extra muscle strain. Misaligned optics not only blur but encourage head posture adjustments—people will tilt or push the headset to chase a clear image, which increases neck load.
In-session posture cues help sustain comfort: set a soft timer or use haptic reminders to check your neck every 20–30 minutes. Perform a quick posture reset—lengthen the neck, roll the shoulders back, and ensure the headset still sits centered. For interactive sessions, pause briefly instead of leaning forward to reach virtual elements; adjust the session space so commonly used controls sit within comfortable reach at neutral posture. Over time these small, regular corrections prevent the cumulative effects of micro-bad-posture that lead to soreness.
Protective Cases and Space-Saving Stand Solutions
Storage and transport are often overlooked in ergonomics. A heavy, awkward case or a headset stowed in a low drawer means you’ll routinely lift from an awkward position, straining the neck. Conversely, cases and stands that keep the Vision Pro at a predictable, accessible height and orientation make consistent, neutral lifts simpler.
Look for protective housings that combine tough outer shells with soft interior linings. Hard-shell cases protect lenses and structure during travel but choose designs with molded recesses for the crown band and straps—this preserves the headset’s balance and prevents accidental bending of sensor arrays. For home use, consider detachable shells or snap-on covers that can be removed if you want a lighter storage option. Magnetic or snap-on covers are useful: they let you swap protection for ventilation without tools.
Integrated stands built into cases are a useful hybrid. These designs let you carry the headset in a case that converts into a stand once opened, placing the headset directly at eye level on a desk or shelf. For small desks, search for foldable stands that tuck flat or slide beneath a shelf, preserving horizontal space while keeping the headset within arm’s reach. A low-profile desk stand with rubber feet and an adjustable tilt prevents slipping and encourages forward-facing lifts instead of reaching up from below.
For frequent commuters, prioritize a lightweight sleeve and a small, balanced portable stand. The sleeve should protect against scratches and sweat while the foldable stand should reconfigure in seconds so you can set the headset down at the correct height on a hotel desk or airplane tray table. In every case, the ergonomic aim is the same: reduce awkward lifts, keep the device at a repeatable hand-to-eye height, and prevent the small postural deviations that add up over days.
Reality vs Perception: Weight, Myths, and Real-World Tips
There are a few persistent myths around headset comfort worth busting. Myth: a heavier headset is inherently intolerable for long use. Reality: perceived heaviness is shaped more by how the weight is distributed and how the headset interacts with your head than by the absolute mass. Myth: more padding always equals more comfort. Reality: padding that’s too thick or poorly placed can push the center of gravity forward or increase local pressure points.
In practice, users notice that when the Vision Pro’s center of gravity is aligned near the ear line and pressure is distributed across a broad forehead and crown area, the headset can be worn for significantly longer than a figure alone would suggest. Comfort complaints often trace back to small issues: a strap that slides down, a face pad that creases and creates a pressure ridge, or an IPD setting that forces a user to tilt the head to see clearly. Address those root causes rather than chasing weight reductions alone.
Comparisons to other headsets help contextualize choices. Most consumer VR headsets are roughly in the same weight band, but some manufacturers succeed by moving weight toward the back with built-in counterweights or by using suspension-style harnesses that transfer load to the crown and neck. Take lessons from these designs: a small, well-placed back weight often beats large amounts of forehead padding because it neutralizes forward torque rather than masking it.
Finally, watch your movement patterns. Repeated small head tilts and micro-adjustments amplify perceived load more than a single steady posture. Small behavior changes—lifting from a tabletop at eye level, pausing to reset instead of leaning in, or adding a two-minute neck mobility break every half-hour—reduce the cumulative effect of repeated loads and transform how the Vision Pro feels over a day of use.
Practical Setup Checklist for Comfort
Before a long session, run through this concise checklist. Use it as a ritual to tune fit, balance, and environment so you avoid the slow creep into neck strain.
- Environment and posture: Clear your workspace of trip hazards, set chair height so your feet are flat and your eyes are roughly level with the monitor or stand, and relax your shoulders.
- Warm-up: Do gentle neck circles and shoulder rolls for 30–60 seconds to reduce initial stiffness.
- Initial strap fit: Place the Vision Pro on your head, seat the rear strap on the occipital bone, and tighten the top strap so the crown pad distributes pressure without digging in.
- Side stabilization: Adjust side straps for a secure but non-pinching fit; the headset should not slide laterally when you shake your head lightly.
- Facepad and eye relief: Check the face seal — no pinching at the nose; adjust eye relief and IPD for clear optics.
- Balance check: Perform a three-step balance test — look straight ahead, nod down, and tilt left-right. If the headset pulls forward, add a small counterweight or shift the rear pad slightly back.
- Endurance test: Wear the headset for 5–10 minutes and walk through typical interactions. If you notice any focal pressure or the urge to readjust frequently, pause and re-balance.
- Session pacing: Plan 20–30 minute session blocks with 60–90 second micro-breaks. Longer creative blocks should include a larger break every 60–90 minutes for movement and hydration.
- Record tweaks: Keep a short log of strap positions, counterweight amount, and how long you wore it. Minor adjustments compound into big improvements over time.
Following this checklist creates a repeatable baseline. When you return to the Vision Pro, you’ll start from a known-good setup rather than rediscovering comfort each time.
How-To: Step-by-Step Comfort Setup for Vision Pro
This step-by-step routine is designed to be quick, repeatable and effective. It helps you measure and calibrate fit, balance with counterweights, and engage posture cues so you can reliably extend comfortable wear time.
Step 1 — Measure and pre-fit: Sit in a chair with good lumbar support. Rest the Vision Pro on your head and feel where the main contact points land. The facepad should seal gently; the rear pad should sit at the curve where your skull meets the neck. Take note of any immediate pressure points.
Step 2 — Calibrate IPD and eye relief: Use the Vision Pro’s calibration tools to match interpupillary distance and eye relief. This is crucial: if your eyes are compensating for incorrect optics, you’ll unconsciously tilt or lean into the display, increasing neck load.
Step 3 — Fine-tune strap tension: Tighten the rear strap first until the headset feels secure. Adjust the crown strap so the load disperses across the top rather than at one narrow seam. Side straps should prevent sliding but not pinch. A good test is to nod gently; the device should stay aligned without creeping.
Step 4 — Add counterweight incrementally: If the headset still tilts forward, attach a small rear clip or strap pouch and add weight in 5–10 gram increments. Test with head tilts and short interaction sequences after each change. Stop when forward tipping disappears and the rear doesn’t become a new hot spot.
Step 5 — Comfort stress test: Put on the headset and do a ten-minute scenario that mimics your typical use—watch content, interact with controls, or lean to reach virtual objects. Pay attention to where you feel pressure and whether you’re adjusting posture to see clearly. Minor tweaks now save large discomfort later.
Step 6 — Establish reminders: Use your phone or a smart timer to remind you to check posture every 20–30 minutes. When the reminder chimes, perform a quick reset: loosen jaw, roll shoulders, and lift the sternum slightly to restore neutral neck alignment.
Finally, log what worked. Note strap settings, any counterweights used, and how long you were comfortable. Over a few sessions you’ll create a custom profile that becomes your go-to setup for long creative sessions or daily use.
Case Studies: Real-World Configurations and Outcomes
Seeing how others set up their Vision Pro helps translate abstract advice into concrete choices. Here are three common scenarios and the configurations that tended to work best for comfort and productivity.
Casual desk user — compact setup: A writer using the Vision Pro in a small home office benefits from a low-profile desk stand that holds the headset at seated eye height. The user selected a thin memory-foam facepad and a modest rear strap cushion to cradle the occiput. Strap tension is moderate: snug enough to prevent lateral drift but loose enough to avoid temple pinching. Result: short, repeated sessions (20–30 minutes) feel comfortable and the user reports fewer instances of forward head posture after adopting a 30‑minute break habit.
Professional immersive studio — extended blocks: A creative professional working in a studio adopted a wall-mounted articulating arm that positions the headset at consistent eye level regardless of whether they sit or stand. They paired this with a strap-integrated counterweight and a broad crown pad that transfers some load across the top of the skull. IPD and eye relief are checked at the start of each day. Result: they can work in 90–120 minute blocks with minimal neck fatigue, and the headset’s repeatable position reduces time spent re-fitting between tasks.
Traveler — quick-setup, portable: A frequent traveler uses a padded sleeve and a compact foldable stand that opens to hold the Vision Pro at a slightly elevated angle on hotel desks. They keep a small detachable rear cushion and one lightweight rear clip in their case to quickly rebalance on the go. The travel kit is configured so the headset can be mounted with one hand from a seated position. Result: quick setups and consistent balance mean fewer uncomfortable lifts on a trip and fast adaptation to new work environments.
These configurations emphasize the same theme: align the headset with your neutral posture, use low-profile accessories that preserve or improve balance, and standardize a repeatable process so you don’t reinvent comfort each session.
Next step: Run the Practical Setup Checklist before your next Vision Pro session, note the changes you make, and try a small rear counterweight if you still feel forward pull. Track comfort across a few sessions and adjust incrementally — the right combination of padding, balance, and posture usually turns a tiring headset into a nearly forgotten tool.


Compartir:
Postural alignment strategies to relieve VR neck strain during long sessions
Practical Comfort Hacks for Vision Pro Reducing Neck Strain During Long Sessions