

Practical Guide to Choosing and Fitting Aftermarket Comfort Straps for Meta Quest 2: Improve Weight Distribution for Long Sessions
If your Quest 2 starts tugging on your face after 20 or 30 minutes, the problem is almost always weight distribution—not the display, not the controllers. The right comfort strap redistributes that front-heavy load across the crown and back of the skull so you can play, create, or binge-watch VR without feeling like you’re wrestling the headset. ⏱️ 11-min read
This guide walks you through how weight affects comfort, the criteria that matter when buying aftermarket straps, how the official Elite Strap stacks up against popular third-party options, step-by-step installation and fit tuning, glasses-friendly setups, maintenance, and compatibility pitfalls to avoid. Expect concrete, non-hype advice you can use the next time you shop or swap a strap.
Understanding weight distribution on Quest 2
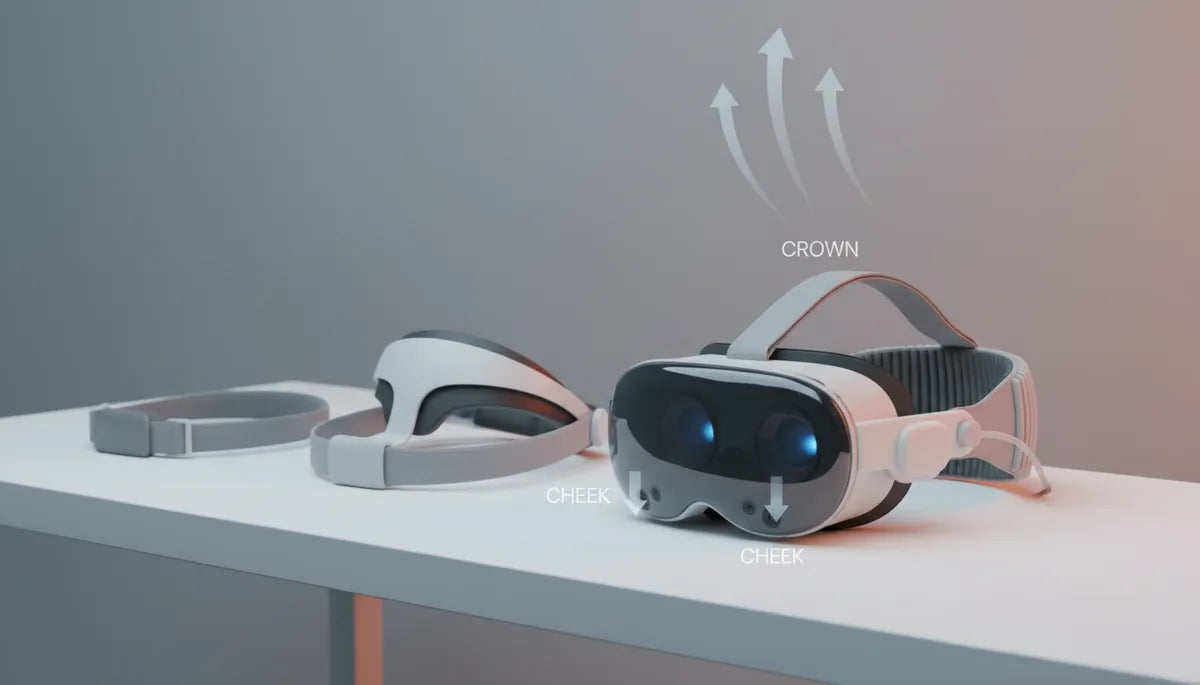
The Meta Quest 2 carries most of its mass in the front—lenses, sensors, and housing—so gravity pulls the headset forward and creates torque around your face. That forward torque translates into pressure on the nose bridge, cheeks, and temples, and it becomes especially obvious during extended sessions or quick head turns. You may notice the display subtly shifting or the headset sliding down your nose; that’s the headset fighting to re-center itself as you move.
Aftermarket comfort straps solve this by changing where the load sits. A simple back strap shifts some force to the base of the skull. A halo or rigid arch routes weight across the crown, spreading pressure away from the face. Counterweight solutions add mass at the rear to balance the forward bulk, while stiffer rails prevent sagging and rotational movement. Which approach works best depends on your head shape, how you move while in VR, and whether you prioritize ventilation or plush padding.
Think of the headset as a seesaw: without a rear fulcrum, the front will tip. The goal is to move the fulcrum—either by creating a halo support higher up on your skull or by adding mass to the rear—so small head motions don’t create large torques that press the headset into your nose and cheeks.
How to choose the right aftermarket strap: criteria
Not all comfort straps are equal. When you’re comparing options, prioritize four things: adjustability, padding and materials, compatibility, and overall weight. These factors determine how the strap will feel during short bursts and multi-hour sessions alike.
- Adjustability: Look for both top/crown height and rear length control. Dial systems give fine incremental changes; ratchet or buckle setups are fast but coarser. Consider whether you need one-handed adjustment while wearing the headset—handy if you swap between users or change play styles mid-session.
- Padding and materials: Breathable mesh, moisture-wicking covers, and memory foam pads will keep pressure spots to a minimum and reduce sweat buildup. Neoprene and microfiber feel soft, but check drying speed and odor resistance; antimicrobial treatments are a bonus.
- Compatibility: Verify that the strap mounts cleanly to Quest 2 anchor points or that the kit includes adapters. If you use a battery pack, check for dedicated attachment points or aftermarket-compatible rails. Not all straps leave room for third-party modules or bigger face cushions.
- Weight and counterweight options: Extra padding and rigid support add weight—counterweights help, but more mass can offset gains if the overall system becomes heavy. Ideally, choose a strap that balances bulk and rear support without turning the headset into a helmet.
Also check practicalities: warranty length, return policy, and the ease of swapping covers or pads. If you wear glasses, verify temple clearance and consider models with thinner or contoured side padding. In short: test adjustability and materials first, then confirm that the strap plays well with the extras you use.
Elite Strap vs aftermarket options: expectations and trade-offs
Meta’s Official Elite Strap is a straightforward, dependable upgrade from the stock elastic band. Its build is predictable, it fits Quest 2 mounting points natively, and warranty support is simple. That reliability is its core appeal. But the Elite Strap uses modest padding and a simple back-strap geometry; it helps, but it doesn’t dramatically change how your Quest 2 balances across long sessions.
Third-party options aim to do more: the BoboVR M2, for example, emphasizes rear counterweights and plush pads to shift load away from the face, making it ideal for extended seated experiences. Kiwi Design’s halo-style alternatives take a different path—rigid arches and dial systems move support higher across the crown for a more helmet-like stability while staying relatively lightweight. These designs often deliver a noticeable improvement in comfort but come with trade-offs: added complexity, possible reductions in accessory compatibility, and sometimes less robust warranties than Meta’s.
Choose based on how you use the headset. If you prioritize a low-fuss, guaranteed fit that integrates cleanly with official accessories, the Elite Strap is a sensible baseline. If you log long hours, value thicker padding or halo support, and are comfortable testing third‑party mounts, a well-reviewed aftermarket strap will likely outperform the Elite Strap for sustained comfort. Always check return policies—comfort is personal, and what blisses one person may feel bulky to another.
Step-by-step installation guide for Quest 2 comfort straps
Installing an aftermarket strap is usually straightforward but varies by design. Below is a clear, general procedure that covers most halo, rear-pad, and counterweight systems. Read the included manual first—some kits use unique fasteners or adapters.
- Prepare: Power off your Quest 2 and place it on a clean, soft surface. Lay out parts and tools so you don’t lose small screws or clips.
- Remove stock strap anchors: If the kit requires removing the stock strap, gently unhook or unscrew the original anchors. Keep the stock hardware—some people swap back when sharing the headset.
- Attach base or adapter: Fit the replacement base plate or adapter to the headset. Align it carefully with the side channels and press or screw it until it sits flush. Tighten hand-tight initially; over-torquing can stress the polycarbonate shell.
- Mount the strap: Slide the halo or side arms into the adapter channels. For dial systems, ensure the ratchet teeth engage; for Velcro or buckle straps, position the pads before fastening.
- Set initial tension: Adjust the crown height and rear pad so the headset sits level when you put it on. Don’t over-tighten—aim for snug, not constricting.
- Test fit: Wear the headset and perform a short movement test—look up and down, turn quickly, and give a small jump or shake. Observe any forward tilt or slippage.
- Fine-tune and secure: Make incremental adjustments to the dial, rear pad, or Velcro until balance is centered. Double-check any screws after the test session.
Safety note: if your kit includes metal hardware that contacts the plastic shell, pad those points if instructed. And always keep spare screws and a small screwdriver nearby—some users prefer to pre-thread screws into a magnetized tray to avoid drops.
Fine-tuning for optimal balance: height, length, and tension
Getting a strap to feel invisible is about subtle adjustments. Your head’s center of gravity sits roughly near the ear-canal/crown area; aim to position the helmet’s support around that zone so the headset’s front weight sits balanced instead of dangling. Here are practical steps to find that sweet spot.
- Start high on the crown: Raise the halo or top strap until you feel upward support across your crown rather than pressure on the forehead. This pulls weight away from the nose bridge.
- Seat the rear pad: The rear pad should sit flat against the lower crown/base of skull—not on top of hair or the upper neck. If it rides too low, the front will still feel heavy.
- Adjust tension incrementally: Turn a dial one or two clicks or pull a Velcro tab slightly; then wear the headset for a minute. Small changes compound quickly; avoid big jumps that create hotspots.
- Test with motion: Tilt your head forward and back, shake gently side to side, and do a brisk head turn. The goal is minimal frontward movement and stable vision alignment without facial pinch points.
- Balance left–right: If the headset leans sideways, check that side rails are evenly seated and that the crown strap is centered. Some kits allow micro-adjustment on each side.
A practical trick: if you still get forward tilt, try adding or sliding a small counterweight rearward (if your strap supports it). Even a modest rear mass can neutralize torque without creating new pressure points. But remember that more weight can also strain the neck—find the minimum addition that achieves balance. Finally, revisit adjustments after 10–20 minutes of play; foam compresses and your muscles relax, so a second tweak often perfects the fit.
Glasses-friendly setup and long-session wear tips
If you wear glasses, your comfort strategy needs small but important changes. Glasses add spacing between your face and the headset, which can help margin-wise but also shift how pads press on temples. Choose straps and face cushions that explicitly state glasses compatibility, and favor thinner side pads with contoured cavities to accommodate temple arms.
Practical adjustments:
- Temples and clearance: Position the side pads slightly lower or rotate them outward if they press on temple arms. Some aftermarket pads include cutouts or tapered edges—these are worth paying for.
- Anti-fog and seal: Glasses create micro-gaps that can change fogging dynamics. Ensure your face seal is snug on the cheeks rather than on the nose to reduce warm air movement upward toward your lenses.
- Use lightweight frames: If you’re considering new glasses for VR, smaller, lighter frames reduce pressure and bulk. Thin metal or lightweight acetate is preferable to heavy chunky frames.
- Breaks and micro-adjustments: For long sessions, plan short pauses every 45–60 minutes to stand, shake out your neck, and briefly loosen straps—this prevents localized numbness and pressure buildup.
Finally, consider strap padding upgrades that include breathable covers or dedicated temple pads. These small modifications transform long sessions from endurance tests into genuinely comfortable play. If you frequently switch between users, store a secondary thin pad for guests who wear glasses so everyone gets a quick, comfortable fit.
Care, cleaning, and lifespan of Quest 2 straps
Good maintenance keeps a comfort strap feeling new and prevents odors, skin irritation, and foam breakdown. Treat fabric covers as the first line of defense: remove and wash them regularly per manufacturer instructions. Hand-wash or use a gentle machine cycle in cold water with mild detergent, then air-dry completely away from direct heat. Rinse thoroughly to remove detergent residue that can irritate skin.
For non-fabric parts—plastic shells, buckles, and metal sliders—wipe with a damp cloth and a mild disinfectant suitable for plastics. Avoid soaking foam inserts; prolonged moisture breaks down cell structure and causes permanent compression. If foam becomes hard, flattened, or chronically smelly, replace it—most aftermarket vendors sell replacement pads.
Other tips:
- Inspect fasteners and screws monthly and tighten gently if needed. Vibration and usage can loosen hardware over time.
- Rotate or flip pads where possible to extend even wear; some pads are reversible.
- Store straps in a cool, dry place away from sunlight and heat sources. Use breathable bags—avoid airtight containers that trap moisture.
- Replace covers and pads proactively if they show persistent stains, compression, or scent; fresh padding maintains proper weight distribution.
With reasonable care, a quality strap will last years. The weak points are usually foam and fabric rather than the rails or dials—plan to refresh the soft parts sooner than the structural pieces.
Compatibility and ecosystem: third-party options, battery packs, and Vision Pro notes
Before you buy, confirm how a strap interacts with the accessories you already use: battery packs, elite face cushions, passthrough modules, and even third-party audio systems. Many aftermarket straps support battery packs either through dedicated rails or clip-in dock points, but some halo-style designs leave no straightforward place to attach a pack without an adapter.
If you rely on a rear battery pack to extend playtime, prioritize straps that list battery compatibility or that include a modular rear tray. For audio solutions, check whether the strap’s arms interfere with over-ear headphones or block proprietary audio mount points. Some halo designs integrate audio mounts directly, which simplifies the setup.
Note on cross-product claims: you’ll occasionally see straps advertised as “Vision Pro compatible.” That can mean different things—sometimes it’s a marketing shorthand for similar mounting geometry, and other times it requires an adapter. Don’t assume direct fit; double-check mounting specs, screw sizes, or the availability of adapters. If an adapter is required, factor in possible increases in weight and the potential for less robust mechanical connection.
Finally, look at the vendor ecosystem: do they sell replacement pads, spare screws, or upgrade rails? A healthy aftermarket with available parts and a flexible return policy makes it safer to experiment. In practice, compatibility is rarely binary: a strap may work with your accessories but require a small adapter or a different face cushion to reach optimal comfort.
Next step: pick the strap type that matches your typical session length and movement style—halo/dial for active, seated, and mixed-use; rear counterweight and plush padding for marathon seated VR; or the Elite Strap for a reliable, simple upgrade. Then follow this guide’s install and tuning steps for the best chance at a comfortable, balanced fit on the first try.


Compartir:
Anatomy of Meta Quest Weight: Balance and Comfort
Achieving balance: using counterweights to reduce VR fatigue