

Which head straps fit which Meta Quest revisions—and how to get the most comfortable fit
Buying a replacement or upgrade head strap can feel like decoding a small hardware puzzle: different Quest models, adapters, screws and mounting rails all add uncertainty. This guide maps which straps work across Meta Quest revisions, compares official and third‑party options, and walks you through installation and fit tweaks so your headset sits comfortably and securely for meta-quest-two-head-straps-and-glasses" rel="nofollow noopener noreferrer">long sessions. ⏱️ 11-min read
Whether you’re using a Quest 1, Quest 2, Quest 3, or Quest Pro, I’ll explain the practical checks to confirm compatibility, show step‑by‑step fitting tips for Quest 2 (the most common upgrade path), and give maintenance advice so your strap lasts. Expect clear examples, quick tests to validate fit, and realistic tradeoffs when mixing straps and adapters.
Compatibility across Quest revisions
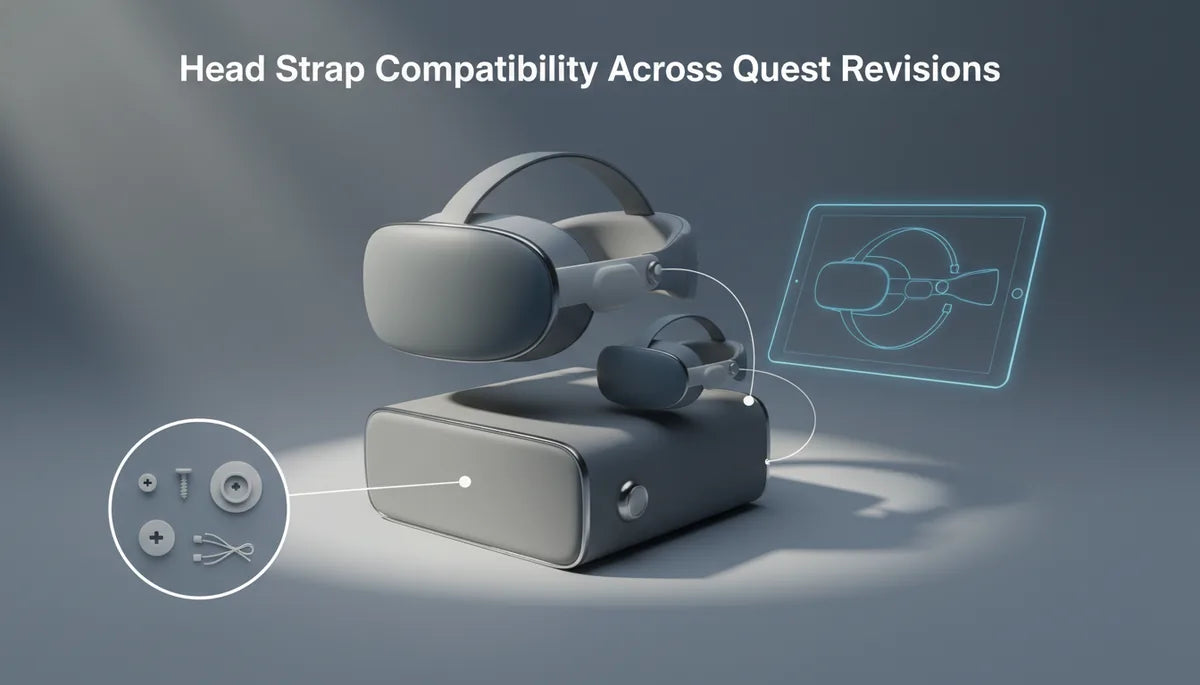
Compatibility isn’t universal. Meta changed mounting patterns and attachment geometry across headset generations, so a strap that threads onto a Quest 1 may not seat cleanly on a Quest Pro. In general you’ll see three broad approaches to attachment:
- Light fabric straps with universal connectors: simple posts or loops that slide into slots. These are the most likely to span multiple revisions with minimal fuss.
- Dedicated mounts and rails on rigid frames: the Elite Strap and many halo designs use specific brackets, screws, or rails that match the headset housing; these often need a generation‑specific plate or adapter.
- Pro‑specific interfaces: Quest Pro uses different attachment points and sometimes different screw sizes or spacing, which prevents a secure fit unless the strap explicitly lists Pro compatibility.
Before you buy, identify your headset model in Settings or on the box, then check the strap’s product page for explicit model support. Look for notes about adapter requirements or included mounting hardware. If the listing is vague, read user reviews for real‑world experiences—owners will often report whether the strap needs a 3rd‑party adapter or whether it impinges on tracking cameras. In short: assume straps aren’t universally compatible, and confirm rail alignment, screw‑hole spacing, and whether any adapter is required before checkout.
Official vs Elite vs third‑party straps
Meta’s stock strap, the Elite Strap, and aftermarket offerings approach comfort differently. The official fabric strap that ships with many headsets is lightweight and designed to preserve the headset’s original balance and lens geometry. It’s simple, breathable, and works well for short sessions or users who prefer minimal bulk.
The Elite Strap upgrades stability: a rigid rear band and a dial or wheel let you micro‑adjust rear tension, shifting more of the headset’s weight off your face and onto the skull. That improves long‑session comfort and reduces facial pressure, though it adds bulk and may require a mounting plate tailored to specific headset generations. If your goal is steadier tracking and less mask pressure, the Elite-style halo is worth the tradeoff.
Third‑party straps offer a broad spectrum—from premium leather halo rigs and modular halo systems with rear battery mounts to cheap nylon replacements. The upside is variety: extra padding, modular cushions, and cheaper replacements. The downside is inconsistent compatibility and hardware quality. Cheap straps sometimes omit adapters or have poorly aligned anchors, causing wobble or placing pressure at awkward points. Reputable third‑party brands (for example Kiwi Design, VR Cover, and similar makers) tend to publish compatibility charts and include adapters or screws; lower‑cost options often do not.
When comparing options, judge by fit (how the strap hugs your head), weight, adjustability (height, depth, rear tension), and whether the strap’s mounting system is explicitly compatible with your Quest revision. A good rule: spend a little more for a known brand that documents compatibility and offers returns—it's cheaper than repairing a scratched housing or buying the wrong strap twice.
Step‑by‑step install and initial fit for Quest 2
Installing a replacement strap on a Quest 2 is simple if you follow a predictable sequence. Below is a beginner‑friendly approach for both the official fabric strap and the Elite Strap. Have a clean surface and the headset stable before you begin.
- Turn the headset face down on a soft cloth so the facial interface is protected.
- If removing the stock strap: gently unclip or slide out the side strap anchors. The fabric bands on the Quest 2 typically slide through slots and detach with a small tug; don’t yank—feel for the connector tab and depress it if present.
- For the official replacement: slide the new fabric bands into the same slots until they click. Confirm the straps sit flush and there’s no twisting at the anchor points.
- For the Elite Strap: attach the rigid mounting bracket first. Line up the plate with the headset’s screw posts or alignment rails—these should seat with minimal force. If the strap uses screws, tighten them finger‑tight first, then give a quarter turn with a screwdriver. Avoid over‑torquing; the plastic housing can crack under excessive force.
- Fit the headset on your head and adjust the rear dial (if present) until the headset sits comfortably without slipping. The lenses should remain centered over your eyes; if you feel pulling on one side, remove the headset and check mounting symmetry.
- Do a quick alignment check: look straight at a unique object in VR and turn your head rapidly left and right. The image should remain steady without the headset sliding down. If it shifts, tighten the rear strap or lower the top strap until steady.
Common cautions: never force a plate into place; adapters must align with camera windows and vents—if an adapter blocks tracking cameras, stop and source a different adapter. Keep screws snug but not over tightened. If you’re unsure, take photos of the original setup before uninstalling anything—reassembling becomes easier with reference shots.
Fine‑tuning fit: height, length, and the top strap
The small adjustments—height, length, and top strap tension—determine how weight is distributed across your skull. Start with conservative settings and refine with quick tests.
Height: Many straps allow you to adjust the vertical position of the headset relative to your eyes. If the headset sits too high you’ll feel pressure at the forehead; too low and the nose bridge bears weight. Aim for the optical center of the lenses to sit comfortably in front of your pupils. Move the headset up or down in small increments and test using a visible VR object to verify lens alignment.
Length (side straps): The side straps control how tightly the headset wraps around the sides of your head. If these are too loose, the headset will wobble during quick head movement. If too tight, you’ll feel pinching around the temples. Tighten until the headset feels secure but you can still slide a finger under the strap.
Top strap: The top strap controls how much weight is transferred to the crown. Increasing top tension reduces facial pressure, but too much will pull the headset forward and potentially create a gap at the back. Adjust the top strap so the headset feels balanced—no forward tilt and minimal facial pressure.
Quick‑test checklist:
- Put on the headset, tighten the rear dial (if present) until secure.
- Check for even pressure across forehead and cheekbones—no single hot spot.
- Do a rapid head‑turn test; the display should remain steady.
- Take a 10‑minute test session, then reassess—small adjustments after short use make a big difference.
Record your preferred settings once you find them. If multiple people use the headset, label or mark your strap positions so switching users can return to a known comfortable setup quickly.
Weight, balance, and long‑session comfort
Strap choice changes the headset’s center of gravity. A rigid halo with a rear pad moves mass from your face to the skull, which lowers facial pressure and reduces fogging from mask squeeze. Conversely, a minimal fabric strap keeps the headset light but concentrates weight on your nose and forehead, which can become uncomfortable during longer play.
Simple tactics to reduce fatigue:
- Add rear counterweight or a battery pack: attaching a small battery to the back of an Elite‑style strap counterbalances front‑heavy headsets and can also expand play time. Keep the weight modest—around 100–250 g—to avoid neck strain.
- Optimize padding placement: swapping thicker forehead pads for thinner cheek pads can redistribute pressure without adding weight.
- Use the rear dial: micro‑adjusting the dial while seated and during gameplay helps you find a tension that stabilizes the display without compressing soft tissue.
- Take periodic breaks: even with an excellent strap, the human neck benefits from short rests every 30–60 minutes when engaged in intense VR sessions.
Practical example: I found that switching from the stock fabric band to a rigid Elite Strap reduced facial pressure in 90‑minute sessions; adding a 150 g rear battery made the headset feel virtually neutral. However, longer sessions required brief neck stretches because the added rear weight shifted load to the cervical muscles. The takeaway: counterweights cure forward tilt but introduce new tradeoffs—find the minimal weight that achieves balance without adding neck fatigue.
Glasses wearers: fit, clearance, and comfort
Many Quest users wear glasses, and strap choice affects clearance and pressure points. Rigid halo straps generally create more internal space near the cheeks because they move the headset slightly away from the face—this can help glasses fit without pinching. At the same time, denser forehead padding can press the frame against temples, so pairing thicker forehead cushions with thinner cheek pads often yields the best results.
Tips to prevent pressure and fog:
- Use a low‑profile spectacles frame when possible. Rounder frames with smaller temple arms interfere less with the foam seal.
- Consider a facial interface spacer (often sold separately) to increase optical distance and reduce temple squeeze. Many third‑party foam inserts are designed to give extra clearance while preserving field of view.
- Adjust the top strap higher to tilt the headset slightly back—this increases cheek space without disrupting lens alignment.
- Use anti‑fog wipes or an anti‑fog cloth between sessions to reduce lens condensation. Better ventilation comes from reducing face seal pressure, not removing the seal entirely.
- If you have progressive lenses or deep frames, test with your glasses in store or rely on prescription lens inserts that snap into the headset—these avoid clearance issues entirely.
Remember: small padding swaps can dramatically change how glasses sit. If you buy a third‑party cushion set, check return policies. What’s comfortable for one frame may pinch for another, so trial and error (with a clear return option) is often necessary.
Care, maintenance, and replacement options
Keeping straps clean and functional lengthens their life and keeps your headset hygienic. Care routines differ slightly by material, but the basics cover fabric, foam, and metal or plastic hardware.
- Wipe non‑fabric parts after sessions: use a slightly damp microfiber cloth to remove sweat and oils from plastic mounts, dials, and metal hinges. Avoid soaking pivot points and exposed electronics.
- Spot clean fabric sections or hand‑wash: for detachable fabric bands, spot clean with mild soap and water, rinse, and lay flat to air dry. Avoid machine washing unless the care label explicitly allows it.
- Don’t use harsh chemicals: bleach, alcohol at high concentrations, or abrasive cleaners can degrade elastic and foam and strip coatings from metal hardware.
- Store properly: keep straps in a cool, dry place away from direct sunlight to prevent fading, cracking, or stretching.
- Inspect hardware regularly: check screws, plates, and connector tabs for wear. Replace stripped screws promptly—using a slightly larger screw is a risky DIY fix that can crack plastic housings.
Replacement sourcing: official replacements and Elite Straps are available from Meta’s store or authorized retailers. Reputable third‑party options and replacement cushions come from brands like Kiwi Design, VR Cover, and other specialty VR accessory makers; Amazon and VR‑focused shops usually list compatibility details. Expect fabric bands and foam cushions to need replacement after one to three years with heavy use; foam can compress and lose shape, while straps may stretch. Warranty policies vary; official Meta accessories often carry limited warranties, while third‑party sellers’ policies depend on brand reputation—check return windows and warranty terms before purchase.
Cross‑device notes: Vision Pro and accessories
Apple’s Vision Pro uses a different mechanical and ergonomic approach than Meta’s Quest line. That means direct compatibility between Quest straps and Vision Pro is limited. The Vision Pro’s headband mounts and facial interface are designed with Apple’s specific housing dimensions in mind, so Quest straps won’t reliably attach without adapters—and such adapters are rare, nonstandard, and often carry tradeoffs.
If you’re thinking of reusing a Quest strap on a Vision Pro, consider these practical limits:
- Mounting points and screw spacing are different; adapters must align precisely or risk blocking cameras and sensors.
- Vision Pro’s thermal and venting design may be affected by non‑OEM attachments—blocked vents can cause overheating problems or tracking interference.
- Third‑party adapters do exist for hobbyists, but they often require modification and can void device warranties. Use them only if you accept the risk.
Better options: if you want a halo or more comfortable band for Vision Pro, buy accessories made or tested specifically for the device. For cross‑platform flexibility, favor modular strap systems with widely available adapters—but verify that any adapter you use does not occlude cameras or interfere with fit sensors. In short: mixing Quest straps with Vision Pro is generally impractical unless you have a tested, device‑specific adapter and accept potential warranty or tracking risks.
Next step: identify your exact Quest model, check the strap manufacturer’s compatibility chart, and, if in doubt, pick a reputable brand that includes adapters or a solid return policy. Small investments in trusted adapters or a pro‑style halo can make your headset comfortable for marathon sessions without risking the device’s tracking or warranty.


Compartir:
Long Oculus Quest 2 Sessions: Ergonomic Straps That Reduce Pressure for Extended Play
How to choose a comfortable facial interface for Oculus Quest headsets