

Make Long Oculus Quest 2 Sessions Comfortable: Ergonomic Straps to Cut Pressure and Neck Strain
If you love sinking into long VR sessions but end up with sore temples, a pinched nose bridge, or a tired neck, you’re not alone. The stock Quest 2 elastic strap is fine for quick rounds, but when playtime stretches beyond an hour its shortcomings become obvious: concentrated front-facing pressure, frequent adjustments, and creeping fatigue that breaks immersion. ⏱️ 12-min read
This guide walks through why those pressure points happen, which strap styles genuinely help for extended play, and how to install and fine-tune a strap so you can play longer with less pain. You’ll get practical comparisons (Comfort Strap vs Elite vs halo and third-party options), step-by-step fitting tips, balance and accessory strategies, cleaning and replacement advice, plus targeted tips for glasses wearers. Read on for actionable steps you can use tonight to make your next Quest 2 session feel like a natural extension of your head—not a weighty accessory.
Understanding the pressure problem in long Quest 2 sessions
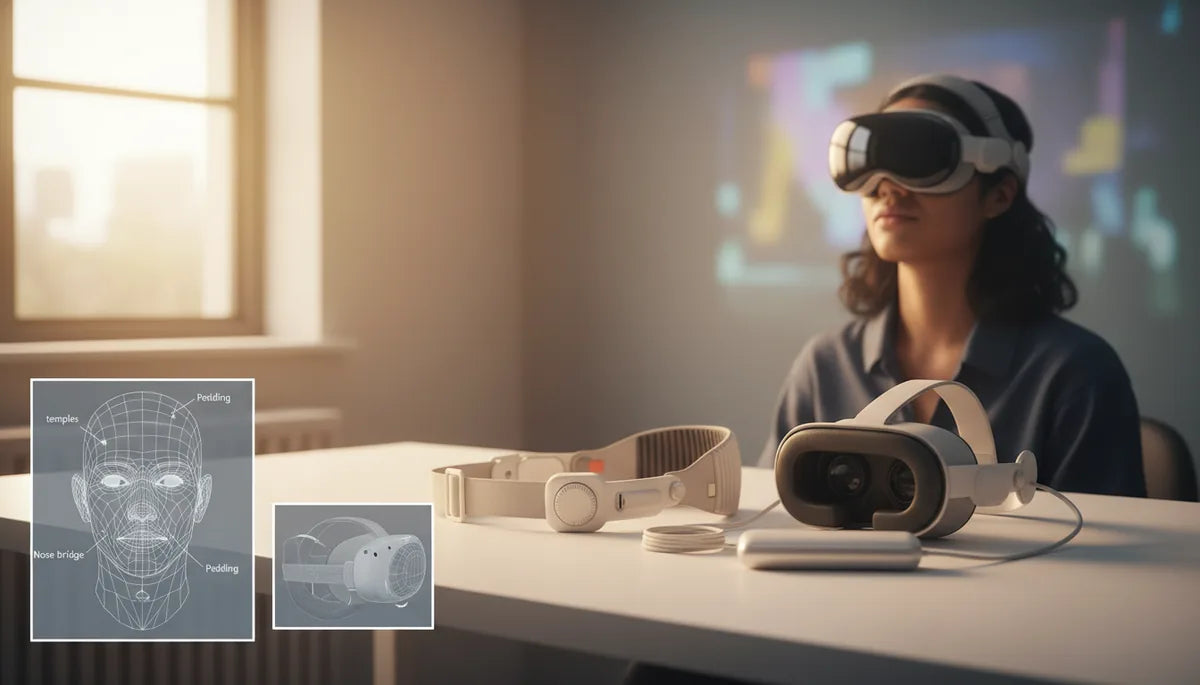
The stock elastic strap on the Oculus Quest 2 is deceptively simple: lightweight and quick to put on, it works well for short bursts. But its design channels most of the headset’s mass forward across the forehead and temples. Over time this inward pressure creates hotspots—commonly across the forehead, along the temples, and sometimes on the cheeks where the faceplate meets skin. You may also notice tension at the back of the head where the strap cinches, leaving marks or soreness after longer sessions.
Why does this happen? Comfort isn’t just padding. It’s weight distribution. When a strap lets the visor sag forward even slightly, your face and nose do the brunt of supporting the optics. That concentrated load leads to irritation, headaches, and neck strain as neck muscles compensate to keep the headset aligned. Small misalignments multiply—an uneven fit can shift the lenses relative to your eyes, prompting micro-adjustments that increase friction and pressure. In short: the stock strap often converts the headset’s mass into a few painful contact points rather than spreading it across the skull.
Recognizing these hotspots is the first step to fixing them. If your discomfort is primarily forehead-heavy, the solution is different than if the rear of your head is sore. The remainder of this guide outlines strap styles and fitting strategies that move load off your face, stabilize optics, and let you stay immersed longer without paying for it later with a sore neck.
Strap options for Quest 2: Comfort Strap, Elite Strap, and beyond
Not every strap is created equal. Two official options and a spectrum of third-party designs dominate the market for Quest 2 comfort upgrades. Here's how they differ and what to look for when shopping.
Meta Comfort Strap (soft fabric): This option upgrades the stock elastic with thicker padding and an easier fit. It’s lightweight and breathable—good for casual sessions or glasses wearers. Because it keeps mass toward the front, it improves comfort mainly through better padding rather than significant weight redistribution. Expect an affordable, low-profile comfort boost without dramatic balance changes.
Meta Elite Strap (rigid frame): The Elite Strap uses a firmer frame to shift weight away from the face. With side supports and a stronger anchor, it keeps the display more stable during fast head movements and distributes pressure toward the rear of the skull. The Elite Strap with integrated battery adds a rear counterweight and extra runtime—this reduces cheek and nasal pressure for many users but adds mass at the back. For marathon sessions, this can be a net win if you’re OK with slightly greater total weight.
Halo and halo-style straps: These designs wrap around the crown and press across a larger surface area. They are excellent at spreading pressure across the top and sides of the head rather than focusing it on the forehead. Halo straps often work well for active VR or prolonged sitting sessions where even pressure and stability matter.
Third-party options: Look for memory foam padding, breathable covers, solid build quality, and easy, repeatable adjustment mechanisms (ratchets or quick-release clips). Popular third-party straps often blend the benefits of rigid support and soft contact points—some include modular pads, back-mounted weights, or better cable routing for Link connections.
How to choose a comfortable head strap for Quest 2
Choosing the right strap starts by matching the strap’s strengths to your head shape, session length, and how you use VR. Use the following criteria to narrow options quickly:
- Padding quality: Prefer closed-cell or memory foam with a washable, moisture-wicking cover. Too-soft foam compresses quickly and loses support; too-firm padding can create new hotspots.
- Adjustment range: Vertical and lateral adjustments let you center lenses and balance pressure. Look for straps that allow both height and circumference changes.
- Glasses compatibility: If you wear glasses, choose straps that reduce frontal pressure and allow the facial interface to sit slightly forward without creating light leaks.
- Weight distribution: Rigid structures or rear counterweights shift pressure off the face; halo designs spread pressure across the crown. Decide which trade-off you prefer: slightly heavier but better-balanced, or lighter with superior frontal padding.
- Session type: For 30–60 minute casual play, light fabric or halo straps suffice. For 2+ hour sessions (streamers, marathon players), a rigid Elite-style strap or halo with a rear counterweight is ideal.
Quick decision guide:
- Short sessions, glasses, low budget: Soft Comfort Strap or third-party fabric strap.
- Long sessions, streaming, high movement: Elite Strap or rigid side-strap with optional rear battery/counterweight.
- Active/fitness-oriented: Halo-style strap with sweat-resistant padding and secure tensioning.
- Mixed use and sensitivity to forehead pressure: Halo or hybrid straps that move load off the brow.
Matching features to behavior—rather than chasing the “most expensive” option—gets you the biggest comfort return on investment.
Step-by-step install and fit for a long-session strap
Installing and tuning a new strap is straightforward, but small mistakes create hotspots that ruin long sessions. Follow this step-by-step process to get a balanced, stable fit that minimizes cheek and temple pressure.
- Mount the strap carefully: Follow the manufacturer’s instructions. Seat anchor points fully into the Quest 2 rails before applying tension. Misaligned anchors often cause uneven pressure and slipping later.
- Set an initial loose fit: Don the headset with the strap deliberately loose. The goal is to prevent pinching while making sure the headset won’t wobble. A loose start lets you find where padding contacts your face before locking anything down.
- Raise or lower the vertical adjustment: Adjust the top/crown strap to center the lenses in front of your eyes. Proper vertical placement reduces the need to tilt the headset with your neck.
- Tighten incrementally: Tighten the side and rear straps in small steps. After each small change, remove the headset and check for even pressure marks on the forehead, temples, and cheeks.
- Check lateral balance: Ensure the headset sits level—neither tilted down at the nose nor pulled back over the crown. The sweet spot is a level display that requires minimal chin or neck effort to keep aligned.
- Lock and test movement: Once snug, perform natural head movements, quick turns, and reach motions to see if the optics shift. Re-adjust if you notice slippage or pressure migrating to a new spot.
Small tip: If you pair a rear counterweight or battery, tighten straps slightly less at first—the added weight will change your balance and often lets you reduce frontal tension.
Fine-tuning fit: height, length, and padding for all-day wear
Getting a good fit is iterative. Even after the initial setup, minor tweaks will make long sessions sustainable. Focus on three adjustments: height, length, and padding.
Height (vertical placement): Adjusting the top strap changes how the headset sits on your face. Lowering the top strap brings the headset’s weight more toward the rear; raising it shifts more weight to the forehead. If you’re feeling forehead fatigue, raise the top strap slightly so the rear and crown take more of the load. For glasses wearers, a higher vertical setting can create crucial extra space between lenses and frames.
Length (circumference and side tension): Side strap tension controls cheek and temple contact. Too loose, and the headset wobbles; too tight, and you get pinching. The correct length yields steady optics with gentle, even contact. When tightening, stop at the point the headset feels secure but not constrictive—if you can comfortably nod without the display sliding, you’re near optimal tension.
Padding swaps and supplements: Swapping the facial interface for a thicker, breathable foam or adding thin forehead pads can redistribute pressure and prevent chafing. Gel pads and memory foam inserts smooth out sharp contact points. Use breathable, washable covers to reduce heat and skin irritation over multiple hours. Test new pads in short increments—the wrong pad placement can create new pressure points just as easily as it relieves old ones.
Practical experiment: For a planned two-hour session, wear the headset for 15–20 minutes after one adjustment, then remove and inspect skin contact. Adjust, retest, and repeat until contact marks are light and uniform. That small investment of time prevents discomfort later and keeps you playing without constant fiddling.
Weight, balance, and accessories that reduce headset load
How a strap handles weight is as important as how it feels. A heavier strap with good balance can be far more comfortable than a lighter strap that concentrates mass on the face. Consider the total system—not just the strap—when aiming to reduce neck strain and hotspots.
Counterweights and rear batteries: Adding a rear-mounted battery or a dedicated counterweight shifts the center of mass backward, reducing forward pull on the face. This is particularly effective for players who experience strong nose or cheek pressure. The trade-off is increased overall weight, which can be mitigated by efficient pad cushioning and a sturdy support frame that spreads load across the crown.
Minimize heavy add-ons: Avoid unnecessary accessories that add weight in front—extra third-party faceplates or thick lens covers can exacerbate front-heavy imbalance. If you need accessories, prioritize lightweight materials or place mass toward the rear where possible.
Cables and routing: Use shorter, lighter Link cables and secure them so they don’t tug on the headset during play. A cable clip or over-head routing reduces pull on the front and prevents momentary janks that transmit to your face and neck.
Balance strategy checklist:
- Prefer rear-mounted mass over frontal mass when adding battery packs or weights.
- Use firm support frames (rigid side straps) to transfer load across the skull rather than the face.
- Choose breathable, low-compression pads that retain shape under weight so support remains even.
- Secure cables and mount accessories to prevent intermittent pulls that force you to re-tighten straps.
Used together, these tactics reduce the perceived load on your neck even if the headset’s total mass increases slightly. It’s about where the weight sits, not just how much there is.
Care, maintenance, and replacement options
Keeping straps and padding clean and intact is essential for long-term comfort and hygiene. Sweat, oils, and compressed foam degrade fit and can create new pressure points or skin irritation. A short maintenance ritual extends strap life and protects your skin.
Cleaning tips:
- Wipe face pads and straps after each heavy session with a mild soap solution or alcohol-free disinfectant wipes. Avoid soaking the foam—damp cloths and air drying work best.
- Use removable, washable covers where possible. Replace covers that show pilling, discoloration, or persistent odors.
- For gel or memory-foam inserts, check manufacturer guidance. Many are wipe-clean only; avoid prolonged water exposure.
When to replace vs repair:
- Replace padding when foam visibly compresses-thin or becomes uneven—this is when comfort and optical alignment degrade.
- Repair strap anchoring if stitching frays or if plastic clips crack; loose anchors create instability and uneven pressure.
- If you upgrade your Quest 2 or a strap model, verify compatibility—new firm mounts or different rail geometries can affect fit. Most reputable strap makers publish compatibility notes for successive headset revisions.
Safety and inspection: Regularly inspect straps for exposed wires, compromised battery packs, or damaged clips. Follow manufacturer advisories on maximum accessory weight and battery safety; avoid ad-hoc heavy additions that exceed those recommendations. A small weekly check prevents surprises that can ruin a long session or damage your headset.
Glasses-wearer tips and long-session benchmarks
Glasses add an extra variable to fit. If you wear spectacles during VR, you want enough clearance to avoid lens/frame contact and pressure on your nose and temples, plus strategies to reduce fog and rubbing.
Glasses-specific adjustments:
- Raise the vertical strap slightly to offer more space between the headset lenses and your glasses frame.
- Use a thinner facial interface or a spacer designed for glasses to increase internal volume without creating light leaks.
- Choose padding materials with smooth edges—rough foam will press rims into your temples.
- Consider prescription lens inserts if you frequently play—while an upfront cost, lens inserts remove the need to wear glasses and eliminate frame pressure entirely.
Fog and ventilation: Breathable, moisture-wicking foam and open-cell padding reduce sweat buildup that causes fogging. Short breaks for ventilation or removing the headset for a minute every 30–60 minutes helps keep lenses clear and skin comfortable.
Session benchmarks and signs you’ve over-tightened:
- Short session (30–60 min): Ideally no lingering marks on your forehead or temples, only light, even contact lines that fade within minutes.
- Extended session (1–2 hours): Minimal redness; no numbness, and no neck muscle ache beyond normal posture strain. If you must frequently loosen the strap, the fit needs rebalancing.
- Marathon session (2+ hours): Expect deliberate balance choices—rear counterweight, robust padding, and scheduled 5–10 minute breaks each hour to rehydrate and stretch the neck.
Warning signs: persistent numbness, headaches, or pressure that doesn’t subside within 10–15 minutes off head mean the strap is too tight or misbalanced. Pause immediately, loosen, and reassess fit. Frequent recurrence suggests a different strap style or padding swap is needed.
Next step: Try a short calibration routine before your next extended session—put on the headset, follow the step-by-step fit checklist, then play for 20 minutes and inspect contact points. Small pre-session investments prevent large mid-session discomforts and keep your virtual worlds enjoyable.


Compartir:
Beyond straps must have Vision Pro accessories that boost comfort and usability
Head strap compatibility across Meta Quest revisions what to know