

Quick-Tips for a Secure Fit: Tightening the Quest 2 Head Strap in Minutes
Spending long stretches in VR should feel immersive, not like a wrestling match with your headset. This guide walks you through a fast, practical routine to get a snug, balanced Quest 2 fit in minutes—without trading comfort for stability. Whether you’re using the stock strap, the official Elite Strap, or a third‑party comfort strap, these steps will help you remove hotspots, reduce fogging, and keep the image steady during intense sessions. ⏱️ 11-min read
Below you’ll find a quick baseline check, a step‑by‑step install for the Comfort Strap, precise tightening and micro‑adjustment techniques, and weight‑distribution tricks that make long sessions comfortable. I’ll also compare the Comfort Strap and Elite Strap, cover maintenance, and address glasses and accessory compatibility so you can jump back into VR faster and with less fiddling.
Quick-fit assessment and baseline
Before you tighten anything, set a baseline. That quick assessment saves time and prevents overcorrection—so you don’t end up with a headset that’s either rocking or pinching. Put the Quest 2 on as you normally would and take note of the strap type: the thin stock band, the upgraded Elite Strap, or a thicker third‑party comfort strap. Each behaves differently under tension and needs a slightly different approach.
With the headset on, check for these simple cues: pads should lie flush against your cheeks and forehead; the band should feel secure without sharp pressure points; and the edges of pads should sit symmetrically at the temples. Run your fingers along the foam and across the brow and cheekbones—if you spot red marks, numb areas, or persistent soreness after a few minutes, pressure isn’t distributed evenly and needs attention.
Record a couple of quick measurements: head circumference (around the widest part of your head, just above the ears and across the forehead) and the current strap length or adjuster position. You don’t need a spreadsheet—write it on a sticky note or in your phone. These baseline figures let you reproduce a comfortable fit after trying padding swaps, battery packs, or any accessory that alters balance.
Finally, consider your head shape and whether you wear glasses. Round heads and narrow heads react differently to tightening; glasses add thickness at the temples and nose bridge. Note these factors now so you can tweak with confidence later rather than guessing mid-session.
Step-by-step install for Quest 2 comfort strap
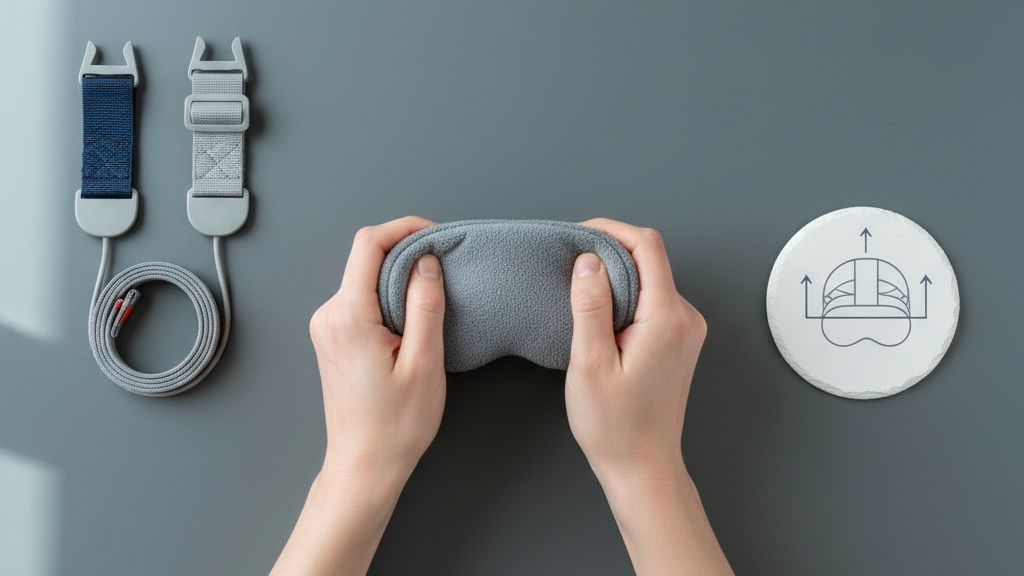
If you’re switching to a Comfort Strap or reseating the stock band, a clean and methodical install prevents misalignment and slippage. Start by removing or loosening the current strap if necessary. Press the release tabs on the side rails and pull the strap away from the headset—if you have the stock strap and are keeping it, you can skip removal and move straight to alignment.
- Clean the contact areas. Use a microfiber cloth to wipe oils, dust, or residue from the side rails and attachment points. This small step improves how securely connectors sit and reduces long‑term wear.
- Align connectors with the rails. Hold the comfort strap so each connector lines up straight with the left and right side rails. Slide in until you hear a click or feel the latch engage—don’t force it past resistance.
- Verify symmetry. After both sides click in, eyeball the strap: it should sit level, not skewed. If one connector looks higher, reseat that side until both mirror each other. Symmetry is the simplest defense against tilt and drift.
- Position the top strap. If your comfort setup includes a crown strap, place it evenly across the top of your head. Adjust length so load is shared between the side bands and the crown—this keeps the visor stable without crushing the forehead.
- Set initial padding placement. Make sure lower pads rest comfortably around the cheeks and the brow pad aligns with the upper ridge of the nose without pinching.
After installation, do a short shake test and a 10‑second walkaround. If the headset shifts noticeably, reseat and repeat. Proper first placement saves the micro‑adjustments that come later and cuts the time to a secure fit down to minutes.
Tightening and micro-adjustment tips
Tightening the Quest 2 straps isn’t a brute‑force task—small, measured changes deliver the best results. The aim is a level headset, even pressure, and roughly 1–2 fingers’ worth of clearance above the eyebrows so the face gasket seals without digging in. Use these micro‑adjustment moves to dial in comfort quickly.
- Start with the side sliders. Turn each adjuster a quarter to a half turn, then pause to test. Listen for subtle clicks as the mechanism settles. Give both sides the same amount of turns to maintain balance.
- Check equal tension. With the headset on, press gently at the back near the occipital ridge (the bony area above your neck). Both side straps should resist finger pressure similarly. If one side bites in or slides, tweak that side back in small increments until you feel parity.
- Use the top strap to balance front weight. Tighten the top strap gradually to relieve forehead pressure and lift the front slightly. The goal is to shift some weight away from the face to the crown—enough to stop slipping but not so much that your scalp feels pinched.
- Perform a motion test. Nod, shake your head, and make quick side‑to‑side movements. If the VR image shifts or the headset tilts, reattune the side adjusters until the visor remains stable through small, sudden motions.
Watch the skin. If the strap leaves deep red marks or you feel numbness, you’ve tightened too far. Conversely, if you can slip two or more fingers under the band easily, it’s too loose. Aim for a secure fit where the headset doesn’t move during quick turns but also avoids pressure concentration—this is what enables long sessions without mid‑game fiddling.
Achieve balance: weight distribution and padding
Comfort is largely about balance: where the weight sits relative to your forehead, crown, and occiput. Small padding shifts and a modest counterweight can transform a front‑heavy Quest 2 into a steady, comfortable rig for hours.
Start by redistributing padding. Slide the crown pad and temple cushions slightly toward the sides and the upper brow. This spreads load across the temples and upper forehead instead of pinning it to a single hotspot. Check for even contact by running your fingertips along the foam—there should be no gaps or concentrated pressure points. If you have removable pads, experiment with thicker material at the back and thinner at the front to nudge the center of gravity rearward.
If you use an external battery pack or a rear counterweight, place it low and centered on the strap. A small, well‑positioned weight at the back often eliminates forward tilt and reduces neck strain more effectively than over‑tightening the front. Keep the weight modest—enough to rebalance without introducing neck fatigue.
Temple and crown cushions spread pressure to broader areas of the skull, reducing numbness and hotspots during long sessions. For example, shifting a soft crown pad slightly forward transferred pressure from one gamer’s temples to a more comfortable crown contact, solving numbness during a 90‑minute session. The difference was subtle but immediate: steadier tracking and less urge to readjust mid‑game.
Choosing between Quest 2 comfort strap vs Elite Strap
Choosing the right strap depends on your play style. The Comfort Strap excels at fast setup and lightness: it’s easy to snap on, quick to adjust, and keeps the front profile low. That makes it a great choice for casual sessions, social VR, or frequent headset swaps. Its simplicity is its strength—fewer moving parts means fewer things to misalign.
The Elite Strap, however, is built for longer, more intense sessions. It offers a broader adjustment range, more secure crown support, and optional rear battery integration. This extra support translates to better stability during vigorous movement and a fit that accommodates a wider range of head shapes. The trade‑off is added weight and slightly more setup time—especially if you pair it with a battery pack.
Practical guidance: if your sessions average 20–40 minutes and you value portability, start with the Comfort Strap. It reduces facial pressure and is less likely to pinch glasses. If you frequently exceed an hour, use fast‑paced experiences, or add a battery, the Elite Strap’s greater support is worth the extra mass. If you’re undecided, try the Comfort Strap first and upgrade later; baseline measurements you took earlier make it easy to replicate a comfortable setting after switching.
Real-world examples
Example A: A gamer tightened both sides evenly, added a slight crown tension, and the headset stayed put through quick turns—no red marks, stable view, 25‑minute session without readjusting. Example B: After a sweaty workout, another user wiped the forehead, loosened the sides slightly to avoid pinching, and retightened—this distributed load better and stayed stable for a 60‑minute session. These small procedural differences underscore how tiny tweaks matter more than hardware alone.
Maintenance and care to maintain fit
A comfortable fit today should be a comfortable fit tomorrow. Regular care keeps straps and pads performing as intended and prevents unexpected slippage mid‑session. Simple maintenance takes minutes and extends component life.
- Clean regularly. Wipe straps and pads with a damp cloth and a mild, fragrance‑free soap. Avoid soaking foam or soaking hardware—excess moisture can degrade adhesives and materials. Air‑dry completely before use to prevent stiffness and odors.
- Inspect sliders and connectors. Look for fraying, cracking, or loose latches. A worn slider can suddenly give way; replace parts at the first sign of damage. A quick weekly glance catches many issues before they affect fit.
- Lubricate sparingly. If your headset manual allows, a tiny amount of silicone‑based lubricant on metal rails can smooth movement—wipe away any excess. When in doubt, replace rather than repair a failing piece; modern straps are affordable and far less hassle than a makeshift fix that fails mid‑game.
- Store correctly. Keep the headset in a neutral position when not in use—avoid hanging it by a single strap or leaving straps stretched over a small object. Proper storage prevents material deformation and preserves the original fit profile.
Periodic replacement of foam and pads is normal: foam compresses with time and sweat, altering fit. Replace compressed pads when you begin needing ever‑tighter adjustments to achieve the same fit—new pads restore the original geometry and reduce the temptation to overtighten.
Special considerations: glasses wearers and compatibility
If you wear glasses, a few targeted changes make a big difference. Glasses add thickness at the temple and nose, which changes how straps sit and where pressure concentrates. Test different frame shapes—full‑rim, semi‑rimless, and wire—to see how each interacts with the padding. Often, sliding the strap slightly higher on the crown reduces temple pressure and lowers the chance of fogging.
Use glasses‑friendly padding or add a slim spacer to increase clearance. Softer edge padding near the temples prevents the strap from pressing into the frame arms. If your padding is removable, pick a softer lip or a thinner center section where the glasses rest. When you put the headset on, align the temple arms so they sit behind the strap rather than crossing it—this keeps the frames stable and maintains lens alignment.
Accessory compatibility matters: third‑party mounts, battery packs, and counterweights can shift balance and require re‑tuning. Any add‑on that changes rear mass should be low and centered to avoid a forward tilt. After attaching accessories, recheck your baseline measurements and perform the micro‑adjustment routine. You’ll likely need to retighten the top strap or slightly reposition padding to maintain the same comfort level.
Finally, always test with your glasses on. Tighten slowly and look for pinch points or fogging; small adjustments—raising the strap an eighth of an inch or swapping to a thinner temple profile—often resolve issues without sacrificing stability.
Quick fixes and next steps you can do in under five minutes
If you’re short on time but need a reliable fit now, follow this compact routine:
- Measure a quick baseline: note head circumference and current slider positions (or snap a photo of the strap settings).
- Seat the headset level, align pads, and ensure temple symmetry.
- Tighten side sliders a quarter turn each, then top strap a notch to lift the front slightly.
- Do a 10‑second shake test and reassess for red marks or slipping.
- If you wear glasses, push the strap slightly higher on the crown and confirm temple arms sit behind the band.
These steps typically yield a balanced fit in under five minutes. If you still feel hotspots, adjust padding by shifting it toward the temples and recheck. If necessary, swap to a thicker crown pad or add a modest rear weight to rebalance front heaviness. Use the baseline you recorded to return to a comfortable starting point quickly after any changes.
Ready to save the baseline? Take a quick photo of the strap settings and store it with your headset—reproducing a favorite fit starts with a good reference. If you want, experiment with both the Comfort Strap and the Elite Strap using the same baseline to see which wins for your play style.
Next step: try this routine at the start of your next session and notice how long the fit stays stable. Small, deliberate adjustments now mean fewer interruptions and more time in VR.


Compartir:
Ergonomics of lightweight VR headsets with Quest two
Weight Distribution Hacks: Battery Placement and Module Positioning for Balance