

Weight Distribution Hacks for Quest 2: Battery Placement and Module Positioning to Reduce Neck Strain
If you’re spending hours in the Quest 2 chasing high scores or immersed in social VR, small misalignments in weight can turn a great session into a sore-neck slog. This guide walks you through practical, device-specific ways to shift the center of gravity (CG), move batteries and modules intelligently, and tune your strap geometry so the headset feels neutral and stable for longer play. ⏱️ 11-min read
We’ll cover the three levers you can tweak—battery placement, module positioning, and strap setup—offer step-by-step tuning, and flag safety and heat issues so you can push session length without paying for it in neck ache.
Weight distribution 101: balance, center of gravity, and comfort
Think of the Quest 2 like a seesaw on your face: where the mass sits determines whether the headset tilts forward onto your cheeks and forehead, or pulls back into your occiput and neck. The center of gravity (CG) is the point where all that mass would balance; ideally it sits close to the axis through your ears and the base of your skull so the headset feels neutral when you look straight ahead.
Three main load paths determine how that mass is borne: the forehead/face gasket, the crown/top strap, and the rear strap or pads over the occiput. Forehead contact resists forward pitch and controls tilt near your eyes; crown support shares vertical load and reduces downward pull on the face; and rear straps pull the device into your skull, which can either stabilize or increase neck tension depending on placement. The goal is even distribution so face muscles, neck extensors, and shoulders aren’t fighting to stabilize the headset for hours.
Practical takeaway: a front-heavy headset increases cheek pressure and forces you to tilt your head back to see clearly, which fatigues neck muscles. A heavy rear pack can relieve forehead pressure but—if too heavy or too low—can create a torque that pulls your head forward or tugs on the neck. Keep adjustments small, and aim for a CG that feels centered when your eyes and head are natural and level.
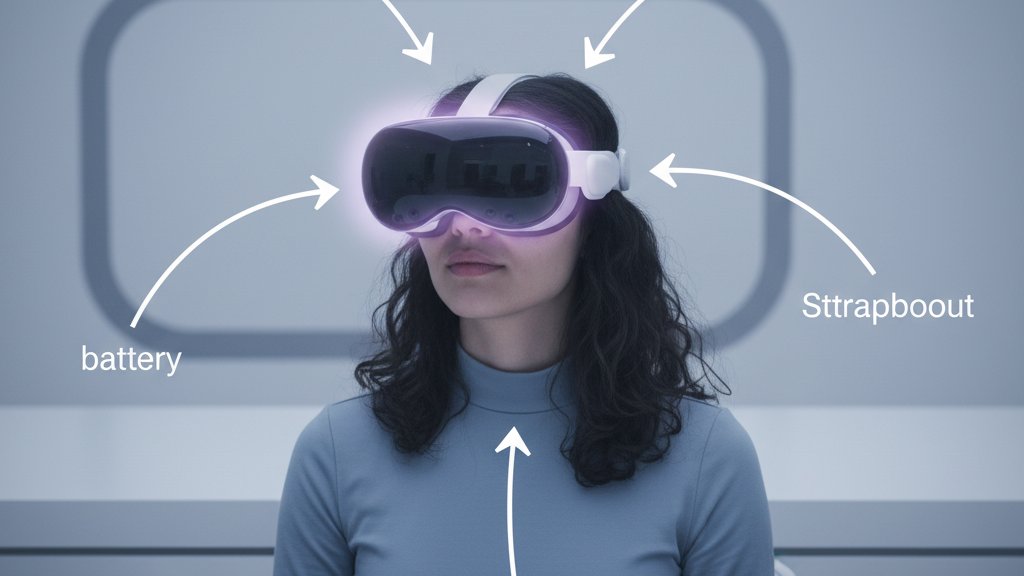
Battery placement options for Quest 2
Where you put battery mass is one of the most powerful ways to tune balance. Each placement trades off balance, heat, and ergonomics differently. Here are the common options and what they do to your CG and thermal comfort.
- Inline/face‑band packs: These integrate into the headband and keep most mass close to the centerline. They shift CG inward and are compact, so they reduce yaw and sway. Pros: minimal strap changes and lower torque. Cons: limited capacity and potential forehead heat if not vented. Low-profile options like the FlitLift GraviPro emulate this approach.
- Rear‑mounted packs (occipital): Attach to the back strap or a rear pad; they push CG toward the back and neutralize front heaviness. Pros: stable sight lines and reduced forehead pressure. Cons: can concentrate weight and heat on the back of the head, and may increase neck load over very long sessions if oversized.
- Top/crown packs: Mounts near the crown add mass above the head, which affects forward pitch less predictably. They can offset heavy rear modules but tend to increase pressure across the top strap and can block airflow to the crown, potentially making you hotter.
- Side‑mounted packs: Attach near the temple area or lateral strap channels. These distribute mass laterally and can help wide‑face setups. However, they may press on the temples, risk interference with ear‑level accessories, and occasionally nudge the lenses if not placed carefully.
Choose a placement that moves mass toward the occipital region without blocking vents or creating a thermal pocket. For most Quest 2 owners looking to reduce forward pitch, a rear strap pack—padded and ventilated—is the simplest, highest-impact change. If you already have heat or sweat issues, consider a low-profile inline pack with breathable padding to keep air moving across the brow.
Module positioning and counterweights strategies
Beyond batteries, the position of the display module and any attached accessories matters. Small shifts in where the screen assembly sits relative to your eyes changes the amount of head tilt required to look straight through the lenses. The two practical tactics are subtle module shifts and calibrated counterweights.
Start by checking how your eyes align with the lenses while the headset is sitting loosely on your face. If you’re tilting your chin to center the display, the balance is off. Move the display module forward by millimeters if possible—this moves the optical center closer to your eyes and reduces the need to tip your head back. Many headset mods or third‑party spacers allow micro‑adjustments to spacing; the goal is to keep your head upright when your eyes are centered.
Counterweights are the fine-tuning tool. Attach small masses behind the head or at the crown to offset the front load. Don’t jump to heavy plates—start with 5–10 g increments and reassess. A good approach is to align counterweights with the ear‑to‑ear line so they shift CG backward without adding asymmetrical torque. If the headset begins to feel like it’s pulling you backward, you’ve gone too far; remove a few grams.
Watch sensors and fit: place weights where they won’t block tracking cameras, vents, or cable anchors. Strap‑mounted packs with secure clips or magnetic plates are useful because they maintain position during movement. Keep a small log of each change and how it felt in a short session—that empirical record will save time as you iterate.
Strap geometry, fit, and ergonomics
Strap shape and tension determine how weight transfers to your skull. Two‑strap systems concentrate tension across fewer contact points, while three‑strap variants spread pressure. Neither is universally better—what matters is how you tune straps to match where you put battery mass.
Key strap adjustments:
- Height: Raising the rear support (moving it closer to the crown) reduces forward pitch by giving the headset a higher fulcrum. This is useful if you’ve added rear counterweights and want to avoid cheek pressure.
- Length/tension: A slightly tighter rear strap moves the load toward the occiput and lifts weight off the face. Loosen the front band enough that your cheeks and brow aren’t pinched, but not so loose the headset slides. The right balance feels snug without compressing soft tissue.
- Top‑strap tension: The top strap prevents the headset from sliding down. Tightening it too much raises pressure on the crown and increases heat; too loose and the headset tips. Use it as a stabilizer rather than the primary weight carrier.
Practical fit sequence: (1) loosen everything, (2) put the headset on and center the lenses, (3) tighten the rear strap until the headset sits firmly on the occiput, (4) snug the front strap until facial pressure is comfortable, and (5) fine‑tune the top strap to remove bounce while keeping the crown breathable. For glasses wearers, ensure temple clearance and consider thinner, breathable pads to avoid pressing frames into your face.
Counterweights and balance accessories
Counterweights come in clip‑ons, modular masses, magnetic plates, and strap‑integrated packs. Choose based on how discreet you want the solution, and how much adjustability you need. A few grams can be transformative, so prioritize small, secure attachments.
Common options and how they shift CG:
- Back‑of‑head weights: Typically 20–100 g, these attach to a rear pad or strap. They pull CG rearward effectively and are the easiest to feel. Use padded mounts to avoid hotspots.
- Strap‑mounted packs: Battery or weight packs integrated into the strap (20–200 g) move mass close to the head’s centerline and reduce lever arm effects. Good for long sessions when you want stability without big torque.
- Small external packs or magnetic plates: These allow very fine tuning in 5–20 g steps. They are excellent for iterative balancing and are unobtrusive when installed along the ear‑to‑ear line.
Safe mounting is crucial. Use non‑slip surfaces, Velcro loops, or threaded clips—avoid loose zip ties that may loosen with movement. Never mount weights over tracking cameras, vents, or cable anchors where they can shift or block airflow. Periodically check fasteners and test for slip by turning your head sharply; a secure accessory should not sway or create noise. Finally, inspect edges and materials so nothing rubs or abrades your skin during vigorous play.
Step-by-step install and balance tuning
Here’s a practical, repeatable workflow to go from baseline to a balanced Quest 2 setup in 6–8 steps. Each step includes a quick sensory test so you know whether to move on.
- Baseline assessment: Wear the headset as-is and play for five minutes. Note forehead pressure, cheek contact, and any urge to tilt your head. Perform the “level gaze” test: look straight ahead and see if the view is centered without chin tilt.
- Install primary weight: Fit your chosen battery pack (inline or rear). Align it on the central axis and secure all fasteners. Recenter the headset on your face.
- Initial counterweight: Add a small rear weight (start 10–30 g depending on pack). Attach near the ear line or rear pad, not directly at the lower neck. Reassess level gaze—does the headset still tilt forward?
- Adjust straps: Follow the fit sequence: tighten rear strap first, then front, then top. Aim for even contact; avoid pinching cheeks or the brow.
- Short test session: Play for 5–10 minutes and do dynamic movements—look up/down and shake head slightly. Check for slippage, hotspots, or sensor occlusions.
- Iterate in 5–15 g steps: If forward pitch remains, increase rear mass by small increments. If you overcorrect and feel backward pull, remove grams in smaller steps until neutral. Keep a notebook or phone note of gram amounts and where they’re placed.
- Real‑world verification: Do a 30–45 minute session. If you feel gradual neck fatigue, reduce rear mass slightly or move the rear pad higher. If the face feels compressed, move counterweight back or raise strap geometry.
- Final check: Ensure no vents or tracking cameras are obstructed, cables are routed away from contact points, and all fasteners are snug. Mark your preferred configuration for future reference.
Quick tests to know you’re balanced: (a) the nod test—nodding your head should not cause the headset to shift; (b) level gaze—the display remains centered with a relaxed jaw; (c) one‑minute hand‑off—lift your chin slightly and let someone else observe whether the headset rocks or stays neutral. If all pass, you’re close to optimal.
Safety, heat, and long-session wear considerations
Adding batteries and weights near the head introduces thermal and safety considerations. Batteries produce heat; poor ventilation compounds it. Small mistakes—like covering vents or tucking packs under dense foam—can raise temperatures to uncomfortable or unsafe levels.
Heat management tips:
- Monitor component temperatures during sessions. If a pack or headset feels hot to the touch, pause and reconfigure vents or padding. Continuous operation with high temperatures shortens battery life and increases discomfort.
- Choose breathable padding—open‑cell foam or perforated covers—so air can circulate around the brow and crown. Avoid thick memory-foam wraps that trap heat around the face.
- Don’t block vents or sensors. Position packs and cushions to leave flow channels clear. A small gap behind the rear pad can make a surprising difference in airflow.
Battery and mechanical safety:
- Use properly rated batteries and packs designed for wearables or the specific headset. Avoid jury‑rigged packs with exposed wiring.
- Secure fasteners and check them before each session. A slipping weight can pull cables or obstruct tracking mid‑play, risking damage or injury.
- Limit continuous play in long sessions—follow manufacturer guidance, take 10–15 minute breaks every hour, and watch for signs of discomfort: persistent neck ache, pins‑and‑needles in shoulders, headaches, or blurry vision.
Signs of improper balance include persistent forward forehead pressure despite adjustments, headaches after short sessions, or visible sensor occlusion. If you notice any of these, back off weight, rework strap geometry, and re-test. Prioritize breathable materials and safe, well‑secured battery solutions to get the most comfort and the longest sustainable sessions.
Cross-device compatibility and real-world notes
Balance strategies that work on Quest 2 often transfer to other headsets, but device shape, strap anchors, and battery position change the math. For example, headsets with taller facial modules or external Pro‑style batteries will require different counterweight placements to hit the same neutral CG.
Compatibility notes:
- Quest 2 vs Quest Pro: The Pro usually has different module geometry and strap anchors. A rear pack that works perfectly on a Quest 2 may sit higher or lower on a Pro and require repositioning to avoid interference with built‑in sensors.
- Vision Pro and other premium straps: Accessories made for Vision Pro or similar devices can sometimes be adapted for Quest 2, but check anchor points and cable routes. Magnetic plates and modular mounts are often the most cross‑compatible choices.
- Third‑party accessories: Many off‑brand straps and counterweights are available, and they range widely in design. Look for products with secure mounts, breathable padding, and clear guidance on whether they obstruct vents or sensors.
Practical combo suggestions:
- Quick day sessions (1–2 hours): Inline low‑profile battery in the headband + minimal rear weight (10–30 g) for a neutral feel and low heat.
- Long sessions (2–4 hours): Padded rear strap pack (50–100 g) with breathable rear pad and adjustable magnetic plate so you can fine‑tune in 5–15 g steps.
- Competitive play (short bursts, high motion): Lightweight strap-mounted pack (20–50 g) positioned close to the centerline to reduce inertia and minimize sway.
Maintenance checklist: periodically inspect mounts and Velcro, verify battery connectors are snug, wash or replace foam covers to prevent dust buildup, and test tracking after each accessory change. Keep a simple log of configurations that worked well—your ideal setup is repeatable and should be easy to restore.
Next step: pick one small change (add a 20–30 g rear weight or swap to an inline pack), follow the step‑by‑step tuning routine, and log how each increment affects your comfort. Small, deliberate adjustments beat guesswork every time.


Compartir:
Quick-Tips for a Secure Fit: Tightening the Quest Two Head Strap in Minutes
Comparing Quest 2 head straps: original vs aftermarket for long-wear comfort