

How Quest 2 Strap Design Changes Weight, Neck Torque, and Long-Session Comfort — A Practical Tuning Guide
If your neck feels tight after a single VR session or your Quest 2 seems to pull forward when you look down, the culprit is usually not just the headset’s raw weight but how that weight is distributed. Small changes in strap geometry, padding, or the placement of a battery pack can dramatically alter the torque on your cervical spine and the hotspots on your face. ⏱️ 10-min read
This article walks through the physics behind perceived weight, compares strap options (stock, Elite, and third-party), and gives step-by-step setup and tuning actions you can try today. Expect data-driven explanations, clear tests you can run at home, and practical tips to extend comfortable playtime.
Why weight distribution matters for Quest 2 comfort
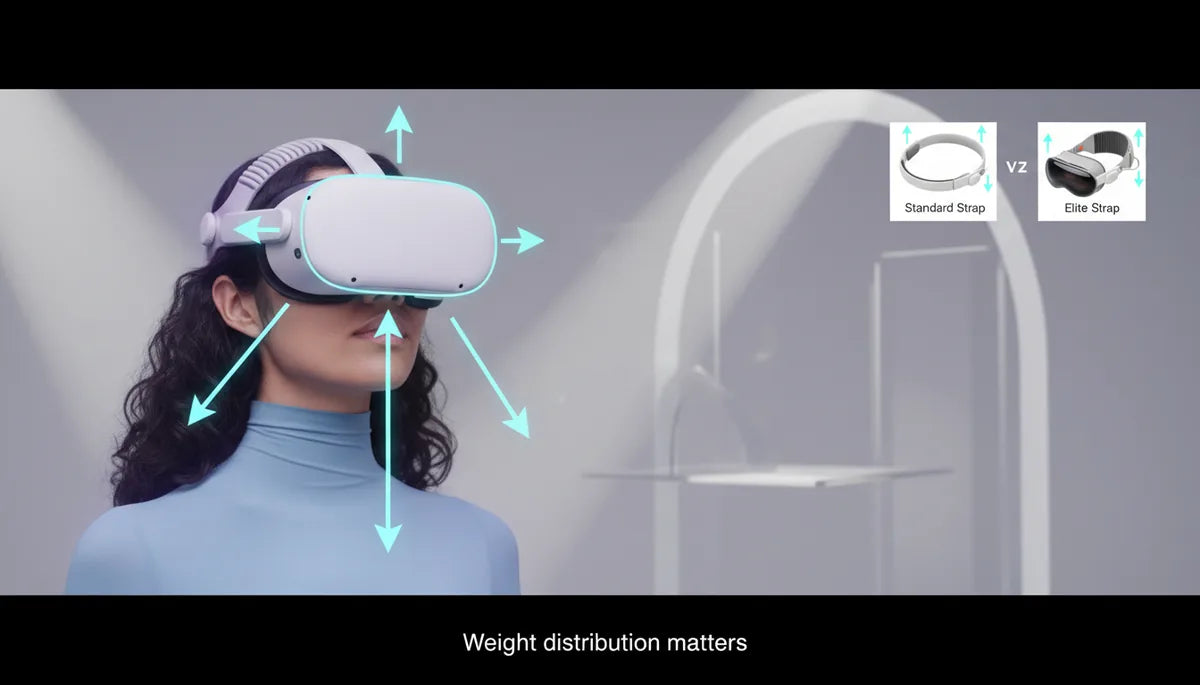
The Quest 2’s mass—about 503 g—doesn’t tell the whole story. What matters more is where that mass sits relative to the pivot point at the neck. When most of the weight sits forward, on the face and optics, the effective lever arm increases. That forward bias multiplies the torque the neck and upper-trapezius muscles must counter, so even small head tilts or rapid tracking cause disproportionately large muscular demands.
Imagine holding a 500 g weight with your arm straight out versus with the elbow bent: the farther the mass is from the pivot, the harder your muscles work. The same principle applies to VR headsets. A headset centered over the crown places load closer to the skull’s axis and reduces torque. A front-heavy headset shifts the center of gravity forward, creating more torque and raising the perceived weight.
On a practical timeline, the neuromuscular cost compounds over minutes. With a front-heavy setup you'll often notice soreness behind the ears, stiffness in the upper shoulders, or tension radiating from the jawline after sessions longer than 20–30 minutes. Reducing that torque—by moving mass rearward or redistributing support across the crown and back of the head—reduces fatigue and reduces the need for constant micro-adjustments during gameplay.
Strap design options: standard vs Elite Strap and third-party options
Strap geometry and construction change how the Quest 2’s mass is supported. The standard soft strap is light and low-profile, which keeps the headset’s mass close to the face but provides little structural support. Its flexibility means the front of the headset still pulls, and pressure can concentrate on the cheeks and nose. That makes it comfortable for short sessions but less ideal for long play or dynamic movement.
The Elite Strap introduces a rigid, curved frame that pushes more of the headset’s mass toward the rear and sides. By cradling the skull, the Elite Strap shortens the lever arm acting on the neck and spreads pressure across the crown and back of the head. That change reduces forward pull and helps maintain alignment during turns and brisk head movements. Adding the Elite Strap with a rear battery further moves the center of gravity rearward: total mass increases, but perceived torque often decreases because the weight acts as a counterbalance.
Third-party options expand the design vocabulary. Halo-style straps redistribute load around the crown and upper sides of the head, reducing top-front concentration. Many third-party systems offer thicker memory-foam padding, gel layers, and modular counterweight mounts that allow you to tune rear bias. The trade-offs are predictable: increased surface contact reduces hotspots but may increase overall system weight and heat; rigid frames improve balance but can feel bulkier and cost more. The best choice depends on your head shape, how long you play, and whether you prioritize minimalism or sustained comfort.
Installation and fit: step-by-step guide for beginners
Proper installation is foundational. A misaligned or over-tightened strap sends pressure to the wrong places and magnifies neck torque. Follow this practical sequence to set up your Quest 2 strap so adjustments later are meaningful.
- Start with a clean headset: wipe foam and lenses, remove any loose accessories, and place the headset on a flat surface.
- Attach the strap frame: if using the Elite or a third-party band, clip or slide the side mounts into the headset’s anchor points, following the manufacturer’s guide. Ensure clips click into place and the strap is seated flush.
- Set the rear pad position: place the rear cushion so it rests on the widest part of the occiput (the back of your skull), not the base of the neck. This moves support to the crown and keeps pressure off the cervical vertebrae.
- Don the headset: let the top band settle on your crown first, then secure side straps. The display should sit evenly over your eyes; don’t fight the facial interface to achieve a perfect seal.
- Top strap tension: tighten or loosen the top strap so the headset’s weight is supported by the crown, not the cheeks. Nod slowly—if the headset pulls or lifts, the top strap needs adjusting.
- Side straps for lateral stability: tighten both sides until the headset remains centered during quick head turns. Avoid pinching the temples; the headset should feel snug, not constrictive.
- Quick loosening/tightening test: release all tension, then reapply slowly to a comfortable point. If you consistently tighten beyond the point of comfort, you may be compensating for poor strap position or mismatched padding.
Common mistakes include seating the rear pad too low (putting pressure on the neck), over-tightening side straps (creating temple hotspots), and failing to equalize side tensions, which allows the headset to yaw and requires corrective neck effort. Fix these first, then move to fine-tuning weight distribution.
Weight-distribution tuning for long sessions
Tuning is iterative: small, deliberate changes produce the biggest wins. Your goal is to minimize forward torque while keeping the headset stable during active movement. Use the following steps as a progressive plan.
- Baseline test (10 minutes): set up the headset with a neutral strap position and play a game or simulate head motion. Log a comfort score (1–10) and note hotspots.
- Move mass rearward: if you’re using a rear battery or counterweight, mount it and tighten the rear stabilizer so the headset’s profile doesn’t tilt forward. Small weights (100–300 g) are typical for DIY counterbalances; commercial batteries usually fall in this range and are safer to mount properly.
- Raise or lower the halo/top strap: raising places load more on the crown (shortening lever arm); lowering shifts pressure toward the forehead and face. Adjust in 5–10 mm increments.
- Pad thickness tuning: thicker crown padding shifts the contact surface and can push the rear pad into a more effective position. Test one variable at a time—change the pad, then test for 15 minutes.
- Symmetry and side balance: ensure any rear weight is centered or mirrored left-right. Off-center loading forces the neck to compensate asymmetrically and produces uneven fatigue.
- Progressive duration testing: after each change, play for 15, 30, and then 60 minutes on separate sessions, logging comfort scores and noting when pain or hotspots appear.
Keep one variable per session. For example, if adding a 150 g battery reduces forehead pressure but creates crown soreness, adjust the top strap height before adding more padding. Aim for a setup where 60-minute sessions produce low-to-moderate discomfort (comfort score ≤3) and you can extend beyond an hour with minimal cumulative neck torque.
Wearability for glasses and skin comfort
Glasses wearers and sensitive skin add complexity to strap tuning. The Quest 2’s facial interface is a common hotspot; strap adjustments can help reduce temple, cheek, and nose pressure without sacrificing seal or image quality.
For glasses: raise the top strap slightly so the headset sits slightly higher on the forehead. This reduces lateral temple pressure while allowing the face gasket to clear the eyeglass arms. Use low-profile or prescription lens inserts if you regularly play longer than 30 minutes—these remove the need to press the headset against your glasses and eliminate temple and nose crease issues.
To reduce facial hotspots: consider thicker or softer facial foam, memory-foam replacements, or breathable covers. These spread contact over a larger area and reduce peak pressures. If you use a halo or rigid rear band, keep side straps looser to shift more load onto the halo; this reduces direct pressure on cheeks.
Skin-care tips are practical: wipe down the foam after use, use a sweat-absorbent cover for hot sessions, and let foam dry fully before storing. For people with sensitive skin, select breathable, hypoallergenic materials; avoid adhesives that trap moisture against the skin. Finally, rotate padding types—if a thicker foam creates a new hotspot, try a gel layer or a thinner memory foam to find the sweet spot for your anatomy.
Maintenance, care, and replacement planning
Straps and pads wear predictably. Fabric stretches, foam compresses, and Velcro loses grip. A maintenance checklist keeps the system performing and avoids unexpected discomfort.
- Monthly inspection: check for frayed fabric, loose stitching, or cracked plastic on clips. Make sure side anchors are secure and that any snap or slide mechanisms move freely.
- Foam condition: facial foam that compresses flat or feels spongy to the touch has lost its load-distributing capacity. Replace it when you notice consistent pressure on the same facial points or a loss of seal that requires overtightening.
- Strap elasticity: if the strap material stretches and no longer holds tension, you’ll compensate by over-tightening—this leads to hotspots and neck strain. Replace straps showing visible stretch or uneven tension.
- Cleaning: use a damp cloth with mild soap for fabric bands; alcohol wipes for plastic surfaces and lens frames. Avoid saturating foam; removable covers can be machine-washed if labeled safe.
- Replacement timeline: heavy daily users should inspect and expect to replace facial foam every 6–12 months and straps every 12–24 months depending on material and usage. Light users can extend those intervals.
When you replace parts, keep a record of what worked. If a particular padding thickness solved your comfort problem, note that specification for future purchases. Finally, store your headset resting on a stand or flat surface with straps relaxed to avoid long-term deformation.
Measuring impact: quick checks and benchmarks
Quantifying the effect of strap changes removes guesswork. Use simple, repeatable tests to compare configurations and track improvements over time.
- Discomfort log: after each session, record session length and a comfort score (0–10). Note hotspots, whether symptoms are left/right/midline, and when they started (e.g., “chin 25 min; neck 40 min”).
- Nod/tilt test: sit upright and tilt your head down 30°, hold for 10 seconds, then lift. Do three repetitions and note if the headset pulls forward or requires hand assistance to lift. If pulling is evident, your center of gravity is too far forward.
- Micro-adjustment count: during a 30-minute session, count how many times you pause gameplay to reposition the headset. Fewer than three adjustments indicates a well-balanced setup; more than ten suggests instability.
- Weight comparison bench test: swap straps and perform the same 15-minute play loop on each. Compare comfort scores and hotspot locations. Keep everything else identical—same game, same play intensity.
- Symmetry check: with the headset donned, use a mirror or a friend to confirm the rear pad sits centered on the occiput. Off-center pads produce asymmetric neck load measurable as uneven fatigue after repetitive motion.
Benchmarks to aim for: stable fit with <3 micro-adjustments per hour; the main discomfort appearing after at least 60 minutes; and a peak discomfort score no higher than 4/10 for intense sessions. If you can meet or beat these values consistently, you’ve likely reduced torque to a level your neck can handle for extended play.
One practical DIY note: if you choose a homemade counterweight, start with 100 g and increment in 50 g steps. Secure weights with Velcro or a purpose-built cradle, keep them flat to avoid pressure points, and test in short increments to avoid destabilizing the headset alignment.
Next step: pick one variable—strap height, rear weight, or pad thickness—and run the 3-session tuning plan above. Log your results and iterate. Small, data-informed adjustments are the fastest path to longer, more comfortable VR sessions.


Compartir:
Third-Party Strap Options for Quest 2: Budget-Friendly Alternatives Without Compromising Comfort
How to choose the right Quest 2 comfort strap for long gaming sessions and heavy use