

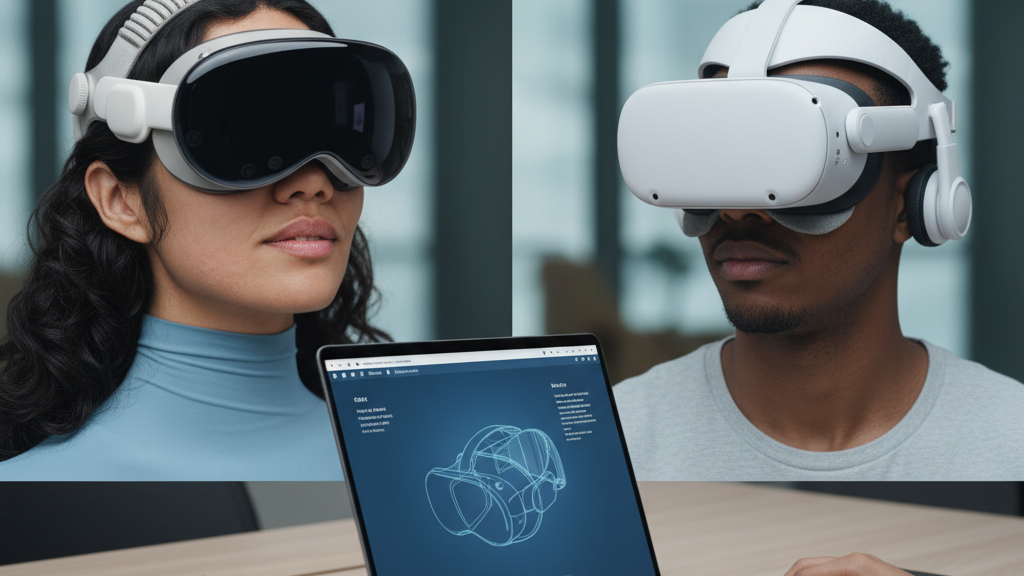
Vision Pro vs Meta Quest 2 Ergonomics: Weight, Straps, and Comfort for Long Sessions
Choosing a VR headset for long sessions is seldom just about resolution or apps — comfort determines whether you can focus on content or spend your time constantly readjusting. Apple’s Vision Pro and Meta’elite-strap-showdown-does-the-quest-two-official-strap-beat-third-party-headbands-for-comfort" rel="nofollow noopener noreferrer">s Quest 2 take very different routes to the same goal: keep the headset stable and comfortable for extended wear. Understanding how weight, strap design, padding, and accessory ecosystems change the experience will help you pick the right device and set it up so long sessions are productive, not painful. ⏱️ 11-min read
This guide walks through the practical ergonomics of both headsets and gives concrete steps: how weight and balance affect fatigue, how straps and pads change pressure points, what glasses-wearers need to check, how to install comfort-strap-installation-guide-a-step-by-step-fit-tutorial" rel="nofollow noopener noreferrer">Quest 2 comfort straps properly, and how to maintain parts so they stay comfortable over time. Expect real-user scenarios and clear actions you can use the next time you sit down for hours of VR.
Weight and balance: Vision Pro vs Quest 2
Weight and balance are the first things you feel, even before power-on. Apple’s Vision Pro is noticeably heavier and tends to be front-loaded: most of the mass sits toward the face, which shifts the center of gravity forward. That front bias increases the load on the nose bridge and cheeks, and it makes small head tilts feel exaggerated. After a couple of hours, users commonly report neck fatigue, forehead pressure, or a need to repeatedly nudge the headset back into alignment.
By comparison, the Quest 2 has a lighter overall profile and a more neutral balance out of the box. Weight sits more across the crown and rear of the head, especially when you add a rear-facing strap like the Elite Strap or Comfort Strap. That distribution reduces cheek pressure and makes the headset feel less “heavy” on the face, which helps when you’re gaming, moving around, or wearing glasses. A lighter, better-balanced headset tends to require fewer mid-session adjustments and lowers the risk of hotspots that lead to headaches.
Practically, weight distribution affects how long you can comfortably play or work: front-loaded designs often force shorter sessions or require additional counterweights at the back. If you plan marathon use, consider whether you prefer Vision Pro’s front optics and integrated headband tradeoffs, or the Quest 2’s lighter chassis that pairs well with aftermarket rear cradles.
Strap design and adjustability
Strap engineering is where the two ecosystems diverge. Vision Pro uses a broad, integrated headband designed to distribute load across a wider area of the crown. That broad contact patch reduces pinpoint soreness and keeps the headset steady during natural movement. Because the headband is mostly integrated and optimized for Vision Pro’s form factor, swapping in third-party straps is not as straightforward as it is for Quest 2.
Quest 2 leans into modularity. Its stock fabric strap works well for casual sessions, and Meta—and the aftermarket—offers several upgrades: the Comfort Strap for better padding, the Elite Strap for a firmer rear support, and hybrid designs with rigid rear cradles. These options let you move mass toward the back, improving balance and reducing nose pressure. The top strap (or “t-link”) on Quest 2 is an important micro-adjustment: it reduces forward tilt by pulling the front of the headset down, improving display alignment without overtightening.
Small adjustments matter. A millimeter of strap length or a slight angle change can eliminate hotspots and restore a better seal without adding pressure. Padding and strap tension trade off stability against breathability: firmer straps lock the headset in place for active play, but soft, well-padded straps are kinder to skin during multi-hour sessions. If you’re comparing devices, prioritize the type of movement you expect: active play favors a tighter, more supportive system; office-style seated sessions favor gentle, distributed pressure.
Face interface and padding for comfort
How a headset meets your face — the foam, fabric, and gasket geometry — determines comfort, seal quality, and heat management. Softer foams reduce sharp pressure points but can collapse over time; denser foams hold shape but may trap heat if the cover fabric isn’t breathable. Seal geometry is critical: wide, rounded seals distribute force across cheekbones and the nose, while narrow or hard edges can press on lashes, bridge points, or temples and increase fogging or hotspots.
Vision Pro leans into larger surface contact to spread load across cheeks and the nose. That approach reduces single-point pressure and generally feels more stable during seated productivity or meetings. Its integrated facial interface aims to reduce concentrated soreness by increasing the area of contact, which can delay the onset of facial fatigue on long calls or creative sessions.
Quest 2’s advantage is replaceability. The foam pads are swappable, and a wide aftermarket ecosystem offers thinner, thicker, and breathable replacements—silicone gaskets, leatherette covers, and moisture-wicking fabrics. Swapping to a breathable pad or adding a thin mesh cover can improve airflow and lower sweat build-up. For long sessions, choose pad materials that balance softness with airflow: open-cell foams and moisture-wicking covers are the most comfortable for multi-hour wear.
Glasses wearers and facial fit
If you wear prescription glasses, fit becomes a practical necessity, not an afterthought. Vision Pro’s face seal is designed with a range of face shapes in mind and may provide generous eye clearance for many glasses frames. Apple also sells optical inserts and accessories to reduce frame contact and prevent glasses from pressing into your eyelids. However, clearance varies with frame thickness and nose geometry, so verify compatibility before long sessions to avoid pressure on the bridge or temple arms.
Quest 2 takes a different path: many users rely on prescription lens inserts or adjust interior padding to create more space for frames. Inserts sit directly in front of the headset lenses and eliminate frame pressure entirely while preserving optical alignment. Interior padding tricks—thicker or thinner cushions—can also make room for frames, though they might slightly change eye relief and focal distance.
Practical tips for glasses wearers: choose low-profile frames, test the headset with your frames for at least 10 minutes before a long session, and consider prescription lens inserts if available. If you feel pressure at the nose bridge, try a different pad thickness or move the rear strap slightly higher on the skull to redistribute some weight to the crown. These small changes often make the difference between being able to work in VR for hours and needing frequent breaks.
Installation and setup: Quest 2 comfort straps
Upgrading a Quest 2 strap is one of the simplest ways to improve balance and long-session comfort. The official Comfort Strap or Elite Strap transforms the experience by shifting mass backward and adding firmer support. Follow this practical sequence to install and tune a strap without guesswork.
- Prepare and inspect. Confirm you have the correct strap and any replacement pads for your headset. Check for missing clips or broken tabs before starting.
- Remove the stock strap. Gently disengage the side clips and pull the fabric strap tabs out from the headset mounts. Keep the stock strap in case you want to revert later.
- Attach the new strap. Align the strap tabs with the same mounting points. Press firmly until you hear a click. Verify the strap lies flat against the housing—no kinks or gaps.
- Position the rear cradle. Place the rear pad so it rests comfortably on the occipital area (the back-top of your skull), not the neck. If you feel neck pressure, raise the cradle slightly toward the crown to shift weight higher.
- Adjust the top strap. Tighten just enough to control slippage without pinching. The top strap should redistribute forward pull across the crown instead of pressing the headset forward on the face.
- Test and refine. Run a 5–10 minute session, look around, bend forward, and jump slightly. Note any tilt or hotspots and make minor length adjustments until the display stays level with minimal pressure.
Small hardware details matter — a slightly crooked mount or a poorly seated tab can create uneven pressure. If you still feel front-heavy after installation, consider a counterweight or an aftermarket rear cradle with a firmer support bar to push more mass toward the back.
Maintenance and longevity of straps
Comfort degrades slowly. If you treat straps and pads as disposable, you’ll be replacing parts less often and staying comfortable longer. A simple Routine can extend lifespan: clean regularly, inspect for wear, and store properly.
- Clean gently and often. Use a mild soap and water to remove oils and sweat from foam and fabric. Avoid harsh chemicals that break down materials. Rinse thoroughly and air-dry fully before reattaching.
- Inspect for wear. Look for fraying, compression in foam, cracked leatherette, or stretched elastic. Buckle joints and clip tabs are common failure points. Replace a strap or pad at the first sign of structural wear that affects fit.
- Store carefully. Keep headsets away from direct sunlight and heat sources that deform foam and elastic. Hang or lay the headset so straps aren’t folded or bent in ways that introduce permanent kinks.
- Plan refresh cycles. For high-use setups (daily, multi-hour sessions), expect to refresh pads or straps every 6–12 months depending on material quality and sweat exposure. Rotating between two sets of pads can let foam fully recover and extend usable life.
- Track warranties and replacements. Use authorized parts to preserve warranty and safety. Keep receipts and note manufacturer recommendations for replacement timelines.
Maintained straps not only feel better, they preserve fit and keep sensors unobstructed — reducing the chance that a degraded pad will interfere with tracking or microphones.
Compatibility, accessories, and cross-ecosystem tips
Accessory ecosystems matter because they determine how broadly you can tailor fit. Quest 2 benefits from a mature aftermarket: third-party rear cradles, thick or thin face pads, silicone gaskets, and optical inserts are widely available and often inexpensive. That modularity makes it easy to experiment with fit until you find a setup that lets you play for hours.
Vision Pro’s accessory landscape is narrower. Apple controls accessory fit tightly, and while official Apple options aim to match the headset’s ergonomics, third-party parts are fewer and sometimes require careful scrutiny to ensure they won’t interfere with sensors or void warranties. That means cross-ecosystem swapping is riskier for Vision Pro: a nonstandard pad could occlude cameras, upset tracking, or muffle microphones.
When mixing ecosystems or buying aftermarket parts, follow these rules: prefer vendors that publish exact headset compatibility, read user reviews focused on long-session comfort, and validate return policies. After any install, check camera view, field-of-view alignment, and microphone clarity before committing to a long session. And be cautious about attaching counterweights or heavy accessories without ensuring the rear strap and housing can handle the added load — improvised solutions can shift pressure in ways that cause new hotspots.
How-to: quick setup to maximize comfort during long sessions
Before you plunge into a marathon session, run through a short comfort checklist. This takes ten minutes, prevents many common issues, and helps you focus on VR instead of discomfort.
- Clean and dry: wipe down pads and your face to reduce slipping. Clean lenses to avoid squinting that causes eye fatigue.
- Balance first: with the headset on loosely, adjust the rear cradle so the display sits level and centered. If using Vision Pro, set the headband so pressure spreads across the crown.
- Top strap: set it to prevent slippage without pinching. It should keep the headset level when you nod or lean forward.
- IPD and eye relief: confirm interpupillary distance (if adjustable) and test clarity at the edges of the field of view. Minor optical misalignment is a major source of eye strain during long sessions.
- Breathability: swap to breathable pads or cover with a mesh sleeve in warm conditions. Consider small breaks every 45–60 minutes to let skin cool and to do neck stretches.
- Test actively: perform the movements you expect in your session — turning, leaning, quick head motions — and make small tweaks so the display stays lined up without extra force.
Also consider ergonomic habits: sit with a neutral neck posture, keep shoulders relaxed, and use a chair with good support for seated VR. If you’re in a standing or room-scale session, a quick mid-session re-seat can prevent cumulative slip without breaking immersion.
Examples: real-user comfort scenarios and takeaways
Concrete scenarios reveal how these ergonomic choices behave in the real world.
Case A — Glasses-wearing professional using Vision Pro: The broader facial interface and integrated crown strap distribute pressure across cheeks and the scalp. During back-to-back meetings and content work, hotspots remain minimal and glasses sit stably without constant re-centering. The device’s front weight is noticeable but offset by the headband’s large contact patch, which makes long seated sessions comfortable for this user.
Case B — Active gamer on Quest 2 with Elite Strap: A tighter rear cradle locks the display alignment during sudden pivots, ducking, and rapid play. Sweat and occasional strap slip are managed with a quick mid-session adjustment or breathable replacement pads. The modularity of Quest 2 makes it easy to swap a pad or upgrade the strap for heavier activity.
Case C — Short demonstrations on either device: When sessions are under 30 minutes, both headsets perform well if you set basic strap tension and lens alignment. The biggest risk is eye strain from misaligned IPD or dirty lenses — not strap fatigue — so a quick alignment and lens wipe is often enough for short bursts.
Takeaways: there is no absolute “ergonomics winner.” Vision Pro excels where distributed crown pressure and premium integrated materials matter (meetings, seated productivity). Quest 2 shines when modularity, lighter overall weight, and aftermarket straps matter (active gaming, experimentation). Match the headset to your priority: stability and crown comfort for long seated work, or lighter weight and modular upgrades for active, longer gameplay.
Next step: before committing to extended use, run a 10–minute practical comfort test using the checklist above; note hotspots and adjust straps, pads, or accessories until the headset stays level and comfortable for that stretch — that single test will predict how manageable multi-hour sessions will be.


Compartir:
The elite strap showdown: does the Quest Two official strap beat third-party headbands for comfort
Using Counterweights to Improve VR Headset Balance and Comfort