

How to Install and Dial In the Quest 2 Comfort Strap for Secure, Long‑Session Comfort
Swapping the stock band on your Meta Quest 2 for a proper comfort strap can be the single best upgrade for longer VR sessions: better balance, less face‑push, and fewer mid‑game adjustments. This guide walks you through a practical, step‑by‑step approach to install and fine‑tune the Quest 2 comfort strap so the headset feels stable, light, and glasses‑friendly even after an hour or more of play. ⏱️ 10-min read
You'll get checklists for what’s in the box, a clear install sequence, and precise tuning tips for height, side tension, and rear cushion placement. Expect real examples, maintenance advice, and troubleshooting steps—everything a Quest 2 owner needs to get a secure, comfortable fit and avoid neck fatigue or lens fog during marathon sessions.
Before you install: define your comfort goals
Before touching any clips or screws, pause and define what “comfortable” means for you. Comfort isn’t only softness; it’s how the headset distributes weight across your forehead, crown, and the rear of your skull so pressure points don’t develop. Spend a few minutes wearing the stock strap and note three things: where you feel pressure, how the headset tilts, and whether your glasses contact the lenses.
Do a short wear test (5–10 minutes) and look for red marks around the temples, cheeks, or the back of your head. These hotspots tell you where to shift padding or change strap height. Consider typical session length: if you usually play 20 minutes, a slightly looser fit may be fine, but for hour‑long sessions you want even weight distribution and a snug, stable fit that resists slipping when you look around quickly.
Also account for hair and head shape. Long hair or a loose bun can push the rear cushion forward, changing the headset’s angle; short hair or a narrow head may need a tighter top strap to avoid slippage. If you wear glasses, prioritize nose clearance and a slight loosening of the top strap so frames don't press into the gasket. Defining these goals now saves repeated adjustments later and helps you decide whether the standard comfort strap is enough or if you should consider the Elite Strap or other upgrades for better weight distribution.
What’s included and compatibility basics
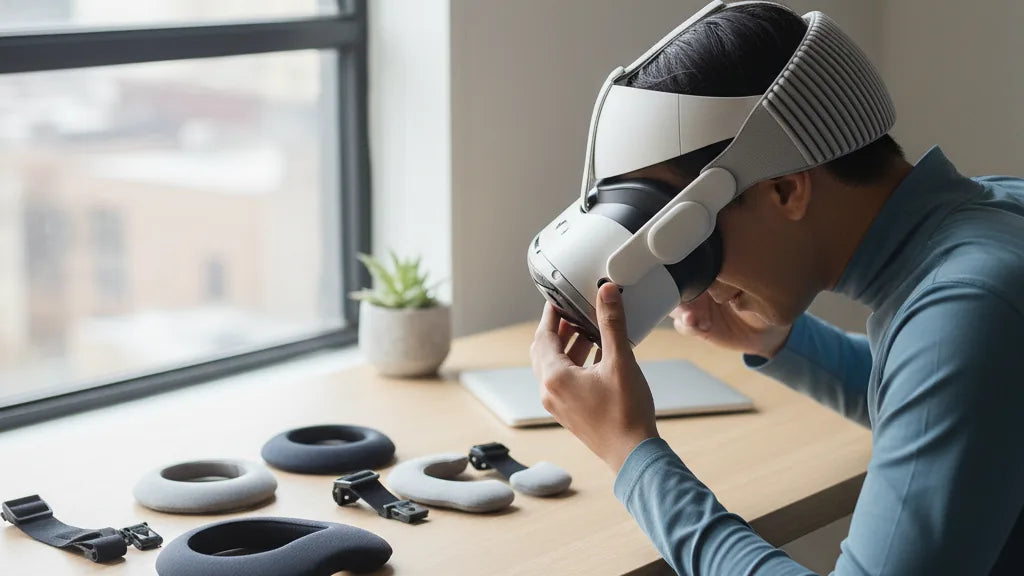
When you unbox a Quest 2 comfort strap, most manufacturers include everything you need for installation, but knowing the parts makes the process faster. Typical components are the main strap body with a cushioned rear pad, two side straps that clip into the headset rails, an optional top strap for crown support, and any clips or quick‑release buckles. Some packages also include a small tool or screws for models that use a tightened hinge or dial.
Compatibility matters. The official Meta/Quest 2 comfort strap and reputable third‑party straps are designed to use the Quest 2’s side mounting points. Universal straps sometimes work, but they rarely offer the same secure integration—look for explicit Quest 2 compatibility on the box or product page. If you’re comparing the standard comfort strap and the Elite Strap, note the Elite Strap adds a rigid brace and a more robust rear pad that improves stability and can better support accessories like battery packs.
Before you start, check if your comfort strap includes a spacer or padding meant for glasses wearers. If you plan to attach a battery pack or head‑mounted accessories, confirm the strap’s rear mount or brace is rated for added weight. Lastly, keep the instruction manual handy—most manufacturers provide simple diagrams that show the correct orientation for the left and right connectors, and any special steps to secure a rear hinge or dial.
Step‑by‑step install: from stock to secure
Swapping the stock Quest 2 strap is straightforward if you follow the order: remove, align, attach, and test. Work on a clean, flat surface with the headset supported so you don’t stress the lenses.
- Remove the stock strap: Hold the headset firmly. Locate the quick‑release tabs on both side rails and squeeze to disengage. Pull the side straps away from the rails until they release. If your headset has a top strap, unclip that first to free the main band cleanly—this prevents tension from catching mid‑remove.
- Inspect the rails: Wipe away any dust from the mounting slots and verify there’s no debris that could prevent a full click. Confirm left and right slots line up with the replacement strap ends.
- Attach the comfort strap: Orient the new strap so the rear cushion faces the back of your head. Slide each side connector into its corresponding rail until you hear a soft click. If your model includes a rear hinge or dial, thread the rear strap through it now and set the dial loose—you'll fine‑tune it when wearing the headset.
- Seat and secure: Put the headset on, then tighten the rear dial or adjustment knob a notch at a time. Check both side connectors sit flush and symmetrical. Lightly shake your head; if you feel slack, remove and re‑seat the side connectors before increasing rear tension.
Don't over‑tighten screws or force clips—most slippage indicates a connector isn’t fully seated rather than a need for brute force. Once installed, perform a short movement test (look left/right, nod up/down) to identify any initial discomfort spots that require immediate adjustment.
Fine‑tuning fit: height, length, and back cushion
After installation, the real work is dialing the strap to your head. Start with all adjustments loosened and use an iterative approach: make small changes, test with movement, then tweak again. This prevents over‑correction and helps you find a neutral, balanced fit.
First, set the vertical or crown height. Slide the top strap or adjust the rear cushion up or down so the headset sits on your face at the same sweet spot you use with the stock band—lenses should frame your eyes without forcing the headset too low on the nose. The rear cushion should cup the back of your head, sitting just above the nape, distributing weight across a broader surface rather than concentrating it on the forehead.
Next, equalize side strap tension. Pull each side strap evenly until the headset feels secure—firm enough to resist rapid head movements but not so tight your cheeks feel compressed. A helpful test: stand and nod briskly; the headset should stay put and the image should stay centered. If the view shifts, loosen the top strap slightly and retighten the rear cradle.
Use the rear cushion to fine‑tune tilt. Many people find that shifting the cushion up or down a centimeter changes the tilt by several degrees. If the headset pulls forward onto your cheeks, raise the rear pad higher; if it feels like it’s tipping back, move the pad lower or increase top strap tension. Once you reach a stable setting, do a 10–20 minute play test and watch for developing pressure points—a short run will reveal whether further micro‑adjustments are needed.
Glasses‑friendly setup for long sessions
Playing with glasses adds another layer to fitting. The last thing you want is frames pressed into the gasket or fogged lenses that ruin immersion. Start by using the official glasses spacer if you have it—this small insert keeps frames off the headset lenses and prevents scratches.
When fitting with glasses, aim for a slightly higher headset position and a balanced rear cushion that prevents the headset from tilting forward. Use a gentle tightening of the top strap to lift the weight off your nose without pinching the crown. If you feel pressure on the nose bridge, slide the headset slightly up; the lenses should still be centered with your eyes. A minor tilt adjustment often frees up nose clearance without sacrificing visual clarity.
To reduce fogging, allow a little airflow by avoiding an overly tight face gasket. A slightly looser top strap combined with a firm rear cradle maintains stability while giving your glasses room to breathe. Take periodic breaks during long sessions—lifting the headset for 30 seconds disperses accumulated heat and moisture and prevents condensation on lenses. If fog remains a persistent issue, consider anti‑fog sprays for eyewear, or try thinner frame profiles that occupy less space inside the headset.
Weight distribution and comfort balance
Proper weight distribution is the core benefit of a quality comfort strap. Instead of letting the Quest 2 rest on the bridge of your nose and cheekbones, the strap’s rear cushion and top band should carry most of the load, making the headset feel like it floats. The goal is a neutral balance: no forward pull, no digging behind the head, and minimal neck strain.
Start by tightening the rear dial until the headset stops sliding forward. Then adjust the top strap so it lifts the headset slightly—enough to relieve facial pressure but not so much that the top of your head aches. Perform a movement test: a few brisk turns and head nods. If the headset tilts forward during movement, increase rear support; if it rocks backward, reduce rear tension or increase top strap tension.
If you attach a battery pack to the rear, re‑evaluate balance after installation. Battery packs add weight and can pull the headset backward; shift the rear cushion lower on your skull and loosen the top strap slightly to compensate. Some Elite Strap variants are better suited for heavier accessories because of their reinforced brace. Test with the pack on—walk around and perform quick head movements to confirm the fit remains secure without putting undue strain on your neck.
Care, maintenance, and longevity
Treat your comfort strap like a piece of gear you want to last. Regular cleaning and sensible storage will keep padding fresh and adjustment mechanisms working smoothly. For fabric, foam, or silicone straps, a damp cloth and mild soap are usually sufficient—wipe the surfaces that contact your skin and let them air dry completely before reattaching to the headset. Avoid bleach, alcohol‑based cleaners, and vigorous scrubbing, which degrade foam and elastic over time.
Inspect clips, dials, and rail connectors periodically. Look for frayed fabric, cracked plastic, or loose hardware. Replace any worn components before they fail mid‑session; most manufacturers sell replacement cushions or straps separately. Avoid leaving the strap in direct sunlight, hot cars, or damp basements—extreme temperatures and humidity accelerate material breakdown.
When storing, keep the strap in a cool, dry place and avoid stacking heavy items on top of the rear cushion, which can deform its shape. If you use a hard case for your Quest 2, position the strap so the cushion doesn’t compress for long periods. For users who rotate headsets or share gear, consider a removable hygiene cover for the rear pad and face gasket—these are easy to wash and protect the original foam from oils and sweat.
Troubleshooting: compatibility and upgrades
Even with careful installation, issues can occur. Start diagnosing slippage or discomfort by confirming the basics: are the side connectors fully seated? Is the rear dial tightened enough? Many problems come down to one of those two points. If your strap sits crooked, remove and re‑seat both side clips, then tighten the rear dial incrementally while checking symmetry in a mirror.
If you experience persistent pressure points or poor balance, consider an upgrade. The Elite Strap and other premium third‑party options offer a rigid brace, thicker memory‑foam padding, and stronger rear anchors that improve both stability and comfort. For glasses wearers, look for straps that include a manufacturer‑provided spacer or specify extra lens clearance. Read compatibility notes carefully—avoid models with vague claims and check return policies so you can test fit at home.
When compatibility questions remain, Meta Quest Support and manufacturer FAQs are reliable resources—have your headset serial, strap model, and purchase details handy. Real‑world mini‑cases are also instructive: for example, one medium‑head glasses wearer solved nose pressure by lowering the rear pad to the base of the skull and tightening the top strap until the headset floated; a smaller‑head user found steadiness by centering the rear pad and easing top tension. Iteration and short test sessions are your best tools for solving fit puzzles.
Takeaway: after installation, run a 20–30 minute play test and make incremental tweaks—small changes compound into a truly comfortable setup. Your next step is to put on the headset, follow these tuning steps, and note any pressure spots to address in a second pass.


Share:
How to adjust straps for glasses wearers on Meta Quest
DIY Weight-Reduction Hacks for Oculus Quest Two Without Voiding Your Warranty