

Upgrade Your Quest 2 Comfort: A Practical Guide to Foam, Fabric, and Cooling Inserts
If your Quest 2 becomes uncomfortable after an hour, you’re not alone. Facial pressure, trapped heat, and slipping straps are the top reasons long VR sessions stop being fun. The good news: thoughtful padding upgrades—foam cores, breathable fabric covers, and targeted cooling inserts—can turn marathon play into a comfortable routine without breaking the bank. ⏱️ 11-min read
This guide walks you through the trade-offs of each padding family, how to pick the right densities and thicknesses, installation basics, and maintenance tips to keep your upgrades working for months. Expect concrete recommendations for glasses wearers, strap compatibility (including the Elite Strap), and practical combinations that balance weight, seal, and airflow for extended sessions.
Understanding padding options for Quest 2
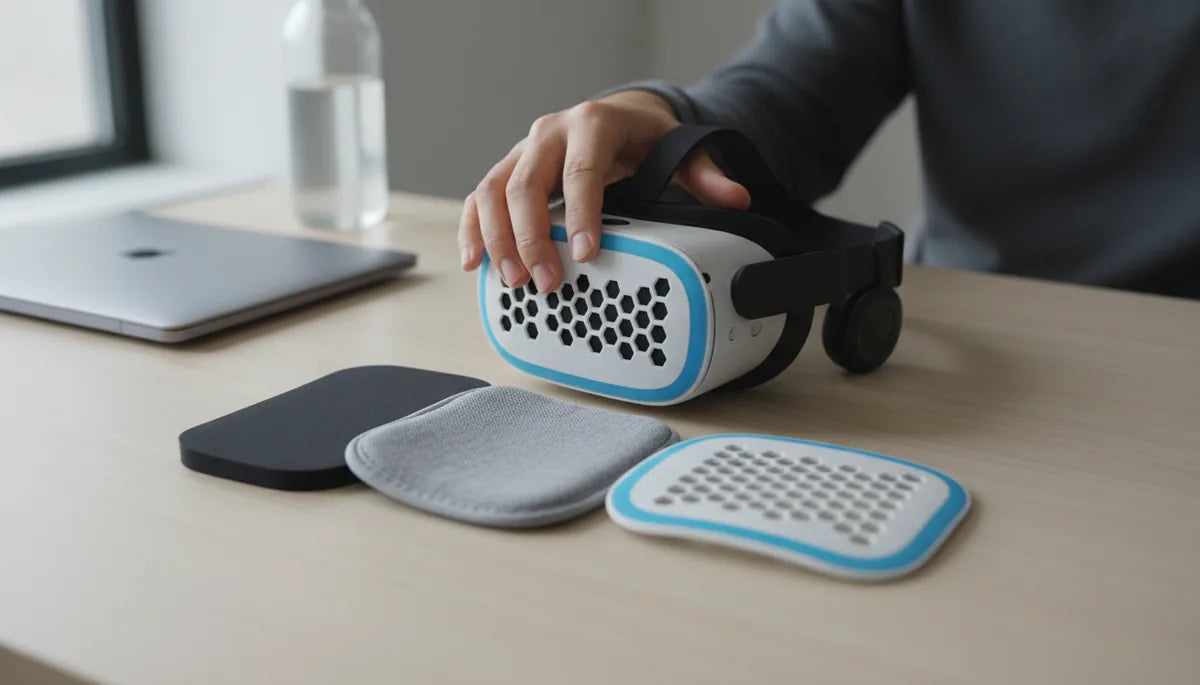
Upgrading your Quest 2 padding boils down to three families: foam, fabric covers, and cooling inserts. Each addresses a different comfort axis—pressure distribution, moisture management, and heat control—and the best result often comes from combining them. Foam provides the structural cushioning and seal against light leakage. Fabric covers determine breathability, skin feel, and hygiene. Cooling inserts actively move or absorb heat to limit sweat and lens fogging.
Foam types range from high-density blocks that keep a reliable seal to soft memory foams that contour to facial curves. Fabric choices—jersey, velour, microfiber, or terry—alter airflow and skin comfort; natural fibers like cotton are hypoallergenic while velour feels plush but can hold a little more heat. Cooling options include gel pads, phase-change materials (PCMs), and ventilated cores that create micro‑channels for airflow.
Trade-offs matter. Denser foam helps maintain a tight light seal and resists compression over time but can feel firmer against cheekbones. Softer foam reduces hot spots but may compress and allow light to leak. Cooling inserts add thickness and a bit of weight; if not contoured, they may change nose clearance or push the headset out of optimal tracking alignment. Consider your primary pain point—pressure, sweat, or light leak—and choose upgrades that target that issue first.
Foam padding upgrades: density, thickness, and fit
Foam is where the headline comforts come from. The right foam core gives support for the forehead and cheeks, preserves a good seal around the nose, and controls how the headset balances on your face. VR pad foams typically include open-cell polyurethane (PU) foam for breathability, memory foam for contouring, and firmer EVA or silicone-backed foams for longevity and easier cleaning.
Density and thickness are two control knobs. High-density foam maintains shape and resists "bottoming out," making it excellent for users who tighten straps aggressively or want a consistent seal over time. Memory foam molds to your nose bridge and temples, reducing point pressure—useful if you suffer from pressure on the nose or temple points. But memory foam rebounds slowly and holds moisture, so pair it with a breathable cover.
Thickness affects fit and tracking. Thicker pads relieve pressure but change how the headset sits: the lenses might sit slightly farther from your eyes, and the Elite Strap or other top straps will need retensioning. Practical guidance: start with a modest thickness increase—about 3–6 mm over stock—if you use the Elite Strap; if you use the original strap and want more lift, 6–12 mm can help redistribute weight to the forehead. For glasses wearers, choose a contoured foam with a deeper nose channel and softer edges to accommodate frames without pinching.
Hybrid foams—an inner high-density spine with softer outer layers—are a sensible compromise: backbone for the seal, softer surfaces for skin contact. Brands like AMVR and VR Cover offer memory-foam cushions with cloth covers in multiple thicknesses; try one that matches how tight you usually wear your headset, and keep a backup pad if you switch between intense and casual sessions.
Fabric padding and covers: breathability and care
Fabric covers are the tactile interface between you and the headset. They can make the difference between a sweaty five‑minute trial and a sweat‑controlled three‑hour session. Popular materials include velour (soft and warm-feeling), cotton (breathable and hypoallergenic), microfiber (smooth and moisture-wicking), and leatherette (easy to wipe but less breathable).
Choose fabric based on session length and skin sensitivity. For long, active play, breathable cotton or specialized moisture-wicking blends are ideal. Velour is luxurious and pleasant for watch-and-relax sessions but can trap a bit more heat. Leatherette works well for hygiene—easy to disinfect after a heavy session—but can build up sweat against the skin. Some covers come with antimicrobial treatments that slow odor and bacterial growth; these are worth it if multiple people use the headset.
Compatibility with glasses: fabric covers with a softer, more pliant lip around the nose and temple areas reduce pressure on frames. A smooth fabric surface prevents frame edges from catching, and a slightly thicker fabric layer can create a buffer between lenses and glasses arms.
Care is straightforward. If the cover is removable, hand-wash with mild soap and air-dry. Avoid machine washing thick foam packs or exposing them to direct sunlight, which degrades adhesive and foam. For non-removable covers, spot-clean with a mild soap solution and allow full drying before storage. Regular cleaning—weekly if you sweat heavily, monthly for casual users—maintains comfort and extends life.
Cooling inserts and cooling strategies for heat relief
Heat and perspiration are the most persistent comfort killers in VR. Cooling inserts address this by absorbing or channeling heat away from contact points. They come in a few practical designs: gel-infused pads that feel cool to the touch, phase-change material (PCM) inserts that absorb heat at a consistent temperature, and ventilated cores with micro-channels that encourage airflow behind the facial interface.
Gel-based pads usually contain a sealed material that soaks up heat and releases it slowly. They can provide an immediate cooling sensation and keep the forehead and cheeks cooler for the length of a session, but they add weight and a little bulk. PCMs are engineered to maintain a narrow temperature band and can be very effective at stabilizing skin temperature. Ventilated designs sacrifice active cooling for a slimmer profile and improved airflow, which reduces humidity and lens fog.
How much cooling? Expect modest but noticeable improvements: a gel pad might reduce perceived skin temperature by several degrees and cut forehead sweat in half during moderate play; PCMs and ventilated cores help more on longer sessions and in warm rooms. Real-world effectiveness depends on seal and movement—if the pad disrupts the gasket and lets warm air circulate, gains vanish.
Installation and maintenance: cooling pads should be removable and have washable covers. Avoid puncturing gel packs; if a pack leaks, dispose of it according to manufacturer guidance. Ventilated inserts need occasional dusting to keep channels clear. If you wear glasses, check nose clearance before committing to a thicker cooling insert.
Compatibility with straps, glasses wearers, and face shapes
Upgrades must play nicely with straps and facial anatomy. The Elite Strap and many third‑party headbands move weight away from the face and onto the back of the head, so padding that increases front lift can change balance. If you use the quest-2-comfort-strap-what-changes-in-your-gameplay" rel="nofollow noopener noreferrer">Elite Strap, smaller thickness increases—3–6 mm—are usually all you need; the strap absorbs the rest. If you use the stock strap, thicker pads (6–12 mm) can distribute pressure more evenly across the forehead and cheeks but will demand strap readjustment.
For glasses wearers, a few targeted choices make a big difference: a deeper nose bridge and tapered inner edges to clear frames; softer perimeter foam to avoid temple pinching; and a fabric cover that grips frames gently so glasses don’t slide. Some users add a thin spacer or a glasses adapter that keeps lenses slightly farther from the headset optics to prevent contact and fogging.
Face shape matters. Broader faces benefit from wider cheek padding to spread pressure outward. Narrow faces might need thinner lateral padding and a deeper nose cup to maintain a seal. If you see persistent light leakage at the nose, try a denser nose gasket or a pad with a pronounced nose contour. For asymmetric pressure—one temple pressing harder—inspect strap height and tighten evenly before changing padding; often, a small strap tweak fixes imbalance without a pad swap.
General fit tips: position the headset so the top strap pulls gently back rather than down; adjust vertical strap height so the lenses align with your pupils; and test movement—shake your head while standing to ensure foam compresses evenly and frames don’t pinch. These quick checks save hours of discomfort.
Step-by-step installation guide for padding upgrades
Installing new padding on the Quest 2 is simple if you work methodically. Before you start, power down and place the headset on a clean surface. Have a soft cloth and isopropyl wipe handy for cleaning. The following steps assume a pad kit that uses Velcro, snaps, or a friction fit similar to many third‑party kits.
- Remove the old pad: Gently peel the stock facial interface away from the shell. If it’s glued or clipped, work slowly to avoid tearing the shell’s Velcro or plastic tabs.
- Clean the shell: Wipe contact surfaces with a lightly damp microfiber or a 70% isopropyl wipe, removing oils and sweat. Let it dry completely.
- Prepare the new pad: Orient it so the nose cutout and forehead relief line up with the headset’s contours. If the pad has adhesive strips, peel protective film just before placing.
- Attach: Press into place, starting from the top and working around the perimeter to push out any air pockets. Ensure clips or snaps engage fully; for Velcro, press firmly along the entire edge.
- Test fit: Put the headset on and adjust strap tension. Move your head gently and check for light leakage, pressure points, and lens alignment.
- Fine-tune: If one area feels too tight, try rotating the pad slightly or adjusting strap height; if the nose cavity feels too tight, consider a thinner pad or trimming only if the kit instructs.
Common mistakes: installing pads backward, over-tightening the strap on the first fit (let the foam compress before fine adjustments), and not cleaning the shell or the pad cover before attachment. If you notice lens refocus issues after installation, swap to a thinner pad or retune the IPD settings and strap tension until the optics fall back into alignment.
Maintenance, cleaning, and longevity of padding
Padding longevity depends on material and care. Regular cleaning prevents odor, skin irritation, and premature breakdown. Different materials need different approaches. Foam cores should not be soaked—wipe with a barely damp microfiber, then air-dry completely. Fabric covers that are removable can be hand-washed in cool water with mild soap and air-dried; machine washing is often too aggressive for the foam beneath. Silicone or leatherette covers handle frequent wiping with a mild disinfectant and dry quickly.
Odor control: sprinkle a little baking soda on dry fabric covers, let sit, then brush or vacuum it off; alternatively, use antimicrobial sprays designed for sports gear. For memory foam that retains moisture or begins to smell, remove and air the foam; if odor persists, replace the foam—odor indicates trapped sweat and bacteria deep in the foam cells.
Replacement cadence: heavy users (daily multi-hour sessions) should plan to replace foam cores and covers every 6–12 months. Moderate users can expect 12–24 months before cushions flatten or fabric shows wear. Visual cues—permanent compression, cracked leatherette, or fabric thinning—are reliable signals that it’s time for a swap.
Storage and care: store your headset with padding in its natural shape—avoid compressing pads under heavy objects. Keep out of direct sunlight and high heat to prevent foam and adhesives from degrading. Rotate covers if you have spares; giving pads time to dry fully between sessions extends life and keeps the seal consistent.
Practical combinations for long sessions: weight, balance, and comfort tips
Combining elements thoughtfully is the most effective way to optimize long sessions. A tried-and-true setup: a medium-density foam core for backbone, a moisture-wicking fabric cover for skin contact, and a slim ventilated or PCM cooling insert for heat relief. This combo balances seal, breathability, and skin temperature without adding excessive bulk or weight.
Recommended pairings by scenario: - Marathon seated sessions: medium-density foam + cotton/velour hybrid cover + slim PCM insert to keep skin temperature steady. - Active, sweaty play: open-cell foam core + moisture-wicking microfiber cover + ventilated insert to encourage airflow and control humidity. - Glasses wearers: contoured memory foam with a deeper nose channel + smooth cotton cover to reduce friction and protect frames. - Light-leak focused: denser outer foam ring + softer inner liner to preserve seal without creating hotspot pressure.
Weight distribution matters. The top strap and Elite Strap shift load to the rear; use that to your advantage. If you still feel front-heavy, lower forehead foam thickness slightly or tighten the rear strap a touch to rebalance. Conversely, if the headset slides down, increase forehead padding or use a firmer, higher-profile pad to keep lenses aligned without over-tightening the strap.
Final practical tips: keep a backup cover on hand for heavy sessions so you can swap and dry between long plays; test combinations in 30‑minute increments to identify hotspots before settling on a configuration; and consider modular kits that let you replace single components rather than the entire pad—cheaper and more sustainable long-term.
Next step: pick the primary issue you want to solve—pressure, heat, or light leak—then try one upgrade at a time. Start with a high-quality foam core, add a breathable fabric cover, and introduce a cooling insert if heat remains a problem. That incremental approach keeps changes measurable and makes it easy to dial in a setup that fits your face, play style, and the straps you prefer.


Share:
Stock versus premium head straps for the Meta Quest two a buyer’s guide
How Strap Design Impacts Weight Distribution on Quest 2 for Extended Play