

Stock versus Premium Head Straps for the Meta Quest 2: A Buyer’s Guide
Choosing the right Quest 2 strap is about weight, balance, and long‑session comfort—not just price. This guide breaks down the practical differences between the stock strap, Meta’s official Elite Strap (with and without battery), and popular third‑party designs, then walks you through fit, installation, maintenance, and a decision framework so you can pick the best strap for your play style and budget. ⏱️ 12-min read
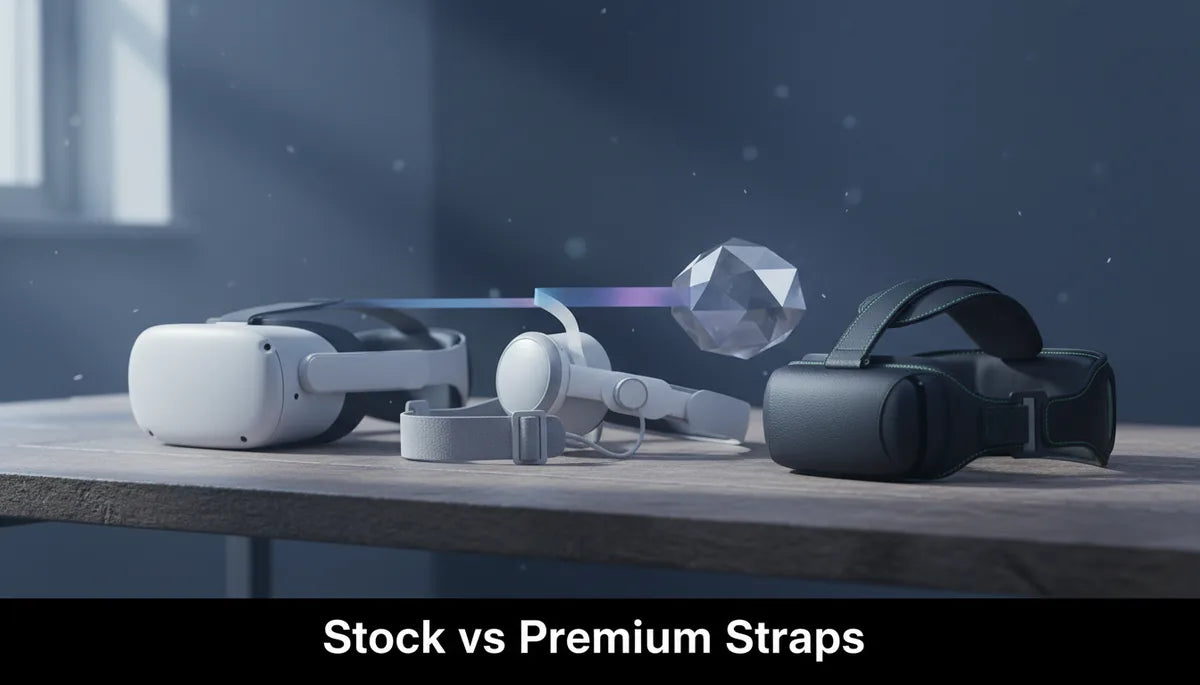
Stock vs Premium Straps: What You’re Getting
The stock Quest 2 strap is deliberately minimal: two thin side straps and a soft foam facial interface. It’s lightweight and keeps the headset compact, which is ideal if you mainly use the Quest 2 for short sessions or portability matters. The trade‑offs are obvious in extended play—limited crown support, a tendency for the front of the headset to pull forward onto your face, and fewer adjustment options to tailor fit to different head shapes.
Premium straps—whether the official Elite Strap or third‑party alternatives—focus on three core improvements: better rear crown support, thicker padding where the strap contacts your head, and more robust adjustment mechanisms (ratchets, velcro plus buckles, or rigid hinges). Those design changes improve balance by shifting more of the headset’s mass to the top and back of the head, reducing pressure on the face and the need to grip the headset with your facial muscles.
Durability is another practical difference. The stock strap uses lightweight elastic and fabric that can stretch and fray over time; premium straps substitute stronger plastics, thicker foam or gel padding, and metal or reinforced plastic buckles that survive repeated adjustment and heavier use. That said, not every “premium” label equals quality—some third‑party straps cut corners on materials but still offer better ergonomics than stock, so read reviews and look for real‑world photos before buying.
Premium Strap Families: Elite Strap, Elite Strap with Battery, and Popular Third‑Party Options
Meta’s official Elite Strap is the most recognizable upgrade. It replaces the flimsy side straps with a single rigid rear band and a padded top. The attachment points are designed to clip onto the Quest 2’s existing mounts, giving a secure feel and a simple snap‑on installation. Meta later released the Elite Strap with Battery, which adds a rear battery pack that extends runtime and shifts the headset’s center of mass rearward for improved balance. The official options tend to be more precisely fit to the headset and maintain clean aesthetics but come at a premium price.
Third‑party manufacturers now offer a wide array of options, from basic rigid bands with thicker padding to full modular systems with adjustable hinge angles, integrated USB‑C battery packs, and swappable cushions. Popular third‑party names typically provide cheaper alternatives in the $25–$80 band (basic rigid designs) and more advanced models priced in the $80–$160 range that compete with the official Elite Strap with Battery. Look for straps that advertise reinforced attachment clips, aluminum hinges, or replaceable padding—these aspects often indicate better longevity.
When comparing value, consider included features: does the strap come with a rear battery, an integrated cable that connects to the headset’s USB‑C, or only a dock for a separate battery? Are there replaceable cushion covers or washable padding? Typical price ranges right now are: stock (free with headset), basic third‑party rigid straps ($25–40), mid‑range third‑party with better padding ($40–80), Elite Strap (official) usually in the $40–70 range, and Elite Strap with Battery or premium third‑party battery systems in the $100–200 range. Those numbers shift with sales, but they give a realistic framework for expectations.
Fit and Comfort by Use Case: Long Sessions, Glasses, and Movement
For long sessions—think multi‑hour gaming, fitness classes, or VR work—strap geometry and padding are everything. A strap that holds more weight at the crown and rear reduces facial pressure and neck strain. In practice, straps with a rigid rear band and a wider contact patch on the crown outperform thin elastic designs: players report being able to play an extra 30–60 minutes before feeling facial fatigue. If you plan to play sessions longer than an hour, prioritize straps that distribute load across the top and back of the head rather than on the nose and cheeks.
Glasses wearers need to consider clearance and pressure points. The stock facial interface often presses glasses against the lenses during intense movement. Premium straps don’t change the facial interface by themselves, but because they stabilize the headset better, glasses sit more naturally and are less likely to be pinched. If you wear glasses, combine a premium strap with a glasses spacer or an aftermarket facial interface that advertises “glasses‑friendly” clearance—this combination reduces lens fogging, pressure on frames, and the risk of scratching lenses.
For active use—VR fitness, beat‑based games, or roomscale play—stability matters as much as comfort. Straps with adjustable hinge angles or locking mechanisms prevent the headset from shifting during sudden head turns. Look for straps where the rear band can be cinched firmly and a top strap or ratchet system holds the headset steady. A strap that tends to slip will not only reduce immersion but can also lead to repeated micro‑adjustments that increase sweat, facial abrasion, and overall fatigue.
Installation and Adjustment: Step‑by‑Step for Quest 2
Swapping the stock strap for a premium one is straightforward but doing it correctly improves longevity and fit. First, power off the Quest 2 and remove any silicone covers or aftermarket facial cushions. That prevents accidental tugging on cables and makes it easier to unclip the stock straps. For the stock straps, gently pull the fabric attachments out of the triangular slots on either side of the headset; they’re held by a friction fit, so work evenly on both sides to avoid stressing the plastic.
To install a rigid or Elite‑style strap, align the strap’s clips with the headset’s mounting slots and push until you hear a definitive click. Don’t force a bad angle—if the clip doesn’t seat easily, back off and re‑align. Once clipped in, do a basic fit test: tighten the rear band until it sits snugly on the back of your skull, then pull the top strap or ratchet until the display rests comfortably against your face with good seal and minimal facial pressure. The correct sequence is rear band first (to establish balance), then top strap (to adjust eye relief), and finally small side adjustments for tilt and lateral position.
If you’re using an Elite Strap with Battery or a third‑party battery pack, connect the USB‑C cable only after you’ve completed the fit test. Many battery packs add rear weight—re‑check the rear band tightness and re‑balance so the headset doesn’t ride too far back. For glasses wearers, adjust the vertical position so the lenses don’t press into your frames: a small increase in top strap tension (not rear band) usually raises the headset slightly without changing tilt. Finally, test with a short game or experience and fine‑tune; the first few minutes of use tell you whether to shift the strap up or down a few millimeters for optimal comfort.
Weight Distribution and Comfort: How Straps Influence the Experience
Weight itself matters, but how it’s distributed matters more. The Quest 2 headset houses the display, battery, and processing inside a front‑heavy shell; a poor strap lets that mass pull downward, concentrating pressure on the face and nose. A well‑designed strap redistributes some of that mass to the rear and crown of the head. That reduces forward torque and makes the headset feel lighter even if the total mass increases slightly—this is why many users prefer the Elite Strap with Battery: the added battery increases total weight but shifts the center of gravity rearward, producing a noticeably more balanced feel.
Think of strap geometry in terms of leverage. The further back you can place counterweight relative to the headset’s center of rotation (near your eyes), the less force the headset applies to your face. A rear battery pack placed 50–70 mm behind the centerline can cut perceived facial pressure significantly. That’s why some premium straps include a purpose‑designed battery housing: they reclaim comfort by changing leverage rather than by simply adding padding.
Don’t forget neck strain. If a strap changes the angle of the headset so your head tilts forward slightly, it will increase neck muscle engagement during longer sessions. Proper adjustment should maintain a neutral neck posture—tilt the display to match your natural gaze and use the strap’s height/offset adjustments to keep the headset centered without forcing your head forward. If you feel neck fatigue after switching to a different strap, re‑balance by loosening the top strap and tightening the rear band in small steps until the force on your face is minimized and neck torque feels neutral.
Budget Path and Value: Affordable Options vs Premium Investments
Not everyone needs the most expensive strap. If your sessions are typically under an hour and you prioritize portability, a basic third‑party rigid strap in the $25–40 range can deliver a clear improvement over the stock elastic bands for a small outlay. These budget options usually provide better rear support and slightly thicker padding but may skimp on materials like metal hinges or replaceable cushion covers. Expect adequate comfort for casual sessions and modest durability; buy with the expectation of eventual replacement if you use the headset daily.
Mid‑range straps ($40–80) hit the sweet spot for many users. Here you’ll find sturdier materials, improved adjustment mechanisms (ratchet or buckle), and sometimes form‑fitting gel or memory foam padding. These are the straps to choose if you play regularly, have longer sessions, or want a noticeably more stable experience without committing to a rear battery. They’re also where you begin to see models designed specifically to be “glasses friendly.”
Premium investments—the official Elite Strap with Battery or top‑tier third‑party rigs ($100–200)—make sense for heavy users: streamers, VR fitness enthusiasts, and anyone who plays multiple hours daily. The added runtime from integrated battery packs can add 2–4 hours depending on pack capacity and headset settings, and the ergonomic benefits will reduce facial pressure and neck strain across long sessions. If you regularly find yourself adjusting the headset mid‑session, or if comfort prevents you from playing as long as you’d like, a premium strap is one of the best upgrades you can make.
Care, Maintenance, and Replacements
Caring for your strap will extend its life and keep the headset comfortable. Wipe down foam and fabric components after sweaty sessions with a slightly damp microfiber cloth and a mild soap solution; avoid submerging foam or letting excess moisture sit on adhesives. For removable cushion covers, many manufacturers provide washable fabric covers—follow their washing instructions, typically a gentle cycle and air‑dry only. Leatherette or PU pads can be wiped clean and conditioned occasionally to prevent cracking.
Velcro and ratchet systems need a quick inspection every few months. Remove lint or dust with a soft brush so the fasteners maintain grip. Check mounting clips and screws for tightness; a loose clip can place uneven stress on attachment points and prematurely wear plastic mounts. If your strap includes a battery pack, follow lithium‑ion battery care: don’t store fully discharged for long periods, avoid extremes of temperature, and use the provided charging cable or a reputable USB‑C charger rated for the pack’s specs.
Replacement intervals vary with use: casual users might never replace a strap beyond cleaning, while heavy users should expect to replace high‑stress components (padding, velcro, and sometimes plastic hinges) every 18–36 months. When shopping for replacement parts, check compatibility—many third‑party straps share modular parts while others use proprietary clips. Also consider aftermarket head cushions and facial interfaces; these are easy upgrades that can add comfort and extend the usable life of your strap by reducing direct wear on the foam.
Decision Guide: Quick Picks by Scenario
Tight budget / casual player: Stick with the stock strap if most sessions are under an hour and portability matters. If you want an inexpensive improvement, choose a basic third‑party rigid strap ($25–40) that offers a rear band and thicker padding. It’s an affordable way to reduce facial pressure without a big investment.
Frequent player / glasses wearer: Go for a mid‑range strap ($40–80) that advertises “glasses‑friendly” clearance and includes a secure rear band plus a ratchet or buckle top. Combine it with a glasses spacer or an aftermarket facial interface for the best fit and minimal framing pressure. This approach balances cost and comfort and is ideal for regular two‑hour sessions.
Long sessions / VR fitness / streamers: Invest in the Elite Strap with Battery or a premium third‑party modular system ($100–200). The extra battery runtime and rear‑shifted balance greatly reduce facial pressure and neck strain during extended play. These straps are also more durable and often have replaceable pads and stronger attachment hardware—important for heavy daily use.
Maximum portability with comfort: If you need to carry your headset frequently but want improved comfort, look for lightweight rigid straps that fold or detach easily and weigh minimally. These avoid the bulk of rear batteries while giving better balance than stock straps. Keep a compact spare facial pad in your carry case to maintain hygiene on the go.
Quick decision framework: 1) How long are your typical sessions? (Under 1 hour → budget/mid‑range; 1–3 hours → mid‑range/Elite; 3+ hours → Elite+Battery). 2) Do you wear glasses or get lens fogging? (Yes → glasses‑friendly padding + spacer.) 3) Are you active in VR? (Yes → locking hinges and firm rear band.) 4) Is runtime a core need? (Yes → rear battery pack.) Answering these four questions will point you to the right price band and features.
Final Thoughts
Upgrading your Quest 2 strap is one of the highest‑impact, lowest‑complexity improvements you can make for comfort and immersion. The right strap reduces facial pressure, improves balance, and can even extend your playtime by making the headset feel lighter and more secure. Whether you choose a budget third‑party band, Meta’s Elite Strap, or a battery‑equipped premium rig, match the strap’s geometry and features to your use case: session length, glasses, activity level, and whether you value runtime or portability.
When shopping, prioritize proven mounting designs, clear compatibility notes, and real‑user reviews that comment on long‑term comfort. And remember: small adjustments to strap tension and headset angle often yield immediate improvements—so give any new strap a few minutes of careful fitting before deciding whether it’s the right choice. A few tweaks can turn a good strap into a perfect fit for your Quest 2 sessions.


Share:
Ergonomic Benefits of Upgrading to a Quest 2 Comfort Strap: What Changes in Your Gameplay?
Padding Upgrade Guide: foam, fabric, and cooling inserts for Quest 2 comfort