

The Ultimate Buyer's Guide to Apple Vision Pro Comfort Accessories: Shift Weight, Not Just Padding
Apple’s Vision Pro delivers an extraordinary visual experience, but for many owners the hardware’s forward-focused optics can turn a brilliant session into a neck‑ache after an hour. This guide isn’t about piling on soft foam; it’s about *smartly* redistributing weight and tuning contact points so the headset behaves like a balanced, wearable system rather than a heavy visor. ⏱️ 13-min read
Read on for practical analysis, tested accessory strategies, and concrete accessory pairings—whether you’re chasing marathon gaming comfort, all‑day productivity, or a lightweight setup for mixed use. I’ll walk through counterbalances, premium straps, facial interfaces, quick-release lifts, storage solutions, posture cues, promising Kickstarter projects, and ready-made combos you can buy today or build yourself.
Understanding Vision Pro Weight Distribution Challenges
The Vision Pro’s perceived heaviness rarely comes from a single measurement. Instead, it’s how the mass shifts across your head as you move, breathe, and fidget. The bulk of the optics and display sits forward of the face, creating a front‑to‑back torque: the forward mass tries to pivot the headset down toward your nose bridge and upper cheeks, while any rear strap tension or crown contact anchors load against the scalp and occipital bone. Small changes—tilting your chin, turning your head, or a little sweat that makes padding slip—magnify those forces and create pressure hotspots.
There are three common pressure zones to watch: the brow and forehead (from forward torque), the nose bridge and upper cheeks (from seal and gravity), and the crown or behind‑the‑ears area (from strap and rear pad contact). Headset geometry—how the frame arcs over the skull, where the crown pad contacts, and how the rear strap pulls—dictates the path weight takes. Even the thickness and stiffness (shore hardness) of the face gasket change how weight transfers: a softer gasket can spread force outward, but may compress too much on long sessions and let the front sag.
Understanding this dynamic is the first step: comfort accessories that succeed do more than cushion; they change the lever arm. The goal is to move the center of gravity (CoG) rearward and broaden the contact area so muscles stabilize the rig with minimal active effort. With that principle in mind, the next sections focus on hardware that achieves that effect rather than masking the underlying mechanics.
Counterbalance Systems: The Game-Changer for Extended Wear
If you can change one thing to make the Vision Pro feel dramatically lighter, it’s where the mass sits relative to your head. Counterbalance systems shift weight toward the occipital region behind the ears so the center of gravity migrates closer to your skull’s pivot point. When the CoG sits near the back of the head, forward torque drops, eyes remain aligned with less micro‑adjusting, and neck muscles stop fighting to keep the visor level.
Counterweights come in two flavors: built‑in and aftermarket. Built‑in solutions—integrated rear pads or adjustable rear shells—offer a polished, plug‑and‑play feel. They’re reliable for average head shapes and avoid fiddly setup. Aftermarket options, however, give you fine control: clip‑on weights that snap into a rear plate, magnetic plates that you can stack or shift laterally, and battery relocation packs that move heavy cells off the front housing entirely. A small, well‑placed rear weight (think 50–150 grams for many users) can stabilize the headset without creating a new pressure point. Heavy, bulky plates are counterproductive: they reduce forward pull but can create a concentrated load on the occiput or snag hair.
Practical tuning tips: mount the weight low and centered over the occipital bone rather than high on the crown; start light and increase in 10–20 gram increments; test during the movements you’ll use—lean back in a chair, nod, and look side to side; and check sensor clearance if using magnetic plates near tracking units. For portable setups, consider a battery pack with an elastic channel that routes the cable along the strap so you get both power and balance without a rigid protrusion.
Premium Strap Upgrades for Superior Weight Management
Straps are more than cosmetic—they rewrite where forces contact your skull and how they’re distributed. Three strap archetypes stand out: halo‑style bands that wrap around the circumference of the head, elite straps with rear adjustment dials that let you micro‑tune tension, and overhead harness systems that add vertical lift points and spread the load across the crown and temples. Each geometry creates distinct load paths and has tradeoffs.
Material matters as much as shape. Silicone straps provide slip resistance and a thin profile that sits cleanly under hair; they’re easy to wipe down and resist stretching. Breathable fabric blends—nylon with spandex and mesh—are lighter, wick sweat, and reduce skin friction over long sessions. Hybrids combine a silicone or polymer core for structure with a soft, breathable face for comfort. If you game in a hot room, prioritize mesh or hybrid; if you often wear hats or beanies, a thinner silicone band may fit better under headgear.
Beyond materials, geometry and attachment points determine function. Halo designs convert torque into compressive forces around the skull, keeping the forehead contact minimal while the band does the work. Rear‑dial systems let you set a steady anchoring force that resists sag without pulling the cheeks into the gasket. Overhead harnesses add a vertical vector that lifts the frontal mass slightly, which can be useful when paired with a rear counterweight. Installation tips: anchor the rear first, then tension the sides; avoid over‑tightening a front strap to “fix” sag—this simply increases facial pressure; and inspect fasteners and hook points regularly for grit and wear, which cause subtle slippage over time.
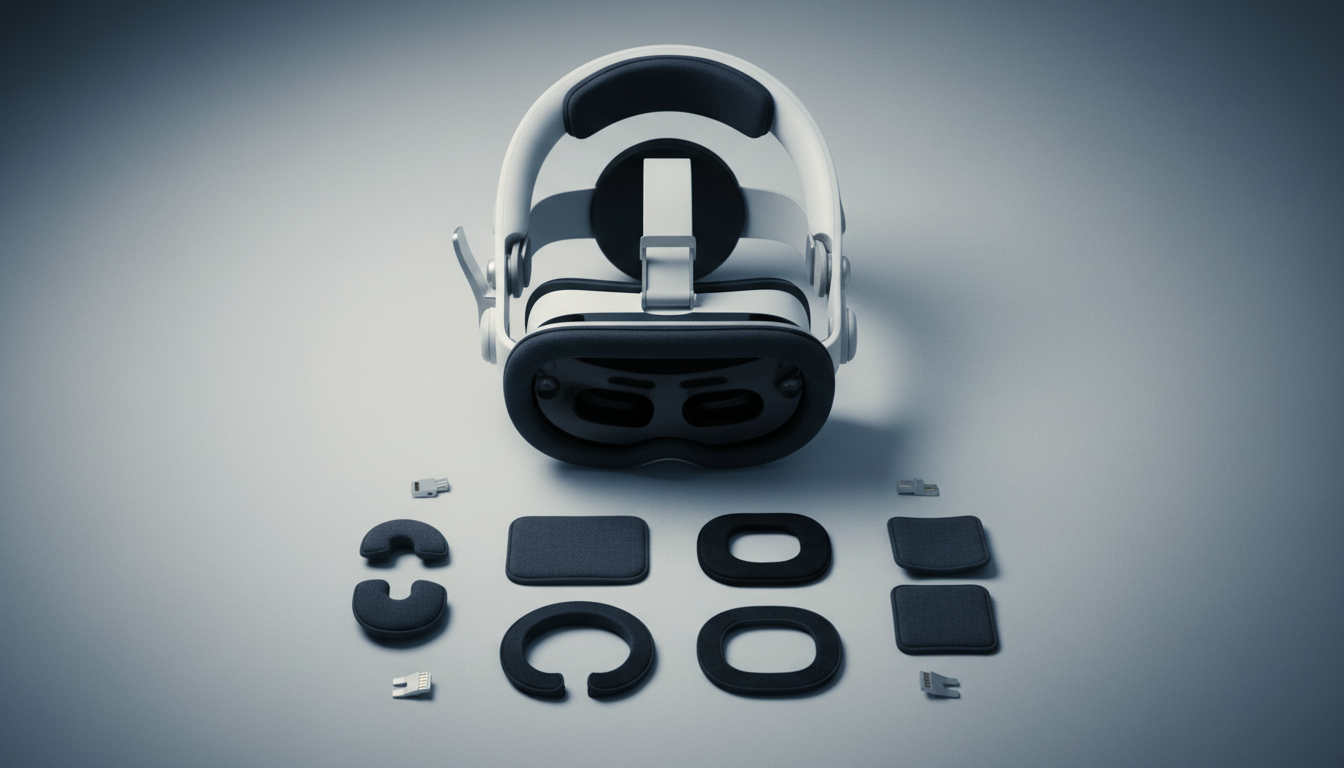
Facial Interface and Padding Replacements
The facial interface is where comfort meets function. Gaskets are not just cushions; they form the seal and determine how much of the headset’s load presses into delicate facial areas. When swapping the Vision Pro’s gasket, evaluate density (softness vs. structural support), edge profile (rounded edges reduce pinching), and moisture management (wicking liners and breathable foams reduce slip and skin irritation).
Memory foam and open‑cell foams are popular upgrades because they contour to facial topography, spreading pressure over a larger area and removing hotspots at the nose bridge and cheekbones. Low‑density foams compress more and can lower peak pressures, but they risk losing shape. Higher‑density foams retain their form and preserve eye alignment, but may feel firmer initially. Consider modular padding kits that offer multiple thicknesses and optional relief zones: for example, a thicker cheek pad to lift the visor slightly combined with a thinner nose profile to reduce pinching.
Moisture‑wicking coverings—silicone skins, suede, or cooling fabrics—manage sweat during longer sessions and reduce friction. Biocompatible coatings and hypoallergenic materials minimize dermatitis risk for sensitive skin. Practical maintenance advice: rotate and wash fabric liners on a gentle cycle, hand‑clean silicone skins with mild soap, and replace foam inserts once they compress noticeably (typical lifespan varies from months to a couple of years depending on use). When fitting a new gasket, always recheck IPD and eye alignment; changing pad thickness alters viewing distance and can introduce strain if not recalibrated.
Lift Devices and Quick-Release Solutions
Lift aids are subtle mechanical helpers that deliver relief without the disruption of taking the headset off. Forehead supports, micro‑spacers, and tiny lift plates reduce pressure on the nasal bridge by slightly adjusting the headset’s pitch. Micro‑adjusters—often screw or dial‑based—let you tune spacing in millimeter increments so you maintain a secure seal without aggressive compressive force.
Quick‑release mechanisms improve real‑world usability. Magnetic latches, spring‑loaded levers, and lockable joints give you fast on/off access without repeatedly re‑setting tension points. Choose recessed magnets or low‑profile latches to avoid catching clothing or interfering with nearby accessories. Spring‑loaded levers provide tactile feedback and a secure feel; lockable joints let you fix the headset during energetic movements and unlock for casual use.
How to use these devices effectively: pair a small lift at the forehead with a light rear anchor so you’re lifting the front rather than simply pushing it away from the nose. Micro‑adjusters are best used after primary strap geometry is set—anchor the rear, engage the halo or side straps, then fine-tune pitch. Quick‑release solutions are particularly valuable in mixed environments—think productivity sessions interrupted by real‑world tasks—because they let you transition rapidly without losing fit. Always test any quick‑release under the full range of motion you expect to use; a release that’s too easy to trigger can be more disruptive than helpful.
Storage and Display Solutions with Integrated Comfort Features
How you store the Vision Pro matters for comfort over time. A poorly supported headset flattens foam, warps strap geometry, and chains small deformations into daily annoyance. Choose a rigid case with tailored foam inserts to preserve crown contours and face gasket shape—firm foam that cradles the lens housing, a soft liner to prevent scratches, and dedicated slots for cables and accessories. Quality cases prevent the face cushion from compressing unevenly in transit and keep fasteners clean and functional.
For desktop storage, a stand that avoids direct pressure on the visor is ideal. Look for open‑frame cradles that support the headband and body while leaving the facial seal and lenses uncovered; soft silicone touchpoints prevent slipping and stop tiny scuffs. An adjustable cradle angle ensures the headset rests in a neutral position, reducing lens misalignment and preserving strap tension. Some stands incorporate a small counterbalance or docking plate that holds a rear weight or battery pack during storage so the headset keeps its tuned geometry.
Practical routine: when you finish a session, loosen adjustment dials slightly to relieve constant tension on fabric and plastic parts, and store the headset in its case or on its stand upright—not dangling from a hook. Keep a microfiber cloth in the case for quick lens wipes and an airtight resealable bag for humid environments. For multi‑user setups, label removable padding sets and stands so each user returns the headset to the correct configuration, avoiding the slow drift toward misfit that happens with shared devices.
Postural Alignment and Wear Technique Adjustments
Accessories can only do so much—your posture and how you don the headset are essential to comfortable sessions. A neutral spine and proper head-neck alignment minimize muscular fatigue. Visual cues help: imagine a string pulling the crown of your head upward, ears aligned over shoulders, and gaze level. If you sit, select a chair with lumbar support and feet flat on the floor; if you stand, distribute weight evenly and avoid leaning forward into the display.
Donning technique influences where forces land. Start with all adjustment points loose, slide the headset on, and let the pads make gentle contact. Center the device and set IPD so images are sharp and the eyes feel relaxed—poor IPD increases ocular strain and often masks itself as “headset discomfort.” Anchor the rear strap first to create a stable backstop, then bring the temple pads into contact so pressure spreads evenly across the temples and crown. Tighten in small increments, aiming for a secure seal rather than a clamp‑like grip. If you feel immediate redness or a hot spot, loosen and retest—small positional changes often fix it.
Small daily habits extend comfort: clear hair from contact points, avoid tight hats or headbands while using the headset, and give your skin a minute to breathe between sessions. Stretching briefly during breaks—neck rolls, shoulder retractions—reduces stiffness. For multi‑hour play or work blocks, set a timer to stand, walk, and re‑check fit every 45–60 minutes; these micro‑breaks reduce both skin and muscle fatigue and reveal whether additional accessory tuning is needed.
Kickstarter Innovations: Cutting-Edge Comfort Technology
Crowdfunding platforms have become mini R&D labs for headset ergonomics. Backers and small teams iterate quickly, exploring materials and modular systems that larger OEMs rarely produce. Recent campaigns focus on lighter shells, vented and thermally conductive pads, modular faceplates that let you adjust cheek height on the fly, and magnetic counterbalance systems that let you slide weight horizontally to match head shapes.
What to watch for when evaluating crowdfunded comfort gear: look for transparency in testing (pressure maps, thermal data, and skin‑safety certificates), evidence of iterative prototypes based on real user feedback, and clear return policies. Projects that publish independent pressure mapping or publish test methods score higher for credibility. Common useful features from successful campaigns include interchangeable gasket inserts, rear weight tracks that accept small coin weights, and quick‑swap harnesses designed to work with existing Vision Pro fasteners.
Be pragmatic: early prototypes can be brilliant conceptually but rough in fit or finish. When backing a project, read backer comments and images closely—these often reveal practical issues such as compatibility with long hair, wear patterns, or unexpected interference with sensors. If you’re not an early adopter, wait for the second production run or a small batch release; many designers refine fit and materials substantially after initial feedback. That said, the crowdfunded space is where you’ll see the fastest innovation in weight redistribution—not just softer foam but smarter leverage.
Building Your Custom Comfort System: Accessory Combinations
Comfort is a system, not a single part. Below are recommended accessory pairings tailored to common use cases—each combination balances weight redistribution, breathability, and usability. Think of these as starting templates you can tweak by small increments.
- Gaming marathons (budget‑minded): aftermarket clip‑on rear weight (50–100 g) + breathable hybrid halo strap + memory‑foam cheek inserts. Rationale: rear weight reduces forward torque; halo strap spreads load; memory foam reduces cheek hotspots. Add a cheap silicone skin for sweat control.
- Competitive gaming / high motion: small modular battery pack with integrated rear plate + rear dial strap + low‑profile forehead lift. Rationale: battery relocates mass and provides power for long sessions, rear dial ensures a locked anchor, and the lift keeps the nose free of pressure during rapid head moves.
- All‑day productivity / hybrid office: built‑in style rear pad or premium halo + fabric, moisture‑wicking facial interface + magnetic quick‑release. Rationale: soft breathable materials for long wear, easy on/off transitions between meetings and real world, stable rear anchor for reading and typing.
- Portable, mixed use (frequent on/off): lightweight silicone strap + micro‑adjuster lift + compact hard case with cradle. Rationale: thin profile fits in bags, micro lift reduces nose pressure between quick sessions, protective case preserves padding when stored.
- Premium ergonomic setup (no compromise): engineered rear counterbalance track + elite strap with rear dial and overhead harness + custom molded facial gasket with cooling fabric. Rationale: maximum adjustability and distribution—ideal for creators and devs who spend all day inside the headset.
How to assemble and tune: start with the rear anchor first, add counterbalance until forward pull stops, then fit the face gasket and set IPD, finally dial side tension to spread force across the temples. Test with the motions you’ll perform in real use; a fit that’s perfect while sitting still can reveal faults when you lean or look up. Keep a small kit—spare foam, cleaning wipes, and an extra strap—so you can iterate quickly between sessions.
Next step: pick the scenario that most closely matches your needs, acquire the core pairings above, and run a weeklong trial—documenting hotspots and adjustments. Fine‑tuning is iterative: small changes in padding thickness or 20 grams of rear weight often make the difference between “tolerable” and “all day comfortable.”


Share:
Mastering Weight Distribution for All-Day VR Sessions
A Guide to Wall-Mounted Apple Vision Pro Stands for Small Home Offices