Wall-Mounted Apple Vision Pro for Tiny Home Offices: A Practical Guide to Balance, Comfort, and Space-Saving Setup
Fitting an Apple Vision Pro into a tiny home office is less about squeezing hardware into a corner and more about designing an intentional, ergonomic habit. A wall-mounted stand keeps the headset off the desk, reduces clutter, and keeps the device accessible — but only if the stand is chosen and tuned with weight distribution, neck posture, and storage in mind. ⏱️ 15-min read
This guide walks small-space Vision Pro users through selecting the right wall mount, balancing the headset to reduce torque, adding comfort accessories, and using lifters or hybrid setups so the device feels natural to reach for and wear. Expect actionable steps, real-world examples, and a clear checklist you can follow during planning and installation.
Choosing the Right Wall-Mounted Vision Pro Stand for Small Offices
In a compact workspace, the ideal wall-mounted Vision Pro stand is a pragmatic compromise between reach, rigidity, and minimal visual footprint. Start by mapping your available wall: measure height from seated eye level to the ceiling, note trim or vents that could interfere, and sketch where doors or drawers swing. The right location puts the center of the visor roughly at eye height when you’re seated, while still leaving clearance if you occasionally stand.
Next, check mounting compatibility. Vision Pro carriers or cradles vary; verify the stand’s mounting pattern matches the bracket or that an adapter exists. Don’t assume every arm or plate will fit — sensor housings and facial-interface geometry can conflict with a generic cradle. Look for mounts that advertise compatibility with AR/VR headsets or have a simple, flat plate that accepts third-party cradles.
In small rooms prioritize these features:
- Short reach and compact folded profile so the arm doesn’t block walkways or aisles.
- Smooth tilt and swivel with a stable detent or friction-adjustment so the headset holds position when you grab it.
- Quick-release access for fast mounting and removal — this reduces the temptation to leave the headset on its side or a shelf where lenses can be scratched.
- Clear cable routing or integrated channels to avoid dangling wires in tight spaces.
Finally, pay attention to weight rating and wall anchoring. The combined headset, cradle, and any attached accessories must fall comfortably inside the mount’s rating. In small offices you’re more likely to anchor into a single stud or a drywall anchor; choose a mount designed to distribute load across multiple fasteners or include a backing plate to reduce sag over time.
Weight Distribution Strategies on Wall Stands
Vision Pro’s bulk sits forward in the visor and electronics housing, which shifts the device’s balance point away from where a traditional headset might center. That top-forward mass creates torque on a wall arm that’s not tuned for it. Your objective when mounting is to align the stand’s pivot as close as practical to the headset’s natural center of gravity so the hinge doesn’t fight or overcompensate when you move the device.
Practical steps to improve balance:
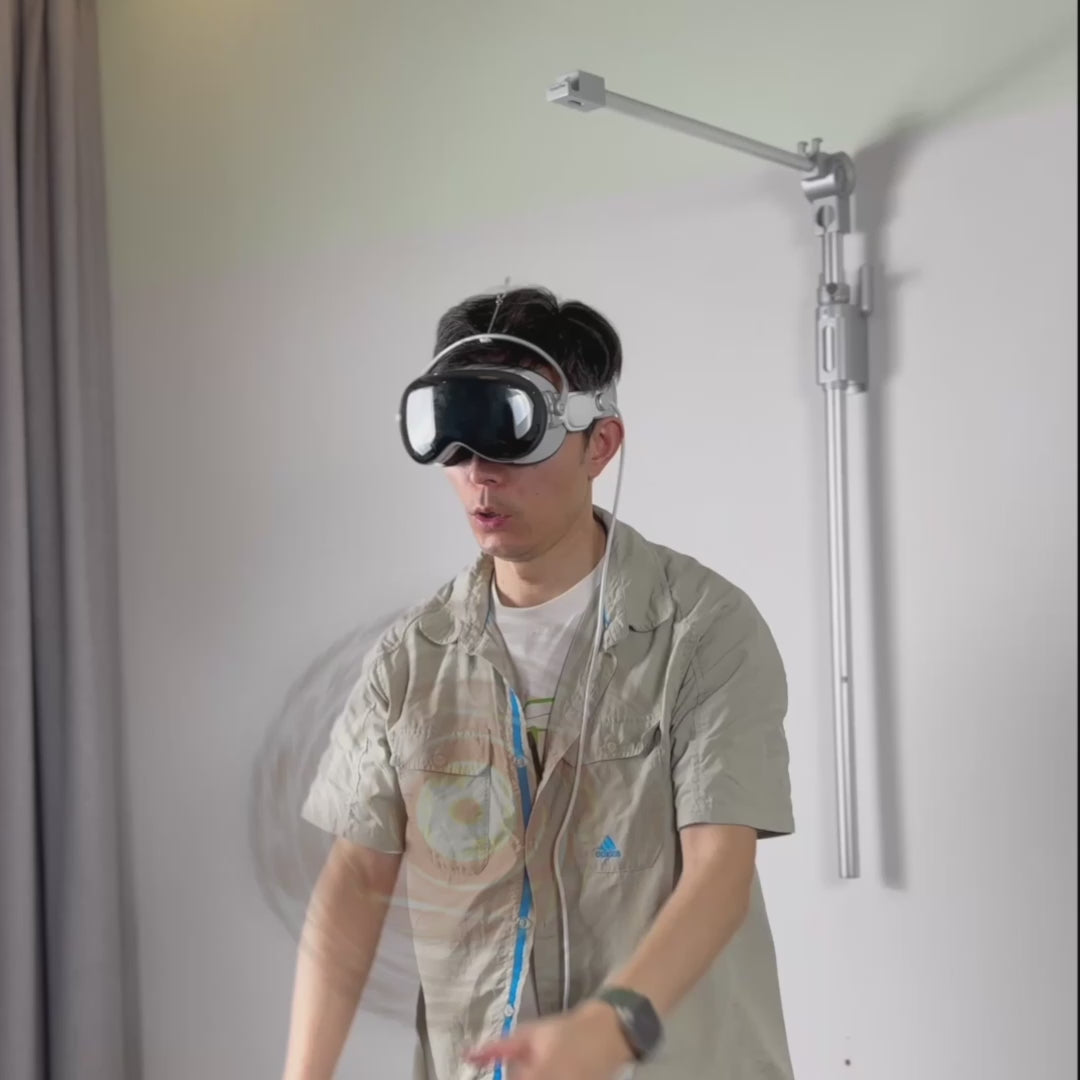
- Mount the arm so its pivot axis lines up with the visor’s centerline. If the pivot is too far forward, the visor will want to droop; too far back, and removing the headset requires an upward tug.
- Prefer dual-arm or symmetric bracket designs where possible. These distribute the load across two points and resist twisting under dynamic motion better than long single-arm cantilevers.
- If you must use an offset mount, counter the moment with a small counterweight or an offset that moves the mounting plate backward toward the wall. Some third-party brackets include adjustable back plates for fine tuning.
- After installation, simulate use: pull the headset out, rotate the arm, and tilt it to the angles you typically use. The hinge should move fluidly and hold its position without slamming forward or retracting toward the wall.
Tuning fasteners matters as well. Keep bolts snug to avoid wobble but don’t overtighten to the point the joint becomes stiff; a forgiving joint absorbs small shocks when the headset is set back in place. Plan for dynamic loads — when you reach for the headset you’ll introduce momentary forces that exceed static weight — so choose wall anchors and plates rated well above the headset’s weight and test periodically for looseness.
Comfort Accessories: Padding, Facial Interface, and Straps
Mounting the Vision Pro changes how you approach comfort. When the headset lives on a wall, it’s easier to adopt consistent fit habits — but the facial interface and straps still determine whether a 15-minute session becomes an enjoyable break or a neck-and-cheek ordeal. Start by thinking about material and shape.
Material choices:
- High-density memory foam: distributes pressure across cheekbones and the nasal bridge, reducing hotspots. It holds shape well for daily mounted use and works with fabric covers that wick sweat.
- Gel-infused padding: adds a cooling element and reduces heat buildup during longer sessions; useful if your office lacks airflow.
- Silicone seals: durable and easy to clean — excellent if multiple people will use the headset — but they can feel firm; consider a thin fabric sleeve for added comfort.
Facial interface design matters more than most users expect. For mounted setups, favor interchangeable facepads with varied nose cuts and depths. If you wear prescription glasses or use reading add-ons, choose a deeper cut. Contoured shapes cradle cheeks and reduce lateral slip when you look around; flatter designs suit broader faces and may reduce pressure at the bridge.
Strap and headband considerations:
- Balance the band tension so the headset’s weight distributes to the crown and back of the head, not just the face. A snug nape strap can offload downward pull and limit forward torque on the neck.
- Consider aftermarket cushioned headbands or a counterbalanced pad that shifts a few ounces toward the rear; small changes in distribution can dramatically reduce perceived weight.
- Quick-adjust straps make it easy to re-fit the unit as you pick it from the wall repeatedly; look for ratcheting or magnetic fasteners that work with one hand.
Finally, keep hygiene and airflow in mind. Breathable covers and removable, machine-washable pads make the setup more pleasant in a small, warmer room. For multi-user households, silicone shells plus fabric sleeves hit a good compromise between cleanliness and comfort.
Lifters and Elevation: Easing Mounting and Reducing Neck Fatigue
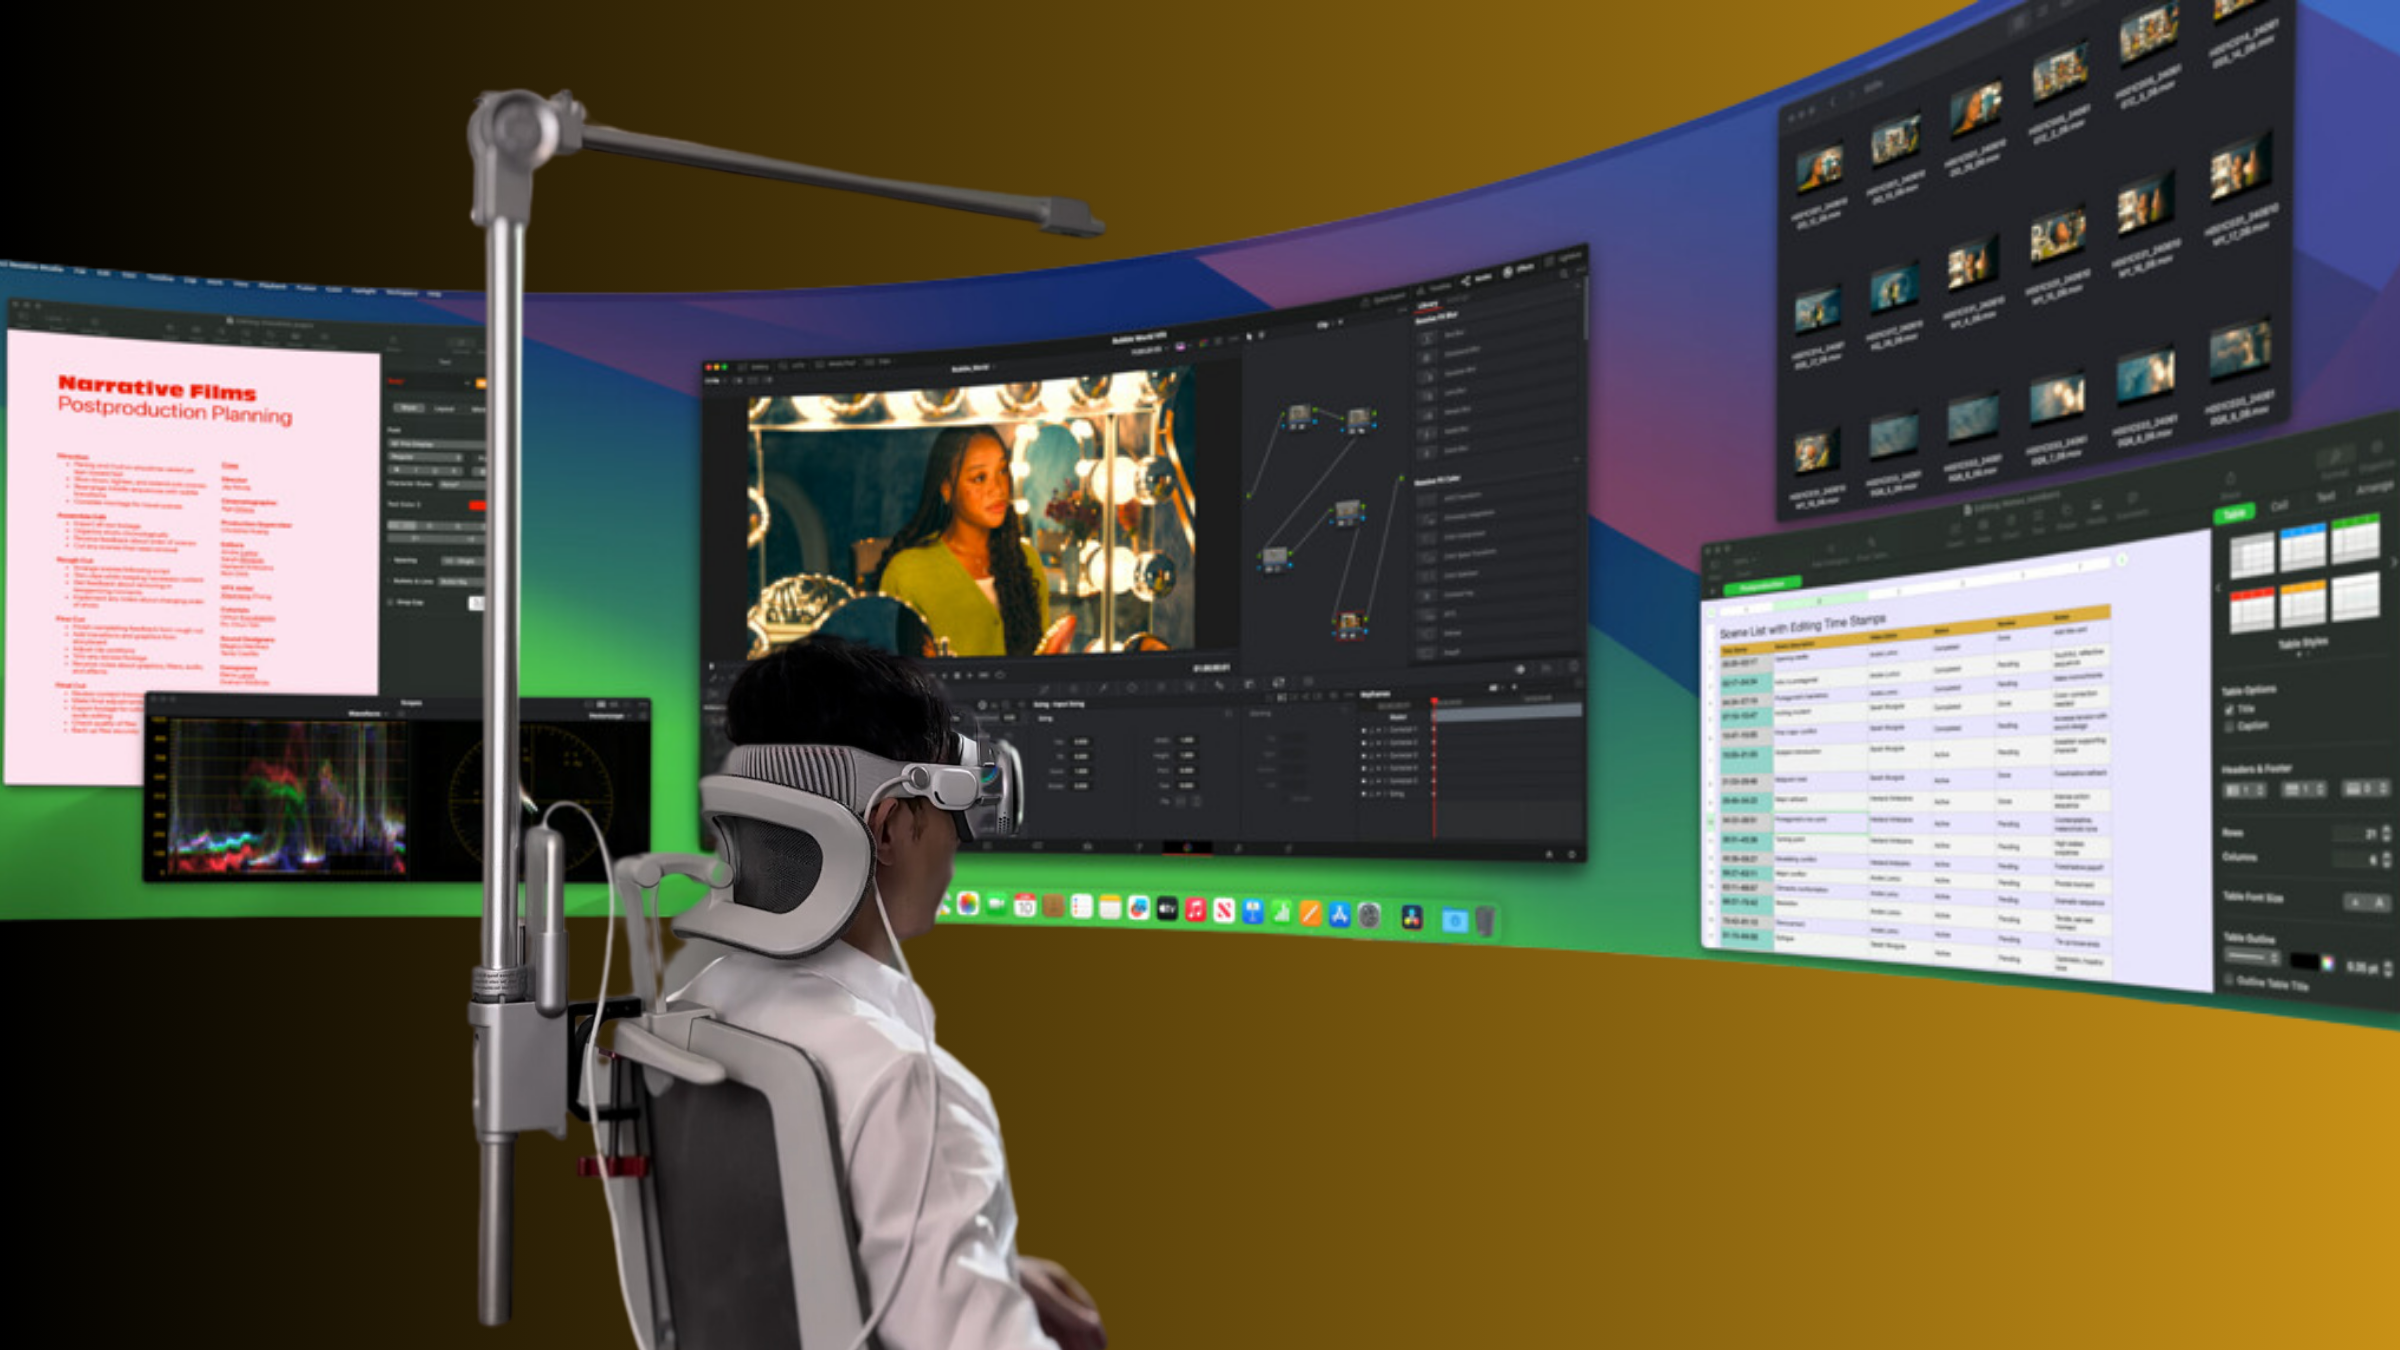
How high or low you mount the Vision Pro determines whether you tilt your head back, look down, or maintain a neutral neck posture. In a tiny office, even small elevation changes matter — a few inches can be the difference between a neutral spine and a strained neck after an hour. The rule of thumb is to align the center of the visor with your eye line when seated; if you switch between sitting and standing, choose a mid-point and use a lifter for quick adjustments.
Two common approaches to elevation:
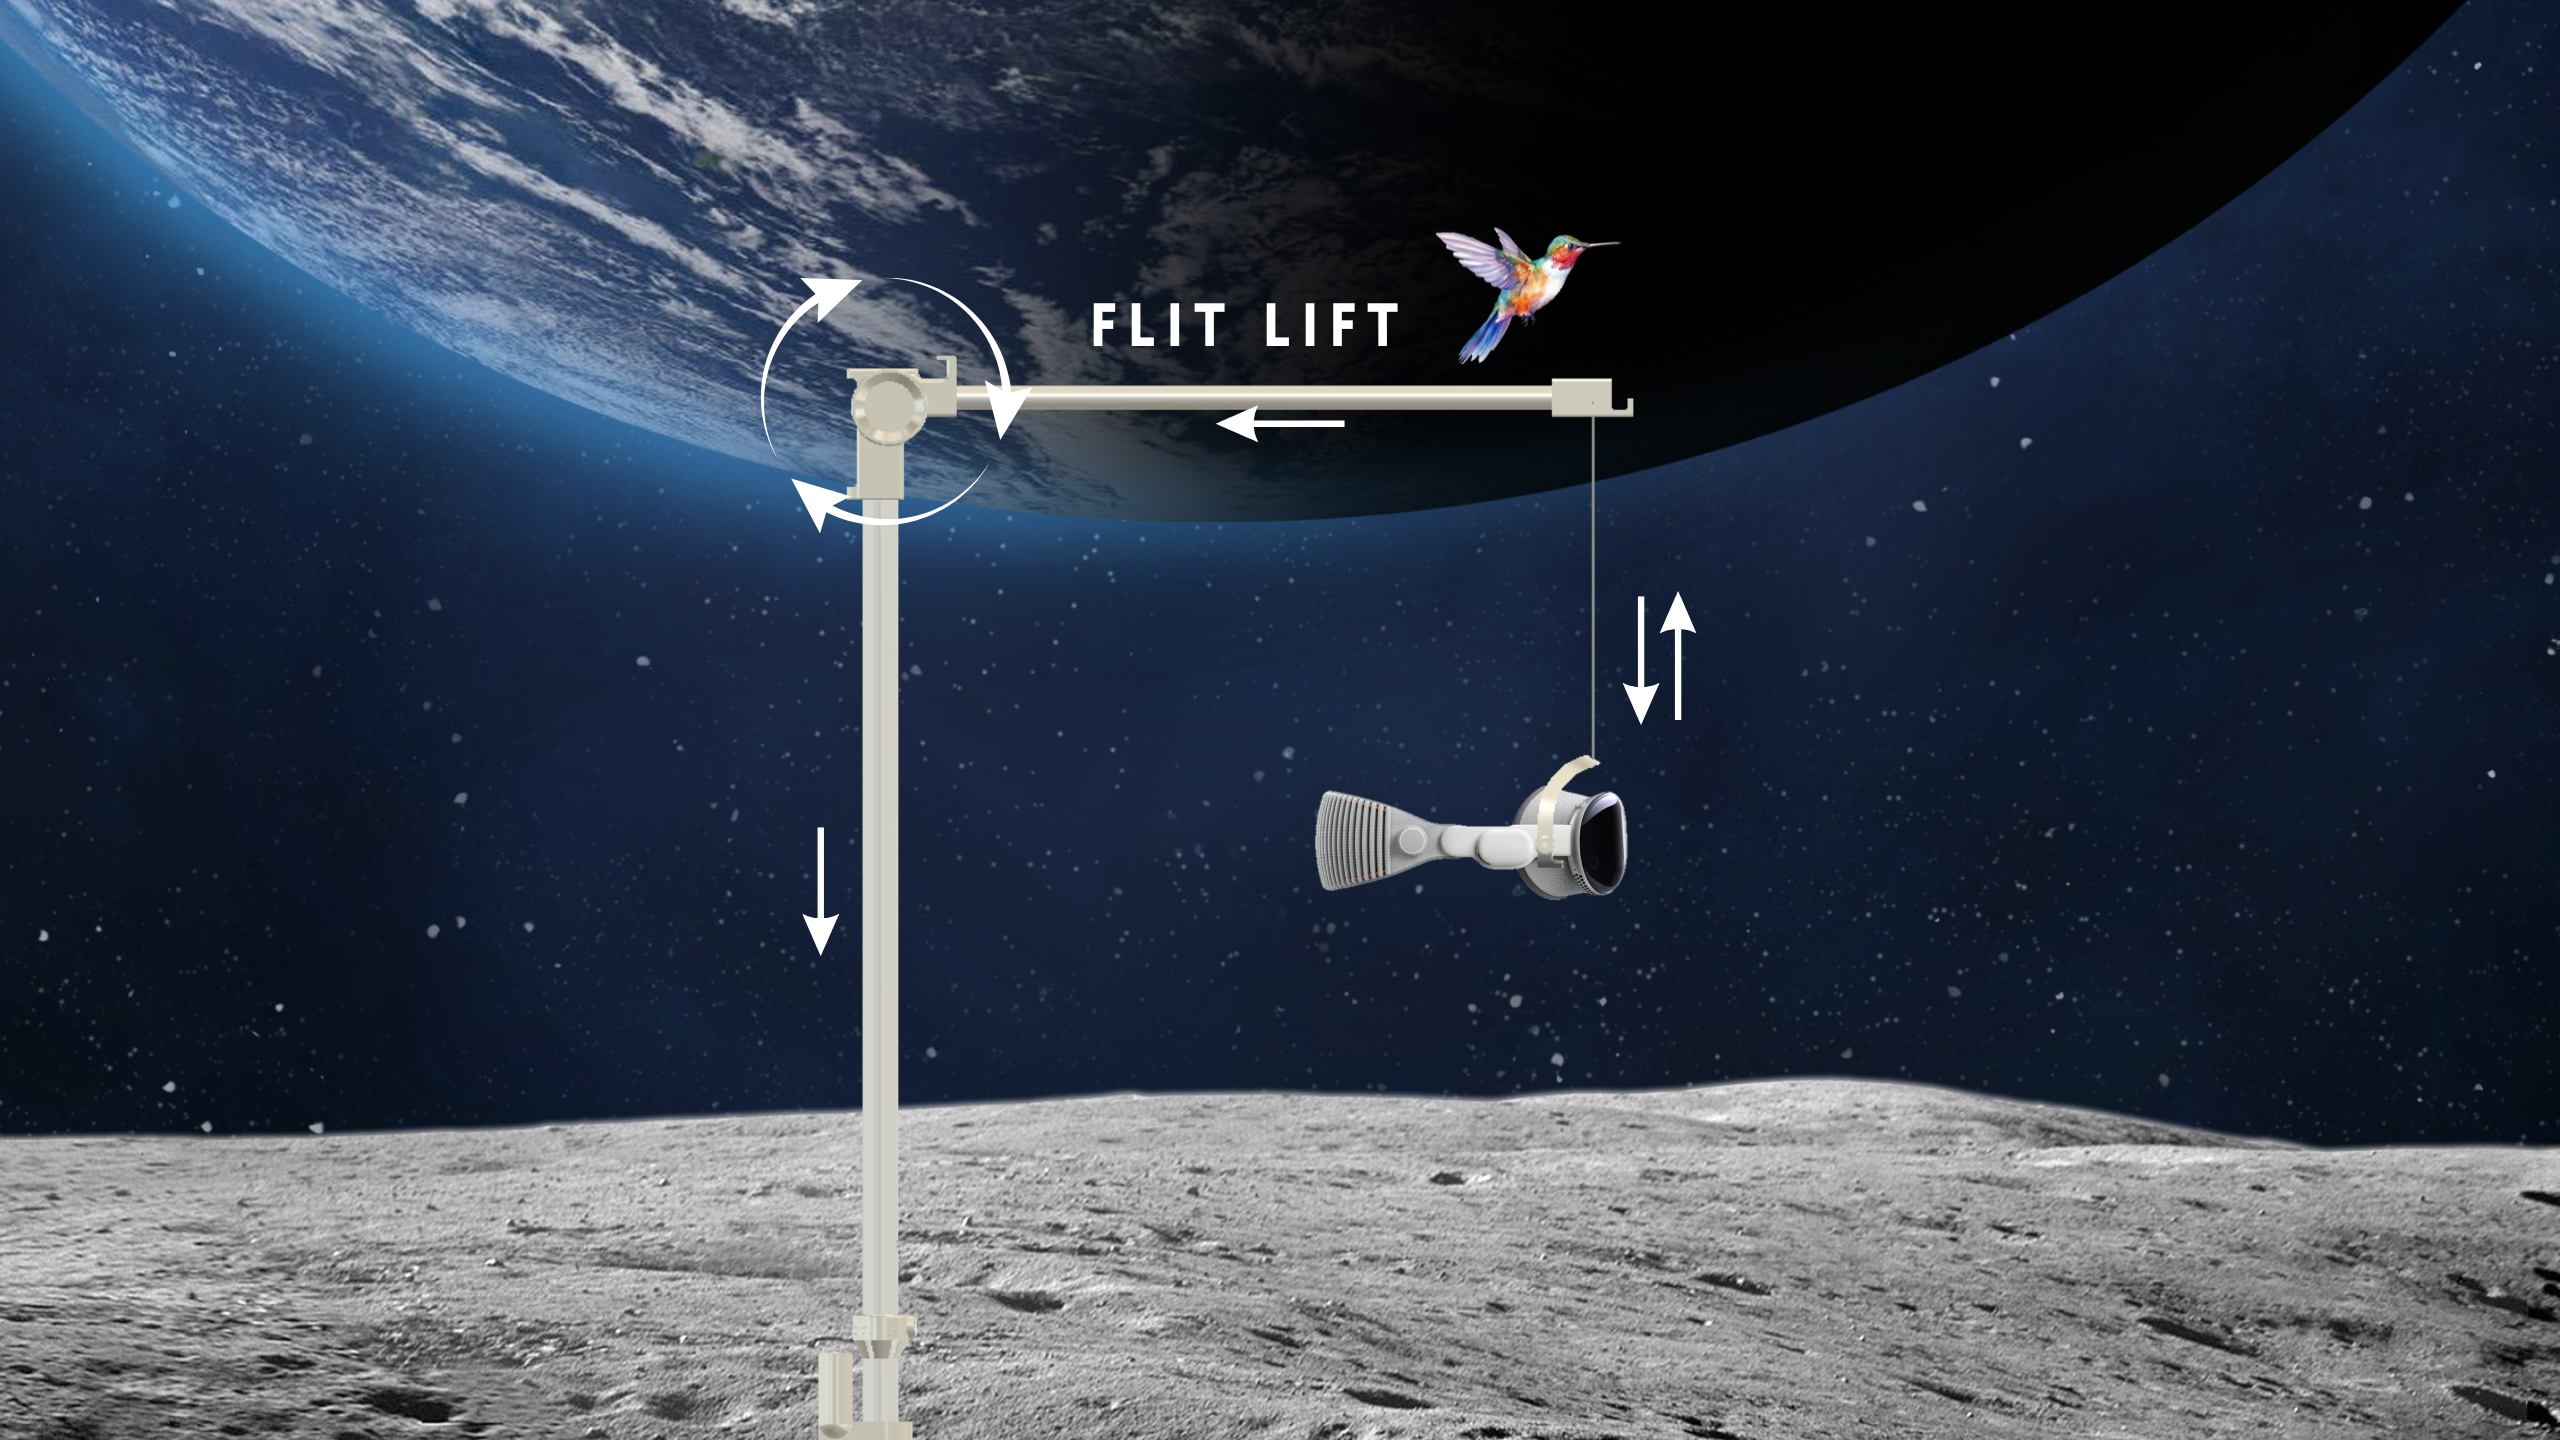
- Wall-mounted lifters and risers: these bolt onto or clip into the primary mount and provide vertical adjustment without sacrificing rigidity. Look for units with clear weight ratings, secure locking positions, and minimal play; a quality riser will hold position under dynamic motion and not introduce wobble that undermines comfort.
- Articulating gas-spring arms: these offer smooth, frictionless motion and can be easier to adjust on the fly. For wall installations, choose gas-spring arms specified for headset loads and ensure the arm’s travel range matches your sitting/standing heights.
Compare the two:
- Wall-mounted risers tend to be simpler and mechanically robust; they can be more compact and are less likely to drift over time. They’re a good fit where you want a fixed set of comfortable positions — for example, seated eye height and a slightly higher standing height.
- Gas-spring arms are more flexible and can be swung out of the way entirely. They’re convenient for hybrid workflows but require careful tuning so they don’t sag or overcompensate for the Vision Pro’s forward mass.
When using a lifter, lock or detent positions are your friend: they keep the headset stable and ensure consistent hand placement when you reach for it. If you prefer a single, foolproof setting for daily use, set the lift so putting the headset on feels like a single, natural motion — no upward reach, no awkward tilt. In tiny spaces, low-profile designs reduce collisions with shelves or ceiling fixtures and help the mount disappear when not in use.
Protection and Built-In Storage: Cases with Stands
Limited floor and shelf space makes a protective case with an integrated stand or mounting-ready handle an attractive option. These solutions defend the Vision Pro’s delicate lenses and electronics, keep cables and extras organized, and make the headset a tidy element of the room rather than a piece of technology that perpetually needs a home.
What to look for in a case-with-stand design:
- Impact-absorbing interior: dense foam cutouts that cradle the visor and crown separately, protecting the headset from drops and side impacts during handling.
- Lens protection and cleaning: a built-in microfiber pad or dedicated cleaning compartment makes it easy to wipe lenses before use. Avoid designs where the headset rest rubs the lenses during storage.
- Cable routing and accessory pockets: integrated channels that let you route the charging puck or data cable without kinking, plus shallow trays for lens wipes, spare tips, or a compact charging puck.
- Mount-ready features: cases that either include an angled cradle you can bolt to the wall or an escape hatch for wall-anchored brackets let you combine protection with accessibility.
Practical layout tips for small offices: mount the case low enough to reach comfortably but high enough to avoid accidental kicks from pets or children. If the case doubles as a charging station, confirm ventilation and avoid sealing heat-sensitive electronics in an airtight compartment during charging. Fast-access lids with magnetic catches speed one-handed operation, and gasketed seams can reduce dust accumulation in a home environment where HVAC systems and cooking can introduce fine particles.
Finally, consider portability. If you’re a renter or frequently rearrange furniture, choose a case and mounting approach that travel together: removable brackets, lightweight cases with carry handles, and modular inserts that adapt to different wall plates make relocation less painful.
Desk Alternatives and Hybrid Setups for Tiny Spaces
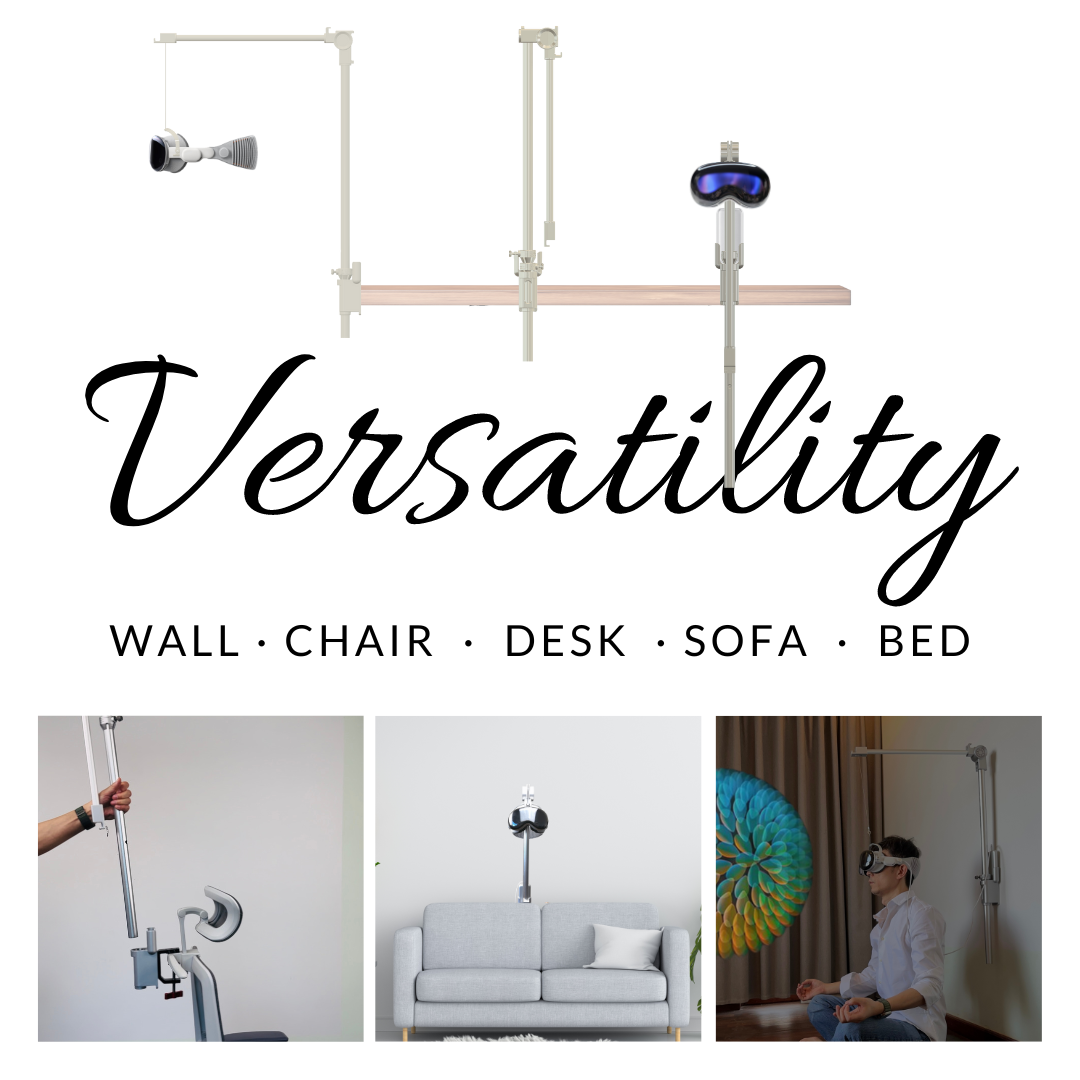
A wall-mounted Vision Pro stand doesn’t have to be the whole solution. Combining the wall mount with compact desk alternatives turns a single tiny room into both a comfortable XR workspace and a functional general-purpose area. The goal is to deploy a usable surface and headset position when you need them and tuck them away when you don’t.
Smart desk pairings to consider:
- Fold-down desks: attach a slim, hinged surface below the Vision Pro mount. A gentle counterbalance or gas spring makes one-handed deployment possible, and the desk folds flat against the wall when not in use. Place the desk at elbow height to maintain ergonomic typing and reduce forward head posture when you use a keyboard alongside the headset.
- Articulating desk arms: these can hold keyboards or laptops and fold away so the Vision Pro remains the dominant wall-mounted element. An arm that locks flush with the wall keeps the footprint minimal and allows you to swing gear out only when needed.
- Under-desk mounts and retractables: if wall mounting isn’t possible or you want a hybrid reachable from a seated desk, consider an under-shelf bracket that raises the headset slightly when you pull it forward. Retractable trolleys or sliding trays hidden under a counter can also give you a flat place to park accessories when not in use.
When to blend wall and desk options:
- If you alternate between long headset sessions and keyboard work, an articulating arm that swings the Vision Pro out of the way preserves desk real estate.
- If your apartment is shared, a fold-down desk beneath the mount creates a quick multi-user setup: the headset sits above when not in use, and a small table deploys for communal activities.
- Renter-friendly setups often favor non-permanent anchors and modular arms attached to a lightweight backing board that can be moved as the layout changes.
In every hybrid plan, prioritize cable management and consistent sightlines. Tidy channels and discreet Velcro straps keep cords from becoming tripping hazards in a small space and preserve the illusion that the room isn’t a gear cave but a considered, multipurpose environment.
Setup, Safety, and Maintenance for Long-Term Comfort
A wall-mounted Vision Pro rewards careful installation and periodic checks. The steps you take during setup determine whether the system feels reliable and comfortable over months of use. Treat the mounting like any precision installation: measure twice, torque to spec, and verify alignment before committing to final fastenings.
Installation checklist:
- Locate studs with a calibrated stud finder and plan anchor points across two studs where possible.
- Measure and mark pilot-hole locations using a level so the mounting plate sits plumb and the visor aligns to eye height.
- Drill clean pilot holes, install the plate, and torque bolts incrementally in a crisscross pattern to distribute pressure evenly.
- Attach the cradle and route cables through built-in guides; leave a small service loop to prevent strain on connectors.
- Test stability with light forward and lateral pressure; confirm the arm holds position through your typical motion range.
Maintenance and safety routine:
- Monthly: inspect fasteners, listen for creaks, and confirm zero drift in hinge positions.
- Quarterly: check cable integrity and clean facepads with recommended cleaners; replace worn interface foam as needed.
- Annually: review anchor integrity and consider swapping to higher-grade anchors if you notice any migration or wall deformation.
Debunking common myths: heavier headsets aren’t always the main cause of neck pain — distribution is. Small shifts in how mass is carried (a rear counterbalance, better headstrap, or slightly different visor angle) can reduce neck torque more than shaving a few ounces off the device. Focus on neutral neck posture, repeatable headband fit, and consistent visor alignment, rather than obsessing about the absolute weight.
Finally, keep a simple posture cue visible: a small tape mark on the wall or a sticker on the mount that indicates your optimal set-down position helps preserve a consistent fit every time you reach for the headset. Consistency is the strongest single factor in avoiding cumulative neck or shoulder strain.
Installation Walkthrough: Step-by-Step Wall-Mount Setup
Follow this practical walk-through to go from planning to a secure wall-mounted Vision Pro in one confident afternoon. Gather a stud finder, drill with appropriately sized bits, a spirit level, a torque wrench (or appropriately rated drivers), and the mounting kit along with the Vision Pro cradle.
- Plan the layout: sit in your primary seat and have a helper mark eye height on the wall. Consider whether you’ll use the headset seated, standing, or both — choose a mounting height that minimizes extreme neck flexion.
- Locate studs and mark anchor points: use the stud finder to find centerlines. Mark pilot locations ensuring the plate spans at least two studs if possible for maximal load distribution.
- Drill pilot holes: use a drill bit matched to your fastener size and keep the drill perpendicular. Clean dust from holes before inserting screws or anchors.
- Install the mounting plate: align it with your level and drive the fasteners to manufacturer torque specs. Tighten in a crisscross pattern on multi-bolt plates for even seating.
- Attach the cradle and secure the headset interface: align the cradle with the plate and install supplied hardware. Check that quick-release mechanisms operate smoothly and that latches lock fully.
- Route cables and test: slide power and any data cables through the mount’s guides, secure with Velcro straps, and leave a small service loop. Test the mount’s motion through the angles you’ll use and confirm it holds position.
- Fit and calibrate: wear the headset and adjust straps and padding so the visor sits at the marked eye height with minimal neck tilt. If available, set detent positions on the arm for repeatable placement.
- Final safety check: simulate putting the headset back and forth 10–20 times, noting any movement in the wall anchors or the mount. Re-torque hardware after initial use to account for settling.
Keep the mounting hardware and instructions in a labeled envelope inside the case or a nearby drawer; it makes troubleshooting and future moves much easier. If you’re a renter, capture photos of the original wall condition before installation and use removable backing plates or track systems that minimize permanent changes.
Real-World Scenarios: Case Studies and Examples
Seeing how these principles translate to real rooms helps clarify choices. Here are three condensed case studies drawn from typical small-home-office layouts.
Case Study A — Urban Micro-Apartment
A user with a ten-foot-wide studio mounted a slim dual-arm bracket above a fold-down table. The arm folds flat when guests arrive; the bracket’s quick-release cradle makes the Vision Pro easy to remove and stash in an integrated case. Cable channels keep lines out of sight, and the mount’s pivot aligns with the visor’s CoG, eliminating forward droop. The result: a neat, multi-functional living space that feels professional when in use and unobtrusive when not.
Case Study B — Renter-Friendly, Damage-Minimal
Here, the tenant used a removable backing board anchored to studs with a small number of screws; the board accepts a track-mounted arm. When it’s time to move, the bracket detaches and the shallow holes left behind are easy to patch. The backing board carried load across two studs, allowed a stable mount for a relatively heavy headset, and protected landlord walls from multiple fasteners while maintaining solid ergonomics.
Case Study C — Shared Family Space
In a shared study, the homeowner chose a height-adjustable gas-spring arm and multiple facepad depths to serve adults and teens alike. A lockable detent for seated use and a higher detent for standing chores ensured everyone had a comfortable setup. The case with an integrated cleaning pad and accessory tray reduced arguments about misplaced chargers — everything had a labeled pocket.
Each example highlights a principle: match the mount to the room and usage pattern, favor repeatable fit over brute force adjustments, and prioritize cable and lens protection in multi-use households. Small-space solutions aren’t one-size-fits-all; they’re thoughtful compromises tuned to how you live and work.
Next step: sketch your wall, measure your seated eye height, and list the three must-have features (e.g., quick-release, short reach, dust-sealed case) before shopping—then choose a mount and plan the installation using the checklist above.



Share:
The Ultimate Buyer's Guide to Apple Vision Pro Comfort Accessories
Lighten the Load: Practical Tips to Minimize Neck Strain in Vision Pro Sessions