

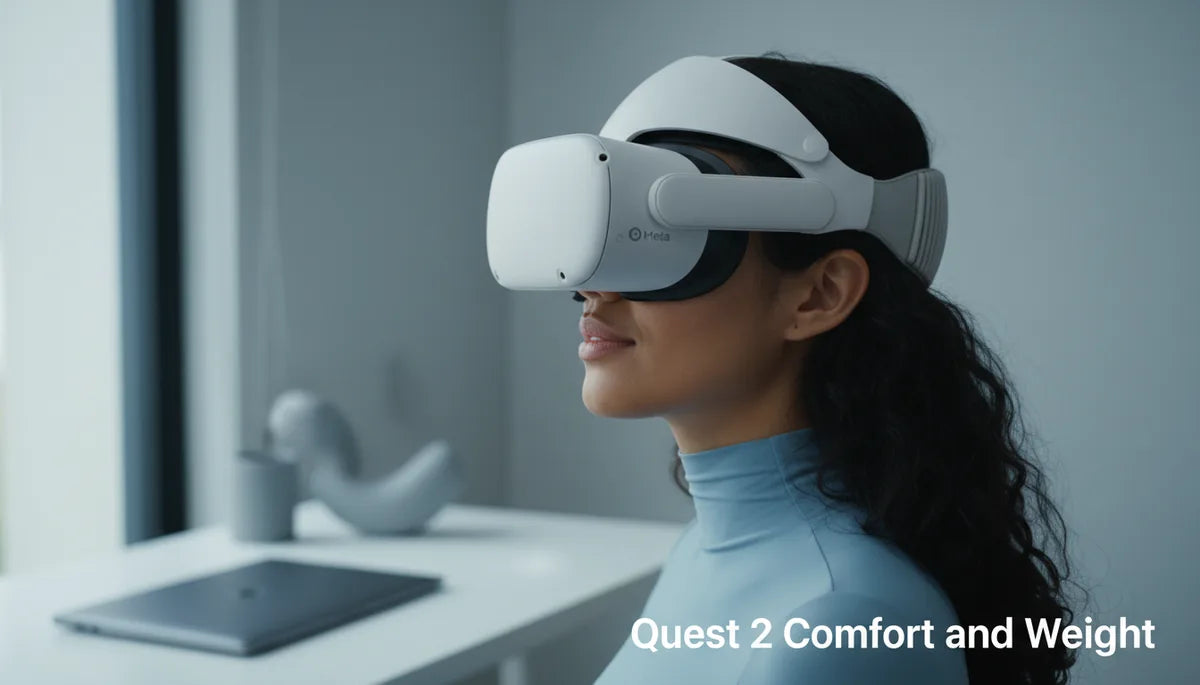
Ergonomics and Endurance: How Weight, Balance, and Strap Design Shape Quest 2 Comfort for Long Sessions
Playing VR for hours is a different kind of endurance test: it’s not just the game difficulty but how your headset carries you through the experience. The Meta Quest 2 wins points for being relatively light, but raw mass is only half the story. How weight is distributed across your face, skull, and neck—combined with strap design and fit—determines whether you finish a marathon session energized or logging off early with a sore neck and pressure marks. ⏱️ 11-min read
This guide walks Quest 2 users through the practical mechanics of comfort: why forward weight causes neck fatigue, how the Quest 2 compares to rivals, what to look for in a comfortable strap, step-by-step installation and fit tips, and the best strap and battery options for long sessions. You’ll also get maintenance routines and glasses‑friendly tweaks so your next extended session feels less like gear management and more like immersion.
Why weight matters for Quest 2 comfort during long sessions
The Quest 2’s modest headline weight—roughly 503 grams (about 1.1 lb) for the headset assembly—is an advantage, but most of that mass sits forward of your center of gravity. That forward-loaded arrangement places continuous demand on your neck extensors to keep the visor up and stable. Over time, the small, sustained muscle contractions responsible for holding the headset in place become fatiguing: stiffness, soreness across the upper neck and shoulders, and a reduced tolerance for long sessions commonly develop after 30–60 minutes for many users.
Pressure points compound the problem. When weight isn’t evenly distributed, it concentrates on the nose bridge, cheeks, and temples. The rear strap or cradle can dig into the occipital area (the bony ridge at the base of your skull) if the headset tilts forward, creating hotspots that build into real discomfort. Uneven padding, friction from straps, or poor ventilation amplifies these sensations, leading to sweat, skin irritation, and frequent micro-adjustments that break immersion.
Understanding the physics helps: think of the Quest 2 as a lever with the face as the fulcrum. A small change—an extra 100 g at the front or a centimeter of crown tension—shifts the torque experienced by your neck. The practical aim is to reduce the torque by either moving weight rearward, increasing the area across which force is applied, or improving balance so the headset sits neutrally rather than pitching forward.
Quest 2 weight and how it stacks up against rivals
When comfort for extended play is your priority, numbers matter, but context matters more. The Quest 2’s roughly 503 g baseline puts it on the lighter side of common consumer headsets. By comparison, Pico 4 sits near 620 g, Valve Index between 560–600 g, and PlayStation VR2 around 600 g. Those differences—100–120 g or more—aren’t huge in isolation, but they add up over hours because the extra mass increases forward torque and cumulative neck load.
Equally important is how that mass is managed. A heavier headset with a well-engineered halo or counterbalanced strap can feel less fatiguing than a lighter headset with poor padding and a front-clamping stock strap. Padding quality, strap adjustability, and where a headset concentrates its weight (front, top, or evenly around the skull) play a bigger role in perceived comfort than the raw gram count on the spec sheet.
So, if you’re choosing a headset for long sessions: prefer a lighter baseline when everything else is equal, but prioritize systems that allow you to tune balance and pressure distribution. For existing Quest 2 owners, that means focusing on strap upgrades and minor counterweights rather than obsessing over a hundred grams—you can shave hours of discomfort by redistributing that weight sensibly.
Choosing a comfortable head strap for Quest 2
Upgrading the head strap is the most cost-effective, high-impact change for longer Quest 2 sessions. Look for three core qualities that alter how weight feels across your face and neck: padding material, adjustability, and overall design.
Padding material: opt for memory foam or a closed-cell foam with a moisture-wicking, breathable cover. These materials conform to your facial contours, reduce sharp hotspots on the nose and cheeks, and resist the sogginess that can occur after intense sessions. Foam that’s too thin or non-breathable becomes a pressure amplifier, not a comfort solution.
Adjustability: good straps allow you to change length, crown height, and rear tension independently. You want to move weight away from your face and toward the top and back of your head without over-tightening the band. Micro-adjustment mechanisms—ratchets, dials, or precise Velcro lengths—make it easy to find a neutral balance where the headset stays put with minimal skin pressure.
Overall design: consider whether the strap distributes force around the crown (halo-style), clamps under the jaw and around the sides (soft-band), or uses a rigid arm that holds shape (rigid or Elite-style). Halo straps are excellent for reducing face pressure and for those who wear glasses, while rigid straps excel at stability for fast motion but require good padding to avoid hotspots. Soft straps can be comfortable initially but may loosen with movement.
In short: prioritize straps that spread contact over a larger area, have breathable, conforming padding, and offer multiple points of adjustment so you can dial in a neutral, balanced fit.
Installation and fit: step-by-step guide for Quest 2 comfort straps
Installing a comfort strap correctly is as important as choosing the right one. A sloppy fit negates the benefits of even the best strap. Follow this sequence to remove the stock strap and fit your upgrade properly.
- Power down and clear accessories: Turn off the headset and unplug any battery packs, dongles, or headphones.
- Release the stock strap: Find the small release latches on each side where the strap meets the headset. Press the latch and slide the strap outward until it disengages. If your strap has a rear cradle, lift it away from the band and disconnect it from the mounting points.
- Inspect the mounting points: Wipe the side slots and connectors with a soft cloth to remove dust or oils that could interfere with a tight fit.
- Attach the new strap: Align the aftermarket strap’s connectors with the side slots and slide until you hear or feel a click. Confirm both sides are secure before lifting the headset toward your face.
- Initial sizing: Put the headset on without tightening fully. Loop the top band over the crown and adjust the rear cradle to sit at the mid-occipital area. The headset should rest higher on the face initially—higher placement takes pressure off the cheeks.
- Dial in tension: Tighten the crown strap gradually, then use the rear wheel or side tensioners to shift the center of gravity. Test by gently lifting the headset at the facial foam; it should stay stable without excessive forehead pressure.
- Fine-tune while playing: Wear the headset for a 15–20 minute play segment and notice hotspots or slippage. Make small incremental adjustments rather than large ones—rapid changes can swap one pressure point for another.
Proper installation is iterative: small changes, wear testing, and minor re-tunes yield a fit that lasts longer and reduces the need for mid-session fiddling.
Weight distribution tips: height, strap length, and back support
Getting long-session comfort out of a Quest 2 comes down to where the headset's center of gravity sits relative to your head. A few practical adjustments make a measurable difference.
- Raise the headset slightly: Positioning the headset a little higher on your face moves contact away from the cheeks and nose. The crown and rear band then support more of the load. Aim for a balance where the headset remains stable with only a light touch on the facial foam.
- Treat the top strap like a lift: Tighten the top strap so it performs lifting duty instead of clamping. The crown section should gently cradle rather than squeeze. This reduces chin and jaw tension created by downward pull.
- Adjust rear cradle height: Moving the rear cradle up reduces forward tilt; lowering it shifts weight forward. Small incremental adjustments change perceived torque—test each change with a 10–20 minute play segment to evaluate.
- Use a counterweight or slim battery pack: A small weight at the back offsets front load and eases neck strain. Battery-integrated designs solve both runtime and balance issues, but start light—adding too much rear mass trades neck fatigue for head load.
- Symmetry matters: Ensure side tension is equal to keep the headset from shifting laterally. Uneven tension creates localized pressure on temples or one side of the nose.
Mini-case: Alex, a rhythm-game player, reduced forehead pain and doubled his comfortable session length by adding a modest rear counterweight and switching to a memory-foam strap. Meanwhile, Maya fixed slipping issues by moving to a halo-style strap that cradled the crown instead of clamping—less facial pressure, more stability. Both outcomes started with small, incremental adjustments rather than a single dramatic change.
Comfort strap options: Elite Strap vs third-party vs battery-integrated designs
When choosing between Meta’s Elite Strap, third-party alternatives, and battery-integrated designs, weigh trade-offs in cost, comfort, adjustability, and added mass.
Meta Quest 2 Elite Strap: The official Elite Strap emphasizes stable, evenly distributed fit and simple micro-adjustment via a rear wheel. It’s reliable, durable, and pairs neatly with stock face-gaskets and official accessories. The Elite with Battery adds a back-mounted battery pack that lengthens playtime and shifts weight rearward, improving balance if dialed correctly. Downsides: higher price than many third-party options and the battery version adds notable rear weight that takes tuning to feel natural.
Third-party straps (BoboVR, Kiwi Design, and similar): These options frequently match or exceed the Elite’s comfort at lower cost. Models like the BoboVR M2/M3 use memory-foam face pads, reinforced hardware, and better tension control. Kiwi Design often provides robust, breathable bands and halo-style designs tailored to glasses wearers. Third-party variability is wide—read recent user feedback about durability and warranty before buying.
Battery-integrated designs: Combining a counterweight and extra runtime is convenient. Integrated battery packs that clip to the rear can relieve front pressure and add hours of play. The key is moderation: choose slim batteries that add a small, well-placed mass rather than bulky packs that move the problem from your face to your neck and shoulders. Also verify electrical safety and connector quality; poorly designed power solutions can introduce failure points or heat build-up.
Recommendation: Start with a comfortable, well-reviewed third-party strap if you want value and immediate comfort. If you value official fit and warranty, the Elite Strap is a solid choice. Add a slim battery only after dialing in balance; test with short sessions first to confirm the added mass helps rather than hinders.
Practical long-session wear: care, maintenance, and replacement cadence
Long VR sessions stress straps and padding. Routine care keeps materials functional, hygienic, and comfortable for longer, and prevents the subtle loosening or sag that increases hotspots.
Fabric straps: hand wash in lukewarm water with mild detergent. Rinse thoroughly and press out excess water by pressing between towels—do not wring. Air dry flat away from direct sunlight or heat. If you must machine wash, use a mesh bag on a delicate cycle with cold water, then air dry.
Silicone and plastic components: wipe with a cloth and mild soap; for disinfecting or sticky residue, use 70% isopropyl alcohol sparingly, then rinse and dry. Avoid solvents and harsh cleaners that degrade materials. For clips, connectors, and adjustment mechanisms, a damp cloth is usually sufficient—do not soak mechanical parts.
Storage: keep straps in a cool, dry place in a padded case or on a hook to preserve shape. Excessive compression in a drawer or suitcase can flatten foam and change fit. Replace face foam and straps when you notice thinning, permanent deformation, rips, or loss of shape. For heavy users, swapping face foam every 6–12 months and checking straps quarterly is a sensible cadence.
Small investments—spare face pads, a backup strap, or a lightweight carry case—reduce downtime and let you maintain a comfortable fit even with daily extended play.
Comfort for glasses wearers and accessories: compatibility notes
Glasses bring a separate set of considerations: frame pressure, lens smudging, and altered fit geometry. Small changes and accessories can preserve clarity and comfort across long sessions.
Start with the included glasses spacer: it increases distance between your frames and the headset lenses, preventing rubbing and reducing pressure on the nose bridge. If you use prescription inserts, verify their thickness and lift—they should not push frames into the foam gasket or force the headset outward. Prescription inserts often deliver the best long-term experience, removing the need to wear glasses inside the headset and eliminating frame pressure entirely.
Choose straps that cradle the crown: halo-style and broader-cushioned straps minimize lateral temple pressure and reduce the tendency of frames to slip or press sideways. Rear tension adjustment is particularly helpful—loosening clamp-style tension that squeezes temples can eliminate hotspots. Some straps are explicitly designed with glasses clearance in mind, so look for that in product descriptions.
Additional accessories: anti-fog wipes or cloths, a soft microfiber cloth for lens cleaning, and replaceable foam gaskets that are slightly thicker or shaped for glasses wearers can make long sessions far more comfortable. For users who perspire a lot, breathable covers and washable face pads keep sweat from building up around frames.
Practical tip: before committing to hours, run a 30–45 minute session with your glasses or inserts and note any pressure points. If you must choose between slight temple pressure and blurred vision from fogging frames, prioritize inserts or the spacer to preserve both comfort and image quality.
Next step: experiment with one change at a time—new strap, minor rear weight, or a prescription insert—and test for at least 30–60 minutes to see real improvements. Small, staged tweaks plus routine care are the fastest route to sustained comfort and longer Quest 2 sessions.


Share:
How Headset Weight Impacts VR Fitness: Endurance, Form, and Movement
Comfort strap vs official Elite Strap: which Quest 2 option improves marathon sessions