

Glasses-Friendly Meta Quest Straps: How to Maximize Comfort and Stability for Long Sessions
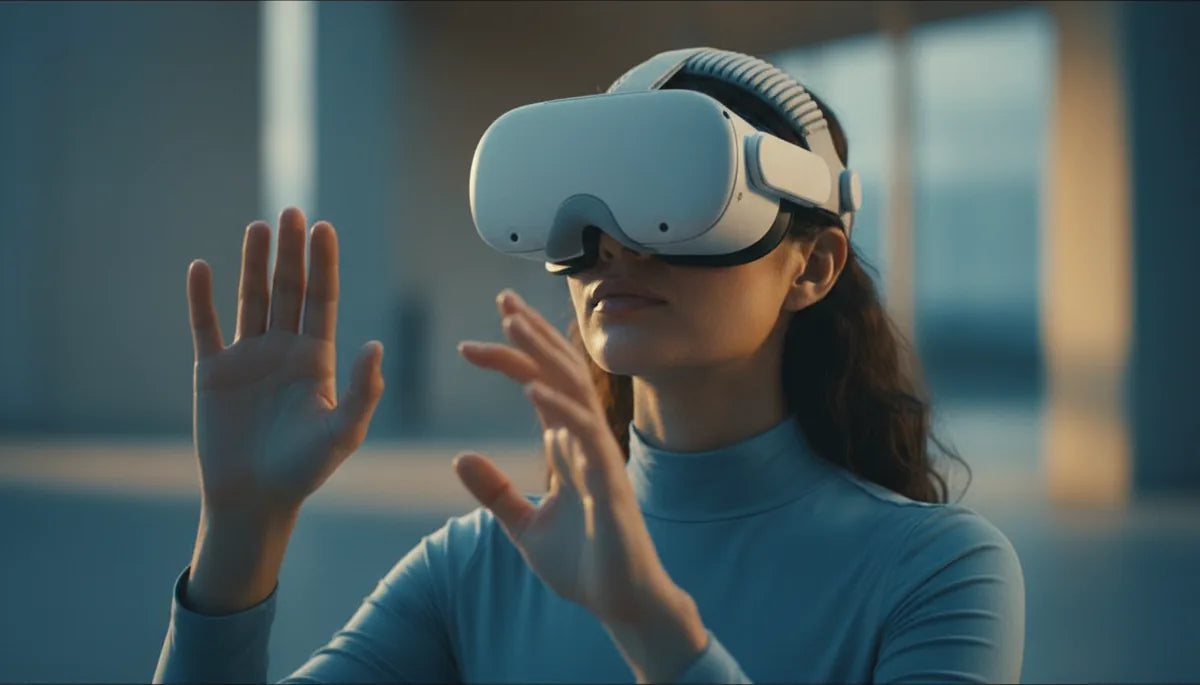
Wearing glasses shouldn’t mean sacrificing comfort, clarity, or immersion in the meta-quest-2-ergonomics" rel="nofollow noopener noreferrer">Meta Quest 2. For spectacle wearers, the right strap transforms a headset from a fiddly, nose-pinching annoyance into a stable, breathable rig that lets you play, create, or socialize for hours without adjusting your frames every five minutes. ⏱️ 10-min read
This guide walks through why glasses-friendly straps matter, the specific features to hunt for, a clear install walkthrough, practical fit tweaks for different frame types, how weight distribution affects long-session comfort, a direct comparison of stock and third-party options, and simple care tips to keep your setup working smoothly. Read on to make your Quest 2 genuinely comfortable—no compromises on eyewear or immersion.
Why glasses-friendly straps matter for Quest 2
Glasses change how a headset hugs your face. A standard Quest 2 strap often centers pressure on the nose and temples, while glasses add bulk at the temples and bridge. The result: sore pressure points, frames that rub or shift, intermittent lens fogging, and an increased chance of scratching either your spectacles or the headset’s foam. A glasses-friendly strap isn’t a luxury—it’s a practical safeguard for comfort, optics, and long-session focus.
In practice, “glasses-friendly” means three things: clearance for frames, pressure redistribution away from the nose and temples, and improved ventilation. Clearance keeps temple arms from colliding with the facial interface; redistribution—usually via a cushioned top strap and rear cradle—moves load to the skull’s back and the crown so the nose bridge and glasses hinge aren’t bearing the headset’s weight; ventilation reduces warm, moist air that fogs lenses. When these elements work together you get steadier perspective, fewer mid-session adjustments, and longer comfortable play.
Key features to look for in a glasses-friendly Quest 2 strap
When you’re shopping, focus on features that directly solve the typical spectacles problems rather than cosmetic extras. Look for a strap that offers adjustable height, a wide cushioned top strap, temple relief around the face gasket, and thoughtful weight distribution. These features combine to protect frames, keep lenses clear, and maintain a steady image.
- Adjustable strap height: A height adjustment (often via a sliding top strap or multi-position anchor) lets you tilt the headset away from the glasses’ bridge when needed or lower it for a tighter seal.
- Wide, cushioned top strap: This reduces nose pressure by transferring load to the crown. Soft, breathable padding is ideal—look for designs that sit flat and don’t compress unevenly against your glasses.
- Nose relief cutout and temple clearance: A recessed or contoured face gasket and inner-channel design prevents frames from contacting the foam. Cutouts, flexible side panels, or a slightly off-face contour leave room for both wire and thick plastic frames.
- Soft temple zone and multi-point adjustability: Padding along the sides and a rear cradle allow you to tune how much pressure rests on your temples versus the back of your head. Three-point systems (top, side, rear) are the most versatile.
- Breathable, easy-to-clean materials: PU leather, mesh, or silicone/TPU surfaces resist sweat and wipe clean easily. Memory foam gives plush comfort but can trap heat—match material to your environment and session length.
A balanced combination of these features—rather than any single detail—delivers the most reliable comfort for glasses wearers. Third-party makers like FlitLift have emphasized lightweight construction plus breathable padding to specifically target glasses users; use their choices as a benchmark rather than a shopping list to check off.
Step-by-step install for Quest 2 comfort straps
Installing a comfort strap on a Quest 2 is typically tool-free, but a careful approach makes sure the strap prioritizes glasses clearance. Follow these steps to swap the stock strap and set a baseline fit that protects frames and lenses.
- Prepare: Power off the Quest 2, unplug accessories, and lay the headset on a soft, clean mat. Remove the stock strap and set aside any small parts so they don’t get lost.
- Inspect anchors and orientation: Look at the strap anchors on the headset and the corresponding tabs on the new strap. Align the side mounts first; these stabilize the front so you can work without shifting the face gasket around your glasses.
- Attach side-mounted anchors: Slide or clip the side anchors flush into the headset’s slots until they sit securely. You should feel a subtle click or resistance indicating they’re seated.
- Fit the top strap: Slide the top strap into the upper slots. Ensure the cushioned pad faces outward (not folded against the gasket), and that its padding will sit on your crown—not on your glasses.
- Mount the rear cradle: Attach the rear cradle or back-strap to the rear anchor points. Check that the rear padding sits near the occipital ridge (base of the skull) to help pull weight backward rather than forward onto the nose.
- Initial feed-through and adjust: Set the strap so tension is loose enough to let glasses sit comfortably within the face gasket. Use the adjustment points to level the headset—aim for equal contact at temples and a slight clearance at the nose.
- Test fit: Put on your glasses and slide the headset into place. Nod, shake, and turn your head slowly to check for rubbing or slippage. Re-seat anchors if any component shifts under movement.
This install path prioritizes temple clearance and a rear-biased weight shift. If you notice any frame contact during the movement test, start by loosening the top strap slightly and raising the headset a few millimeters until the temple arms clear the gasket.
Fit and adjustment tips for glasses wearers
Small adjustments make a big difference once the strap is installed. Prioritize even weight, clearance from the frame hinges, and ventilation. Here are practical tweaks and quick fit checks you can use every time you strap in.
- Top strap tension: If you feel nose pressure, loosen the crown strap by one or two notches. For thin-wire frames, relax the top strap more to reduce brow compression; for thick frames, moderate the top strap so the headset tilts slightly upward and clears the temple arms.
- Rear-cradle length: Tighten the rear cradle to pull weight back toward the occiput. This reduces forward pull on the nose and keeps spectacles from sliding down. If eyesight or optics feel downward, compensate by lowering the front using the height adjustment instead of tightening the face seal.
- Glasses placement: Position your glasses slightly further up your nose than usual within comfort—this creates added clearance between the lens edges and the gasket. Make minor adjustments and check for even gaps on both sides.
- Temple relief and thin spacers: If your temple arms make light contact, add a 0.5–1 mm adhesive spacer or choose a strap with a wider inner channel. This prevents pinching and reduces micro-movements that fog or misalign optics.
- Quick fit checks: After adjustments, perform a three-step check: look straight and ensure the lungs of the gasket aren’t contacting the frames; nod and observe for slippage; turn your head briskly to test for frame movement. Any consistent pressure point should be corrected immediately to avoid soreness.
These tweaks let you hone the balance between a tight optical seal and frame comfort. The goal is a steady headset that keeps lenses aligned with minimal contact on glasses—so you’re playing, not readjusting.
Weight distribution and long-session comfort
Weight is the silent driver of discomfort. Even the Quest 2’s modest mass becomes noticeable over long sessions when it’s concentrated on the nose and temples. The solution is geometry: use a strap that spreads the load across the crown and rear of the head so your facial interface carries as little pressure as possible.
Two strap geometries dominate: single-band (stock) and three-point or cradle systems (comfort/elite). Single-band straps put more of the headset’s forward weight directly onto the face. Three-point systems add a top strap and a rear cradle so the headset is a triangle of contact—crown, rear skull, and face—allowing you to tune how much weight each point supports.
Practical tips to reduce neck strain and facial fatigue during long sessions:
- Shift load rearward: Tighten the rear cradle incrementally until you feel relief on the nose without creating an uncomfortable pinch at the crown.
- Use a wider top strap cushion: A broad pad spreads pressure over a larger area of the skull, lowering local force and reducing fatigue during multi-hour play.
- Lighten the front: If you’re using accessories (battery packs, large lens inserts), try to mount extra weight lower and rearward or choose accessories with a rear-facing offset to avoid forward torque.
- Take scheduled breaks: Memory foam and PU leather pad compress over time. Regular short breaks let materials recover and give your skin and frames a minute to breathe, which reduces cumulative discomfort.
Mindful weight distribution is especially important for users with oversized frames—the extra front bulk increases forward torque. A good rear cradle or counterweight can be the difference between a comfortable marathon session and a painful 30-minute limit.
Comparisons: Quest 2 Comfort Strap, Elite Strap, and third-party options
Choosing a strap comes down to priorities: budget, adjustability, padding quality, and glasses compatibility. Here’s a glasses-focused comparison of the common choices so you can match features to your needs.
- Stock Quest 2 strap: Lightweight and simple, but minimal padding and limited adjustability. For glasses wearers it often concentrates pressure on the nose and temples. It’s fine for short demos, but not ideal for extended gaming sessions.
- Meta Quest 2 Elite Strap (official): Adds a sturdier rear band and top strap for better weight distribution. It’s more rigid and improves stability, but padding is still modest; some users with thicker plastic frames report remaining temple contact. Installation is straightforward and it’s officially supported, which simplifies warranty concerns.
- Meta Quest 2 Elite Strap with Battery: Excellent for long sessions because it moves battery mass to the rear, balancing front weight. The added bulk and expense are trade-offs; it increases comfort for glasses wearers by reducing nose pressure, but careful calibration is required so the rear mass doesn’t press pads into the occiput uncomfortably.
- Third-party comfort straps (e.g., FlitLift GraviPro and others): These often prioritize breathable padding, flexible temples clearance, and lightweight materials. Many third-party models use memory foam or hybrid padding to maximize cushioning; some offer wider inner channels specifically for spectacles. Prices and build quality vary—look for solid reviews about long-term fit and foam compression.
Cross-compatibility: Most third-party straps use the same anchor points as the stock system, but always confirm the fitment notes—especially if you plan to use prescription lens inserts or custom facial interfaces. Third-party options can be the best value for glasses users when they emphasize clearance and breathable padding, while the official Elite Strap variants offer a conservative, fully supported upgrade path.
Care, compatibility, and maintenance
Maintenance is often the overlooked part of comfort. Clean, well-cared-for pads last longer and keep your glasses and skin safe. Follow a simple regimen: wipe soft padding and straps with a cloth dampened by mild soap and water, avoid alcohol-based cleaners and harsh solvents, and let everything air dry completely before storage or reuse.
Inspect attachment points regularly. Fraying, loose anchors, or compressed foam can create unexpected pressure points that rub or scratch your glasses. Replace worn padding as needed—many manufacturers offer replacement kits designed to preserve the original geometry and glasses clearance. If you notice persistent rubbing or frame contact, swap the padding before major damage occurs.
Compatibility checks to perform before investing in a new strap:
- Measure your temple width against the strap’s inner channel—brands often list maximum frame widths.
- Confirm space for oversized frames or sunglasses-style lenses; look for “temple relief” or “wide inner channel” in descriptions.
- Check whether the strap design leaves a small off-face contour that increases airflow; that reduces fogging.
- If you use prescription lens inserts, verify that the strap won’t press inserts into the frame and reduce clearance.
Replacement options: If foam becomes compressed beyond comfort, replace pads rather than increasing strap tension to compensate—tightening will only move pressure to other facial points. For long-term hygiene, rotate a secondary washable interface or use removable covers to extend pad life. Proper storage—headset face-up with glasses stored separately—prevents accidental scratches and maintains a predictable fit when you next play.
Final takeaway: pick a strap that prioritizes clearance, adjustable geometry, and breathable cushioning. Install carefully, fine-tune with small adjustments, and maintain parts so your glasses and headset stay protected. If you’re testing an upgrade, spend an hour with your glasses on and simulate typical movements before committing—real-world use quickly reveals whether a strap truly solves your fit issues.


Share:
Front versus back weight: optimizing headset balance for VR
How to optimize Quest 2 comfort with weight distribution and strap adjustment