Lighten the Load: An Equipment‑First Guide to Balancing Vision Pro Weight and Preventing Neck Strain
Apple Vision Pro opens a new chapter in immersive computing, but even the most exciting hardware can be a comfort challenge during long sessions. Neck strain isn’t simply a function of mass — it’s how that mass is carried, where it presses, and how you move while wearing it. This guide focuses on practical, gear‑forward strategies to redistribute load, refine the facial interface, and use mounts and posture habits to keep your neck comfortable for hours. ⏱️ 14-min read
Read on for hands‑on checks, specific upgrade options, and a compact 7‑day trial you can run at home. I’ll walk you through balance targets, padding swaps, strap choices, mounts and stands, posture cues, and realistic decision rules so you can enjoy longer sessions without paying for them afterward.
Assess and Balance: Core Principles for Vision Pro Weight Distribution
Think of the Vision Pro as a small suspended ecosystem: the headset’s center of gravity, the crown strap, the rear support and the facial interface all determine how much torque the neck must resist. The core principle is simple — shift load toward the facial contact area and the crown, and away from hanging on the neck. When weight is balanced front‑to‑back, your head stays neutral and your neck muscles do less work over time.
Practical ways to assess balance:
- Mirror test: Put the headset on and look straight ahead. If the unit pulls your head backward or forces you to tilt your chin up or down to see clearly, it’s not balanced. Aim for a neutral gaze where your eyes line up naturally with the center of the display without effort.
- Tilt test: With the headset on, nod slightly up and down and then side to side. If you feel pressure spikes or the headset slides, you’ve got an uneven pressure map that will fatigue the neck over an hour.
- Sensory check: Pause after a minute and notice tension: a numbness at the bridge of the nose, pressure behind the crown, or a pull at the base of the skull are clues. Work toward a configuration where any pressure feels distributed, not concentrated.
Set realistic comfort targets to gauge success. For many users a comfortable 30–60 minute block with minimal neck effort is a good early milestone. Once that’s routine, push to longer durations with periodic breaks and a mount or lift to relieve static load.
Fit, Padding, and Facial Interface Optimization
Neck strain often begins at the interface between headset and face. When the facial gasket sits poorly, the headset compensates by tugging on the crown or the neck. The fix isn’t always thicker padding — it’s matching shapes, preserving sensor clearance, and removing tiny slippage that forces you to hold your head differently.
Key fit areas and how to tune them:
- Nose bridge: Choose a nosepad that matches the width and curvature of your bridge. Too narrow and the headset digs into the top of your nose; too wide and it pivots forward. Swap in alternate bridge pads when available, or add a gentle strip of foam to fine‑tune forward bias without pinching.
- Cheek pads: These stabilize vertical drift. Cheek pads should mirror your cheekbone contour; contoured memory foam works best for longer sessions because it reduces sag and stops the headset from sliding down and forcing you to tilt your chin up.
- Temple and forehead contact: Use medium‑density pads that cushion without encroaching on cameras or infrared sensors. The goal is a stable seat that doesn’t push on sensors or shift optics out of alignment.
Quick checks to perform after any pad change:
- Close your eyes and nod — the headset should stay put without you gripping it with your hands.
- Open your eyes and confirm a full, centered field of view. Any off‑center image suggests a tilt that will force neck correction.
- Run a one‑minute motion test (turn head left/right, look up/down) and note any hotspots or slipping. Adjust until contact points feel uniform rather than pointy.
Small changes make big differences. A 2–3 mm thicker cheek pad can eliminate forward drift and reduce neck torque, while a slightly forward‑biased pad can shift more load onto the face instead of the crown or rear strap. The objective is predictability — a headset that behaves the same during movement and rest.
Lightweight Straps and Cushions: Reducing Load without Compromising Security
The strap system is the headset’s suspension bridge. The right materials and geometry can cut perceived weight dramatically by spreading load and preventing the headset from pulling your head forward. Look for solutions that trade raw bulk for smart engineering: lighter materials arranged to maximize contact area and maintain a secure fit.
What to look for in straps and cushions:
- Materials that don’t sag: Closed‑cell foam, high‑quality webbing, and breathable mesh keep tension consistent over time. Thin, low‑density foams compress permanently and funnel weight to smaller areas, increasing neck strain.
- Wider, tapered designs: Wider straps across the crown spread load; tapering toward the sides avoids pressure points near the temples. This geometry keeps the headset from pivoting down the front of your face.
- Cushion geometry: Choose jaw and cheek cushions that cradle rather than pinch. A curved cushion that hugs the lower cheek and jawline helps the headset resist forward rotation — that’s the motion that makes you jut your chin and stress the neck.
Counterweights are useful but should be minimal. A light counterweight that clips into the rear strap can offset forward mass, but heavy or poorly placed weights simply move the problem to your cervical muscles. If you use a weight, aim for a balance that reduces forward head tilt without making the headset feel rear‑heavy.
Installation and tuning tips:
- Start with strap tension slightly looser than you think you need; you'll gain stability from proper pad seating. Tightening to eliminate movement often creates new hotspots.
- Micro‑adjust in small increments and test with short tasks — 5–10 minute sessions where you focus on natural head positioning.
- If you plan to move a lot (standing or reaching), prioritize security over absolute lightness; a slightly heavier but locked‑in fit can be less fatiguing than a light, loose strap that forces you to hold your head steady.
Lift and Mount Solutions: Vision Pro Lifter, Stands, and Desk Mounts
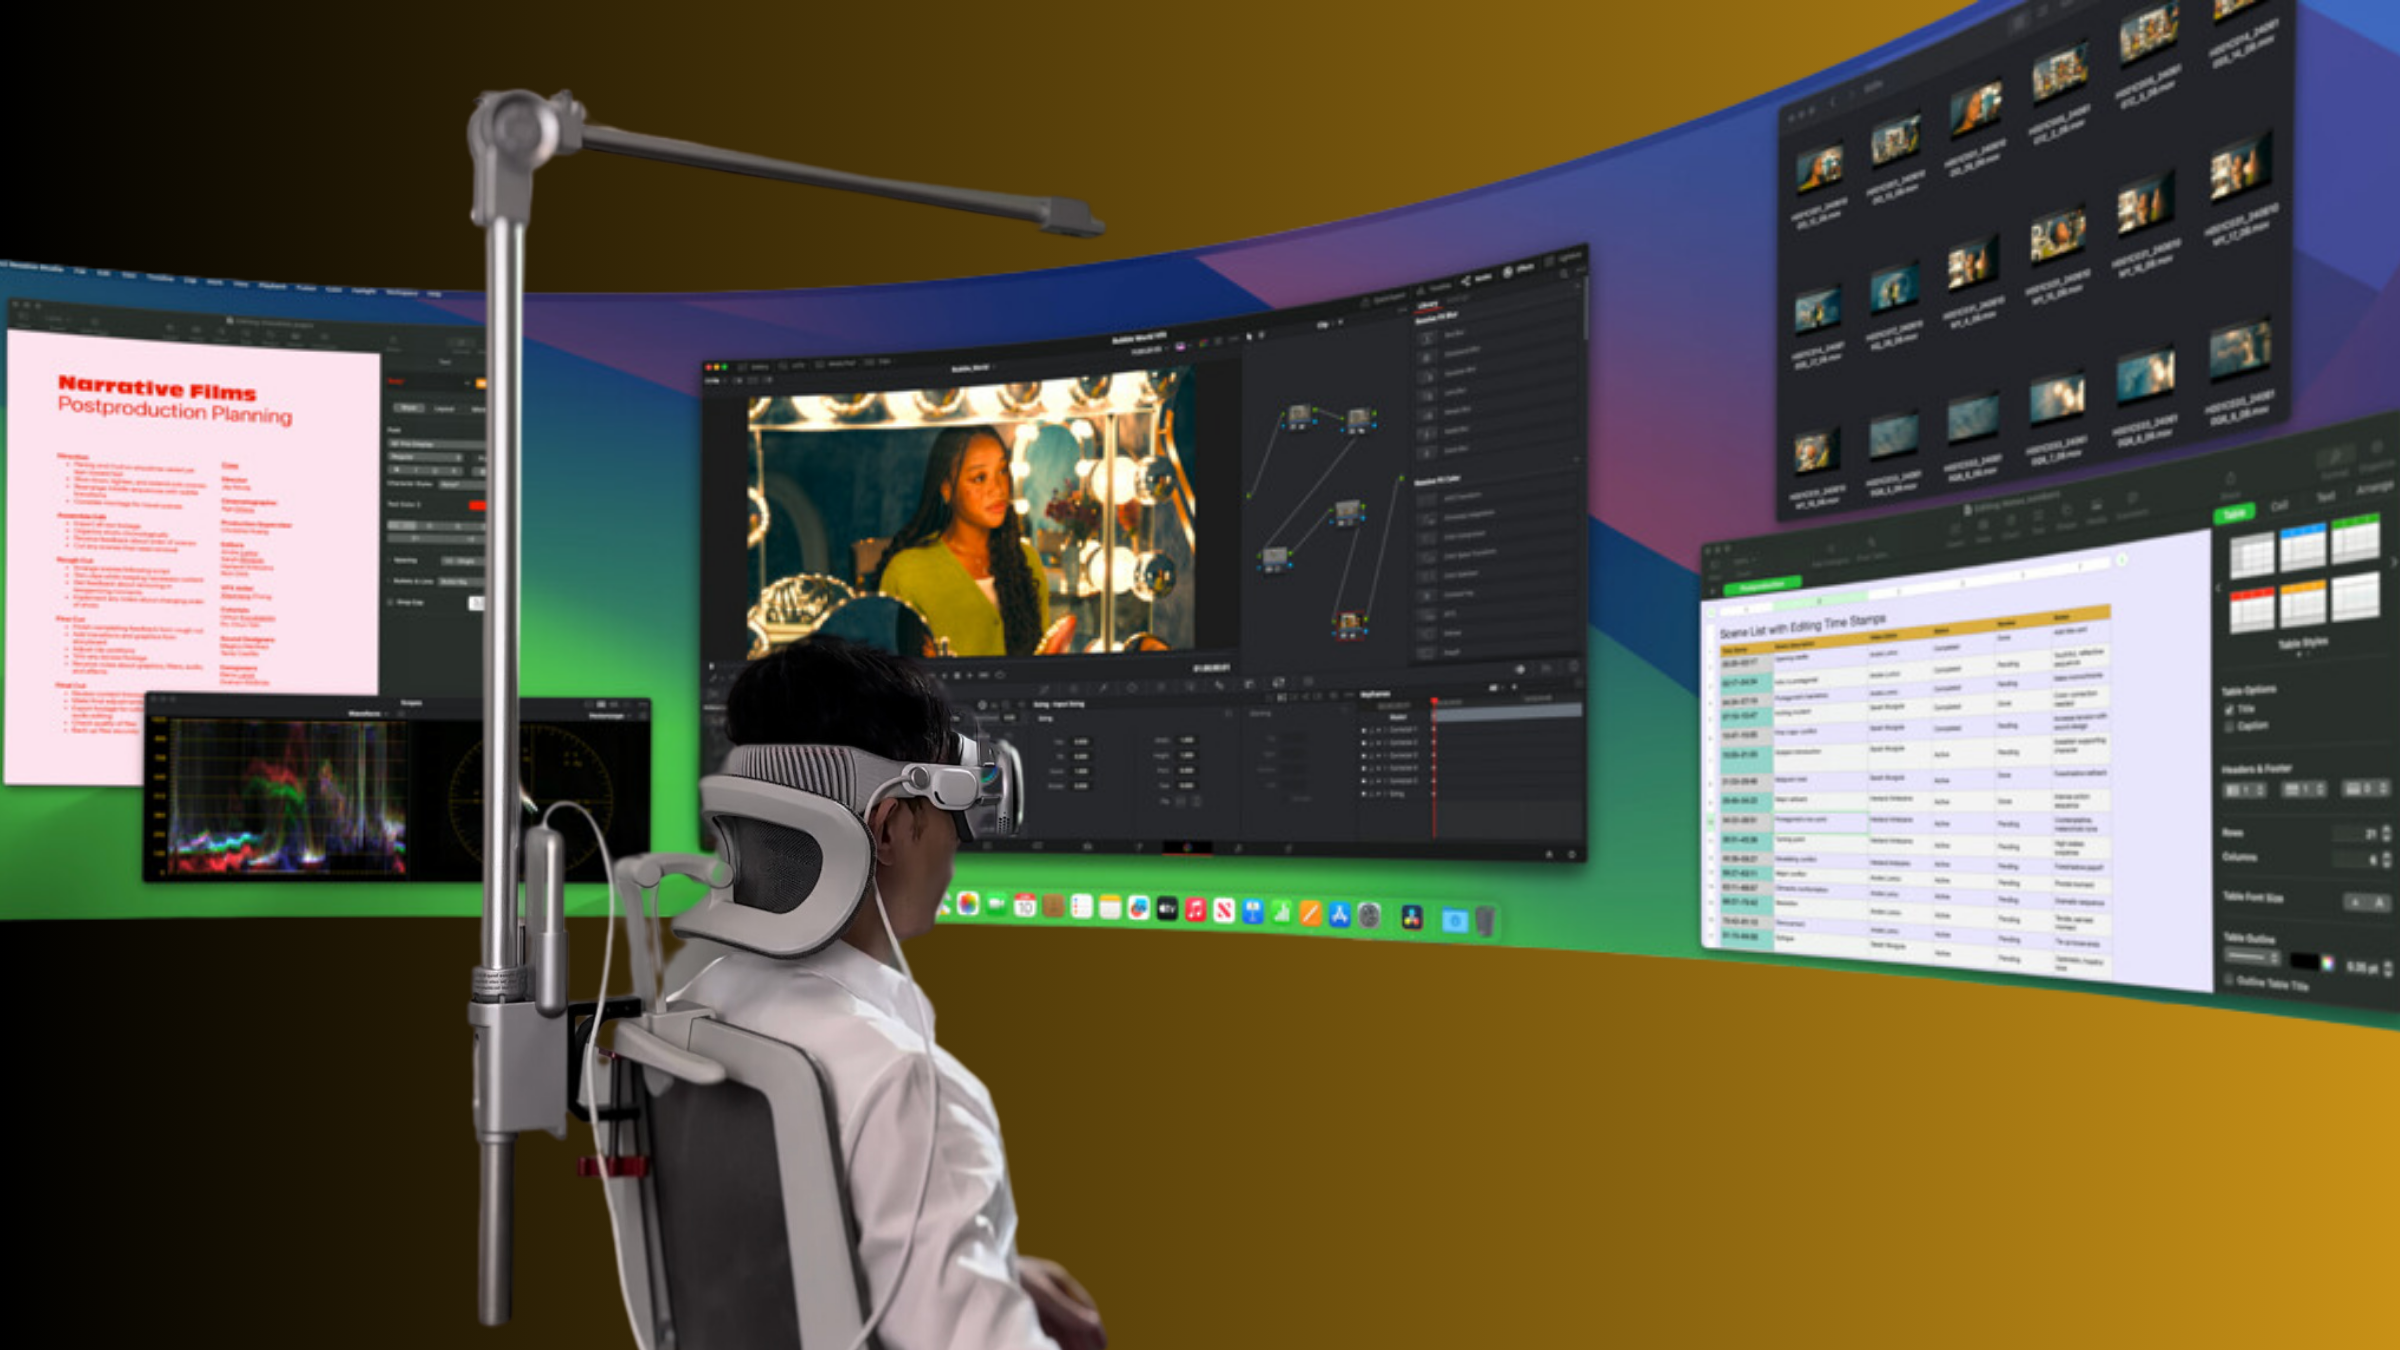
When sessions stretch past an hour, any headset that leaves the neck supporting static weight will become tiring. Lift and mount solutions remove that burden by letting you position the Vision Pro at your line of sight for on/off use and quick rests without repeated shoulder and neck strain. Choose a solution based on how mobile you need to be and how often you want to set the headset down.
Comparing options:
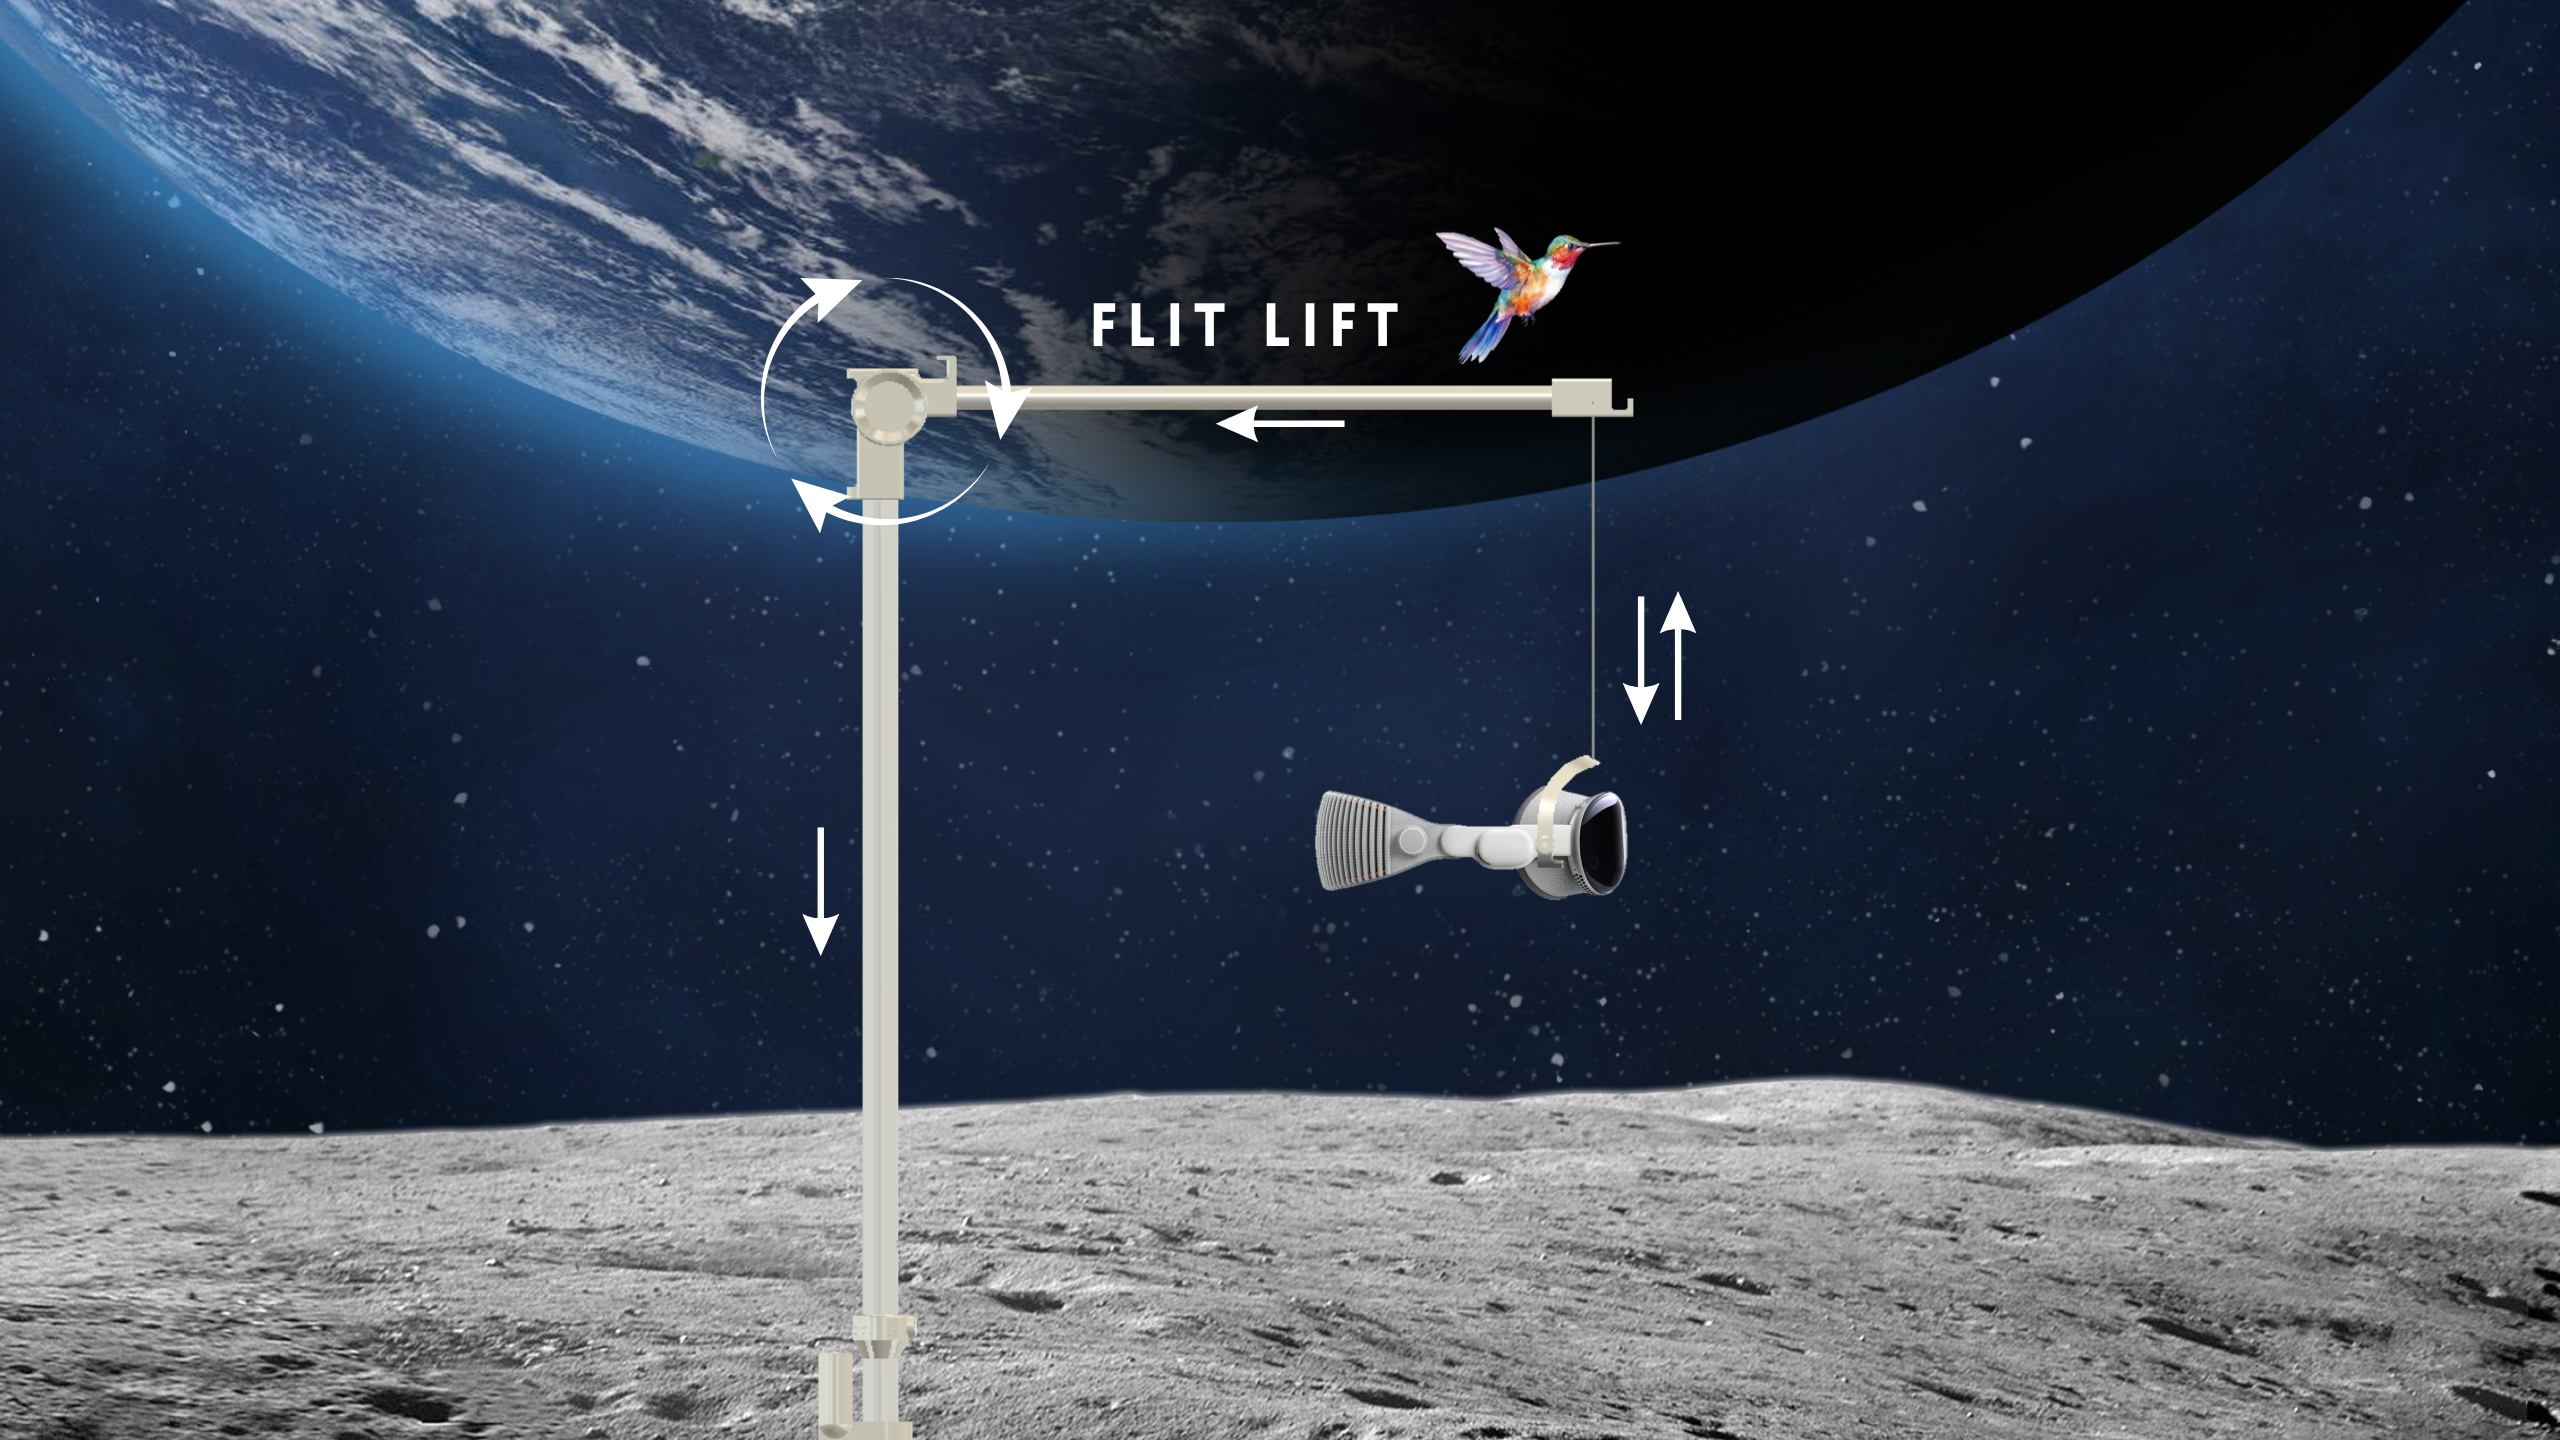
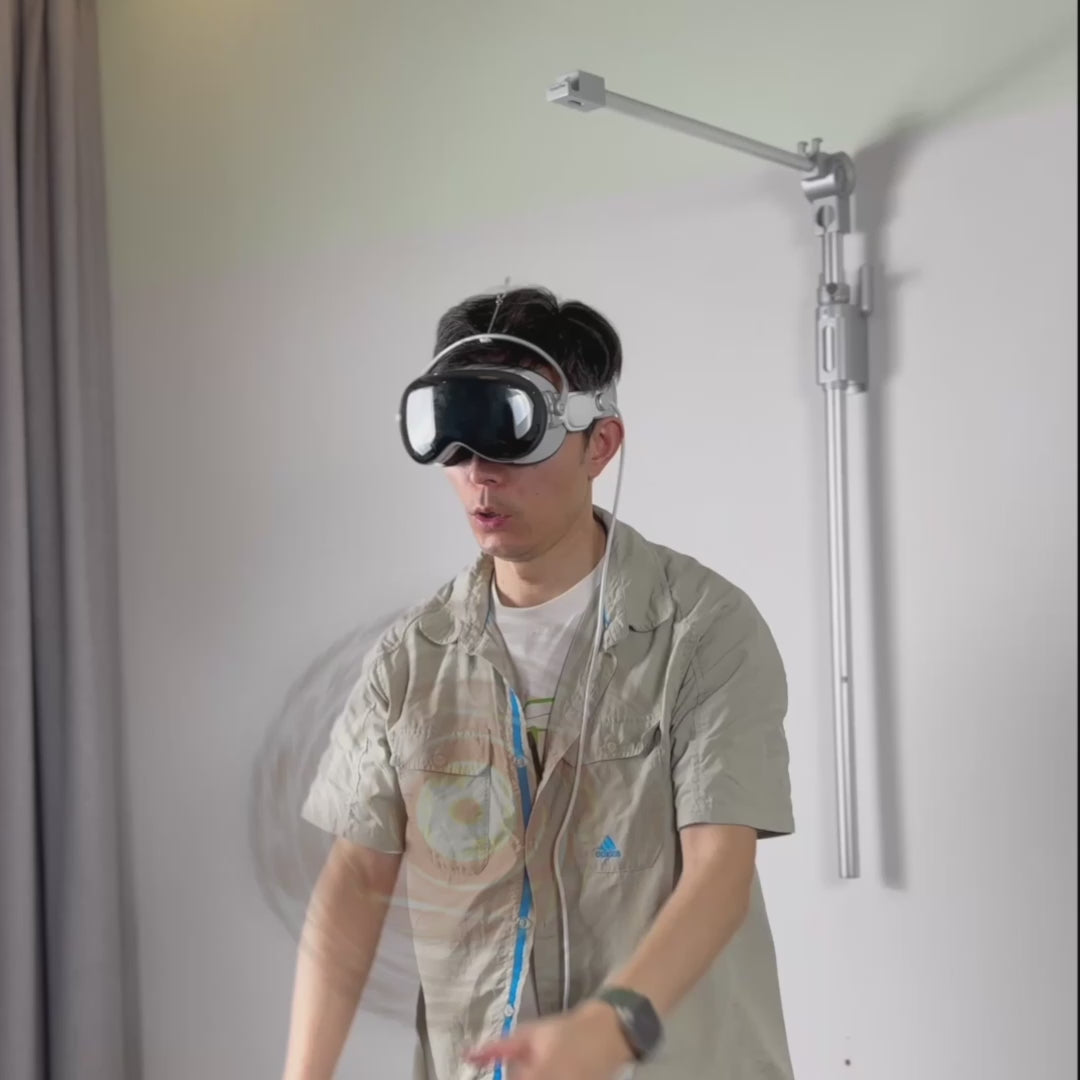
- Manual lifters: These are simple arms or cradles that let you lift and lower the headset with your hands. They give tactile control and precise placement, making it easier to match eye level without sudden jerks. For many people, a good manual lifter reduces the peak muscular effort required to put the headset on and take it off.
- Powered or assisted lifters: Small motorized lifts can eliminate the initial heft of mounting the headset. They’re helpful for users with limited shoulder strength or for frequent in‑and‑out sessions. Look for units with slow, controlled motion and soft stops to avoid jarring the neck.
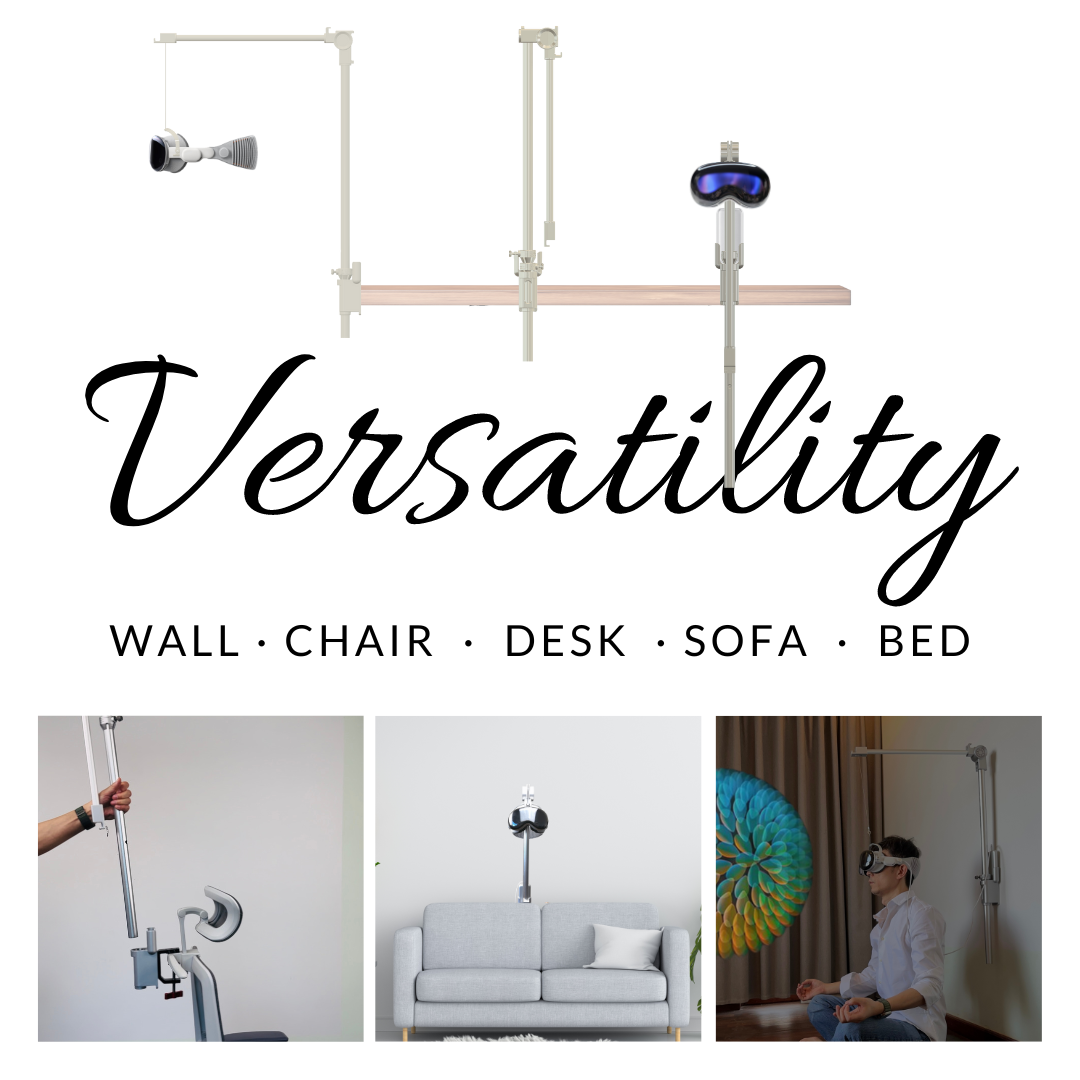
- Desk clamps and articulating arms: For a static workstation, a sturdy desk clamp with a ball joint offers tilt, yaw and height adjustments. Choose one with smooth locking and enough range to switch between seated and standing positions without re‑routing cables or changing base height.
Practical considerations:
- Cable routing: If you use external power or tethering, choose mounts with integrated cable channels to avoid tugging on the headset and moving your center of gravity mid‑session.
- Range of motion: Prioritize arms with generous pitch and yaw so you can establish a neutral posture whether you’re reading, sketching, or gesturing in mixed reality.
- Portability: Tripods and clamp‑on arms are more portable than freestanding pedestals. If you work between rooms, a quick‑release mount or travel‑friendly lifter will let you transfer setups without recalibrating your comfort every time.
In practice, many users find a hybrid approach best: a manual lift for day‑to‑day ease and a small powered assist if they need frequent high‑precision placement. The goal is to remove the repetitive action of craning forward to compensate for misalignment, and to give your neck micro‑rests throughout a session.
Desk‑Ready Stands and Protective Cases with Built‑In Support
A good desk stand is an extension of your ergonomic toolkit: it should let you set the Vision Pro at eye level quickly, provide stability without top‑heaviness, and offer micro‑adjustments so you don’t have to hover in an awkward posture while you line things up. Cases with built‑in supports do double duty — protecting optics while giving you a reliable rest point between wears.
Stand features that reduce neck work:
- Smooth, lockable tilt and pan: Being able to fine‑tune the headset’s pitch while it’s on the stand prevents you from having to tilt your head to an awkward angle during adjustments.
- Weighted or wide base: A low center of gravity prevents top‑heavy wobble that could cause the headset to tip when you reach for it, which otherwise would force you into compensatory neck movements.
- Quick micro‑adjust grips: Small knobs or levers that let you tweak height and angle in fine increments beat large coarse adjustments; tiny changes can be the difference between neutral and strained head posture.
Protective cases with support systems:
- Internal bracing and rails: Cases designed with internal cradles that hold the headset in a ready position let you lift without twisting the neck to find the centerline.
- Sensor windows and clearances: Avoid cases that obstruct cameras, LiDAR or eye‑tracking sensors. A poor‑designed case can impair tracking and force you to hold the headset in odd orientations to regain accuracy.
- Portable rests: Some cases integrate quick stands or handles that double as a resting dock. These are handy for short pauses — you can take the weight off your neck for a minute, read a notification, then be back in the experience.
Practical setup tip: keep the stand within easy reach and at a consistent height. During hot or mobile workflows, I place the stand so my elbows rest on the desk when I lift or lower the headset; this reduces shoulder engagement and keeps the neck neutral during transitions.
Posture, Breaks, and Weight‑Tuning Techniques
Even with perfect gear, poor posture and long continuous blocks will fatigue the neck. Comfort is cumulative — micro‑tensions add up. The physical habits you build around headset use are as important as the hardware you buy.
Simple posture cues to rehearse:
- Ears over shoulders: Align your ears vertically over your shoulder joints. This reduces anterior head carriage and shifts load back onto your spine instead of your neck muscles.
- Chin tucked: A gentle chin tuck lengthens the cervical spine and engages stabilizing muscles without straining. Think of creating a small double chin rather than forcing your head back.
- Open chest: Roll your shoulders back slightly to open the chest. This encourages a neutral thoracic spine and prevents slumping, which can amplify neck strain.
Break cadence and micro‑resets:
- Micro‑breaks every 12–15 minutes: Short breaks — 20–40 seconds of looking at a distant point, dropping your shoulders and relaxing the jaw — are highly effective. They reset proprioception and reduce sustained muscular contraction.
- Longer breaks every 45–60 minutes: Stand, walk, and perform a few gentle neck rolls and scapular squeezes for 2–5 minutes. These longer resets flush muscle tension and restore circulation.
Weight‑tuning steps you can do in session:
- Redistribute before you start: With the headset on, adjust the crown and rear strap so more contact sits near the forehead and cheeks. Small forward bias often reduces neck torque.
- Test counterweight placement: If you use a rear counterweight, move it up or down the strap in 1 cm increments. The ideal spot minimizes forward rotation without making the back of the head take all the load.
- Micro‑reposition: Every time you take a micro‑break, re‑settle the headset and confirm the field of view. Tiny habitual shifts can lead to cumulative drift and increased neck effort.
Seven‑day trial (condensed plan):
- Day 1 — Baseline: Note posture, session lengths, hotspots and pain on a 0–10 scale.
- Day 2–3 — Padding and strap experiments: Swap pads and strap tensions and run short tests.
- Day 4 — Mount trial: Try a lifter or stand and evaluate neutral sightlines.
- Day 5 — Counterweight tuning and movement tests: Check stability during gestures.
- Day 6 — Break cadence: Adopt 12–15 minute micro‑breaks and longer hourly breaks.
- Day 7 — Review and decide: Compare Week 1 metrics and pick which upgrades yielded real improvements.
Keep a simple log: session length, pain scale, adjustments made, and perceived stability. That record turns subjective comfort into actionable data.
What to Look for in Comfort Upgrades: Kickstarter, Custom, and Cross‑Device Tips
The accessory market moves fast — Kickstarter projects, small makers and cross‑device mods offer creative comfort upgrades. Many are excellent, but vetting is key. You want materials that hold up, designs that don’t interfere with sensors, and a creator who will stand behind their product.
Vetting checklist for third‑party comfort products:
- Warranty and returns: Campaigns that offer a clear warranty and straightforward returns indicate confidence and reduce your risk if a pad compresses or a strap fails.
- Community feedback: Look for threads or reviews showing long‑term use from people with similar face shapes and workflows. Real world photos and wear reports are more valuable than polished marketing shots.
- Material specs: Choose memory‑foam or gel‑infused pads rated for high compression cycles and breathable covers. Avoid unspecified foams that may collapse within weeks.
- Sensor safety: Confirm that modifications do not block LiDAR, eye‑tracking or camera windows. If an accessory sits near sensors, the maker should document compatibility testing.
Cross‑device considerations:
- Adapters and modular mounts: If you already have Quest or PSVR accessories, look for modular arms and quick‑release adapters that can be repurposed for Vision Pro. This reduces cost and lets you reuse proven hardware.
- Micro‑adjusters and modular cushions: Choose upgrades with fine‑tune capability — small screws or sliders allow repeated, precise set‑ups across headsets.
- Red flags: No testing data, no returns, materials that list only “foam” without density or rebound specs. If a product can’t demonstrate it preserves sensor function, skip it.
Safe testing guidelines for mods and custom pads:
- Start short: Use a new accessory for 10–15 minute sessions initially to check for skin irritation and movement effects.
- Monitor skin and tracking: Look for pressure marks or tracking dropouts after each session. If either occurs, remove the mod and report to the vendor.
- Avoid adhesives near sensors: Removable, mechanical fixes are preferable to glues that leave residue or interfere with contact surfaces.
Many productive Kickstarter projects start from a community need and iterate quickly based on feedback. If you back a campaign, factor in shipping and potential design changes — but do expect to find creative, user‑centered solutions that Apple’s standard accessory lineup may not address yet.
Myth vs Reality: Does Vision Pro Really Weigh Too Much?
The short answer: weight alone isn’t the full story. A headset’s perceived heaviness depends on how that mass is distributed and how long you wear it. A heavier unit that’s well‑balanced across the crown, cheek and temple can feel lighter than a physically lighter headset that concentrates pressure at the nose or forces you to tilt your head.
Practical comparisons and scenarios:
- Short sessions (10–30 minutes): For these bursts, padding and strap tuning are often sufficient. You’re unlikely to need a lift or heavy counterweight; minor tweaks usually remove discomfort.
- Moderate sessions (30–90 minutes): Here balance matters more. If you notice forward head carriage or tension at the base of the skull, invest in better padding, a wider strap, and consider a light lifter for micro‑rests.
- Long sessions (90+ minutes): Accessories become crucial. A desk‑mounted arm, powered lift, or well‑placed counterweight can make the difference between sustainable work and accumulated pain.
Decision checklist — when to upgrade:
- Persistent pain rated 4/10 or higher after medium sessions despite pad and strap tweaks — invest in a mount or a professional fit option.
- Frequent field of view shifts or slippage during movement — prioritize strap and cushion upgrades for stability.
- Regularly exceeding 90 minutes per session — add a stand or lifter and enforce micro‑breaks.
Remember: a lighter accessory that introduces instability can be worse for your neck than a slightly heavier, locked‑in solution. Prioritize predictable behavior: if your headset stays centered and doesn’t demand constant small corrections, you will feel lighter, whatever the scale says.
Next step: Run a quick baseline today — put on the Vision Pro, look straight ahead in a mirror, and note whether your chin tucks naturally or you tilt to compensate. If you see forward head tilt, start with a cheek pad or strap adjustment and add a micro‑break every 12 minutes. If discomfort persists across two short sessions, try a desk mount or audition a lightweight strap upgrade. Use the seven‑day plan above to track changes and make decisions based on measured comfort, not assumptions.
— By [Senior SEO Copywriter & Editor]



Share:
A Guide to Wall-Mounted Apple Vision Pro Stands for Small Home Offices
DIY Vision Pro stands: affordable upcycling ideas to hold and access your headset